ZEISS Victory RF 8x42 | 10x42 | 8x54 | 10x54 - Binoculars Manual
- Instructions for use manual (100 pages)
Advertisement
- 1 IDENTIFICATION OF THE COMPONENTS
- 2 SCOPE OF SUPPLY
- 3 TECHNICAL DATA
-
4
PREPARATION
- 4.1 Inserting/Removing the battery
- 4.2 Attaching the carrying strap and the protective caps
- 4.3 Observation with and without glasses
- 4.4 Cleaning and replacing the eyecups
- 4.5 Adjusting the interpupilary distance
- 4.6 Focusing the aiming mark and diopter compensation
- 4.7 Menu settings in the rangefinder
- 4.8 Brightness
- 4.9 Ballistics Settings (BIS II)
- 4.10 Display Settings
- 4.11 Unit
- 4.12 Key Assignment
- 4.13 Turn off
- 4.14 Adjustment with the ZEISS Hunting APP
- 5 ESTABLISHING A CONNECTION
- 6 MAKING ADJUSTMENTS
- 7 CARE AND MAINTENANCE
- 8 INFORMATION FOR YOUR SAFETY
- 9 Documents / Resources
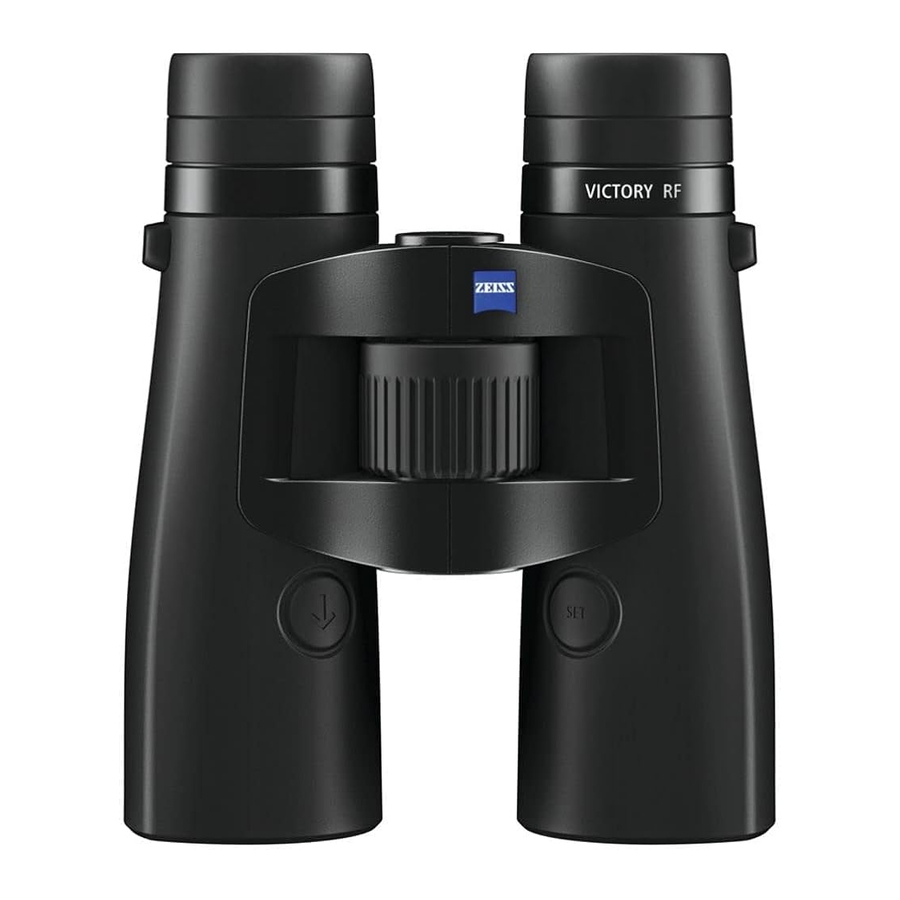
IDENTIFICATION OF THE COMPONENTS

- Eye cup
- Central focusing
- Diopter compensation
- Diopter compensation for display
- Eyelet for fixing the carrying strap
- Range finder button
- Set button
- Battery cover/battery compartment
- LED sighting mark
- 4-figure LED display
- Unit yard display
- Unit meter display
- Bluetooth display
- Battery display
- Carrying strap
- Eyepiece cap
- Protective lens caps
SCOPE OF SUPPLY
ZEISS Victory ® RF binoculars:
| Product | Order number | Scope of supply | |
| Victory RF | 8x42 | 52 45 48 | ZEISS Victory RF Protective lens caps Eyepiece cap Carrying strap Bag with strap CR2 battery Lens cleaning cloth Quick Guide Part 1 & 2 |
| Victory RF | 10x42 | 52 45 49 | |
| Victory RF | 8x54 | 52 56 48 | |
| Victory RF | 10x54 | 52 56 49 |
TECHNICAL DATA

Subject to changes in design and scope of supply due to technical improvements.
1 Battery is subject to a lower temperature limit.
Product also functions under – 10°C /14°F.
2 The range is influenced by the size and the degree of reflection of the object as well as by the weather and sun beams.
PREPARATION
Inserting/Removing the battery
The laser range finder is powered by a type CR 2 lithium battery.
To insert and replace the battery, unscrew the battery cover (Fig. 3/8) – using a coin or similar – by turning anticlockwise. Insert the battery with the positive end forward (according to the symbol in the battery compartment).

Then screw the battery cover back on by turning clockwise.
At 20°C, a new battery will last for over 2,500 measurements.
Depending on the conditions of use, however, low temperatures or frequent use of the scan mode for example may result in the battery life being considerably shorter. Low battery is indicated by the appearance of the battery symbol on the display. If the equipment will be unused for a long period, remove the battery in order to prevent damage by leakage from the battery. Use only high quality brand batteries.
Attaching the carrying strap and the protective caps
The carrying strap (Fig. 4/15) and the eyepiece cap (Fig. 4/16) are attached as shown in the illustrations.

Fig. 4
 Note: Feed the carrying strap only once through the eyelet on the eyepiece cap. Depending on personal taste, use the carrying strap to connect the eyepiece cap either on both sides or on one side only. The eyepiece cap is held onto the eye cups by a catch.
Before using the binoculars, remove the eyepiece cap with the index finger.
After observation, replace the eyepiece cap in order to protect the eyepieces. The protective lens covers (Fig. 5/17) are fitted on the binoculars as shown.

Observation with and without glasses
When observing without glasses, use the equipment with the eye cup extended. To do this, turn the eye cup (Fig. 6/1) upwards and to the left (anticlockwise) until it locks in the highest position.

The eye cup can be locked in four positions – in the upper and lower plus in two intermediate positions. This adjustment option allows variation of the distance from the eye to the exit pupil and thus individual adjustment for each user. When observing with glasses, turn the eye cup downwards and to the right (clockwise) until it locks in the lowest position (Fig. 6).
Cleaning and replacing the eyecups
To replace the eyecups or for cleaning, they can be completely screwed off of the binoculars. Turn the eyecups out as shown in Fig. 6 to the top click stop position and turn one more thread in the same direction until the eyecup is completely screwed out.
After cleaning, or replacing the eyecup, turn it to the right (clockwise) completely on the eyepiece. Using a slight jerk to the right the thread of the eyepiece clicks into the lowest setting. Finally, you can again set your desired distance between the eye and eyepiece using the click stops.
Adjusting the interpupilary distance
By folding the halves of the binoculars about the central axis, the eye relief can be adjusted such that a circular image is formed when observing with both eyes (Fig. 7).

Note: Depending on the set of the interpupilary distance, the aiming mark and display may be slightly angled.
Focusing the aiming mark and diopter compensation

Fig. 8
Use the range finder button (Fig. 1/6) to switch on the aiming mark (Fig. 2/9) and hold down the button. Focus the aiming mark and the display by turning the right hand diopter compensation (Fig. 1/4) to the left or the right. Then carefully use the central focusing (Fig. 1/2) for sharp focusing of the image in the right hand binocular tube.
Next, use the left hand diopter compensation (Fig. 1/3) for sharp focusing on the same object of the image in the left hand binocular tube. The values that are set can be read from the "+" or "–" scale on the back of the binoculars.
Menu settings in the rangefinder
Press the SET button for approx. two seconds to load the menu of your ZEISS Victory RF. You can then switch between the individual menu options by pressing the SET button once for each option.
Table 1
| Menu 1 | Brightness | Press SET button for 2 seconds |
| Menu 2 | Ballistics settings | Press SET button for 2 seconds + press the SET button once |
| Menu 3 | Display settings | Press SET button for 2 seconds + press the SET button twice |
| Menu 4 | Unit of measure | Press SET button for 2 seconds + press the SET button three times |
| Menu 5 | Measuring mode | Press SET button for 2 seconds + press the SET button four times |
| Menu 6 | Key layout | Press SET button for 2 seconds + press the SET button five times |
| Menu 7 | Turn off | Press SET button for 2 seconds + press the SET button six times |
Brightness
The brightness settings are located in menu 1 (press the SET button for 2 seconds). The ZEISS Victory RF has 11 brightness curves. By pressing the range finding button, you can select one of the 11 different brightness curves (curve 1 ≙ darkest setting possibility; curve 11 ≙ lightest setting possibility).
In addition to this, your ZEISS Victory RF also has automatic brightness adjustment for each of the selected brightness curves.
Simply release the range finding button (Fig. 1/6) when it reaches the appropriate setting for you. The brightness curve displayed most recently will then be saved. To check, you can always display the saved settings in the menu.
Ballistics Settings (BIS II)
You can select the appropriate ballistics curve in menu 2 (press the SET button for 2 seconds + press the SET button once). As standard, you can choose between nine different ballistics curves, which cover almost all calibres. The ballistics curves are numbered consecutively in your ZEISS Victory RF and are labelled bA 1 – bA 9. Choose the most appropriate bullet trajectory dependant on the calibre, bullet type and bullet weight used. Knowledge of the ballistic data (bullet drop) for the load used is a prerequisite for selecting the corresponding bullet trajectory.
In table 1 (below), on the basis of the bullet drop of the load, select the row with the value that corresponds most precisely. By pressing the range finding button (Fig. 1/6), you can simply select the appropriate ballistics curve for you. By releasing the button, the ballistics curve is saved. To check, you can always display the saved settings in the menu.
In addition to the 9 default curves, you can upload up to 9 additional personalised ballistics curves to your ZEISS Victory RF. In your ZEISS Victory RF, the curves are labelled bAu 1 – bAu 9.
(More information can be found in the „Settings with the ZEISS Hunting App" section).
Simply release the range finding button (Fig. 1/6) on the appropriate setting for you. The ballistics curve displayed most recently is then saved. To check, you can always display the saved settings in the menu.

Please note that the ballistic information system BIS II is not to be used as a replacement for the hunter's assessment of the situation, but rather to support and increase hunting safety. We recommend shooting exercises from different ranges, which can be used to check the correct match of the specifications with the actual points of impact.
Table 2
")
Display Settings
You can select the appropriate display settings in menu 3 (press the SET button for 2 seconds + press the SET button twice). As standard, you can choose between seven different display settings. The display settings are numbered consecutively in your ZEISS Victory RF and are labelled dI 1 – dI 7.
Table 3
Display in your ZEISS
| Victory RF | Function |
| dI 1 | Distance |
| dI 2 | Distance & angle |
| dI 3 | Distance & equivalent horizontal distance |
| dI 4 | Distance & holdover in cm/in |
| dI 5 | Distance & holdover in MOA |
| dI 6 | Distance & holdover in MIL |
| dI 7 | Distance & number of clicks |
In addition to the 7 standard settings, you can 3 more personalised display settings to your ZEISS Victory RF. On your ZEISS Victory RF, the curves are labelled dIu 1 – dIu3.
(Further information can be found in the „Settings with the ZEISS Hunting App" section).
Simply release the range finding button (Fig. 1/6) on the appropriate setting for you. The display setting last show will then be saved. To check, you can always display the saved settings in the menu.
Unit
Choose the appropriate unit in Menu 4 ( press the SET button for 2 seconds + press the SET button three times).
The distance can be shown in either meters or yards. You can change the settings with the range finding button (Fig. 1/6). On your ZEISS Victory RF, the units have the indicators unitM (for meters) and unitY (for yards). To check, you can always display the saved settings in the menu.
Measuring Mode
You can select the appropriate measuring mode for you in menu 5 (press the SET button for 2 seconds + press the SET button four times). You can select whether you are shown the best measurement (tA b) or the furthest measurement (tA L). You can change the settings with the range finding button (Fig. 1/6).
Fig. 9 illustrates the options.

Fig. 9
The animal in the background is, in this case, the furthest measured point (tA L). Since a higher proportion of the measuring points encounter the tree in the foreground, this point is equivalent to the best measurement (tA b).
To check, you can always display the saved settings in the menu.
Key Assignment
You can select the most appropriate key assignment for you in menu 6 (press SET button for 2 seconds + press the SET button five times). By pressing the range finding button (Fig. 1/6), you can choose between the standard setting („5 _ _ °" is shown on your ZEISS Victory RF) and the reverse setting („° _ _ 5" is shown on your ZEISS Victory RF). As standard, your ZEISS Victory RF is configured for right-handed users. In this setting, the measuring button is operated with the right hand and the SET button is operated with the left hand. In the reverse setting, you measure with your left hand and the SET button is in your right hand. To check, you can always display the saved settings in the menu.
Turn off
You can turn off your ZEISS Victory RF menu by pressing the range finding button in menu 7 (press SET button for 2 seconds + press the SET button six times). There are two other ways to shut down your ZEISS Victory RF. Either hold the SET button down for 2 seconds or don't press either of the buttons for around 10 seconds.
Adjustment with the ZEISS Hunting APP
With the ZEISS Hunting App, you have the option of carrying out all the adjustments mentioned above with your smartphone, in a simple and user-friendly way. You also have the option of making two further, personalised adjustments. Firstly, you can enter your own ballistics profile, created in the ZEISS Hunting App, and you can also set up to three different displays in the display settings.
ESTABLISHING A CONNECTION
BETWEEN THE ZEISS HUNTING APP AND ZEISS VICTORY RF
Initial Connection
When you first want to connect your ZEISS Victory RF, „Connect Your ZEISS Product" will appear on the screen in the Connected Products section (Fig. 10).

Fig. 10
By clicking the Connect Button once, your ZEISS Hunting App begins connection set-up. As described in Fig. 11, you must then hold the SET button down for only 10 seconds.

Fig. 11
Then, the word „CON_" appears on your ZEISS Victory RF. After you release the SET button, the word „PAIr" appears on the display and you confirm this by pressing the measuring button once.
Now your ZEISS Victory RF is connected with your ZEISS Hunting App as shown in Fig. 12. You only need to confirm the „PAIr" for your first connection.

Fig. 12
Repeated Connection
After you have initially connected your ZEISS Victory RF with your ZEISS Hunting App, the Start screen changes the Connected Product Section, as shown in Fig. 13.

Fig. 13
Above the (+) button on the bottom right, you can connect ZEISS Victory RF with your ZEISS Hunting App again. Furthermore, by simply clicking on the stored ZEISS Victory RF you can make adjustments on your device (Fig. 14) and then sync these.

Fig. 14
MAKING ADJUSTMENTS
Ballistics Settings
In the ballistics settings (Fig. 15) in your ZEISS Hunting App, as well as selecting the nine standard profiles, you also have the option of adding up to nine more personalised profiles and subsequently syncing with your ZEISS Victory RF.

Fig. 15
To add a personalised profile, click on the button „Add Profile" in the ballistics menu. Then you can select all previously created ballistics profiles (you can create these in the „Ballistics" section of the Toolbox) (Fig. 16).

Fig. 16
You also have the option of setting one of your profiles as a „favourite". The favourite is the setting that is active on your ZEISS Victory RF and is indicated by a blue star.
In the ZEISS Hunting App display settings (Fig. 17), as well as the choice of the seven standard profiles, you have the option of adding up to three more personal profiles and subsequently syncing them with your ZEISS Victory RF.

Fig. 17
To add a personal profile, click on the button „Add Configuration" in the ballistics menu. Unlike the standard profiles (Fig. 18), you can combine up to three display modes in your personal profiles.

Fig. 18
Here, the distance is always set as the first display mode. You also have the option to save one of your configurations as a „favourite". The favourite is the setting that is active on your ZEISS Victory RF and is indicated with a blue star.
Device Settings
In the device settings, you have the option carry out all the adjustments shown in Fig. 19 in the user-friendly ZEISS Hunting App. Precise information about the individual adjustment options can be found in the preceding section.

Fig. 19
Measurement Data
In the „measurement data" field (Fig. 20), you have the option of selecting the measured distances from your ZEISS Victory RF.

Fig. 20
As well as the individual measurements, the average of all the measurements is shown, as well as the average of a specific time period, defined by you. It should be noted that only the last 100 measurements from ZEISS Victory RF are transferred. However, the average values are based on all measurements carried out in the defined time period.
Measuring the Distance
By pressing the range finding button (Fig. 1/6), the target mark is switched on (Fig. 3/9). The object to be measured is targeted with the target mark. The measurement is started by releasing the range finding button (Fig. 1/6). After a maximum of approx. 1 second, the measured distance is shown on the display for approx. 3 seconds (Fig. 3/10). If no measurement can take place, because the range is exceeded or the reflection of the object is not sufficient, 4 lines are shown „_ _ _ _". A new measurement is possible right away. After displaying the result, the range finder shuts off automatically.
Scan Operation
You can still measure with your ZEISS Victory RF in continuous operation (scan operation). For this, hold the range finding button (Fig. 1/6) down for longer than approx. 3 seconds. The device subsequently switches to scan operation and continually performs measurements. Continuous operation is ended as soon as you release the measuring button. You will see this on the distance indicator, which issues new measurement values approx. every 1.5 seconds. Scan operation is helpful when calculating small or moving targets.
Accuracy of Range Finding
The accuracy of the range finder can be up to +/– 1 meter/yard. The maximum range in accordance with the technical data is reached in optimal environmental conditions.
The following environmental factors affect the range:
Table 4:
| Range is further when there is | Range is shorter when there is | |
| Atmospheric conditions | Clear view | Mist, fog |
| Brightness | Low brightness | High brightness (sun) |
| Colour of the object | White object colour | Black object colour |
| Angle to the object | 90° (perpendicular) angle | Acute angle |
| Object structure | Homogenous structure (sign, wall) | Inhomogeneous structure (bush, tree) |
CARE AND MAINTENANCE
The binoculars feature the ZEISS LotuTec® coating. The effective protective coating for the lens surfaces noticeably reduces contamination of the lenses through a special smooth surface and the strong beading effect connected with it. All types of contamination adhere less and can be quickly and easily removed, smear-free. The LotuTec coating is also durable and abrasion resistant.
Please do not wipe coarse particles (e. g. sand) from the lenses. Blow them off the lens, or use a soft brush! Over time, fingerprints can corrode the lens surface. Breathing on the lens and polishing with a clean optical cleansing cloth is the easiest method of cleaning the lens surface. Dry storage and keeping the outer lens surfaces well ventilated, especially in the tropics, helps to prevent a possible mould film forming on the optics. Your ZEISS Victory RF binoculars require no further special care.
The product should be cleaned with a dry cloth; liquids and cleaning products should be avoided. Clean the product when it is turned off.
Never attempt to repair or tamper with the product yourself. Dismantling can cause damage to the product, which is not covered in the guarantee.
In the event of a repair issue, please contact our customer services team. Our customer service team is available from Monday to Friday from 8:00 am until 6:00 pm (CET) should you have any questions.
Tel.: +49 (0) 64 41-4 67 61
Fax: +49 (0) 64 41-4 83 69
service.sportsoptics@zeiss.com
Replacement parts for ZEISS Victory RF
Should you require spare parts for your binoculars, e. g. a protective cover, please contact your specialist retailer or our after-sales service. You can find the after-sales addresses for your country at: www.zeiss.com/sports-optics/service-points
Accessories for ZEISS Victory RF*
www.zeiss.com/sports-optics/binoculars-accessories
* Accessories are not included in the scope of supply!
ZEISS is a byword for reliability and a high level of quality. Therefore, quite independently of the seller's warranty obligations to the customer, we the manufacturer offer a ten year guarantee on this ZEISS product.
The scope of the guarantee can be seen by accessing the following link: www.zeiss.com/sports-optics/premium-warranty-conditions
For US, please follow this link:
www.zeiss.com/sports-optics/us-warranty-conditions
Register your product at: www.zeiss.com/sports-optics/registration
Subject to changes in design and scope of supply due to technical improvements.
No liability for mistakes and printing errors.
INFORMATION FOR YOUR SAFETY
Environmental influences
![]()
Do not use the binoculars to look at the sun or at laser light sources. This could result in serious injury to the eyes and in considerable damage to the product.![]()
Never leave the binoculars in the sun for extended periods of time without the protective lens cap. The objective lens and eyepiece can function as a burning glass and damage the interior components.

Danger of swallowing
Do not leave the batteries and removable exterior parts within reach of children (danger of swallowing). Further information and safety instructions be found in the Quick Guide provided. This guide can also be found at the Download Center on our website.
Documents / Resources
References
Download manual
Here you can download full pdf version of manual, it may contain additional safety instructions, warranty information, FCC rules, etc.
Download ZEISS Victory RF 8x42 | 10x42 | 8x54 | 10x54 - Binoculars Manual
Advertisement


Need help?
Do you have a question about the Victory RF 8x42 and is the answer not in the manual?
Questions and answers