Advertisement
- 1 YOUR COFFEE MACHINE
- 2 KNOW YOUR COFFEE MACHINE
- 3 HOW TO MANAGE LIMESCALE BUILD-UP
- 4 SETTING UP
- 5 USING YOUR COFFEE MACHINE – PRIMING (FILLING) THE BOILER
- 6 USING YOUR COFFEE MACHINE – MAKING COFFEE
- 7 DISPENSING HOT WATER
- 8 WARMING & FROTHING MILK
- 9 CLEANING – AFTER USE
- 10 CLEANING – MONTHLY
- 11 DESCALE
- 12 TROUBLESHOOTING
- 13 IMPORTANT SAFETY PRECAUTIONS
- 14 Documents / Resources
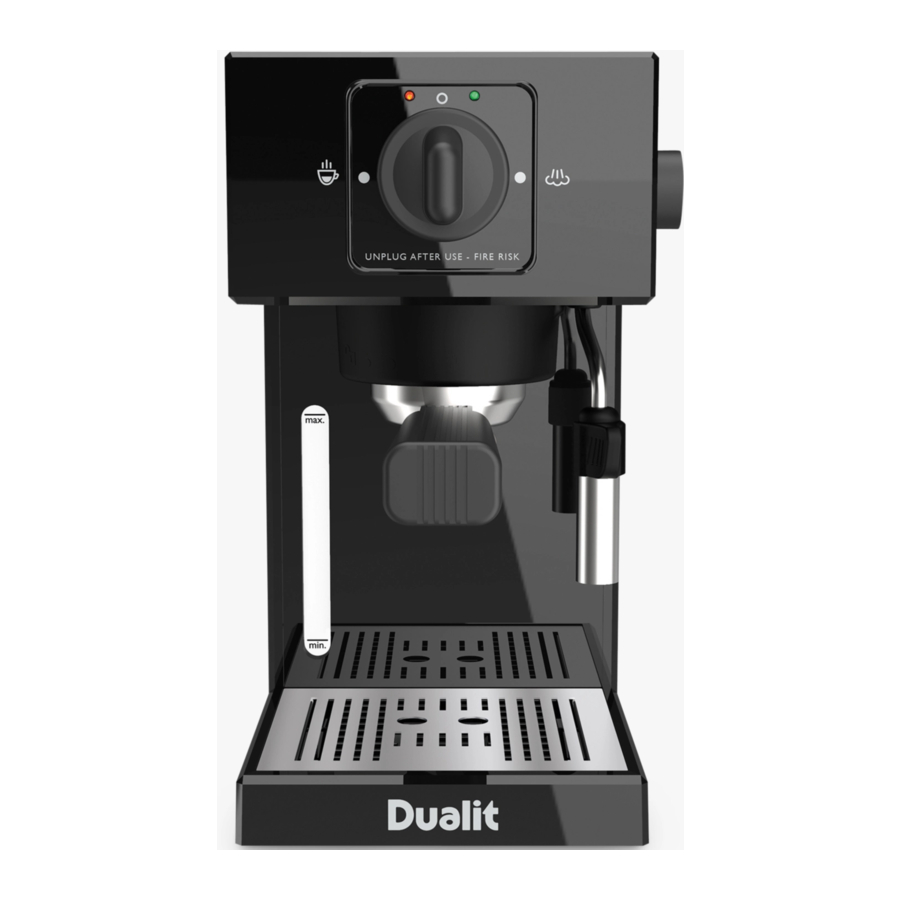
YOUR COFFEE MACHINE
Dualit has been making high quality, innovative products to make the lives of our customers easier since 1945. With over 20 years of experience making award-winning beverage machines you can trust Dualit's dedication to quality, enabling you to make authentic, cafe-quality coffee at the touch of a button. Welcome to the Dualit family.
The Dualit Espresso Coffee Machine is designed for everyday use, encompassing both functionality and style. Its sleek and compact, making it ideal for smaller spaces, with an easy to use Function Selector Knob that allows you to make perfect coffee every time.
High pressure espresso machines, such as your new Espresso Coffee Machine, require constant care and maintenance in order to prolong their lives.
Please remember to:
- Test your water hardness using the test provided.
- Always use a Water Softener Bag in your appliance (available for purchase from dualit.com).
- Rinse through and wipe the Steam Wand after every use.
- Descale your machine on a regular basis, in accordance with your water hardness.
- Follow the Barista Training and Recipe guides found on dualit.com.
Unpack the box with care, keeping all the packaging materials until you are satisfied everything is present and in working order. Once satisfied remove any tags from the appliance body and recycle the packaging appropriately. Do not remove tags from the cord. You may wish to keep the box to store your appliance. See dualit.com for the latest guidance and advice.
All illustrations are for representation only; your model may vary from illustrations shown.
KNOW YOUR COFFEE MACHINE


HOW TO MANAGE LIMESCALE BUILD-UP

LIMESCALE WARNING!
HARD WATER WILL CAUSE LIMESCALE BUILD-UP, RESULTING IN BLOCKAGES THAT WILL CAUSE PERMANENT DAMAGE OR WILL DECREASE THE LIFE OF YOUR MACHINE. TO PREVENT THIS, DESCALE REGULARLY AND USE A WATER SOFTENER.

PRODUCT FAILURE DUE TO THE BUILD UP OF LIMESCALE IS NOT COVERED BY GUARANTEE.
Before Use – Know Your Water Hardness:
- Confirm the exact hardness of the water in your area using the Water Hardness Test provided. Follow steps 2 – 4 in "SETTING UP" for full instructions.
- If you require a replacement Water Hardness Test, these are available from Dualit.com. Alternatively, confirm the hardness of your water with your local water company or use the quick reference map as a guide.
- Find your water company on the OFWAT site (ofwat.gov.uk/contactcompanies) and check the water hardness of your area.
- If you are unable to establish the water hardness of your area, or require further support, contact Dualit Customer Services on 01293 652500.
BRITISH ISLES WATER HARDNESS MAP

| WATER HARDNESS | ACTION FREQUENCY | |||||
| Hardness level | CaCO3 mg/l | Descale | Water Softener | Slow Coffee Extraction or Drop in Steam Output | ||
Soft | 0-100 | At Least Once Every 2 Months or Every 100 Cycles | Replace Annually | Descale Immediately | ||
Medium | 101-200 | At Least Once Per Month or Every 50 Cycles | Replace Bi-Annually | Descale Immediately | ||
Hard* | 201+ | At Least Once per Month or Every 25 Cycles | Replace Bi-Annually | Descale Immediately | ||
*Treat bottled water as hard water.
During Use - Water Softeners
You must use a Water Softener Bag (replacements available at Dualit.com) in medium and hard water areas, but Dualit recommends the use of a water softener in all areas. Follow the manufacturer's instructions for use. Replace the Water Softener Bag according to the table above.
During Use - Descaler
Dualit recommends using limescale removing solution (available at Dualit.com). Follow the manufacturer's dosage and safety/handling precautions. Descale your appliance regularly according to the table above.
For further assistance, contact Dualit's Customer Services on 01293 652500.
- See descale instructions for full descale procedure and further details.
- User must descale using a specific limescale removing solution, coffee machine cleaners will not descale your machine.
SETTING UP

Ensure that the appliance is unplugged and cool before starting. Remove all packaging and protective films from the appliance, including the protective bag that can be found on the Water Tank Pipes. The Setting up process will take approximately 15 minutes to complete and will help you achieve optimum performance from your machine.
PRODUCT FAILURE DUE TO THE BUILD-UP OF LIMESCALE IS NOT COVERED BY GUARANTEE. Dualit recommends descaling regularly, in a well-ventilated area to prevent limescale build up in the machine. See Limescale warning for frequency in your area in accordance with the hardness of your water. Dualit recommends the use of a Water Softener bag in all areas. For more information, visit our website dualit.com/products/machine-care or contact our Customer Services on 01293 652500.
- REGISTER MY APPLIANCE
Register your appliance on dualit.com. This will only take 60 seconds. You will need the product model and serial number that are on the rating label on the base of the product. - WATER HARDNESS TEST
Dip the Water Hardness Test Strip in a deep cup of water for 1 second. DO NOT USE RUNNING WATER.
![]()
- WATER HARDNESS TEST
Gently shake off any excess water. Leave the Test Strip to stand for 1 minute laid on a flat surface, in order to develop.
![]()
- WATER HARDNESS TEST
Compare results shown on test strip to table to establish your water hardness and refer to table for guidance on descale frequency.
![]() = Green
= Green
![]() = Orange
= Orange

- POSITION
Position in a safe space. This must be away from heat sources, water taps and not in a cupboard or in a tray that collects water. The surface must be flat in order to keep the machine level and stable.
![]()
- REMOVE AND FILL WATER TANK
Remove the Water Tank from the back of the appliance and remove the protective bag over the Water Tank Pipes. Rinse before filling with fresh water. DO NOT USE ANY OTHER LIQUID.
Maximum fill level is the MAX marker, do not overfill.
![]()
- LIFT PIPES
Lift both Water Tank Pipes.
![]()
- POSITION PIPES
Position Water Tank Pipes in Water Tank.
![]()
- INSERT TANK
Insert Water Tank.
![]()
- WATER TANK FILL HOLE
![warning]() Note, you can also fill your Tank by removing the Water Tank Cover and pouring water into the Water Tank Fill Hole. ALWAYS UNPLUG BEFORE FILLING. DO NOT SPILL WATER OVER APPLIANCE. CLEAN SPILLAGES BEFORE USE.
Note, you can also fill your Tank by removing the Water Tank Cover and pouring water into the Water Tank Fill Hole. ALWAYS UNPLUG BEFORE FILLING. DO NOT SPILL WATER OVER APPLIANCE. CLEAN SPILLAGES BEFORE USE.
Risk of electric shock.
![]()
- WATER SOFTENER BAG INSTALL
Once the Water Tank has been filled, follow instructions provided with Water Softener Bag to install in the Water Tank. Place Water Tank back into the machine. Ensure that the Water Tank Pipes are positioned into the Water Tank.
![]()
- CHECK WATER TANK PIPES
When inserting Water Tank, lift both Water Tank Pipes up, and place down into the tank, before insertion. The pipes must hang down into the water, as shown, when Water Tank is fully inserted. If the Water Tank Pipes are not as shown, remove Water Tank, pull Water Tank Pipes down and insert again.
![]()
- GROUPHEAD HEAT SHIELD
Ensure that the Grouphead Heat Shield is in place. Ensure that the Steam Wand is positioned over the Drip Tray when not in use.
![]()
- TURN ON & PRIME
Plug in the Power Cord and press the Power Switch into the 'On' position. Follow Priming Instructions.
![]()


 = Green
 = Orange


 Note, you can also fill your Tank by removing the Water Tank Cover and pouring water into the Water Tank Fill Hole. ALWAYS UNPLUG BEFORE FILLING. DO NOT SPILL WATER OVER APPLIANCE. CLEAN SPILLAGES BEFORE USE.


USING YOUR COFFEE MACHINE – PRIMING (FILLING) THE BOILER
The Boiler must be primed before each use or after using the Steam Function. Keep hands away from the Steam Wand. Risk of scalding and permanent damage to your machine not covered by your guarantee.
- REMOVE AND FILL WATER TANK
Ensure that the water level is above MIN and below MAX. DO NOT USE ANY OTHER LIQUID. Do not overfill. Ensure Water Tank Pipes are correctly positioned.
![]()
- POWER ON
Plug the appliance into the mains supply and press the Power Switch into the 'On' position. You do not need to wait for the Temperature Indicator Light to illuminate.
![]()
- POSITION
Without the Filter Holder in place, place the Steam Wand into a deep Jug.
![]()
- OPEN THE STEAM VALVE
Step 1: Turn the Steam Flow Control Knob anticlockwise to open the valve.
Step 2: Immediately turn the Function Selector Knob to the Coffee/Hot Water Function.
![]()
- PRIMING
Step 1: When water starts to dispense, turn the Function Selector Knob back to the 'OFF' position
Step 2: Turn the Steam Flow Control Knob clockwise to close the valve.
![]()
![]()
Hot Water and Steam will dispense out of the Steam Wand. Risk of scalding. - PRIMED
Your appliance is now primed and ready for use. Repeat steps 1-5 before making coffee, steaming or frothing milk.
![]()


USING YOUR COFFEE MACHINE – MAKING COFFEE
To achieve optimum performance from your Espresso Machine, follow this procedure.
Beware of hot surfaces around the Grouphead and Showerhead when inserting removing the Filter Holder. Ensure Grouphead Heat Shield is correctly fitted.
Risk of burns and scalding.
The basis of all coffee beverages is an espresso shot – a single or double shot of strong, black coffee. Ground coffee only has a three-day shelf life, so only grind the amount of coffee required at a time. Use a medium grind suitable for espresso machines. Too fine might block the Filter, too coarse will result in a weak and under-extracted espresso.
When making a milk-based drink, always make the espresso before steaming or frothing the milk to ensure optimum coffee extraction temperature.
Your appliance has an automatic shut off feature to save energy. The machine will turn off after 15 minutes of no use. There will be an audible click as the Power Switch returns to the 'Off' Position.
- FILL WATER TANK/ DRIP TRAY
Ensure that the water level is above MIN and below MAX. DO NOT USE ANY OTHER LIQUID. Do not overfill. Ensure that the Drip Tray is empty and in position.
![]()
- INSERTING WATER TANK
Ensure the protective bag has been removed from the Water Tank Pipes. When inserting Water Tank, lift both pipes up and place down into the Water Tank, before insertion. The Water Tank Pipes must hang down into the water as shown, when Water Tank is fully inserted. If the Water Tank Pipes are not as shown, remove Water Tank, pull Water Tank Pipes down and insert again.
![]()
- TURN MACHINE ON
Plug the Power Cord into the mains supply and press the Power Switch into the 'On' position.
![]()
- PRIME
Check Boiler is primed by turning the Function Control Knob to the Coffee/ Hot Water Function. If Boiler is primed, water will be dispensed from the Showerhead. If no water is dispensed, follow Priming instructions.
![]()
- THE COFFEE
Freshly grind your beans using setting 3-5 on the Dualit Coffee Grinder (available at dualit.com), 6 clicks on the Dualit Handheld Grinder (available at dualit.com), or a pre-ground coffee suitable for espresso machines.
![]()
- THE COFFEE
Find required grind setting by adjusting grind size and volume of coffee and testing in coffee machine until high quality coffee is achieved.
![warning]() Note: Adjust grind setting whilst Grinder is running, purge and discard previous grind size from Grinder.
Note: Adjust grind setting whilst Grinder is running, purge and discard previous grind size from Grinder.
![]()
- FILTER
Place required Cup Filter into Filter Holder.
![]()
- WARM CUP & FILTER HOLDER
Insert the empty Cup Filter and Filter Holder into the Grouphead. Place cup under Grouphead and turn Function Selector Knob to Coffee/Hot Water Function. Ensure that the Steam Wand is positioned over the Drip Tray when not in use.
![]()
- WARM CUP & FILTER HOLDER
Water will dispense into cup, warming the cups, Cup Filter and Filter Holder for a hotter drink and ensuring they are clean and not blocked. When desired volume of water has been dispensed, turn Function Selector Knob to 'Off' and place cup to one side.
![]()
- DRY
Remove the Filter Holder from the Grouphead and dry the inside of the Cup Filter with a cloth.
![]()
Filter Holder will be hot. Always hold by the handle, do not touch the metal Cup Filter. Risk of burns and scalding.
![]()
- GROUND COFFEE QUANTITY
Using the Measuring Spoon, measure out one level Spoon (6-9 grams) per serving into the Cup Filter. Use 2 level Spoons (12-18 grams) if using the 2 Cup Filter. THESE ARE APPROXIMATE, EXACT QUANTITY DEPENDENT ON BEANS AND GRIND SIZE.
![]()
- LEVEL COFFEE
Level coffee using the other end of the Measuring Spoon. If coffee is not level before tamping, coffee density will be uneven and will cause water to tunnel through less dense areas, resulting in weak coffee.
![]()
- TAMPING
Using other end of the Measuring Spoon or the Dualit Tamper, tamp coffee grounds. Aim to apply 5kg of force and try to achieve a 5mm space between top of coffee and top of Cup Filter. For more details on Headroom, see Barista Tips on dualit.com.
![]()
- WIPE
Wipe the rim of the Cup Filter to remove excess ground coffee. If you don't, a watertight seal will not form and water or coffee will leak from the Brewhead.
![]()
Grouphead will become very hot, do not touch the Filter Holder. Risk of burns and scalding.
![]()
- ATTACH HOLDER
Align Filter Holder with the unlock symbol on the Grouphead Heat Shield, then rotate towards the closed lock symbol. Ensure Filter Holder is locked in place before dispensing.
![]()
if not correctly aligned or not tight enough, coffee may come out of the Filter Holder. Risk of scalding and burns.
![]()
- EXTRACTING COFFEE
Empty dispensed hot water from cups and place under the Filter Holder - ensure cups are directly under both nozzles. Turn Function Selector Knob to Coffee/Hot Water Function. You will hear the pump operating. Flow for an espresso will begin 5-8 seconds after function selection.
![]()
- STOP EXTRACTING
Once desired volume of coffee has been extracted, turn the Function Selector Knob to 'Off' position. A 1 Cup Filter Basket should take 20-30 seconds to extract, a 2 Cup Filter Basket should take 25-35 seconds to extract.
![]()
- NOTE
If the flow is too quick, use finer grind or greater volume of coffee. If flow is too slow, use coarser grind. An ESE Pod can also be used in the 2 Cup Filter instead of ground coffee. Place ESE Pod in the Cup Filter and ensure the tab is tucked in, then follow steps 14 - 16.
![]()
- POWER OFF Press the Power Switch into the 'Off' position and UNPLUG AFTER EACH USE. Wait 15 seconds for the pressure in the Filter Holder to disperse before removing from the Grouphead.
![]()
removing the Filter Holder too quickly will cause hot coffee grounds to be ejected from the Holder. Risk of scalding.
![]()
- CLEAN FILTER
Remove Filter Holder from the Grouphead and knock out the grounds over a bin. Rinse the filter under running water to remove any coffee grounds. Use a pin to unblock if required. Caution: Filter Holder will be hot. Always hold by the handle, do not touch the metal Filter Basket. Risk of burns and scalding.
![]()
- CLEANING
Follow Cleaning instruction.
![]()
If extraction times have slowed, clean Filter Basket following instructions, step 4.
![]()


DISPENSING HOT WATER

WATER WILL BE HOT AND DISPENSED AT HIGH PRESSURE. Position Steam Wand into a deep Jug or Teapot and point the Wand towards a wall to reduce splashback. Risk of scalding.
- POWER ON
Plug the appliance into the mains supply and press the Power Switch into the 'On' position. Then prime the Boiler by following instructions.
![]()
- REMOVE FROTH NOZZLE/INSERT WAND
Pull the Froth Nozzle downwards to remove. Position the Steam Wand into a deep Jug or Teapot.
![]()
- STEAM FLOW CONTROL KNOB
Step 1: Turn the Steam Flow Control Knob anticlockwise to open the valve.
Step 2: Immediately turn the Function Selector Knob to the Coffee/Hot Water Function to start.
![]()
- START DISPENSING
The flow of hot water can be controlled by the Steam Flow Control Knob – turn anticlockwise to increase flow and clockwise to decrease flow.
![]()
Keep hands away from the Steam Wand and avoid hot water splashback. Risk of scalding.
![]()
- STOP DISPENSING
Step 1: Once desired volume of hot water has been dispensed, turn the Steam Flow Control Knob clockwise to close the steam valve.
Step 2: turn the Function Selector Knob to the 'Off' position
![]()
Water will be hot, if using a metal Jug, the Jug will get hot. Risk of scalding and burns.
![]()
- POWER OFF
Press the Power Switch into the 'Off' position and unplug the appliance when not in use.
![]()


WARMING & FROTHING MILK
After each use, wipe the Steam Wand & flush the inside of the Wand following the Dispensing hot water instructions.
It is recommended to use a chilled Milk Jug and fresh semi-skimmed milk straight from the fridge for best results. Note: plant based, skimmed and full fat milk can be also be used. Keep hands away from the Outlet at all times.
Hot! Always keep hands away from Steam Wand and Steam Nozzle. Metal Milk Jug will get hot during warming process. Risk of scalding and burns.
Dualit recommends the use of the Dualit Milk Jug and Thermometer whilst warming and frothing milk – optimum temperature is between 60°c - 70°c.
Always prime the Boiler before warming/frothing milk by following the Priming instructions. A full Boiler (185ml) will give maximum steam run time, which will heat or froth 500 ml (2 x 250ml) of milk. Note: If you do not prime before steaming, the steam might run out before the Steam Function has completed.
Do not exceed 3 minutes of steam time without repriming the Boiler. If steam speed reduces, stop steam cycle and prime Boiler immediately. Using the Steam Function until Boiler is empty will cause permanent damage to the appliance not covered by guarantee. Ensure that the Steam Wand is positioned over the Drip Tray when not in use.
- REMOVE/INSTALL FROTH NOZZLE
Warming Milk: Pull the Froth Nozzle downwards to remove from the Steam Wand. Frothing Milk: Push the Froth Nozzle upwards onto the Steam Wand to install.
![]()
- ADD MILK
Add 100-250ml of cold milk to a Milk Jug. Hold the Jug by its handle and tilt at a slight angle. Position the head of the Froth/Steam Nozzle just under the surface of the milk. The Steam Wand must be submerged to prevent milk splashback. Risk of scalding.
![]()
- START STEAMING
Turn the Function Selector Knob to the Steam Function and wait for the Temperature Indicator Light to be illuminated.
![]()
- STEAM FLOW CONTROL KNOB
Turn the Steam Flow Control Knob anticlockwise to open the valve, keeping the Froth Nozzle just under the surface of the milk. Take care not to splash the milk.
![]()
Never allow the milk to boil. Risk of scalding.
![]()
- FROTHING
The milk will swirl in the Jug. If large bubbles form, the Froth Nozzle is not sufficiently submerged in the milk.
![]()
Never allow the milk to boil. Risk of scalding.
![]()
- STEAMING/ FROTHING
Step 1: Once milk reaches optimum temperature/forms desired amount of froth, turn Steam Flow Control Knob clockwise.
Step 2: Turn Function Selector Knob to 'Off'. Ensure steam is off before removing Steam Wand from Jug. Pour immediately. Risk of scalding.
![]()
- CLEANING
Flush the Steam Wand by dispensing hot water or steam to remove milk residue from inside Steam Wand. Wipe the Steam Wand with a damp cloth. Product failure due to build-up of milk residue is not covered by your guarantee.
![]()
- PRIMING
At the end of your steaming cycle, the Boiler must be primed before making coffee or using the Steam Function again. Follow Priming instructions.
![]()


CLEANING – AFTER USE
BEFORE CLEANING, ENSURE THAT THE APPLIANCE IS SWITCHED OFF, UNPLUGGED AND ALLOWED TO COOL. GROUPHEAD AND FILTER HOLDER TAKE A LONG TIME TO COOL. Risk of electric shock, burns and scalding. Do not wash any of the plastic accessories or Filter Holder in the dishwasher.
- CLEAN FILTER
Turn the Filter Holder upside down over a bin and knock out the grounds. Be careful not to throw away the Cup Filter.
![]()
- DRIP TRAY
Empty the Drip Tray regularly. Rinse the Drip Tray Cover after each use.
![]()
- RINSE FROTH NOZZLE
Ensure that the Froth Nozzle is cool before cleaning. Pull the Froth Nozzle off the Steam Wand and wash under running water to remove any milk residue. Risk of burns.
![]()
- WIPE
Remove the Grouphead Heat Shield and use a damp cloth to clean the Steam Wand, Grouphead, Grouphead Heat Shield and Showerhead. There should be no milk residue or coffee grounds visible. Then reinstall the Grouphead Heat Shield.
![]()
- FLUSH STEAM WAND
![]()
After each use, flush the Steam Wand by dispensing water (see instructions), this will remove any milk residue from inside the Steam Wand and prevent blockages. Risk of scalding.
![]()
- WATER TANK
Top up the Water Tank with fresh water after making coffee, steaming or frothing milk.
![]()


CLEANING – MONTHLY
BEFORE CLEANING, ENSURE THAT THE APPLIANCE IS SWITCHED OFF, UNPLUGGED AND ALLOWED TO COOL.
Risk of electric shock and scalding. Do not wash any of the plastic accessories or Filter Holder in the dishwasher.
*If you have trouble removing the Nozzle, call Customer Services on 01293 652500. Use a pin to ensure that the Steam Nozzle is not blocked.
- WIPE BREWHEAD
Wipe the entire Brewhead area and external surfaces to ensure it is completely free of coffee grounds. Fine coffee grounds can block the Shower Head.
![]()
- UNSCREW
Using a screwdriver and hammer, gently tap the screw to dislodge any dried coffee. Then unscrew clockwise (when viewed from above).
![]()
- CLEAN BREWHEAD
Use a pin to clear holes and grooves, and clean with a soft brush. Dry, then use a screwdriver to reinstall the Showerhead.
![]()
- FILTER BASKET
Unscrew using a Philips ph2 screwdriver to separate Filter Basket components. Use a pin to clear holes and grooves, and clean with a soft brush. Dry, then carefully reassemble.
![warning]() Note: Do not overtighten the components during reassembly.
Note: Do not overtighten the components during reassembly.
![]()
- RINSE FROTH NOZZLE
Ensure that the Froth Nozzle is cool before cleaning. Pull the Froth Nozzle off the Steam Wand and wash under running water to remove any milk residue. Risk of burns.
![]()
- UNSCREW
Unscrew Steam Nozzle in a clockwise direction (when viewed from above) to remove from the Steam Wand. Do not apply excessive force.*
![]()
- CLEAN STEAM WAND HANDLE
Support the Steam Wand then pull the Steam Wand Handle down to remove.
![warning]() Note: Steam Wand Handle is tightly fitted and may need extra time and attention to remove. Clean Steam Wand Handle with detergent and a cleaning brush.
Note: Steam Wand Handle is tightly fitted and may need extra time and attention to remove. Clean Steam Wand Handle with detergent and a cleaning brush.
![]()
- CLEAN THE STEAM WAND
Use a pin to remove dried milk from inside the Steam Wand.
![]()
- REINSTALL STEAM WAND HANDLE
Reinstall the Steam Wand Handle by aligning the Steam Wand Handle with the Steam Wand and pushing it upwards. Note: the Steam Wand Handle is tightly fitted and may need extra attention and time to attach.
![]()
- REINSTALL STEAM/FROTH NOZZLE
Reinstall Steam Nozzle by screwing it anticlockwise into the Steam Wand (when viewed from above). Then push the Froth Nozzle upwards onto the Steam Wand to install.
![]()
- FLUSH STEAM WAND
![]()
Turn on your machine. Flush the Steam Wand by dispensing water, this will remove any milk residue from inside the Steam Wand and prevent blockages. Risk of scalding.
![]()
- WATER TANK
Empty and rinse the Water Tank and refill with fresh water.
![]()


DESCALE
HARD WATER WILL CAUSE LIMESCALE BUILD-UP, RESULTING IN BLOCKAGES THAT CAUSE PERMANENT DAMAGE.
IMPORTANT NOTICE: PRODUCT FAILURE DUE TO THE BUILD-UP OF LIMESCALE IS NOT COVERED BY GUARANTEE.
Dualit recommends descaling regularly, in a well-ventilated area to prevent limescale build up in the machine. See Limescale warning for frequency in your area in accordance with the hardness of your water. It is essential that a compatible descaler is used - visit www.dualit.com for descaler options. The descale process takes approximately 30 minutes.
Avoid contact with descaling solution. Steam released during descale process may be harmful. Risk of scalding and injury.
- THE DESCALER
Ensure your descaling product is suitable for coffee machines; follow descaling product instructions carefully.
![]()
- FILTER HOLDER
Ensure the Filter Holder is empty before attaching to the Grouphead. DO NOT SOAK FILTER HOLDER IN DESCALE SOLUTION.
![]()
- CONTAINER
Place a container with a capacity greater than 1L on the Drip Tray underneath the Filter Holder. The container must not overhang the edge of a table or surface. Risk of injury.
![]()
- FROTH NOZZLE
Pull the Froth Nozzle downwards to remove from the Steam Wand. Position the Steam Wand into the container.
![]()
- REMOVE WATER SOFTENER
Remove the Water Tank from the back of the appliance, remove the Water Softener Bag and place to one side. Empty the Water Tank.
![]()
- FILL WATER TANK
Fill the Water Tank with recommended amount of descaler (see instructions of your descaler) and fill to MAX line with water. Then reinstall the water tank. DESCALE AT LEAST ONCE A MONTH IN HARD WATER AREAS.
![]()
- POWER ON
Plug the appliance into the mains supply and press the Power Switch into the 'On' position. You do not need to wait for the Temperature Indicator Light to illuminate.
![]()
- START DISPENSING
Turn the Function Selector Knob to the Coffee/Hot Water Function to start. Allow the descale solution to dispense for 1 minute. Do not engage the Steam Function. Risk of chemical inhalation.
![]()
- ALLOW TO STAND
After 1 minute, turn Function Selector Knob to 'Off' and switch machine 'Off'. Allow appliance to stand for 5 minutes, then repeat steps 7-9 twice in total.
![]()
- POWER ON
Plug the appliance into the mains supply and press the Power Switch into the 'On' position. You do not need to wait for the Temperature Indicator Light to illuminate.
![]()
- START DISPENSING
Step 1: Turn the Steam Flow Control Knob anticlockwise to open the valve.
Step 2: Immediately turn the Function Selector Knob to the Coffee/Hot Water Function. Do not engage the Steam Function. Risk of chemical inhalation.
![]()
- ALLOW TO STAND
Step 1: After 1 minute, turn Steam Flow Control Knob clockwise to close steam valve.
Step 2: Turn Function Selector Knob to 'Off'. Switch the appliance 'Off' and allow to stand for 5 minutes. Repeat steps 10 - 12 twice in total.
![]()
- POWER OFF
Press the Power Switch into the 'Off' position and unplug the appliance.
![]()
- RINSE WATER TANK
Empty Water Tank, container with dispensed descale solution and Drip Tray. Rinse thoroughly. Refill Water Tank with fresh water and reinstall. Reinstall Drip Tray and place container back under Grouphead.
![]()
- POWER ON
Plug the appliance into the mains supply and press the Power Switch into the 'On' position. You do not need to wait for the Temperature Indicator Light to illuminate.
![]()
- START DISPENSING
Turn the Function Selector Knob to the Coffee/Hot Water Function to start. Allow clean water to pass through the appliance for 1 minute.
![]()
- REPEAT
After 1 minute, turn Function Selector Knob to 'Off'. Repeat steps 15-17 twice in total.
![]()
- POWER ON
Plug the appliance into the mains supply and press the Power Switch into the 'On' position. You do not need to wait for the Temperature Indicator Light to illuminate.
![]()
- START DISPENSING
Step 1: Turn the Function Selector Knob to the Coffee/Hot Water Function to start.
Step 2: Turn the Steam Flow Control Knob anticlockwise to open the steam valve. Allow clean water to pass through the appliance for 1 minute.
![]()
- REPEAT
Step 1: After 1 minute, turn Steam Flow Control Knob clockwise to close Steam Valve.
Step 2: Turn Function Selector Knob to 'Off'. Repeat steps 18-20 twice in total.
![]()
- FILTER HOLDER
Remove the Filter Holder from the appliance. RINSE THE FILTER HOLDER THOROUGHLY AFTER DESCALING.
![]()
- RINSE WATER TANK
Empty the Water Tank and rinse thoroughly, before refilling with fresh water and replacing the Water Softener Bag.
![]()
- EMPTY CONTAINER
Empty the container with the dispensed water into the Drip Tray, before emptying and rinsing both the container and Drip Tray well. Reinstall the Drip Tray once clean.
![]()


TROUBLESHOOTING
Product failure due to the build up of limescale is not covered by guarantee - descale regularly.
* TO CONTACT CUSTOMER SERVICES, PLEASE EMAIL INFO@DUALIT.COM WITH YOUR MODEL AND SERIAL NUMBERS.

TO REPLACE FUSE, REMOVE SILVER LABEL TO ACCESS SCREW.
| POSSIBLE CAUSE(S) | SOLUTION(S) |
| MY MACHINE IS NOT WORKING – THE LIGHTS ARE OFF AND THE MACHINE CEASES TO OPERATE: | |
|
|
|
|
|
|
| AFTER FROTHING MILK, MY MILK IS NOT FOAMY: | |
|
|
|
|
|
|
|
|
| |
|
|
| NO HOT WATER OR STEAM/ REDUCED STEAM OUTPUT FROM THE STEAM WAND: | |
|
|
|
|
|
|
|
|
| |
|
|
|
|
| STEAM SPEED IS TOO HIGH: | |
|
|
| MY MACHINE HAS STOPPED DURING USE OR COFFEE/HOT WATER IS NOT BEING DISPENSED FROM GROUPHEAD: | |
|
|
|
|
|
|
|
|
|
|
|
|
| MY COFFEE IS WEAK: | |
|
|
|
|
|
|
|
|
| MY COFFEE IS TOO STRONG: | |
|
|
|
|
|
|
|
|
| MY COFFEE HAS NO CREMA: | |
|
|
|
|
|
|
|
|
| MY ESPRESSO MACHINE IS VIBRATING DURING USE: | |
|
|
| MY COFFEE IS NOT HOT ENOUGH: | |
|
|
|
|
| MY COFFEE IS TOO HOT: | |
|
|
|
|
| MY MACHINE IS MAKING A LOUD AND CONTINUOUS PUMPING NOISE: | |
|
|
| MY FILTER HOLDER WON'T FIT THE GROUPHEAD: | |
|
|
| MY CUP FILTER FALLS OUT WHEN I HIT THE KNOCK BOX BANG BAR: | |
|
|
|
|
| COFFEE LEAKING FROM THE BREWHEAD: | |
|
|
|
|
|
|
|
|
| MY APPLIANCE IS LEAKING: | |
|
|
|
|
|
|
|
|
| I AM GETTING COFFEE GROUNDS IN MY COFFEE: | |
|
|
| GROUND COFFEE IS STICKING TO THE TAMPER: | |
|
|
| MY FILTER BASKETS AND/OR MY CUP FILTERS HAVE DISCOLOURED: | |
|
|
| I HAVE RUN OUT OF DUALIT WATER SOFTENER BAGS OR DESCALER: | |
| To purchase more Dualit Water Softener Bags or Descaler, visit our website at www.dualit.com | |
IMPORTANT SAFETY PRECAUTIONS
READ ALL INSTRUCTIONS BEFORE USING THE APPLIANCE KEEP THESE INSTRUCTIONS FOR FUTURE REFERENCE.
IMPORTANT SAFEGUARDS
- THIS IS AN ATTENDED APPLIANCE. Do not leave unattended during use, unplug after each use. Risk of fire if an unattended appliance is left operating or plugged in.
- This appliance must not be used by children younger than 8 years old, persons insensitive to heat and persons with very extensive and complex disabilities.
- This appliance can be used by children aged 8 years and above if they have been given supervision or instructions concerning use of the appliance in a safe way and if they understand the hazards involved. This appliance can be used by persons with reduced physical, sensory or mental capabilities or lack of experience and knowledge if they have been given supervision or instruction concerning use of the appliance in a safe way and if they understand the hazards involved. Cleaning and user maintenance shall not be made by children unless they are older than 8 and supervised. Keep the appliance and its cord out of reach of children less than 8 years old.
- Children shall not play with the appliance.
- This appliance is intended for indoor household use only. This appliance is not intended to be used in similar applications such as: Staff kitchens areas in shops, offices and other work environments, farm houses, by clients in hostels, motels, or other residential types environments or bed and breakfast environments. If the appliance is used improperly or for professional or semi-professional purposes or if it is not used according to these instructions the Guarantee becomes invalid and Dualit refuses any liability for damage caused.
- The appliance is not designed for commercial or industrial use; it is for domestic use only.
Electrical safety
- Ensure that the voltage of the appliance corresponds to that of the mains supply. Risk of electric shock and fire.
![]()
This appliance must be earthed. Connect the appliance to an outlet with an earth socket withstanding a minimum of 10 amperes.- If the Power Cord is damaged, it must be replaced by the manufacturer, its service agent, or a similarly qualified person in order to avoid hazard. Call Dualit's Customer Helpline on +44 (0)1293 652 500. Risk of electric shock and fire.
- Never touch the cable with wet hands.
- Do not wrap the Power Cord around the appliance.
- Do not clip or crease the Power Cord.
- If any of the appliance casings break, immediately disconnect the appliance from the mains. Risk of electric shock.
- This appliance conforms to directive 2014/30/EU regarding electromagnetic compatibility.
- The use of extension cables not authorised by the manufacturer may cause damage or accidents.

General safety
- Do not operate any appliance with a damaged Power Cord or plug, or after the appliance malfunctions or has been dropped, damaged or cracked in any manner. Risk of electric shock and fire.
- The use of accessory attachments not recommended by Dualit may result in fire, electric shock or injury to persons.
- The appliance's plug must fit into the mains socket properly. Do not alter the plug. Do not use plug adaptors. Risk of electric shock.
- Never use the plug without the fuse cover fitted. Ensure replacement fuse is the same current value as the original. Replacement fuses are available and should be ASTA approved to BS1362. Risk of electric shock and fire.
- Do not touch the metal parts, the filter holder or its housing when the appliance is in use, as this may cause burns or scalding.
- Do not place the appliance on a polished wood or permeable surface, it could damage the surface.
- Do not place the coffee machine on a metal tray or other metal surface during use. Risk of electric shock.
- Do not operate on an uneven surface. The appliance must only be operated on a flat, horizontal surface. Risk of injury.
- Do not place the appliance or Power Cord on or near any hot surface, hot hob, gas burner or in a heated oven. Risk of electric shock and fire.
- Do not use the appliance without water as this may cause damage to the pump/boiler.
- Do not leave the appliance in a room with a temperature below 0°C, as any water remaining in the appliance could freeze and cause damage.
- Before refilling the water tank, unplug the appliance from the mains. Risk of electric shock.
- Do not overfill the water tank.
- Do not use sparkling water (with carbon dioxide).
- Never fill the water tank with hot or boiling water.
- Only use the appliance with the drip tray correctly fitted.
- To be protected against electrical hazards, fire and injury to persons, do not immerse the Power Cord, plug or appliance in water or any other liquid. Risk of electric shock.
- If there is internal water leakage, do not operate the coffee maker and unplug it at once in order to avoid electric hazard.
- Unplug the unit when not in use, before fitting or removing parts and before cleaning. To unplug it, hold the plug and pull it out of the socket. Never pull it out by the power cord. Risk of electric shock and fire.
- To prevent damage to the appliance do not use alkaline cleaning agents when cleaning, use a soft cloth and a mild detergent.
- Do not use scouring pad or abrasive cleaner on the main body.
- Do not place on a tray or surface that may collect liquid.Risk of electric shock.
- Steam and hot water hazard. Do not get into direct contact with hot liquid and steam.Risk of scalding.
- Do not lift the appliance up using the water tank, Power Cord or cup rails. Only hold the appliance body. Unplug and allow to cool prior to moving.
- Do not place on a tray or surface that may collect liquid. Risk of electric shock.
- The Power Cord should not be allowed to come into contact with hot surfaces. Risk of electric shock.
- A short Power Cord is provided to reduce risks resulting from becoming entangled in or tripping over a longer cord.Risk of injury and electric shock.
- We recommend that the appliance is plugged into a socket that has no other appliance connected to it. Failure to do this may cause an overload, trip a circuit breaker or blow a fuse. Preferably the socket outlet should be protected by a residual current device (RCD).
- Do not come into contact with the Grouphead, Filter Holder Body or coffee outlets. The surface will be hot. Use Filter Holder Handle only. Risk of scalding.
- Do not use without Group Head Heat Shield – Grouphead surfaces are hot, this cover prevents contact with hot surface. Allow to cool before removing for cleaning.Risk of scalding.
- Unplug the appliance from the mains before cleaning or maintaining. For details, please refer to Cleaning section.
- Clean all parts of the appliance that will be in contact with food before use. For details please refer to Cleaning section.
- Coffee maker shall not be placed in a cabinet or appliance garage when in use.
SAVE THESE INSTRUCTIONS
In the interest of improving products, Dualit Ltd. reserves the right to change the product specification without prior notice. All illustrations are for representation only, your model may vary from illustrations shown.
BEFORE FIRST USE
- Read this instruction manual before you start using the coffee machine. It gives you important safety information and will ensure you get the most out of your Dualit product.
- Keep this manual and your proof of purchase in a safe place.
- Don't forget to register your product at www.dualit.com/register
- The Water Tank, Steam Wand and Frother Nozzle must be washed with warm soapy water, then rinsed and dried.
- THE COFFEE MACHINE MUST BE FLUSHED THROUGH WITH WATER BEFORE THE FIRST USE.
Follow the instructions for set up, ensuring that the Boiler has been primed.
REGISTER YOUR PRODUCT
DON'T FORGET TO REGISTER YOUR PRODUCT
WWW.DUALIT.COM/REGISTER
OR BY POST
- Fast and efficient customer service important safety advice, access to manuals and product information should you require assistance with your purchase.
- A library of mouth-watering recipes and regular articles and blogs.
- Be the first to hear about exciting new Dualit products. Dualit recommends safety first: please register your product so that we can contact you in the unlikely event that a safety notification is issued. Remember to keep your receipt as proof of purchase.
Documents / Resources
References
![dualit.com]() Dualit — Award winning toasters, kettles, coffee & more
Dualit — Award winning toasters, kettles, coffee & more![dualit.com]() Dualit Coffee Machine Care — Essential Products
Dualit Coffee Machine Care — Essential Products![www.dualit.com]() Dualit — Award winning toasters, kettles, coffee & more
Dualit — Award winning toasters, kettles, coffee & more![www.dualit.com]() Register A Dualit Product
Register A Dualit Product
Download manual
Here you can download full pdf version of manual, it may contain additional safety instructions, warranty information, FCC rules, etc.
Advertisement


Need help?
Do you have a question about the Espresso Coffee Machine and is the answer not in the manual?
Questions and answers