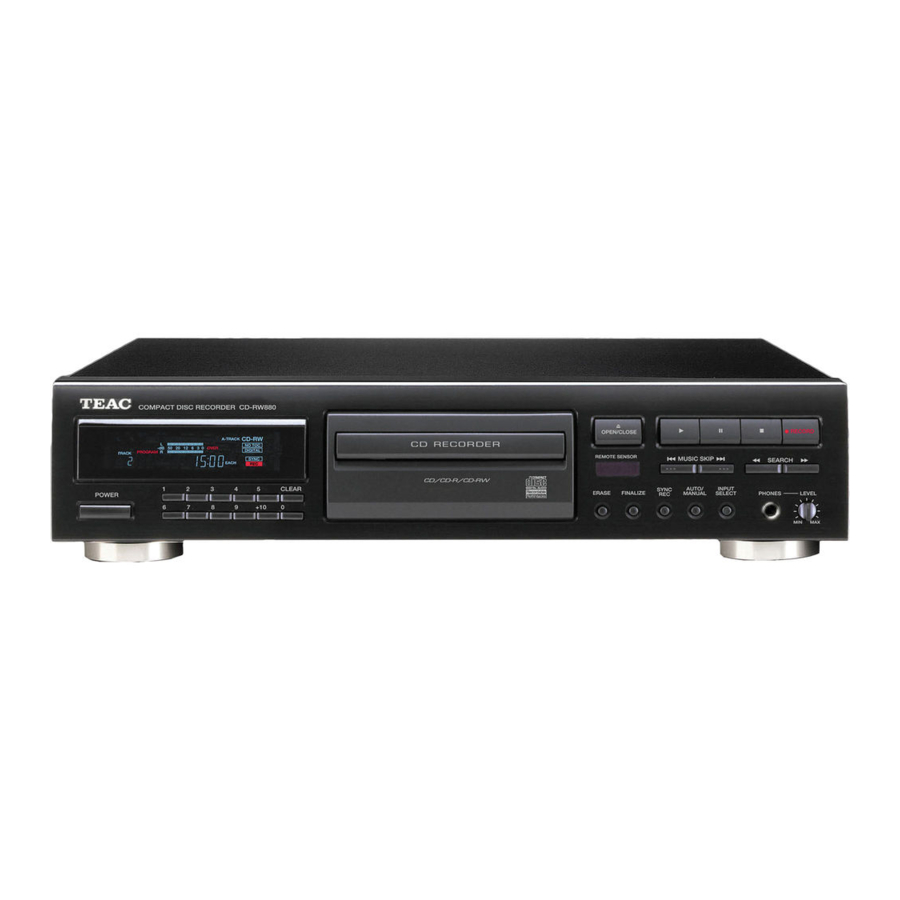
Teac CD-RW880 - CD Recorder Manual
- Quick-start recording manual (2 pages) ,
- Owner's manual (44 pages) ,
- Service manual (20 pages)
Advertisement
- 1 Before using the unit
- 2 Connections
- 3 Discs
- 4 Remote Control Unit
- 5 Unit Functions and Remote Control
- 6 Listening to a CD
- 7 Direct Playback
- 8 Shuffle Playback
- 9 Time Display
- 10 Repeat Playback
- 11 A-B Repeat
- 12 Programmed Playback
- 13 Before Recording
- 14 Recording
- 15 Manual track division
- 16 Input Monitoring
- 17 Automatic Track Division
- 18 Synchronous Recording
- 19 Finalize
- 20 Erase or Unfinalize a CD-RW
- 21 Troubleshooting
- 22 Messages
- 23 Specifications
- 24 IMPORTANT SAFETY INSTRUCTIONS
- 25 Documents / Resources
Before using the unit
Read this before attempting any operations
- The nominal temperature should be between 5°C and 35°C (41°F and 95°F). The CD-RW recorder is more sensitive to extremes of temperature than ordinary CD players.
- Relative humidity should be 30 to 85 percent noncondensing.
- As the unit may become warm during operation, always leave sufficient space around the unit for ventilation.
- The voltage supplied to the unit should match the voltage as printed on the rear panel. If you are in any doubt regarding this matter, consult an electrician.
- Choose the installation location of your unit carefully. Avoid placing it in direct sunlight or close to a source of heat. Also avoid locations subject to vibrations and excessive dust, heat, cold or moisture.
- Do not place the unit on an amplifier/receiver.
- Do not open the cabinet as this might result in damage to the circuitry or electrical shock. If a foreign object should get into the unit, contact your dealer or service company.
- When removing the power plug from the wall outlet, always pull directly on the plug, never yank the cord.
- To keep the laser pickup clean, do not touch it and always close the disc tray.
- Do not attempt to clean the unit with chemical solvents as this might damage the finish. Use a clean, dry cloth.
- Keep this manual in a safe place for future reference.
DO NOT MOVE THE UNIT DURING PLAYBACK/RECORDING
During playback or recording, the disc rotates at high speed. Do NOT lift or move the unit during playback or recording. Doing so may damage the disc or the unit.
WHEN MOVING THIS UNIT
When changing the unit's location or packing the unit for moving, be sure to remove the disc. Moving this unit with the disc loaded may result in damage to this unit.
Connections

- Switch off the power to all equipment before making connections.
- Read the instructions of each component you intend to use with this unit.
- Be sure to insert each plug securely. To prevent hum and noise, avoid bundling the signal interconnection cables together with the AC power cord.

- ANALOG IN/OUT jacks
Analog 2-channel audio signal is input or output from these jacks. Connect these jacks to the amplifier with RCA cables.
Make sure to connect:CD-WR880 Amplifier ANALOG OUT ![]() MD PLAY, TAPE PLAY, etc.
MD PLAY, TAPE PLAY, etc.ANALOG IN ![]() MD REC, TAPE REC, etc.
MD REC, TAPE REC, etc.
white plug![]() white jack (L: left channel)
white jack (L: left channel)
red plug![]() red jack (R: right channel)
red jack (R: right channel) - DIGITAL IN terminal
To record digital audio signals, connect this terminal to the digital output terminal of a digital device such as a CD player, MD deck, etc. with an optical digital cable.- Keep the supplied cap to cover the terminal when it is not in use.
- AC Power Cord
After all other connections are complete, connect the plug to the AC wall socket.
Be sure to connect the power cord to an AC outlet which supplies the correct voltage.
Hold the power plug when plugging or unplugging the power cord. Never pull or yank on the power cord.

Discs
Please use CD, CD-R and CD-RW discs bearing the "DIGITAL AUDIO" logo.

This unit CANNOT RECORD CD-R and CD-RW discs designed for computer systems.

In this manual, although we refer to "CD-R" and CD-RW" discs, we always mean "CD-R Digital Audio" and "CD-RW Digital Audio", even when this is not explicitly stated.
- CD-R and CD-RW discs designed for computer systems and properly recorded by a computer are playable, but this unit cannot record, finalize nor erase them.
- Depending on the quality of the disc and/or the condition of the recording, some CD-R/CD-RW discs may not be playable.
- Copy-protected discs and other discs which do not conform to the CD standard may not play back correctly in this player. If you use such discs in this unit, TEAC Corporation and its subsidiaries cannot be responsible for any consequences or guarantee the quality of reproduction. If you experience problems with such non-standard discs, you should contact the producers of the disc.
- Always place the disc on the disc tray with the label side uppermost. (Compact discs can be played or recorded only on one side.)
- To remove a disc from its storage case, press down on the center of the case and lift the disc out, holding it carefully by the edges.
![]()
- Should the disc become dirty, wipe the surface radially (from the center hole outward towards the outer edge) with a soft, dry cloth:
![]()
- Never use such chemicals as record sprays, antistatic sprays or fluid, benzine or thinner to clean the discs. Such chemicals will do irreparable damage to the disc's plastic surface.
- Discs should be returned to their cases after use to avoid dust and scratches that could cause the laser pickup to "skip."
- Do not expose discs to direct sunlight or high humidity and temperature for extended periods. Long exposure to high temperatures will warp the disc.
- Do not play any disc that is warped, deformed or damaged. Playing such discs may cause irreparable harm to the playing mechanisms.
- CD-R and CD-RW discs are more sensitive to the effects of heat and ultraviolet rays than ordinary CDs. It is important that they are not stored in a location where direct sunlight will fall on them, and away from sources of heat such as radiators or heat-generating electrical devices.
- Printable CD-R and CD-RW discs aren't recommended, as the label side might be sticky and damage the unit.
- Do not stick papers or protective sheets on the discs and do not use any protective coating spray.
- Use a soft oil-based felt-tipped pen to write the information on the label side. Never use a ball-point or hard-tipped pen, as this may cause damage to the recorded side.
- Never use a stabilizer. Using commercially available CD stabilizers with this unit will damage the mechanism and cause them to malfunction.
- Do not use CDs with an irregular shape (octagonal, heart shaped, business card size, etc.). CDs of this sort can damage the unit:
![]()
- If you are in any doubt as to the care and handling of a CDR/ CD-RW disc, read the precautions supplied with the disc, or contact the disc manufacturer directly.


About CD-R and CD-RW discs
CD-R discs can be recorded once only. Once they have been used for recording, they cannot be erased or re-recorded. However, if space is available on the disc (and the disc has not been finalized), additional material can be recorded.
By contrast, a CD-RW disc can be used in much the same way as a CD-R disc, but the last track or tracks recorded can be erased, and the space on the disc can be re- used for other recordings.
However, you should note that an audio CD created using a CD-RW disc may not play back satisfactorily on every audio CD player. CD-R, by contrast, may be played satisfactorily on the majority of audio CD players.
Finalizing
Although audio data may be written on a CD-R or CD-RW disc, a standard CD player will not be able to play back the audio until a final table of contents (TOC) has been written at the start of the disc. The process of writing this table of contents is known as "finalizing". Once this has been done, no further data can be written to the disk. Note that a CD-RW disc that has been finalized can be "unfinalized". This allows further tracks to be recorded to the disc, provided that there is space on the disc.
- Repeat, shuffle and programmed playback don't work with unfinalized (NO TOC) discs.
Recordable discs
In this manual, we use the term "recordable" disc to describe a CD-R or CD-RW disc that has not been finalized, and has enough space to record.
Remote Control Unit
The provided Remote Control Unit allows the unit to be operated from a distance.
When operating the remote control unit, point it towards the REMOTE SENSOR on the front panel of the unit.
- Even if the remote control unit is operated within the effective range, remote control operation may be impossible if there are any obstacles between the unit and the remote control.
- If the remote control unit is operated near other appliances which generate infrared rays, or if other remote control devices using infrared rays are used near the unit, it may operate incorrectly. Conversely, the other appliances may operate incorrectly.
Battery Installation

- Remove the battery compartment cover.
- Insert two "AA" (R6, SUM-3) dry batteries. Make sure that the batteries are inserted with their positive "
![]() " and negative "
" and negative "![]() " poles positioned correctly.
" poles positioned correctly. - Close the cover.
 " and negative "
 " poles positioned correctly.
Battery Replacement
If the distance required between the remote control unit and main unit decreases, the batteries are exhausted. In this case replace the batteries with new ones.
Precautions concerning batteries
- Be sure to insert the batteries with correct positive "
![]() " and negative "
" and negative "![]() " polarities.
" polarities. - Use batteries of the same type. Never use different types of batteries together.
- Rechargeable and non-rechargeable batteries can be used. Refer to the precautions on their labels.
- When the remote control unit is not to be used for a long time (more than a month), remove the batteries from the remote control unit to prevent them from leaking. If they leak, wipe away the liquid inside the battery compartment and replace the batteries with new ones.
- Do not heat or disassemble batteries and never dispose of old batteries by throwing them in a fire.
Unit Functions and Remote Control

- POWER
Press this button to turn the unit standby or off.
The equipment draws a nominal amount of power from the AC outlet even with its POWER switch in the OFF position. - Display
- Disc Tray
- OPEN/CLOSE
Use this button to open and close the disc tray. - MUSIC SKIP (
![]() )
)
Use these buttons to skip tracks.
Hold down these buttons to search for a part of a track. - PLAY (
![]() )
)
Use this button to start playback, recording, finalizing and erasing. - PAUSE (
![]() )
)
Use this button to pause playback or recording. - STOP (
![]() )
)
Use this button to stop playback or recording. - RECORD
Use this button to enter record pause mode.
During recording, use this button to divide tracks. - DIGITAL REC LEVEL
In record pause mode, use these buttons to adjust the recording level. - PHONES
For private listening, first reduce the volume level to minimum. Then insert the plug from your headphones into the PHONES jack, and adjust the volume by turning the LEVEL knob. - INPUT SELECT
Use this button to select a source to be recorded. - AUTO/MANUAL
Use this button to select the mode of track number assignment. - SYNC 1/ALL
Use this button for digital synchronized recording. - FINALIZE
Use this button to finalize a CD-R/CD-RW disc. - ERASE
Use this button to erase or unfinalize a CD-RW disc. - Remote Sensor
When operating the remote control unit, point it towards the REMOTE SENSOR.
 )
) )
)
- STANDBY/ON
When the POWER switch of the main unit is depressed, use this button to turn the unit on or standby. - Numeric buttons
Use these buttons to select track numbers. - REPEAT (1/ALL, A-B)
Use these buttons to select a repeat mode. - SEARCH (
![]() )
)
Use these buttons to search for a part of a track. - TIME
Use this button to change the display mode. - PROGRAM
Use this button to program tracks. - CLEAR
Use this button to clear programmed tracks. - PROGRAM CHECK
Use this button to check the programmed contents. - SHUFFLE
Use this button for shuffle playback. - MUSIC SKIP (
![]() )
)
Use these buttons to skip tracks.
 )
) )
)Note:
To simplify explanations, instructions in this manual refer to the names of the buttons and controls on the front panel only. Associated controls on the remote control will also operate similarly.
Listening to a CD

- Press the POWER switch.
The unit enters standby mode, and "STAND-BY" lights on the display.
![]()
- Press the STANDBY/ON button of the remote control unit to turn the unit on.
When no disc is set, "NO DISC" appears on the display.
![]()
- < If one of the following buttons is pressed in the standby mode, the unit will also turn on:
OPEN/CLOSE, PLAY, STOP
- < If one of the following buttons is pressed in the standby mode, the unit will also turn on:
- Press the OPEN/CLOSE button (
![]() ).
).
![]()
- Place a disc on the tray with the printed label face up.
![]()
- Never place more than one disc on the tray.
- The disc must be placed in the center of the disc tray. If the disc is not correctly loaded, it may not be possible to open the tray again once it has closed, so you should ensure the disc is always centered on the tray.
- Do not force the tray by hand during opening and closing operations.
- Press the OPEN/CLOSE button (
![]() ) to close the tray.
) to close the tray.
![]()
- It takes a few seconds for the unit to load the disc. No buttons will work during loading. Wait until the total number of the tracks and the total play time of the disc are displayed.

- The disc type indicator shows the type of disc currently loaded.
CD:
A commercial pre-recorded CD
CD-R:
A finalized CD-R
CD-RW:
A finalized CD-RW
CD-R NO TOC:
A CD-R which has yet to be finalized
CD-RW NO TOC:
A CD-RW which has yet to be finalized
blank:
No disc
- It takes a few seconds for the unit to load the disc. No buttons will work during loading. Wait until the total number of the tracks and the total play time of the disc are displayed.
- Press the PLAY button (
![]() ) to start playback.
) to start playback.
Disc playback starts from the first track, and the PLAY indicator (![]() ) lights on the display.
) lights on the display.
![]()
- If you load the disc, and then press the PLAY button without having first closed the disc tray, the disc tray closes and playback starts.


 ).
).


Standby mode

When the POWER switch of the main unit is depressed, use this button to turn the unit on or standby.
If one of the following buttons is pressed in the standby mode, the unit will also turn on:
OPEN/CLOSE, PLAY, STOP
To suspend playback temporarily (pause mode)

Press the PAUSE button ( ) during playback. Playback stops at the current position.
To resume playback, press the PLAY button ( ) or the PAUSE button ().
To stop playbacks

Press the STOP button ( ) to stop playback.
To skip to the next or a previous track

During playback, repeatedly press the MUSIC SKIP button ( or
or  ) until the desired track is found. The selected track will be played from the beginning.
In the stop mode, press the SKIP button ( or ) repeatedly until the track you want to listen to is found, and press the PLAY button () to start playback from the selected track.
- When the
![]() button is pressed during playback, the track being played will be played from the beginning. To return to the beginning of the previous track, press the
button is pressed during playback, the track being played will be played from the beginning. To return to the beginning of the previous track, press the ![]() button twice.
button twice.
Search for a part of a track

During playback, hold down the MUSIC SKIP button ( or ) of the main unit (or the SEARCH button ( or
or  ) of the remote control unit) and release it when the part you want to listen to is found.
Direct Playback

While in stop or playback mode, you can use the numeric buttons of the remote control unit to select a track.
Press the numeric buttons to select a track. Playback starts from the selected track.
To play tracks 1 through 9, simply press the appropriate button (1 through 9).
To play a track whose number is higher than 9, press the +10 button appropriate number of times to set the "tens" digit of the track number, followed by a single button to set the "units" digit.
- Direct playback isn't possible during shuffle playback and programmed playback.
Shuffle Playback

The tracks can be played randomly.
In the stop mode, press the SHUFFLE button and the PLAY button.
When the shuffle playback of all the tracks has been finished, the unit stops and the shuffle playback mode is cancelled.
- If you press the
![]() button during shuffle playback, next track will be randomly selected and played. If you press the
button during shuffle playback, next track will be randomly selected and played. If you press the ![]() button, the currently played track will be played from the beginning. A track cannot be replayed during shuffle playback.
button, the currently played track will be played from the beginning. A track cannot be replayed during shuffle playback. - Shuffle playback doesn't work during programmed playback.
- If one of the following buttons is pressed, shuffle mode will be cancelled:
SHUFFLE in the stop mode, OPEN/CLOSE, STANDBY/ON, POWER - Shuffle playback works with finalized discs only.
Time Display

Each time the TIME button is pressed, the display changes as follows:
CD/CD-R/CD-RW playback

Unfinalized CD-R/CD-RW, stopped

During recording

Repeat Playback

Each time the REPEAT button is pressed, the repeat mode is changed as follows:

REPEAT ALL (Repeat All the Tracks)
Press the REPEAT button once during playback.
All the tracks of the disc will be played repeatedly.
REPEAT 1 (Repeat one track)
Press the REPEAT button twice during playback.
The track being played will be played repeatedly. If you press the MUSIC SKIP button and select another track, the track you selected will be played repeatedly.
It is also possible to select a track to be repeated in the stop mode. Press the REPEAT button twice and then select the track number by pressing the MUSIC SKIP button. Press the PLAY button to start playback.
- If one of the following buttons is pressed, repeat mode will be cancelled:
OPEN/CLOSE, STANDBY/ON, POWER - Repeat playback works with finalized discs only.
A-B Repeat

To repeat a designated section
Please note that CD-R/CD-RW discs that haven't been finalized cannot be used for A-B repeat.
- Start playback and designate the point at which the A-Brepeat should start (point A) by pressing the A-B button.
"REPEAT A-" blinks on the display. - When the point at which repeat playback should end(point B) is reached, press the A-B button again.
The designated section will be played repeatedly.
- After designating point A, the SEARCH button can be used to fast-forward or fast-backward to point B.
Note that the point B should be forward the point A. Do not go back beyond the point A. - MUSIC SKIP buttons don't work during A-B repeat playback.
- If one of the following buttons is pressed, A-B repeat mode will be canceled:
A-B, STOP, OPEN/CLOSE, STANDBY/ON, POWER
Programmed Playback
Up to 32 tracks can be programmed in the desired order.
- Insert a disc before beginning programming.
- Shuffle playback does not work during programmed playback.
- Programmed playback works with finalized discs only.
- Press the PROGRAM button in the stop mode.
"PROGRAM" indicator blinks, and "0P00" appears on the display.

- Press the numeric button to select a track.
You can also use the MUSIC SKIP button and the PROGRAM button to program tracks. Select a track using the MUSIC SKIP button, and press the PROGRAM button. Repeat this step to program more.

- If you made a mistake, press the CLEAR button. The last programmed number will be deleted.
- To exit the program mode, press the STOP button.
- When the selection of track numbers has been finished, press the PLAY button (
![]() ) to start program playback.
) to start program playback.
![]()


To check the programmed order
In the stop mode, press the PROGRAM CHECK button repeatedly to show the track numbers that have been stored in memory.

To add a track to the end of the program
In the stop mode, press the PROGRAM button, and select a track number using the numeric buttons. The track is added to the end of the program.
To overwrite the program
In the stop mode, press the PROGRAM CHECK button repeatedly until the program number to be changed appears on the display. Press the PROGRAM button, and select new track number by pressing the numeric buttons to overwrite the program.
To delete a track from the program
In the stop mode, press the PROGRAM CHECK button repeatedly until the program number to be deleted appears on the display, then press the CLEAR button. The selected track is deleted from the program.

To clear the program
In the stop mode, hold down the CLEAR button for more than 2 seconds.
If the OPEN/CLOSE button or the POWER button is pressed, the programmed contents will also be cleared.

Before Recording
Before you start recording, make sure that you understand the following points:
- The unit requires Digital Audio CD-R or CD-RW media for recording. Computer CD-R or CD-RW discs do not work with this unit.
- Once you have recorded on a CD-R disc, the data cannot be erased from it.
- You can add tracks to an unfinalized recordable disc. Once finalized, a CD-R disc is "fixed" and behaves in the same way as a CD. Finalized CD-RW discs, however, can be unfinalized, erased and re-recorded.
- Due to the system restrictions of CD, a track cannot be less than four seconds in length, and there can be a maximum of 99 tracks on an audio CD.
- If the STOP button or PAUSE button is pressed within four seconds from the beginning of a track, the unit continues to record no signal and stops when the track's length reaches four seconds.
- When the recording is finished, "PMA WRITE" blinks for a few seconds, and the unit then goes into stop mode. Do not apply shock or vibration to the unit during recording.
- If the disc reaches the end during recording, the unit will start a fade-out over a few seconds and stop recording.
- If the disc reaches the end of the 99th track during recording, the unit stops.
- The recording time of a track may differ slightly from the original one.
Serial Copy Management System
This unit is in compliance with the Serial Copy Management System standard. This standard has been established to restrict digital-to-digital copying to only the first generation. The basic rules governing this system are as follows:
Rule 1
A digital recording is possible from a digital source such as a CD, DAT or MD onto a recordable CD-R, CD-RW, MD or DAT through a digital input connection. However, further digital to- digital recording is prohibited for the second and later generations.
Rule 2
When an analog source such as an analog disc or FM broadcast is digitally recorded by using a CD-R, CD-RW, MD or DAT, this recorded source can be digitally recorded on another CD-R, CD-RW, MD or DAT. However, further digital copying is prohibited.
Recording

- Load a recordable CD-R or CD-RW disc into the unit.
Press the OPEN/CLOSE button (![]() ), place a disc on the disc tray with the printed label side up, and then press the OPEN/CLOSE button (
), place a disc on the disc tray with the printed label side up, and then press the OPEN/CLOSE button (![]() ) to close the disc tray.
) to close the disc tray.
Make sure NO TOC and "CD-R" (or "CD-RW") indicators lights on the display.

- Select the source to be recorded using the INPUT SELECT button.
DIGITAL (OPTICAL IN)
Select this to record a source connected to the DIGITAL IN terminal.
ANALOG (ANALOG IN)
Select this to record a source connected to the ANALOG IN terminal.
![]()
- If necessary, select the mode of track number assignment using the AUTO/MANUAL button.
When the POWER button or the STANDBY/ON button is pressed, this setting is reset to –60 dB.
![]()
- Press the RECORD button.
![]() and
and ![]() indicators on the display will light, and the unit enters record pause mode.
indicators on the display will light, and the unit enters record pause mode. - No button will work while "WAITING" is displayed. Wait a few seconds until "WAITING" disappears from the display. When DIGITAL is selected in step 2, the sampling frequency of the digital source ("FS 44_1K", "FS 48K" or " FS 32K") briefly appears after "WAITING".
- "DIN UNLOCK" appears when the unit cannot perceive the digital signal. In that case, connect a digital device to the DIGITAL IN terminal, switch it on, and wait a few seconds until the unit enters record pause mode.
- You cannot record if "MONITOR" appears on the display. In that case, reload a recordable disc, wait a few seconds until NO TOC and "CD-R" (or "CD-RW") indicators light on the display, and press the RECORD button again.
- If necessary, adjust the recording level using the REC LEVEL buttons.
Play the source to be recorded and adjust the recording level so that the loudest sound does not exceed the "OVER" indicator on the peak level meter.
The level can be adjusted from –∞, –60 dB to +18 dB.

- Unlike analog equipment, digital audio units produce extremely unpleasant sounds when distorted, and there is no "headroom" after the 0 mark. When you record digitally from a commercially-produced CD, set the digital volume to 0 dB. This will maintain all the dynamic range of the source CD without clipping. Only boost the signal if the source is exceptionally quiet.
When the POWER button or the OPEN/CLOSE button is pressed, the recording level is reset to 0 dB.
- Unlike analog equipment, digital audio units produce extremely unpleasant sounds when distorted, and there is no "headroom" after the 0 mark. When you record digitally from a commercially-produced CD, set the digital volume to 0 dB. This will maintain all the dynamic range of the source CD without clipping. Only boost the signal if the source is exceptionally quiet.


- Press the PLAY or the PAUSE button to start recording.
![]()
- Play the source to be recorded.
When the playback of the source has been finished, press the STOP button to stop recording.- The STANDBY/ON button doesn't work during recording.

To stop recording

Press the STOP button () to stop recording.
To suspend recording temporarily (pause mode)

Press the PAUSE button (). "WAITING" briefly appears on the display, and the recording is paused. To restart recording, press the PLAY button () or the PAUSE button ().
- You cannot restart recording while "WAITING" is displayed.
- Remember that every time recording is paused or stopped, a new track number will always be assigned. It is not possible to record in two "stages" within one track.
Sampling Rate Converter
This unit incorporates a sampling rate converter so that it can record digital signals sampled at 48 kHz or 32 kHz by converting the sampling frequency into 44.1 kHz.
Manual track division
It is possible to divide the recording into tracks while recording.
While recording is taking place, press the RECORD button. The current track number will be incremented by one.

- Manual track division is possible regardless of the AUTO/MANUAL setting.
- A track cannot be less than four seconds in length. The RECORD button will not work if it is pressed within four seconds from the beginning of a track.
Input Monitoring

To monitor the input signal
When there is no recordable disc in the unit, press the RECORD button (when there is a recordable disc in the unit, pressing the RECORD button will enter record pause mode).
The word MONITOR appears on the display to show that the output signal is an echo of the input signals. The meters show the current input level.
Exit the monitor mode by pressing the STOP button.
Automatic Track Division

When the AUTO/MANUAL button is pressed once, the current mode is displayed. Press the AUTO/MANUAL button repeatedly to select any other mode.
 . . . .
- The "A.TRACK" indicator lights when –60dB, –50dB, –40dB or –30dB is selected.
A TRACK (–60, –50, –40 or –30 dB)
When recording digitally, the unit will automatically insert a track division in the recorded material when an increment signal is detected.
When the digital source doesn't contain increment signals, or when recording analogically, the unit will automatically insert a track division in the recorded material when sound level has dropped below the increment level (–60, –50, –40 or –30dB) for more than 3 seconds and then sound has re-started.
You can add track numbers by pressing the RECORD button during recording.
The increment level is also used to trigger analog synchronous recording.
"–30dB" takes a louder signal to trigger the start of the analog synchronous recording or a track division. "–60dB" means that a relatively quiet signal will trigger the start of the analog synchronous recording or a track division. "–60dB" is suitable for recording a noiseless source such as a CD.
MANUAL
The unit doesn't divide tracks.
Use the RECORD button to divide tracks.
MANUAL is recommended for recording an analog source such as a record.
- AUTO TRACK may not work properly with analog sources that contain low-level noises.
- The default setting is –60. When the POWER button or the STANDBY/ON button is pressed, the setting is automatically reset to –60.
(In case the INPUT SELECT is set to ANALOG, the default setting is –50.) - The AUTO/MANUAL button doesn't work during recording or in the record pause mode.
Synchronous Recording
Synchronous recording means that recording will begin automatically when a signal is received, and will stop when the signal ends.
The conditions under which an input signal is used as the trigger to start recording are:
when recording a CD digitally, a digital start signal is detected, and audio is also detected
or
when recording an MD or DAT digitally, a digital start signal is detected
or
the sound level has dropped below the increment level for one second or more, and has then risen above the increment level again
The conditions under which synchronized recording stops are:
when recording digitally, a digital stop signal is detected
or
the sound level drops below the increment level for 5 seconds
To start synchronous recording
- After step 3, press the SYNC 1/ALL button and select SYNC 1 or SYNC ALL.
When the SYNC 1/ALL button is pressed once, the current setting is displayed. Press the SYNC 1/ALL button repeatedly to select any other setting.
SYNC ALL
Select this to record all the tracks.
SYNC 1
Select this to record only one track.
SYNC OFF
Select this when you don't use this function.
The SYNC indicator lights when SYNC ALL or SYNC 1 is selected.
![]()
- Press the RECORD button.
The unit enters record pause mode.
![]()
- The PLAY or the PAUSE button doesn't work in synchronous record pause mode.
- Start playing the source.
The unit will start synchronous recording.


- During digital synchronous recording, if the input signal stops for 5 seconds, recording will stop automatically.
- Press the STOP button to stop the recording manually.
- If you press the STOP button or the PAUSE button during recording, the synchronous recording function will be cancelled.
- The synchronous recording function automatically turns off after the recording.
- The SYNC 1/ALL button doesn't work during recording or in the record pause mode.
- When SYNC ALL is selected, AUTO TRACK is always on. Select –60, 50, 40 or 30 dB using the AUTO/MANUAL button.
- If the AUTO/MANUAL button is set to MANUAL, AUTO TRACK (–60 dB) will be selected during synchronous recording. The setting automatically returns to MANUAL after the recording.
Finalize

This section deals with the actions taken after recording. Once finalized, CD-R discs are truly final. No more tracks can be recorded on them. By contrast, CD-RW discs can be "unfinalized", and if there is space, further material can be recorded on them.
Finalizing
As has been explained earlier, in order for a disc to become a standard CD, it must have a Table of Contents (TOC) written to it. This process is known as finalizing.
- Load an unfinalized (recordable) disc.

- Press the FINALIZE button in the stop mode.
"FINALIZE" appears on the display.- To cancel the finalizing process, press the STOP button (
![]() ).
).
- To cancel the finalizing process, press the STOP button (
- Press the PLAY (
![]() ) button to start finalizing.
) button to start finalizing.
"TOC" and the "REC" indicator blink, and the remaining time for the finalizing operation appears in the display. When the operation has been finished, the display returns to the track/time display.
During finalizing, no button works.
Never turn the power off nor unplug the power cord.
![]()
- Although finalized CD-R discs may be played on ordinary CD players, remember that finalized CD-RW discs may not play on ordinary CD players.


Erase or Unfinalize a CD-RW

It is possible to erase the last recorded tracks. It is not, however, possible to erase tracks in the "middle" of the disc. It is also possible to erase a whole disc. Erase procedures are possible only on an unfinallized CD-RW disc. If a CD-RW disc has been finalized, unfinalize it prior to erasure. Remember that it is not possible to perform any erase or unfinalize procedures on a CD-R disc.
- Load a recorded CD-RW.

- Press the ERASE button in the stop mode.
![]()
"UNFINALIZE" appears when a finalized disc is loaded.
"ERASE" and the last track number appear when the disc hasn't been finalized. Each time the ERASE button is pressed, the display changes as follows:
"ERASE" and the number of the last track recorded on the disc
Select this to erase the last track on the disc.
If you want to erase two or more tracks at once, press the MUSIC SKIP button repeatedly to select the first track number to be erased. For example, if 12 tracks have been recorded on the disc, "ERASE 10-12" means the last 3 tracks (No.10, 11 and 12) will be erased.- This will not appear when only one track is recorded on the disc.
ERASE DISC
Select this to erase all the tracks.
REFRESH
Select this to refresh the disc. It will take more than 40 minutes. - If a CD-RW disc has been corrupted at any point (e.g. power has been cut off in the middle of a finalize operation, etc.), "REFRESH" might be effective to make the disc usable again. This operation will destroy all data on the disc.
- To cancel the erasing or unfinalizing process, press the STOP button (
![]() ).
).
- This will not appear when only one track is recorded on the disc.
- Press the PLAY button (
![]() ) to start erasing or unfinalizing.
) to start erasing or unfinalizing.
The remaining time for the operation appears in the display. When the operation has been finished, the display returns to the track/time display.
During erasing/unfinalizing, no buttons will work.
Never turn the power off nor unplug the power cord.
![]()
- This operation cannot be undone. If you are going to erase a track or tracks, make sure that they are recordings that you really want to erase.


Troubleshooting
If you experience any problems with the unit, please take a moment to look through this chart and see if you can solve the problem yourself before you call your dealer or a TEAC service center.
No power
- Check the connection to the AC power source. Check and make sure the AC source is not a switched outlet and if it is, the switch is turned on. Make sure there is power to the AC outlet by plugging another item such as a lamp or fan.
No sound
- Adjust the volume.
The sound is noisy
- The unit is too close to a TV set or similar appliances. Relocate the unit further away from them, or turn the other appliances off.
Remote control doesn't work
- Press the POWER switch of the main unit to turn it ON. eIf the batteries are dead, change the batteries.
- Use the remote control unit within the (5m) range and pointed at the front panel.
- Clear obstacles that are between the remote control unit and the main unit.
- If a strong light is near the unit, turn it off.
CD Recorder
Will not play
- Load a disc with the playback side facing down. eIf the disc is dirty, clean the surface of the disc.
- A blank disc has been loaded. Load a prerecorded disc.
- Depending on the disc, etc. it may not be possible to play back CD-R/CD-RW discs. Try again with another disc.
Sound skip
- Place the unit on a stable surface to avoid vibration and shock.
- If the disc is dirty, clean the surface of the disc. eDon't use scratched, damaged or warped discs.
Recording is not possible
- A playback-only disc or finalized disc has been loaded. Use a recordable disc.
- The disc does not have a recordable area. Use another disc.
- The recording level is too low. Adjust the recording level.
- This unit cannot record CD-R or CD-RW discs designed for computer systems. Use a disc bearing the "DIGITAL AUDIO" logo.
If normal operation cannot be obtained, unplug the power cord from the outlet and plug it again.
Beware of condensation
When the unit (or a disc) is moved from a cold to a warm place, or used after a sudden temperature change, there is the danger of condensation; vapor in the air could condense on the internal mechanism, making correct operation erratic or impossible. To prevent this, or if this occurs, leave the unit for one or two hours with the power turned on. The unit will stabilize at the temperature of its surroundings.
Maintenance
If the surface of the unit gets dirty, wipe with a soft cloth or use a diluted mild liquid soap. Be sure to remove any excess liquid completely. Do not use thinner, benzine or alcohol as they may damage the surface of the unit. Allow the surface of the unit to dry completely before using.
Messages
BLANK 0:00
A blank CD-R/CD-RW disc is set on the tray.
CLOSE
Close the disc tray.
ERASE
Erase the last track of the CD-RW disc.
ERASE DISC
Erase all the tracks of the CD-RW disc.
FINALIZE
Finalize the disc.
FS 44_1K, FS 32K or FS 48K
The sampling frequency of the digital source
NO DISC
No readable disc has been loaded.
NOW OPC
Appears during OPC (Optimum Power Control). Wait a few seconds.
OPEN
Open the tray.
- - - -:- -
The unit is reading the disc.
PMA WRITE
Writing the recorded memories on the disc.
(PMA: Program Memory Area)
READING
The unit is reading the disc. Wait a few seconds.
REFRESH
Refresh the CD-RW disc.
REPAIR
Repair the disc.
UNFINALIZE
Unfinalize the CD-RW disc.
Error Messages
DIN UNLOCK
A digital input source has been selected, but the source is not connected or is not switched on.
READ ERROR
Something is wrong with the disc.
Press the OPNE/CLOSE button and change the disc.
DISC FULL
There is no space on the disc, or no more tracks are available.
NO TOC
The SHUFFLE or the PROGRAM button was pressed with an unfinalized disc.
Programmed playback and shuffle playback works with finalized discs only.
PGM FULL
32 tracks have been programmed. No more tracks can be programmed.
TRAY ERROR
An error occurred within the unit.
Press the POWER switch to turn the unit off, wait a minute, and turn it on again.
Specifications
Media type
CD-RW and CD-R for Digital audio (record and playback)
CD (playback only)
Frequency converter input sampling frequency
32 kHz, 48 kHz
Recording sampling frequency. . . .. . . 44.1 kHz
Frequency response. . . . . . . 20 Hz to 20 kHz
(playback: ±1.5 dB, recording: ±1.5 dB)
Signal to noise ratio. . . . . . . .. . . 90 dB (playback)
90 dB (digital recording)
82 dB (analog recording)
Dynamic range. . . . . . 86 dB (playback)
84 dB (recording)
Total Harmonic Distortion. . . . . . Less than 0.05% (playback)
Less than 0.05% (recording)
Wow & flutter. . . . . . Unmeasurable
Audio Input Sensitivity/Impedance LINE: –6 dBV (0.5 V)/20 kΩ
Output Level/Impedance. . . . . . . . LINE: –6 dBV (0.5 V)/1 kΩ
Maximum output level. . . . LINE:+6dBV (2.0V)
Power requirements. . . .. . . . . . . 120V, 60Hz
Power consumption. . . . . . . . . 16 W
Dimensions (W x H x D). .. . . . . . 435 x 100 x 295 mm
(17 1/8" x 3 15/16" x 11 5/8")
Weight (Net). . . 4.5 kg (9 15/16 lbs)
Standard Accessories
RCA cable x 2
Optical digital cable x 1
Remote control unit x 1
Battery (AA, R6, SUM-3) x 2
Owner's manual x 1
Warranty card x 1
- Design and specifications are subject to change without notice.
- Weight and dimensions are approximate.
- Illustrations may differ slightly from production models.
IMPORTANT SAFETY INSTRUCTIONS

TO REDUCE THE RISK OF ELECTRIC SHOCK, DO NOT REMOVE COVER (OR BACK). NO USER- SERVICEABLE PARTS INSIDE. REFER SERVICING TO QUALIFIED SERVICE PERSONNEL.
 The lightning flash with arrowhead symbol, within an equilateral triangle, is intended to alert the user to the presence of uninsulated "dangerous voltage" within the product's enclosure that may be of sufficient magnitude to constitute a risk of electric shock to persons.
 The exclamation point within an equilateral triangle is intended to alert the user to the presence of important operating and maintenance (servicing) instructions in the literature accompanying the appliance.
- Read these instructions.
- Keep these instructions.
- Heed all warnings.
- Follow all instructions.
- Do not use this apparatus near water.
- Clean only with dry cloth.
- Do not block any ventilation openings. Install in accordance with the manufacturer's instructions.
- Do not install near any heat sources such as radiators, heat registers, stoves, or other apparatus (including amplifiers) that produce heat.
- Do not defeat the safety purpose of the polarized or grounding-type plug. A polarized plug has two blades with one wider than the other. A grounding type plug has two blades and a third grounding prong. The wide blade or the third prong are provided for your safety. If the provided plug does not fit into your outlet, consult an electrician for replacement of the obsolete outlet.
- Protect the power cord from being walked on or pinched particularly at plugs, convenience receptacles, and the point where they exit from the apparatus.
- Only use attachments/accessories specified by the manufacturer.
- Use only with the cart, stand, tripod, bracket, or table specified by the manufacturer, or sold with the apparatus. When a cart is used, use caution when moving the cart/apparatus combination to avoid injury from tip-over.
![]()
- Unplug this apparatus during lightning storms or when unused for long periods of time.
- Refer all servicing to qualified service personnel. Servicing is required when the apparatus has been damaged in any way, such as power-supply cord or plug is damaged, liquid has been spilled or objects have fallen into the apparatus, the apparatus has been exposed to rain or moisture, does not operate normally, or has been dropped.

- Do not expose this apparatus to drips or splashes.
- Do not place any objects filled with liquids, such as vases, on the apparatus.
- Do not install this apparatus in a confined space such as a book case or similar unit.
- The apparatus draws nominal non-operating power from the AC outlet with its POWER switch in the off position.
- The apparatus should be located close enough to the AC outlet so that you can easily grasp the power cord plug at any time.
- An apparatus with Class I construction shall be connected to an AC outlet with a protective grounding connection.

TO PREVENT FIRE OR SHOCK HAZARD, DO NOT EXPOSE THIS APPLIANCE TO RAIN OR MOISTURE.
- DO NOT REMOVE THE EXTERNAL CASES OR CABINETS TO EXPOSE THE ELECTRONICS. NO USER SERVICEABLE PARTS ARE WITHIN!
- IF YOU ARE EXPERIENCING PROBLEMS WITH THIS PRODUCT, CONTACT TEAC FOR A SERVICE REFERRAL. DO NOT USE THE PRODUCT UNTIL IT HAS BEEN REPAIRED.
- USE OF CONTROLS OR ADJUSTMENTS OR PERFORMANCE OF PROCEDURES OTHER THAN THOSE SPECIFIED HEREIN MAY RESULT IN HAZARDOUS RADIATION EXPOSURE.
Optical pickup:
| Type | SF-W36FR |
| Manufacturer | SANYO ELECTRIC CO., LTD. |
| Laser output | Less than 1 mW (Play) on the objective lens Less than 5 mW (Record) on the objective lens Less than 10 mW (Erase) on the objective lens |
| Wavelength | 783 nm |
The product shall not be exposed to dripping or splashing and that no object filled with liquids, such as vases, shall be placed on the product. Do not install this equipment in a confined space such as a book case or similar unit.
Documents / ResourcesDownload manual
Here you can download full pdf version of manual, it may contain additional safety instructions, warranty information, FCC rules, etc.
Advertisement


Need help?
Do you have a question about the CD-RW880 and is the answer not in the manual?
Questions and answers