Advertisement
CONTACT US FIRST
CONTACT US FIRST
sauder.com
sauder.com
sauder.com
BEFORE MAKING ANY RETURNS TO THE STORE.
BEFORE MAKING ANY RETURNS TO THE RETAILER.
sauder.com/service
Visit
Prefer the phone? Give us a ring at
Customer Service is available Monday-Friday - 9 a.m. to 5:30 p.m. EST (except holidays)
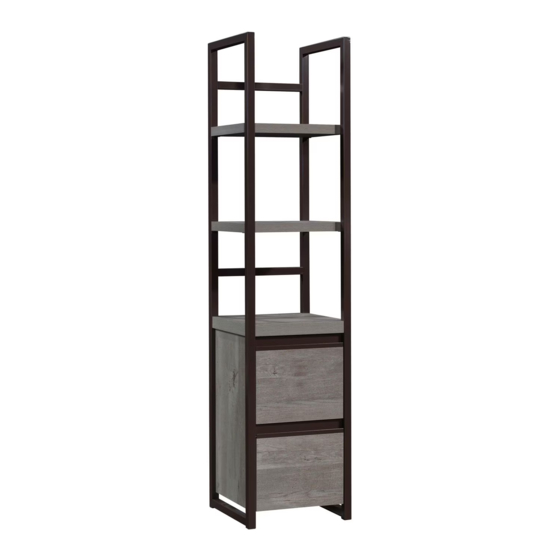
Narrow Bookcase
Manhattan Gate Collection | Model 429253
Sauder.com
Share your journey!
to order replacement parts, view video assembly tips, or chat with a live rep.
1-800-445-1527
.
Treat yourshelf.
NOTE: THIS INSTRUCTION
BOOKLET CONTAINS IMPORTANT
SAFETY INFORMATION.
PLEASE READ AND KEEP FOR
FUTURE REFERENCE.
English pg 1-28
Français pg 29-32
Español pg 33-36
Lot # 565094
Purchased: __________________
04/27/21
Advertisement
Table of Contents

Subscribe to Our Youtube Channel
Related Manuals for Sauder Manhattan Gate 429253


Summary of Contents for Sauder Manhattan Gate 429253
- Page 1 CONTACT US FIRST CONTACT US FIRST sauder.com sauder.com sauder.com BEFORE MAKING ANY RETURNS TO THE STORE. BEFORE MAKING ANY RETURNS TO THE RETAILER. sauder.com/service Visit to order replacement parts, view video assembly tips, or chat with a live rep. 1-800-445-1527 Prefer the phone? Give us a ring at Customer Service is available Monday-Friday - 9 a.m.
- Page 2 No. 2 Phillips Screwdriver Hardware Identification Tip Shown Actual Size Hardware Usage Guide Assembly Steps 6-28 Hammer Not actual size Français 29-32 Español 33-36 Pencil Safety 37-38 Electric drill with 1/8" or 3/8" bit (ONLY in indicated step) Warranty Page 2 www.sauder.com/service 429253...
-
Page 3: Part Identification
DRAWER BACK (2) RIGHT END (1) BRACE (1) DRAWER BOTTOM (2) LEFT END (1) DRAWER FRONT (2) DRAWER HANDLE (2) BACK (1) UPPER RIGHT DRAWER SIDE (1) LOWER RIGHT DRAWER SIDE (1) TOP/SHELF (2) LEFT DRAWER SIDE (2) 429253 www.sauder.com/service Page 3... -
Page 4: Hardware Identification
L-WRENCH - 1 RESTRAINT KIT - 1 1-1/2" FLAT HEAD SCREW - 8 3/8" PAN HEAD SCREW - 24 1/2" PAN HEAD SCREW - 21 5/8" HEX HEAD SCREW - 12 1/2" FLAT HEAD SCREW - 8 Page 4 www.sauder.com/service 429253... - Page 5 The arrow in the HIDDEN CAM must point Arrow toward the hole in the edge of the board. Hidden Cam Hole Insert the CAM SCREW or CAM DOWEL into the HIDDEN CAM. Tighten the HIDDEN CAM. 429253 www.sauder.com/service Page 5...
- Page 6 Step 1 Look for this icon. It means a video assembly tip is available at www.sauder.com/service/tips Find the numbered video or scan the QR code. å Assemble your unit on a carpeted floor or on the empty carton to avoid scratching your unit or the floor.
- Page 7 NOTE: The EXTENSION SLIDES will be used later for the DRAWERS. Open end Push the black lever and pull the SLIDE from the RAIL. 3/8" PAN HEAD SCREW (12 used in this step) Open end Open end 429253 www.sauder.com/service Page 7...
- Page 8 Step 3 å Fasten the INTERLOCK MECHANISM (7) to the RIGHT END (B). Use three 1/2" PAN HEAD SCREWS (16). 1/2" PAN HEAD SCREW (3 used in this step) Page 8 www.sauder.com/service 429253...
- Page 9 Step 4 å Fasten the BRACKETS (10) to the ENDS (B and C). Use six 1/2" PAN HEAD SCREWS (16). 1/2" PAN HEAD SCREW (6 used in this step) 429253 www.sauder.com/service Page 9...
- Page 10 Separate the LOCK (9) and fasten the two pieces to the RIGHT END (B) as shown in the enlarged diagram. Use two 1/2" FLAT HEAD SCREWS (18). 1/2" FLAT HEAD SCREW (2 used in this step) Page 10 www.sauder.com/service 429253...
- Page 11 BACK fastened. The unit may collapse. å Fasten the BRACE (G) to the RIGHT END (B). Tighten two HIDDEN CAMS. å NOTE: Be sure the WOOD DOWELS in the RIGHT END insert into the BRACE. Arrow Arrow Surface without HIDDEN CAMS 429253 www.sauder.com/service Page 11...
- Page 12 Fasten the BACK (D) to the RIGHT END (B). Use three 1/2" PAN HEAD SCREWS (16) through the BRACKETS and into the BACK. Arrow 1/2" PAN HEAD SCREW (3 used in this step) Edge with holes Page 12 www.sauder.com/service 429253...
- Page 13 å Fasten the LEFT END (C) to the BACK (D). Use three 1/2" PAN HEAD SCREWS (16) through the BRACKETS and into the holes in the BACK. 1/2" PAN HEAD SCREW (3 used in this step) 429253 www.sauder.com/service Page 13...
- Page 14 Step Step 9 å Turn six CAM SCREWS (4) into the SHELF (A). Page 14 www.sauder.com/service 429253...
- Page 15 å Fasten the SHELF (A) to the ENDS (B and C) and BACK (D). Tighten six HIDDEN CAMS. å NOTE: Be sure the WOOD DOWELS in the SHELF insert into the ENDS and BACK. (6 used) 429253 www.sauder.com/service Page 15...
- Page 16 Step Step 11 å Open the FURNITURE TIPPING RESTRAINT KIT (96) and fasten the SAFETY STRAP to one of the TOP/SHELVES (E). Use the provided SHORT SCREW. Use the SHORT SCREW from the RESTRAINT KIT. Page 16 www.sauder.com/service 429253...
- Page 17 5/8" HEX HEAD SCREWS (17) using the L-WRENCH (13). å NOTE: You should start each SCREW a few turns before completely tightening any of them. SAFETY STRAP should be here. 5/8" HEX HEAD SCREW (8 used in this step) 429253 www.sauder.com/service Page 17...
- Page 18 5/8" HEX HEAD SCREWS (17) using the L-WRENCH (13). Now might be a good time to refresh å NOTE: You should start each SCREW a few turns before your drink. completely tightening any of them. 5/8" HEX HEAD SCREW (4 used in this step) Page 18 www.sauder.com/service 429253...
- Page 19 Step Step 14 å Push eight HIDDEN CAMS (3) into the DRAWER SIDES (J, K, and P). Arrow 429253 www.sauder.com/service Page 19...
- Page 20 (12 used in this step) Open end Open end 1/2" PAN HEAD SCREW (6 used in this step) Edge with more holes Open end Edge with more holes Open end Edge with more holes Edge with more holes Page 20 www.sauder.com/service 429253...
- Page 21 Fasten the DRAWER BACK (L) to the å Slide a DRAWER BOTTOM (M) into the grooves in the DRAWER SIDES (J and K). Use four 1-1/2" FLAT DRAWER SIDES (J and K) and DRAWER FRONT (H). HEAD SCREWS (14). 429253 www.sauder.com/service Page 21...
- Page 22 Fasten the DRAWER BACK (L) to the å Slide a DRAWER BOTTOM (M) into the grooves in the DRAWER SIDES (K and P). Use four 1-1/2" FLAT DRAWER SIDES (K and P) and DRAWER FRONT (H). HEAD SCREWS (14). Page 22 www.sauder.com/service 429253...
- Page 23 Step Step 18 å Push the FILE GLIDES (11) onto the DRAWER SIDES (J, K, and P). 429253 www.sauder.com/service Page 23...
- Page 24 Step 19 å Fasten the DRAWER HANDLES (N) to the DRAWER FRONTS (H). Use six 1/2" FLAT HEAD SCREWS (18). Almost time to celebrate! With a nap. 1/2" FLAT HEAD SCREW (6 used in this step) Page 24 www.sauder.com/service 429253...
- Page 25 Diagram 4. Push the drawer in until it is fully inserted. Pull the lower wing forward until it clicks into place. The Lower Drawer ACTUATOR must be here. Pull the upper wing forward until it clicks into place. 429253 www.sauder.com/service Page 25...
- Page 26 - Fasten the unit to the wall. Use the LONG SCREW through the other end of the SAFETY STRAP and into the 1/8" hole. Electric drill with 1/8" bit Mark and drill a 1/8" hole into the wall stud. Page 26 www.sauder.com/service 429253...
- Page 27 NOTE: You will need to turn the LONG SCREW multiple turns to completely tighten and secure your unit to the wall. Electric drill with 3/8" bit Mark and drill a 3/8" hole into the wall. Squeeze the wings together and tap the wall anchor into the 3/8" hole in the wall. 429253 www.sauder.com/service Page 27...
- Page 28 NOTE: Please read the back pages of the instruction booklet for important safety information. å This completes assembly. Clean with a damp cloth. Wipe dry. And to celebrate, why not share your success story at sauder.com or 35 lbs. Page 28 www.sauder.com/service...
-
Page 29: Liste De Pièces
REFERENCE DESCRIPTION QUANTITÉ REFERENCE DESCRIPTION QUANTITÉ conserver le livret pour future référence. Pour contacter Sauder en TABLETTE ................1 (ENSEMBLE DE GLISSIÈRE ILLUSTRÉ À PART) ce qui concerne cet EXTRÉMITÉ DROITE ..........1 GLISSIÈRE D'EXTENSION ........4 élément, faire référence EXTRÉMITÉ GAUCHE ..........1 COULISSE D'EXTENSION ........4... - Page 30 TÊTE GOUTTE DE SUIF 13 mm (16) à travers les CONSOLES et dans les trous de l’ARRIÈRE. Fixer le MÉCANISME DE VERROUILLAGE (7) à l'EXTRÉMITÉ DROITE (B). Utiliser trois VIS TÊTE GOUTTE DE SUIF 13 mm (16). Page 30 www.sauder.com/service 429253...
- Page 31 DE TIROIR (K et P) et du DEVANT DE TIROIR (H). CÔTÉS DE TIROIR (J, K et P). 4. Fixer l’ARRIÈRE DE TIROIR (L) aux CÔTÉS DE TIROIR (K et P). Utiliser quatre VIS TÊTE PLATE 38 mm (14). 429253 www.sauder.com/service Page 31...
- Page 32 ÉTAPE 21 REMARQUE : Prière de lire les informations importantes sur la Placer l'élément dans son emplacement final. sécurité figurant sur les pages arrière du manuel d’instructions. Ceci complète l'assemblage. Nettoyer avec un tissu humide. Essuyer. Page 32 www.sauder.com/service 429253...
-
Page 33: Lista De Partes
ESTANTE ................1 (JUEGO DE EXTENSIÓN SE MUESTRA POR su referencia futura. Si SEPARADO) necesita ponerse en EXTREMO DERECHO ..........1 contacto con Sauder en RIEL DE EXTENSIÓN ..........4 EXTREMO IZQUIERDO ..........1 cuanto a esta unidad, CORREDERA DE EXTENSIÓN ......4 DORSO .................1 refiérase al número... - Page 34 TORNILLOS DE CABEZA REDONDA de 13 mm (16) a través de los SOPORTES y en los agujeros del DORSO. PASO 3 Fije el MECANISMO DE UNIÓN (7) al EXTREMO DERECHO (B). Utilice tres TORNILLOS DE CABEZA REDONDA de 13 mm (16). Page 34 www.sauder.com/service 429253...
- Page 35 4. Fije el DORSO DE CAJÓN (L) a los LADOS DE CAJÓN (K y P). Empuje ocho EXCÉNTRICOS ESCONDIDOS (3) en los Utilice cuatro TORNILLOS DE CABEZA PERDIDA de 38 mm (14). LADOS DE CAJÓN (J, K y P). 429253 www.sauder.com/service Page 35...
- Page 36 Esto completa el ensamblaje. Limpiar con un trapo húmedo. siendo fijada a un montante de la pared. Si no está fijando su Seque con un paño. unidad a un montante de la pared, vaya al paso siguiente ahora. Page 36 www.sauder.com/service 429253...
- Page 37 TOUJOURS décharger les tablettes et les tiroirs, en commençant par les surface supérieures, avant de déplacer le meuble. NE JAMAIS pousser ou tirer un meuble sur de la moquette. Demander à une autre personne de le soulever correctement pour le déplacer et/ou le repositionner. 429253 www.sauder.com/service Page 37...
- Page 38 SIEMPRE descargue los estantes y cajones, empezando con las superficies superiores, antes de moverlo. NUNCA empuje ni tire de los muebles sobre una alfombra. Obtenga que un amigo le ayude a levantarlo correctamente para moverlo y/o reposicionarlo. Page 38 www.sauder.com/service 429253...
-
Page 39: Year Limited Warranty
à compter de la date d'achat la première fois et qui sont signalés à Sauder dans les limites de couverture de la contre tout défaut de matériaux ou de fabrication des composantes de mobilier Sauder. - Page 40 BEFORE MAKING ANY RETURNS TO THE RETAILER. So, how did it go? Dear Valued Customer: Thanks so much for choosing Sauder® furniture. I hope the Set a world record for speed? purchase and assembly process was a positive experience Feeling good about yourself? and you feel good about the furniture you just built.
Need help?
Do you have a question about the Manhattan Gate 429253 and is the answer not in the manual?
Questions and answers