
Related Manuals for ADLINK Technology NEON-2000-JNO Series


Summary of Contents for ADLINK Technology NEON-2000-JNO Series
- Page 1 NEON-2000-JNO Series AI Smart Camera User’s Manual Manual Rev.: Revision Date: January 31, 2023 Part No: 50M-00107-1000...
-
Page 2: Revision History
Revision History Revision Release Date Description of Change(s) 2023-01-31 Initial release... -
Page 3: Preface
NEON-2000-JNO Preface Copyright © 2023 ADLINK Technology, Inc. This document contains proprietary information protected by copy- right. All rights are reserved. No part of this manual may be repro- duced by any mechanical, electronic, or other means in any form without prior written permission of the manufacturer. - Page 4 Conventions Take note of the following conventions used throughout this manual to make sure that users perform certain tasks and instructions properly. Additional information, aids, and tips that help users perform tasks. NOTE: NOTE: Information to prevent minor physical injury, component dam- age, data loss, and/or program corruption when trying to com- plete a task.
-
Page 5: Table Of Contents
NEON-2000-JNO Table of Contents Revision History..............ii Preface ..................iii List of Figures ............... vii List of Tables................ix 1 Introduction ................ 1 Overview................1 Features................2 General Specifications............3 Mechanical Dimensions............6 Accessories ................. 8 2 Connectors and I/O ............9 Bottom Side I/O and Connector Description...... - Page 6 This page intentionally left blank.
-
Page 7: List Of Figures
NEON-2000-JNO List of Figures Figure 2-1: NEON-2000-JNO Orientation .......... 9 Figure 2-2: Bottom Side I/O and Connectors ........10 Figure 2-3: D-sub I/O Connector............11 Figure 2-4: DC Jack Connector............12 Figure 2-5: Top Side I/O and Connectors ........13 Figure 2-6: Wafer Connector............ - Page 8 This page intentionally left blank. viii...
-
Page 9: List Of Tables
NEON-2000-JNO List of Tables Table 1-1: NEON-2000-JNO Model and Sensor Specifications .. 1 Table 1-2: NEON-2000-JNO General Specifications....4 Table 2-1: Bottom Side I/O and Connectors......10 Table 2-2: D-sub I/O Connector Pin Definitions......11 Table 2-3: D-sub I/O Connector Specification ......12 Table 2-4: DC Jack Pin Definitions .......... - Page 10 This page intentionally left blank.
-
Page 11: Introduction
NEON-2000-JNO Introduction 1.1 Overview The NEON-2000-JNO series is an open camera platform equipped with an Nano module supporting a NVIDIA® Jetson™ series of image sensors providing industrial DI/O capabilities. It is designed for deep learning inference or other vision applications that requires a GPU at the edge. -
Page 12: Features
1.2 Features Provides rich sample code and AI development, quick to start CPU: Quad-Core Arm® Cortex®-A57 MPCore processor GPU: NVIDIA Maxwell architecture with 128 NVIDIA CUDA® cores and 16GB eMMC USB3 sensor interface compatible with the most machine vision software Type-C connector supports DC power, DisplayPort and USB signal, reducing cabling Preinstalled Ubuntu and software suite on microSD card,... -
Page 13: General Specifications
NEON-2000-JNO 1.3 General Specifications Lens mount: C-mount Total weight: <700g (without lens) Operating temperature (tested with YOLOv4) NEON-20XA-JNO series, 0°C to 55°C with 0.6 m/s airflow at 15W mode Power consumption: <40W Computing module: NVIDIA Jetson Nano CPU: Quad-Core Arm® Cortex®-A57 MPCore processor GPU: NVIDIA Maxwell architecture with 128 NVIDIA CUDA®... -
Page 14: Table 1-2: Neon-2000-Jno General Specifications
Model NEON-201A-JNO NEON-202A-JNO Image Sensor Resolution (HxV) 1920x1200 3840x2160 Resolution Frame Rate (fps) Color/Mono Color Color Shutter Global Rolling Sensor Size 1/2.6" 1/1.8" Pixel Size (µm) 3 x 3 2.0 x 2.0 Sensor Vendor onsemi Sony Sensor Model AR0234 IMX334 Image Capturing Software V4L2 &... - Page 15 NEON-2000-JNO Model NEON-201A-JNO NEON-202A-JNO Connectors and Functions Ethernet Supports 10/100/1000 Mb Video output (DisplayPort), 1920x1080 @ 30fps 1x USB3 and 1x USB2 Power supply for the camera USB Type C (when connected to Type-C charger or adaptor) Power supply (5 W) for external Type-C Hub (when connected to Type-C hub) 4x DI and 4x DO D-sub...
-
Page 16: Mechanical Dimensions
1.4 Mechanical Dimensions This section provides dimensions and related mechanical informa- tion for the NEON-2000-JNO. 1.4.1 Camera Dimensions 66.81 Dimensions: mm Introduction... - Page 17 NEON-2000-JNO 1.4.2 USB Type-C Screw Lock Location and Dimensions Dimensions: mm 1.4.3 LED Light Mounting Thread Metric thread M60x1.5mm Introduction...
-
Page 18: Accessories
1.5 Accessories Use ADLINK recommended accessories for optimum system per- formance. The table below includes ADLINK verified accessories. Accessory Part Number Description USB Type-C (M) to USB Type-C USB Type-C cable 30-01284-0030-A0 (M), length 1.8M, with screw lock USB Type-C AC 100-240V, USB –... -
Page 19: Connectors And I/O
NEON-2000-JNO Connectors and I/O This chapter includes the locations and descriptions of the connectors and I/O found on the NEON-2000-JNO. Top Side Top Side Front Side Back Side Bottom Side Bottom Side Figure 2-1: NEON-2000-JNO Orientation Connectors and I/O... -
Page 20: Bottom Side I/O And Connector Description
2.1 Bottom Side I/O and Connector Description Figure 2-2: Bottom Side I/O and Connectors Item Description • DC Jack for DC input with included ADLINK AC/DC adaptor (P/N 31-62156-1010-A0) • Power input: 12-24V DC at >30 W • USB Type-C connector w/ screw lock •... -
Page 21: Figure 2-3: D-Sub I/O Connector
NEON-2000-JNO 2.1.1 D-sub I/O Connector Figure 2-3: D-sub I/O Connector Pin Function Pin Function UART - TX DI/O GND Digital output 0/Strobe output 0 Digital output 1 (see note 2) Digital output 2 Digital output 3 UART GND Reserved UART – RX DI/O GND Digital input 0/Trigger input 0 Digital Input 1... -
Page 22: Figure 2-4: Dc Jack Connector
Maximum I/O Category Specification Throughput UART Baud rate: 9600bps @ 8N1 1 common for sharing Common sharing: ground Input range: 0-5 VDC Digital Input 10 KHz High level threshold: 2-5 VDC Low level threshold: 0-0.8 VDC Input voltage 3.3-30 VDC range: Digital Output 10KHz Open-collector... -
Page 23: Top Side I/O And Connector Description
NEON-2000-JNO 2.2 Top Side I/O and Connector Description Figure 2-5: Top Side I/O and Connectors Item Description Power status LED. Lights green when power is connected. Operating system status LED. Flashes orange when the system is booting, and lights when the system has booted successfully. User define green/red LED. -
Page 24: Figure 2-6: Wafer Connector
2.2.1 Wafer Connector Figure 2-6: Wafer Connector Pin Function Pin Function Reserved Reserved System Reset RECOVERY Reserved Reserved Table 2-6: Wafer Connector Pin Definitions Connectors and I/O... -
Page 25: Front Side I/O And Connector Description
NEON-2000-JNO 2.3 Front Side I/O and Connector Description Figure 2-7: Front Side I/O and Connectors Item Description C-type lens mount Image sensor Strobe/LED light mounting thread. See “LED Light Mounting Thread” on page 7. Table 2-7: Front Side I/O and Connectors Connectors and I/O... - Page 26 This page intentionally left blank. Connectors and I/O...
-
Page 27: Getting Started
NEON-2000-JNO Getting Started 3.1 Mounting The NEON-2000-JNO can be mounted using the mounting screw holes on either the front (A) or back (B) sides. Le NEON-2000-JNO peut être monté à l'aide des trous de vis de montage sur les côtés avant (A) ou arrière (B). A: 4x M4 screws, L=6mm 4x vis M4, L=6mm B: 4x M4 screws, L=6mm... -
Page 28: Digital I/O Connection Example
3.2 Digital I/O Connection Example External devices such as trigger sensors, LED light controllers or relays can be connected to the NEON-2000-JNO to implement dif- ferent applications. This section shows an example of how to con- nect such devices. Camera Side Max 5V control circuit DI 0-3... -
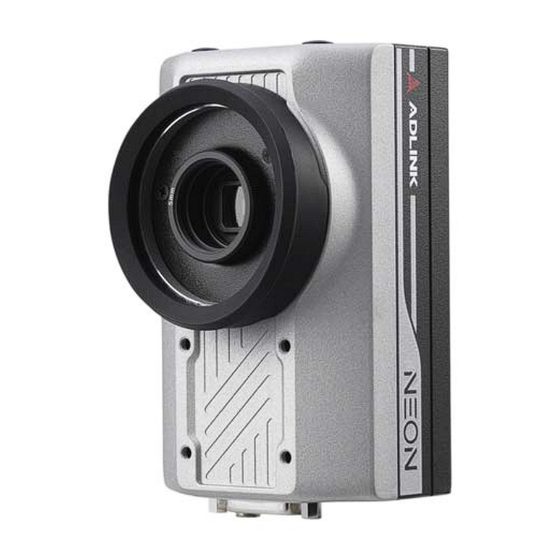
Page 29: Attaching A Lens
NEON-2000-JNO 3.3 Attaching a Lens The NEON-2000-JNO is compatible with C-mount type lenses. Washer Transfer ring Lens Figure 3-4: Lens Attachment Assembly The transfer ring is installed before shipping. Neon-201A: 0.9mm washer Neon-202A: 1.55mm washer NOTE: NOTE: Getting Started... -
Page 30: Power And Peripheral Connections
3.4 Power and Peripheral Connections The NEON-2000-JNO DC power source can be either from a USB Type-C adaptor or DC jack. The USB Type-C connector also sup- ports a DisplayPort video signal and USB3, which can be used to connect a keyboard and mouse. The following figures show exam- ples of possible power and peripheral connection configurations. -
Page 31: Figure 3-6: Combined Power And Peripheral Connections
NEON-2000-JNO Keyboard & Mouse Power Type C HDMI Cord AC Power Monitor Adapter/Hub Type C This configuration requires an ADLINK USB Type-C hub/adapter (P/N 92-99090-1010). NOTE: NOTE: Figure 3-6: Combined Power and Peripheral Connections Getting Started... -
Page 32: Log In
3.5 Log In Log in to the NEON-2000-JNO with the following credentials: Default account: adlink Default password: adlink Getting Started... -
Page 33: Image Capture And Inference
NEON-2000-JNO 3.6 Image Capture and Inference ADLINK provides sample files for testing the NEON-2000-JNO image capturing functions. The files are located in the Samples folder on the Desktop. To get the latest sample code, go to https://github.com/AIoT-IST/ Samples Getting Started... -
Page 34: Neon-20Xa Trigger Control
3.7 Neon-20XA Trigger Control 3.7.1 Trigger API Function You can adjust image features or control a lens by using the v4l2-ctl command as follows: v4l2-ctl --set-ctrl=<ctrl>=<val> To list the all the options, enter: v4l2-ctl --all The following table list all the Trigger API Function options and their descriptions. - Page 35 NEON-2000-JNO <ctrl> <val> <val> <ctrl> description type description trigger_wb_rgain set the r gain of min=1 white balance at max=4095 trigger mode step=1 default=1024 trigger_wb_bgain set the b gain of min=1 white balance at max=4095 trigger mode step=1 default=1024 trigger_wb_colortemp set the color min=2000 temperature at max=12000...
- Page 36 Step 2: To test the functionality of the software trigger of the pulsed trigger mode, enter: v4l2-ctl --set-ctrl=trigger_mode=1 v4l2-ctl --set-ctrl=low_latency_mode=1 v4l2-ctl --set-ctrl=trigger_start_stop=1 Step 3: To test the functionality of the hardware trigger of the pulsed trigger mode, enter: v4l2-ctl --set-ctrl=trigger_mode=1 v4l2-ctl --set-ctrl=low_latency_mode=1 Step 4: To test the functionality of the software trigger of the automatic trigger mode, enter:...
-
Page 37: Important Safety Instructions
NEON-2000-JNO Important Safety Instructions For user safety, please read and follow all instructions, Warnings, Cautions, and Notes marked in this manual and on the associated device before handling/operating the device, to avoid injury or damage. Read these safety instructions carefully Keep the User’s Manual for future reference Read the Specifications section of this manual for detailed information on the recommended operating environment... - Page 38 A Lithium-type battery may be provided for uninterrupted backup or emergency power. Risk of explosion if battery is replaced with one of an incorrect type; please dispose of used batteries appropriately. CAUTION: The device must be serviced by authorized technicians when: The power cord or plug is damaged Liquid has entered the device interior...
-
Page 39: Consignes De Sécurité Importante
NEON-2000-JNO Consignes de Sécurité Importante S'il vous plaît prêter attention stricte à tous les avertissements et mises en garde figurant sur l'appareil, pour éviter des blessures ou des dommages. Lisez attentivement ces consignes de sécurité. Conservez le manuel de l'utilisateur pour pouvoir le consulter ultérieurement. - Page 40 tenu que par du personnel technique qualifié à l'aide d'outils appropriés. Une batterie de type lithium peut être fournie pour une alimen- tation de secours ou une alimentation de secours ininterrom- pue. Risque d’explosion si la pile est remplacée par une autre de type incorrect.
-
Page 41: Getting Service
San Jose, CA 95119-1208, USA Tel: +1-408-360-0200 Toll Free: +1-800-966-5200 (USA only) Fax: +1-408-600-1189 Email: info@adlinktech.com ADLINK Technology (China) Co., Ltd. 300 Fang Chun Rd., Zhangjiang Hi-Tech Park Pudong New Area, Shanghai, 201203 China Tel: +86-21-5132-8988 Fax: +86-21-5132-3588 Email: market@adlinktech.com ADLINK Technology GmbH Hans-Thoma-Straße 11...
Need help?
Do you have a question about the NEON-2000-JNO Series and is the answer not in the manual?
Questions and answers