
Related Manuals for DCS DCS-DRH48N

Summary of Contents for DCS DCS-DRH48N
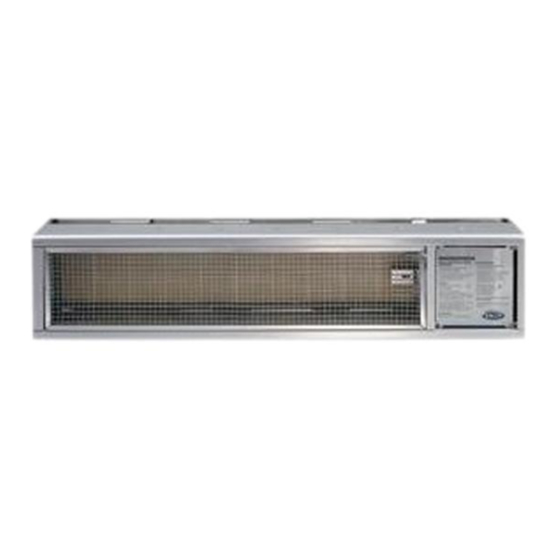
- Page 1 PROFESSIONAL DEL REY HEATER Use and Care Guide and Installation Instructions MODELS: DCS-DRH48N...
-
Page 2: A Message To Our Customers
A MESSAGE TO OUR CUSTOMERS Thank you for selecting DCS Professional Del Rey Heater. Because of this appliance’s unique features we have developed this Use and Installation Guide. It contains valuable information on how to properly operate and maintain your new appliance for years of safe and enjoyable use. -
Page 3: Table Of Contents
SAFETY PRACTICES AND PRECAUTIONS CLEARANCES / INSTALLATION SPECIFICATIONS INSTALLATION ...9-10 LEAK TESTING ...11 LIGHTING INSTRUCTIONS ...12 CARE AND CLEANING/ TROUBLESHOOTING SERVICING ...14 GAS VALVE REPLACEMENT ...15-16 HEATER ASSEMBLY PARTS LIST ...17 WIRING DIAGRAM ...18 WIRING SCHEMATIC ...19 WARRANTY ...20 OBTAINING SERVICE ...21 TABLE OF CONTENTS ...3-4... -
Page 4: Safety Practices And Precautions
SAFETY PRACTICES AND PRECAUTIONS When properly cared for, your Del Rey Heater will give safe, reliable service for many years. However, extreme care must be used since the heater produces intense heat and can increase accident potential. When using this appliance basic safety practices must be followed, including the following: Read this Care and Use Guide carefully and completely before using your heater to reduce the risk of fire, burn hazard or other injury. -
Page 5: Safety Practices And Precautions
SAFETY PRACTICES AND PRECAUTIONS Children should not be left alone or unattended in an area where the heater is being used. Never allow them to sit, stand or play on or around the heater at any time. When in use, portions of the heater get hot enough to cause severe burns. -
Page 6: Clearances/Installation Specifications
CLEARANCES/INSTALLATION SPECIFICATIONS INSTALLATION MINIMUM CLEARANCES TO COMBUSTIBLE MATERIAL. 14" (MIN) Utilize 2 bolts (min) per bracket. 10-1/4" 96" (MIN) Side View Combustible Surface Gas Pipe Gas Shut-off (installer supplied) Valve Four Bolts Two (installer supplied) On Each Side (installer supplied) 1/2"... - Page 7 INSTALLATION MINIMUM CLEARANCES TO COMBUSTIBLE MATERIAL. Note: Mounting channels can be hacksawed 13” for use in 30 23" min. 1/2" Conduit (installer supplied) max. 96" CLEARANCES installations. SIDE VIEW Combustible Surface Gas Pipe 4 bolts per (installer supplied) bracket Gas Shut-off (installer supplied) Valve (installer supplied)
- Page 8 CLEARANCES & 30 INSTALLATION (MINIMUM CLEARANCES TO COMBUSTIBLE MATERIAL). Wall (Combustible Surface) Heater Mounting Body Assy. 18" INSTALLATION (MINIMUM CLEARANCES TO NON-COMBUSTIBLE MATERIAL). Utilize 2 bolts (min) per bracket. Make sure heater is level (see warning on page 9) 96" min.
- Page 9 INSTALLATION MINIMUM CLEARANCES TO NON-COMBUSTIBLE MATERIAL. Utilize 2 bolts (min) per bracket. 96" CLEARANCES SIDE VIEW Four Bolts Per Side Non Combustible Surface Gas Pipe Gas Shut-off (installer supplied) Valve (installer supplied) 1/2" Conduit (installer supplied) Drip Leg max. FLOOR...
-
Page 10: Installation
INSTALLATION INSTALLATION: The Del Rey Heater provides radiant warmth *indoors (commercial applications only) or outdoors with a powerful 58,000 Btu/hr natural gas. All units are equipped with hot surface ignition and 100% shutoff valve for safety. Del Rey Heaters to be installed in Aircraft Hangers must be installed in accordance with American National Standards for Aircraft Hangers, ANSI/NFPA No. -
Page 11: Installation
INSTALLATION Do not locate either the gas or electrical supply line directly over the flue outlet of the heater. Electrical supply line shortage and / or control overheating may occur. The heater must be installed in a location such that it is accessible for servicing and have no restriction of air flow to the air inlet of the heaters casing. -
Page 12: Leak Testing
LEAK TESTING IMPORTANT: VENTILATION A minimum building ventilation rate of 4 CFM per 1,000 BTU’s of installed heater input must be provided. This rate of ventilation may be obtained through either gravity or mechanical ventilation of the building. In conjunction with building ventilation system, adequate fresh air into the building must be provided through fresh air inlets and/or building inlets. -
Page 13: Lighting Instructions
LIGHTING/OPERATION INSTRUCTIONS LIGHTING INSTRUCTIONS Upon installation of the heater and completion of the gas line and electrical supply to each heater, follow the steps below for Lighting Instructions. Lighting instructions are also provided on the control panel of the heater. Turn gas and power to “ON”... -
Page 14: Care And Cleaning/ Troubleshooting
CARE & CLEANING / BASIC TROUBLESHOOTING CARE AND CLEANING To keep your Del Rey Heater in maximum performance, we recommend the following to be perform annually. 1. With an air hose regulated to 30 psig, blow off any dust and dirt that has accumulated around the burner and inside the control compartment of the heater. -
Page 15: Servicing
REMOVAL OF BURNER Turn off gas and electrical before attempting any service to this appliance. Heater may be serviced by following instructions below: Remove the four screws on the control service panel. b. Remove the hex nut that is holding the orifice fitting to the infrared burner’s bracket. Remove the burner windscreen by removing the screw on the windscreen’s frame. -
Page 16: Gas Valve Replacement
GAS VALVE REPLACEMENT Turn off gas supply. Turn off electrical supply. Disconnect gas & electrical supply. Remove unit from hangers. Remove screws securing the rear panel and remove the panel. Use a 7/8” open end wrench to hold orifice nut. Remove the existing black pipe and install it in the new valve. - Page 17 Reinstall (4) screws securing valve to case. Re-connect leads to valve. Be sure valve switch is on (in the up position). The transformer must be mounted outside of unit to protect it from the heat and ensure long service life. Refer to page 10. Do not install transformer inside unit.
-
Page 18: Heater Assembly Parts List
HEATER PARTS LIST ITEM DESCRIPTION PART NO. Wall Plate R/H 22019 Mounting Channel 22014 Body Plate R/H 22012 Screws 15001-26 Back Panel 22002 Wall Plate L/H 22019 Mounting Channel 22014 Body Plate L/H 22012 Collector Box 22016 Mini Ingiter 16325 Control Valve 18270 Ignition Module Cover... -
Page 19: Wiring Diagram
WIRING DIAGRAM... -
Page 20: Wiring Schematic
WIRING SCHEMATIC... -
Page 21: Length Of Warranty
All repair labor and parts found to be defective due to materials or workmanship for one full year from date of purchase. Service must be provided by an Authorized Factory Service Agent during normal working hours. DCS WILL NOT COVER: Installation or start-up General maintenance... -
Page 22: How To Obtain Service
SERVICE HOW TO OBTAIN SERVICE: For warranty service, please contact your local service provider or DCS Customer Care Center at (888) 281-5698, Monday thru Friday, 6:00 am – 4:30 pm PST. Before you call, please have the following information ready:... - Page 23 NOTES...
- Page 24 NOTES...
- Page 25 NOTES...
- Page 26 5800 Skylab Road, Huntington Beach, CA 92647 Tel: 714.372.7000 • Fax: 714.372.7001 Customer Care Center: (888) 281-5698 www.dcsappliances.com As product improvement is an ongoing process at DCS, we reserve the right to change specifications or design without notice. P/N 10955 Rev. B...
Need help?
Do you have a question about the DCS-DRH48N and is the answer not in the manual?
Questions and answers