
Related Manuals for Labtron LMPWM-A11


Summary of Contents for Labtron LMPWM-A11
- Page 1 Portable Multi-parameter Water Quality Meter LMPWM-A11 www.labtron.com info@labtron.com...
- Page 2 Portable Multi-parameter Water Quality Meter LMPWM-A11 Index Sr.no Title Page no Introduction Features Specifications Applications Instrument Introduction Installation Operations Maintenance Troubleshooting Accessories...
- Page 3 Portable Multi-parameter Water Quality Meter LMPWM-A11 1. Introduction Portable Multi-parameter Water Quality Meter LMPWM-A11 is adapted with different modes for measuring quality of water on different parameters such as pH, ORP, conductivity, TDS, salinity. Its memory can store & recall up to 500 sets of data. Due to its portable design, it is suitable for outdoor measurements i.e., on site water testing, remote...
-
Page 4: Specifications
Portable Multi-parameter Water Quality Meter LMPWM-A11 3. Specifications Model No. LMPWM-A11 pH measurement range (-2.000) to 20.000 pH pH accuracy ± 0.002 pH pH mode pH calibration points 1 to 5 points pH calibration USA, NIST, DIN or user solutions... - Page 5 Portable Multi-parameter Water Quality Meter LMPWM-A11 Memory Stores up to 500 data sets Output USB communication interface Power supply 3 × 1.5 V “AA batteries or DC 5 V power adapter Dimension (L × W × H) 185 × 88 × 32 mm...
-
Page 6: Instrument Introduction
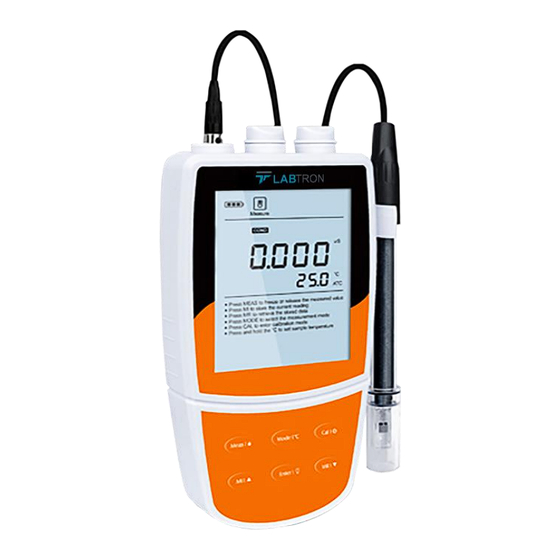
Portable Multi-parameter Water Quality Meter LMPWM-A11 5. Instrument Introduction 1. pH Electrode 2. Conductivity Electrode 3. Dissolved Oxygen Probe 4. Temperature Probe 5. pH Buffer Pouches (pH4.01/7.00/10.01) 6. Conductivity Calibration Solutions (84µS/cm, 1413µS/cm, 12.88mS/cm) 7. Membrane Cap 8. Electrolyte Solution... - Page 7 Portable Multi-parameter Water Quality Meter LMPWM-A11 Display LMPWM-A11 Portable Multi-parameter Water Quality Meter is equipped with a clear and bright LCD that is used to show measured values, mode indicators and help messages. The following table describes the meaning of each indicator.
- Page 8 Portable Multi-parameter Water Quality Meter LMPWM-A11 Measurement mode indicator: Indicates meter is in the measurement mode. Measure Calibration mode indicator: Indicates meter is in the calibration mode. Calibration Setup mode indicator: Indicates meter is in SETUP mode. Setup Memory mode indicator: Indicates data is stored in memory.
- Page 9 Portable Multi-parameter Water Quality Meter LMPWM-A11 Keypad The meter has a succinct membrane keypad, names and symbols describe each function key control. DESCRIPTION • Power the meter ON/OFF. • Freeze the measured value on the display and press the key again to resume measuring.
-
Page 10: Installation
• Ambient temperature is greater than 0℃ and less than 60℃. • No potential electromagnetic interference. 1. Connectors LMPWM-A11 Portable Meter provides 3 connectors for connecting the various types of sensors. Listed in the below table are the details of these connectors. CONNECTOR... - Page 11 Portable Multi-parameter Water Quality Meter LMPWM-A11 2) Insert the batteries into the battery compartment, ensuring the correct polarity is observed. 3) Secure the battery cover back into its original position to complete the installation. When batteries are depleted, the meter allows you to use the USB cable connected to the computer as a temporary power supply.
- Page 12 4. Preparing the pH Buffer solutions LMPWM-A11 Portable Multi-parameter Water Quality Meter is packaged with three pH buffer packets required for calibration. • Open the pH7.00 buffer packet and place the powder into a 250ml volumetric flask.
- Page 13 Portable Multi-parameter Water Quality Meter LMPWM-A11 2) Fill the membrane cap halfway with electrolyte solution. 3) Screw the membrane cap onto the probe, excess electrolyte will drain out. 4) Be sure the cathode of the probe contacts the membrane cap, the electrolyte solution in the membrane cap should be without an air bubble.
- Page 14 Portable Multi-parameter Water Quality Meter LMPWM-A11 2) For the ORP Electrode: Soak the electrode in 3M KCL solution or tap water for 5 minutes. 3) For the Ion Selective Electrodes: Soak the electrode in the diluted standard solution (e.g., 100ppm) for at least 15 minutes.
- Page 15 7. Operations 1. Setup Menu LMPWM-A11 Portable Multi-parameter Water Quality Meter contains an integrated setup menu that allows you to customize each displayed option to meet measurement requirements. In the different modes, the meter will show the corresponding options. For the general options, once it is changed that will be applied to all modes.
- Page 16 Portable Multi-parameter Water Quality Meter LMPWM-A11 4) Conductivity/TDS/Salinity/Resistivity modes:...
- Page 17 Portable Multi-parameter Water Quality Meter LMPWM-A11 5) Dissolved Oxygen mode: 6) General options:...
- Page 18 Portable Multi-parameter Water Quality Meter LMPWM-A11 Setting the Default Parameters • If necessary, press the MODE key until the display shows the corresponding mode indicator (e.g., pH mode). • Press and hold the key for 3 seconds, the meter enters the setup menu and the...
- Page 19 Portable Multi-parameter Water Quality Meter LMPWM-A11 • Press ▲ or ▼ key to scroll through the menu and select the parameter you want to set (Refer to the Setup Menu section). • Press the ENTER key to confirm and the display shows an option in the submenu.
- Page 20 During the setup mode, press the MEAS key and the meter returns to measurement mode immediately. Setting the Date and Time LMPWM-A11 Portable Meter has a real-time clock that is used to time-stamp stored measured value and calibration data. Follow the steps below to set the date and time during the first use.
- Page 21 Portable Multi-parameter Water Quality Meter LMPWM-A11 6) Press ▲ or ▼ key to set the date and time. 7) Press the ENTER key to confirm that the meter returns to measurement mode. The setting is completed. Temperature Compensation To get accurate measuring results, you need to enable manual or automatic temperature compensation before measurement or calibration.
- Page 22 The dissolved oxygen probe has a built-in temperature sensor. 2. pH Calibration LMPWM-A11 Portable Multi-parameter Water Quality Meter allows up to 5 points calibration in the pH mode. We recommend that you perform at least 2 points of calibration for high-accuracy measurement. The meter will automatically recognize and calibrate to the following standard buffer values.
- Page 23 Portable Multi-parameter Water Quality Meter LMPWM-A11 • Dip the pH electrode into the pH7.00 (or 6.86, or 6.79) buffer solution, the end of the electrode must be completely immersed into the calibration solution. Stir the sensor gently to create a homogenous solution.
- Page 24 Portable Multi-parameter Water Quality Meter LMPWM-A11 • Rinse the pH electrode with distilled water. Dip the electrode into the next standard buffer solution (e.g., pH4.01). The meter automatically senses the current calibration solution and begins calibrating. The “Calibration” indicator begins flashing.
- Page 25 Portable Multi-parameter Water Quality Meter LMPWM-A11 pH Calibration with the User-Defined Buffers: 1) Make sure that you have selected the "USER" option in the setup menu. Custom buffer solution values should be at least 1 pH unit apart from each other.
- Page 26 Portable Multi-parameter Water Quality Meter LMPWM-A11 • During the calibration process, if you want to exit the calibration mode, press the MEAS key and the meter will return to measurement mode immediately. • The electrode indicator shows the average slope of the pH electrode after calibration.
- Page 27 Portable Multi-parameter Water Quality Meter LMPWM-A11 4) Press ▼ the key and the meter shows "OFS" (zero-point offset potential). 5) Press ▼ the key again and the meter shows the slope of each pH buffer group. 6) After browsing, press the MEAS key to exit the current mode.
- Page 28 Portable Multi-parameter Water Quality Meter LMPWM-A11 3. ORP Calibration LMPWM-A11 Portable Multi-parameter Water Quality Meter allows 1-point calibration in the relative mV mode, but calibration is not necessary unless an exact readout agreement with a work standard and at a specific ORP value is needed.
- Page 29 Portable Multi-parameter Water Quality Meter LMPWM-A11 5) Wait for the measured value to stabilize, the display shows "END". The meter returns to measurement mode automatically. Calibration is completed. ORP Calibration Report This program lets you check the millivolt offset in the ORP mode.
- Page 30 5) After browsing, press the MEAS key and the meter returns to measurement mode. 4. Ion Concentration Calibration LMPWM-A11 Portable Multi-parameter Water Quality Meter supports ion concentration calibration up to 5 points with a minimum of 2 points, available calibration points include the following options.
- Page 31 Portable Multi-parameter Water Quality Meter LMPWM-A11 To obtain accurate measurement results, we recommend that you perform ion calibration and measurement at the same temperature. If you do not calibrate the meter or calibration is not successful, the display will always show "0.000".
- Page 32 Portable Multi-parameter Water Quality Meter LMPWM-A11 4) If necessary, press ▲ or ▼ key to select the desired calibration point (e.g., 0.01ppm). 5) Rinse the Ion Selective Electrode with distilled water, then rinse with a small amount of ion standard solution.
- Page 33 Portable Multi-parameter Water Quality Meter LMPWM-A11 8) Rinse the Ion Selective Electrode with distilled water. Dip the electrode into corresponding calibration solution. Stir the sensor gently. 9) Press ENTER key, "Calibration" indicator begins flashing. Wait for the measured value to stabilize, the display shows "1/CAL3". The meter prompts you to continue with third point calibration.
- Page 34 Portable Multi-parameter Water Quality Meter LMPWM-A11 Exit the calibration During the setup mode, press the MEAS key and the meter returns to measurement mode immediately. Ion Calibration Report This program lets you check the slope of the Ion Selective Electrode.
- Page 35 5) After browsing, press the MEAS key to exit the current mode. 5. Conductivity Calibration LMPWM-A11 Portable Multi-parameter Water Quality Meter can use the three types of conductivity electrodes. Before calibration or measurement, you need to select the different sensors as per your sample concentration. The table below shows available sensors and their effective measuring ranges.
- Page 36 Portable Multi-parameter Water Quality Meter LMPWM-A11 Make sure that you selected the cell constant between 0.1, 1 or 10 in the setup menu. If the current option is "USER", the automatic calibration function will be disabled (Refer to the Setup Menu section).
- Page 37 Portable Multi-parameter Water Quality Meter LMPWM-A11 5) Press the ENTER key to confirm and the "Calibration" indicator begins flashing. 6) Wait for the measured value to stabilize, the display shows "END". The meter returns to measurement mode automatically. Calibration is completed.
- Page 38 Portable Multi-parameter Water Quality Meter LMPWM-A11 Multi-Point Calibration: 1) Make sure that you have selected 2 to 5 points calibration in the setup menu. 2) Repeat steps 2 to 5 above, when the first calibration point is completed, the display will show "CAL2".
-
Page 39: Manual Calibration
Portable Multi-parameter Water Quality Meter LMPWM-A11 6. Manual calibration LMPWM-A11 Portable Meter provides a quick manual calibration mode that allows users to easily calibrate the meter. 1) Record the cell constant value on the electrode (e.g., K=1.08). 2) Press and hold the key for 3 seconds to enter the setup menu, the display shows the "CELL"... - Page 40 Portable Multi-parameter Water Quality Meter LMPWM-A11 4) Press ▲ or ▼ key to select the "USER" option. 5) Press the ENTER key to confirm that the meter has entered User-Defined mode. 6) Press ▲ or ▼ key to set each digit according to the previous record.
- Page 41 Portable Multi-parameter Water Quality Meter LMPWM-A11 Conductivity Calibration Report This program lets you check the calibration factor of the conductivity electrode. 1) Press the MR key in the conductivity measurement mode, the display shows "LOC/P- 01". 2) Press ▲ or ▼ key until the meter shows "ELE/P-02" (Electrode Diagnosis).
- Page 42 5) After browsing, press the MEAS key to exit the current mode. 7. DO Calibration in % Saturation Mode LMPWM-A11 Portable Multi-parameter Water Quality Meter can be calibrated quickly in the air. In the percentage saturation mode, the meter can perform either 1 or 2-point calibration.
- Page 43 Portable Multi-parameter Water Quality Meter LMPWM-A11 4) Hold the dissolved oxygen probe in the air or place the sensor into air-saturated water for 3 to 5 minutes, press ENTER key to confirm. Wait for the measured value to stabilize, the display shows “END”. Single-point calibration is completed.
- Page 44 Portable Multi-parameter Water Quality Meter LMPWM-A11 6) Wait for the measured value to stabilize, the display shows “100/CAL2”. The meter prompts you to continue with second point calibration. 7) Dip the dissolved oxygen probe into air-saturated water for 3 to 5 minutes, press ENTER key to confirm.
- Page 45 Portable Multi-parameter Water Quality Meter LMPWM-A11 DO Calibration in mg/L or ppm Mode 1) Press the MODE key until the meter shows indicator and measurement unit “mg/L” or “ppm”. 2) Make sure that you have selected 1-point calibration in the setup menu.
- Page 46 Portable Multi-parameter Water Quality Meter LMPWM-A11 7) Wait for the measured value to stabilize, the display will show “END”. The meter returns to measurement mode automatically. Single-point calibration is completed. 2 Points Calibration: 1) Make sure that you have selected 2 points of calibration in the setup menu.
- Page 47 Portable Multi-parameter Water Quality Meter LMPWM-A11 6) Wait for the measured value to stabilize, the display shows “8.25/CAL2”. The meter prompts you to continue with the second point calibration. 7) Dip the dissolved oxygen probe into air-saturated water for 3 to 5 minutes and press the ENTER key to confirm.
-
Page 48: Temperature Calibration
4) Wait for the reading to stabilize and record the measured value on the display. 9. ORP Measurement LMPWM-A11 Portable Meter contains two millivolt measurement modes. Absolute Millivolt Mode: Press the MODE key until the display shows the measurement unit “mV”, the meter now... - Page 49 Portable Multi-parameter Water Quality Meter LMPWM-A11 Relative Multivolt Mode: Press the MODE key until the display shows indicator and the meter enter relative millivolt measurement mode. Select one of the above modes. Dip the ORP electrode into the sample solution and stir the sensor gently.
- Page 50 4) Wait for the reading to stabilize and record the measured value on the display. 10. Salinity Measurement LMPWM-A11 Portable Meter provides two salinity measurement modes: practical salinity (unit: PSU) and natural seawater (unit: ppt). 1) Press the MODE key until the display shows indicator and measurement unit “PSU”, the meter is now entering practical salinity measurement mode.
- Page 51 4) Wait for the reading to stabilize and record the measured value on the display. Dissolved Oxygen Measurement LMPWM-A11 Portable Multi-parameter Water Quality Meter is suitable for measuring water, wastewater, brine and other liquids. If you use a meter to measure seawater or other water containing large amounts of salt, kindly set the salinity coefficient before use.
-
Page 52: Memory Input
Portable Multi-parameter Water Quality Meter LMPWM-A11 Storing and Recalling Data from Memory LMPWM-A11 Portable Multi-parameter Water Quality Meter allows up to 500 data sets to be stored and recalled. Memory Input: During the measurement process, press the MI key to input the measured value into the memory, “Memory”... - Page 53 Portable Multi-parameter Water Quality Meter LMPWM-A11 2) Press the ENTER key to confirm, the meter shows the page number of the stored data. 3) Press ▼ the key and the meter shows the date and time of the stored data (Format:...
- Page 54 Portable Multi-parameter Water Quality Meter LMPWM-A11 4) Press ▼ the key again and the display shows the stored data. 5) After browsing, press the MEAS key to exit the current mode. Communication • Our company provides a free Data Acquisition System that can be used to transfer data, receive the measuring values or import the data to Excel.
-
Page 55: Interval Recording
Portable Multi-parameter Water Quality Meter LMPWM-A11 • Click the Connect button and the screen shows “Port is connected” indicating that communication between the meter and the computer has been established. • Click the OK button to confirm. • Click the Receive button and the stored data in the meter will automatically be sent to the computer. - Page 56 Portable Multi-parameter Water Quality Meter LMPWM-A11 Warning: • Once the software is closed, all received data will be lost and cannot be recovered. • pH Electrode Care and Maintenance • Since pH electrodes are susceptible to dirt and contamination, clean as necessary...
-
Page 57: Maintenance
Portable Multi-parameter Water Quality Meter LMPWM-A11 8. Maintenance 1) After Measuring: Rinse the pH electrode in distilled water and store the electrode in the electrode storage solution. 2) Cleaning the Electrode: • Salt Deposits: Soak the electrode in warm tap water to dissolve deposits, then thoroughly rinse with distilled water. - Page 58 Portable Multi-parameter Water Quality Meter LMPWM-A11 6) Inorganic Deposits: • Soak the ORP electrode in 0.1M HCl for 10 minutes. • Remove and rinse with distilled water, then place in alcohol for 5 minutes. • Remove, rinse again, and soak in pH4.01 buffer solution for 15 minutes.
-
Page 59: Troubleshooting
Portable Multi-parameter Water Quality Meter LMPWM-A11 9. Troubleshooting LCD Display Cause Solution Soak the pH electrode in 3M KCL solution for 15 minutes. Soak the Ion ion-selective electrode in the Electrode dried out diluted standard solution. Soak the conductivity electrode in tap water for a few minutes. - Page 60 Portable Multi-parameter Water Quality Meter LMPWM-A11 Accessories Optional Accessories • Temperature probe • Calibration solutions • Batteries • Carrying Case Quatro House, Lyon Way, Camberley, Surrey GU16 7ER United Kingdom Email: info@labtron.com | Website: www.labtron.com...
Need help?
Do you have a question about the LMPWM-A11 and is the answer not in the manual?
Questions and answers