
Subscribe to Our Youtube Channel
Related Manuals for Labtron LUS-C10


Summary of Contents for Labtron LUS-C10
- Page 1 SINGLE BEAM UV-VIS SINGLE BEAM UV-VIS SPECTROPHOTOMETER SPECTROPHOTOMETER SPECTROPHOTOMETER LUS-C10 LUS-C10 www.labtron.com info@labtron.com...
-
Page 2: Table Of Contents
Single Beam UV-Vis Spectrophotometer LUS-C10 Index Sr.no Title Page no Safety Measures Introduction Features Speci�ications Applications Instrument Introduction Installation Working Principle Operations Software Operations Maintenance Troubleshooting Accessories Replacement... -
Page 3: Title Page No
Single Beam UV-Vis Spectrophotometer LUS-C10 1. Safety Measures 1.1 Safety The safety statements in this manual comply with the HEALTH AND SAFETY AT WORK ACT, 1974 requirements. Kindly read the following before installing and using the instrument and its accessories. Appropriate laboratory technicians should operate this instrument. - Page 4 Single Beam UV-Vis Spectrophotometer LUS-C10 3) Has been subjected to prolonged storage under unfavourable conditions. 4) Has been subjected to severe transport stresses. 1.5 Performance To ensure that the instrument is working within its speci�ication, especially when making measurements of an important nature, carry out performance checks concerning wavelength and absorbance accuracy.
-
Page 5: Introduction
Single Beam UV-Vis Spectrophotometer LUS-C10 2. Introduction Single Beam UV-Vis Spectrophotometer LUS-C10 is a compact, table top unit, comprising Silicon photodiode detector, Tungsten and Deuterium lamp as light source. Features 200 nm to 1000 nm wavelength range, 4.0 nm bandwidth with automatic setting of wavelength, direct input by K, B factor for quantitative measurement of standard curve. -
Page 6: Speci�Ications
Single Beam UV-Vis Spectrophotometer LUS-C10 4. Speci�ications 200 to 1000 nm Model No. LUS-C10 4.0 nm Wavelength Range Single beam Spectral Bandwidth ±0.2 nm Optical System 0.2 nm Wavelength Accuracy 0.1 nm Wavelength Repeatability -4 to 4 A Wavelength Resolution... -
Page 7: Instrument Introduction
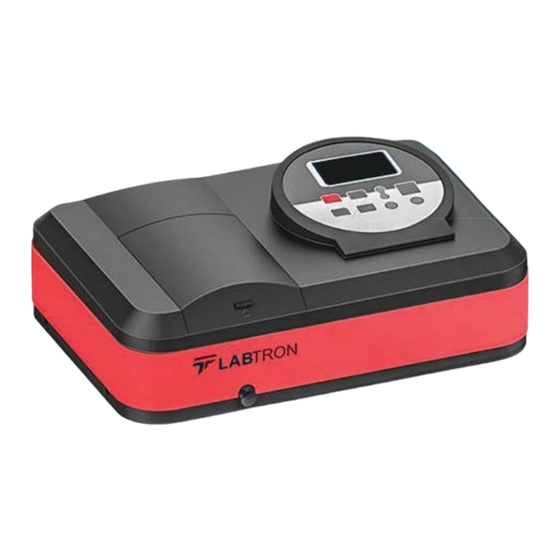
Single Beam UV-Vis Spectrophotometer LUS-C10 6. Instrument Introduction 6.1 Front view of the instrument Figure-1 Front view 6.2 Structure 1) Halogen or deuterium lamps to supply the light. The spectrophotometer consists of �ive parts: 2) A Monochromator to isolate the wavelength of interest and eliminate the unwanted second-order radiation. - Page 8 Single Beam UV-Vis Spectrophotometer LUS-C10 In a spectrophotometer, light from the lamp is focused on the entrance slit of the monochromator where the collimating mirror directs the beam onto the grating. The grating disperses the light beam to produce the spectrum, a portion of which is focused on the exit slit of the monochromator by a collimating mirror.
-
Page 9: Installation
Single Beam UV-Vis Spectrophotometer LUS-C10 7. Installation 7.1 Unpacking instructions Carefully unpack the contents and check the materials to ensure that you have received everything in good condition. 7.2 Install instrument 7.2.1 Environment required To ensure the best performance, the following conditions are required: 1) The best working temperature range is 16-30℃... -
Page 10: Working Principle
Single Beam UV-Vis Spectrophotometer LUS-C10 8. Working Principle Different matter has different but special absorbance wavelength points. Also, when at the �ixed wavelength point, the absorbance has some relation to the substance’s (Always transparent Solution) concentration and its thickness. The relation can be concluded as the following Formula which is called Lambert-Beer Law. -
Page 11: Operations
Single Beam UV-Vis Spectrophotometer LUS-C10 9. Operations 9.1 Basic operation 9.1.1 Set wavelength In the measurement Interface, press to go into the wavelength setting Interface. Use the Arrow Key to increase or decrease the value of wavelength,then press to con�irm. When arriving at the setting wavelength point, it sets 100%T/0Abs automatically. -
Page 12: Software Operations
Single Beam UV-Vis Spectrophotometer LUS-C10 Software Operations 10.1 Software structure 10.1.1 Main interface After 20 minutes of warm-up, the system goes into the main interface. (Figure 3) Press the key of MODE to change the functions. Figure-3 Main interface 10.1.2 Firmware Functions The �irmware consists of 5 functions: T, A, C, F and system functions:... - Page 13 Single Beam UV-Vis Spectrophotometer LUS-C10 10.2 Measure 10.2.1 T-Mode In the Main Interface, press the MODE Key to move the cursor on “T”, you’ll see the Step 1: Go into the T Mode Interface current sample’s T% value. Press to go into Continuous Measurement Interface.
- Page 14 Single Beam UV-Vis Spectrophotometer LUS-C10 10.2.5 Print or Delete the Data Press PRINT/CLEAR to go into the following interface. (Figure 6) Figure-6 1) When the optional Printer is linked to the instrument, if you want to print out the test result, use the Arrow Key to choose “Print”, then press ENTER to con�irm.
- Page 15 Single Beam UV-Vis Spectrophotometer LUS-C10 10.4 C-Mode (Standard Curve) 10.4.1 Go into C-MODE Interface In the Main Interface, press the Arrow Key to move the cursor on “C”, then you’ll see the following Interface. (Figure 8) Here you can create a new curve, or you can load a saved curve.
- Page 16 Single Beam UV-Vis Spectrophotometer LUS-C10 Step 1: Set wavelength Press to go into the wavelength setting interface,input the WL. Value by the Arrow key and press to con�irm. (Figure 10) Figure-10 Use the Arrow Key to input the quantity of the standard samples, then press Step 2: Input the quantity of the standard samples con�irm.
- Page 17 Single Beam UV-Vis Spectrophotometer LUS-C10 Step 4: Input Standard Samples’ Concentration 1) Pull the 1# Standard Sample in the light path and input the value of its concentration by the Arrow key, then press to con�irm. The system will go into the next interface.
- Page 18 Single Beam UV-Vis Spectrophotometer LUS-C10 1) Pull the Reference solution in the light path and press to go into the continuous Step 6: Measure samples measurement interface. (Figure 14) Figure-14 2) Pull the unknown sample in the light path, then press START to measure. The results will be displayed on the screen one by one.
- Page 19 Single Beam UV-Vis Spectrophotometer LUS-C10 2) Move the cursor on the equation that you need and press to con�irm. Then the corresponding curve will be displayed on the screen. (Figure 16) Figure-16 3) Press to go into the sample continuous measure interface and measure samples.
- Page 20 Single Beam UV-Vis Spectrophotometer LUS-C10 2) Move the cursor on the curve equation that you want to delete and press and then the system will ask you to con�irm again. (Figure 18) Figure-18 3) Move the cursor on “Yes” and press to con�irm, then the curve equation will...
- Page 21 Single Beam UV-Vis Spectrophotometer LUS-C10 10.5.2 Parameter setting 1) Use the Arrow Key to move the cursor on “Coef�icient K” and press to go into the K setting interface. (Figure 20): Input every bit of K by Arrow Key and press to con�irm.
- Page 22 Single Beam UV-Vis Spectrophotometer LUS-C10 10.5.3 Test samples Move the cursor on “Test”, then press ENTER to go into the pre-test Interface. (Figure Step 1: Go into the pre-test Interface Figure-22 Step 2: Set Wavelength Press to go into the wavelength setting interface, input the wavelength value by Arrow key and press to con�irm.
- Page 23 Single Beam UV-Vis Spectrophotometer LUS-C10 Pull the samples to be measured in the light path, press ENTER to measure, and then the Step 4: Measurement result will be displayed on the screen. Repeat this step to measure other samples. All the test results will be listed on the screen and stored in the RAM automatically.
- Page 24 Single Beam UV-Vis Spectrophotometer LUS-C10 10.6.2 D2 lamp management When the wavelength point needed is in the range of 340-1100nm, the D2 lamp can be switched off to prolong its lifetime. Use the Arrow key to choose “D2 Lamp On” and press it to go into the D2 lamp setting interface (Figure 27).
- Page 25 Single Beam UV-Vis Spectrophotometer LUS-C10 When it �inishes, it will display the following words on the screen. (Figure 29) If it displays “Dark Current Err”, you should check if there’s something else in the compartment and repeat this step. Figure-29 10.6.4 Wavelength Calibration...
- Page 26 Single Beam UV-Vis Spectrophotometer LUS-C10 When it �inishes, it will display the following words on the screen. (Figure 31) If it displays “Wavelength Err”, you should check if there’s something else in the compartment and repeat this step. Figure-31 10.6.5 Load default Press the Arrow Key to choose “Load Default”...
- Page 27 Single Beam UV-Vis Spectrophotometer LUS-C10 10.6.6 Version Press the Arrow Key to choose “Version” and press to con�irm. You’ll see the version of the software and hardware. (Figure 33) Press to return. Figure-33...
-
Page 28: Maintenance
Single Beam UV-Vis Spectrophotometer LUS-C10 Maintenance To keep the instrument work in good condition, constant maintenance is needed. Daily maintenance After measurement, the cuvettes with sample solutions should be taken out of the 1) Check the compartment compartment in time. Or the volatilization of the solution would make the mirror go mouldy. -
Page 29: Troubleshooting
Single Beam UV-Vis Spectrophotometer LUS-C10 Troubleshooting Dark Current Error Open the lid of the Close the lid of the Fault Possible Cause Solution when self-test compartment compartment and switch on the during self-test. power again. No response after Bad contact in the power... -
Page 30: Accessories
Single Beam UV-Vis Spectrophotometer LUS-C10 Accessories 1 cm quartz cuvette 2 pcs S. No Accessory name Quantity 1 cm glass cuvette 4 pcs Dust cover 1 pc Power line 1 pc Instructional Manual 1 pc... -
Page 31: Replacement
Single Beam UV-Vis Spectrophotometer LUS-C10 Replacement Fuse Replacement Danger! Be sure to switch off the power and unplug the socket before replacement! Step 1: Tools preparation: Prepare a 3×75 Flat Blade screwdriver. Step 2:Switch Off the power supply: Switch off the power supply and unplug the socket.
Need help?
Do you have a question about the LUS-C10 and is the answer not in the manual?
Questions and answers