Table of Contents
Advertisement
Quick Links
Advertisement
Table of Contents

Related Manuals for Labtron LABM-A10


Summary of Contents for Labtron LABM-A10
- Page 1 Bilirubin Meter LABM-A10 www.labtron.com | info@labtron.com...
-
Page 2: Table Of Contents
Bilirubin Meter LABM-A10 Index Sr.no Title Page no Safety Measures Introduction Features Specifications Applications Instrument Introduction Installation Working Principle Operations Software Operations Accessories... -
Page 3: Safety Measures
Hence wait an appropriate time (approximately 1h), before you connect to the mains or switch on the instrument. • Only use original equipment Only use equipment that is expressly approved for the Bilirubin Meter LABM-A10; otherwise, reliable functioning cannot be guaranteed. • Never open the instrument There are no parts inside the instrument that require care or maintenance. - Page 4 Bilirubin Meter LABM-A10 • Transporting In its packaging, the instrument weighs about 3kg and about 2kg without packaging. The carton dimensions are 320(L)×250(W)×170(H) mm. No special equipment is therefore required for transporting, loading or unloading the instrument in its box. When handling the equipment, the warning on the outside of the package, (This Side UP ↑) must be respected.
-
Page 5: Introduction
Bilirubin Meter LABM-A10 2. Introduction Bilirubin Meter LABM-A10 can actively determine the total bilirubin quantity in blood. Requires only 40 to 45µL of sample volume and provides quick results within 10 seconds. It works in the principle of direct photometry. Incorporated with a long- lifetime white light LED for the light source. -
Page 6: Specifications
Bilirubin Meter LABM-A10 4. Specifications Model No. LABM-A10 Measuring Principle Direct Photometry Sample Volume 40 To 45µl Measurement Time 10 Sec Warm Up ≥ 5min Capillary 75mm/60µl Disposable Capillary Capillary Diameter 1.3mm × 1.4mm Environment Temperature 10℃ To 30℃ Relative Humidity ≤... -
Page 7: Instrument Introduction
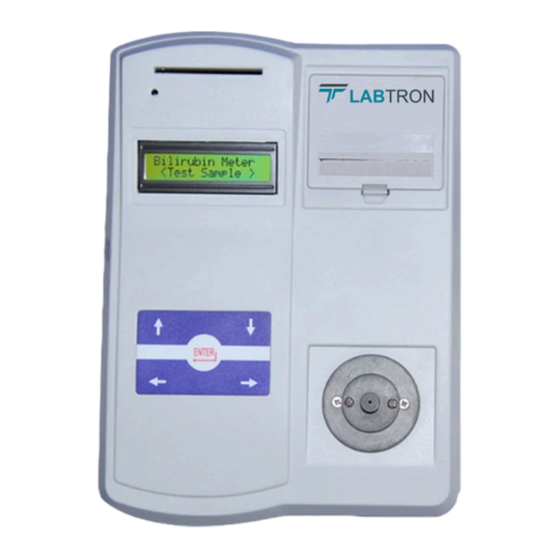
Bilirubin Meter LABM-A10 6. Instrument Introduction The principle of total bilirubin meter is direct photometry. It tests the color of blood plasma and gets the concentration of total bilirubin by comparing the color to the calibrator. The collected blood is divided into 2 parts after centrifuge, the bottom part is blood cell, and the top part is plasma. -
Page 8: Installation
The wrong power supply can damage the instrument. After the above steps are confirmed, start the installation of LABM-A10. 3) Place LABM-A10 on a flat, clean, stable table. Since it is an indoor instrument, avoid strong light, heat sources, electromagnetic radiation, and strong vibrations. -
Page 9: Working Principle
Bilirubin Meter LABM-A10 8. Working Principle The Bilirubin Meter LABM-A10 works on the principle of Direct photometry. It measures the color of blood plasma and determines the total bilirubin concentration by comparing the color to a calibrator. Figure-2 The concentration of the substance is calculated using the formula given below: Conc =F ×... -
Page 10: Operations
Bilirubin Meter LABM-A10 9. Operations Prepare a blank calibrator and sample. Kindly use appointed capillary only: 75mm/60μL, diameter 1.3mm-1.4mm made by HIRSCHMANN LABORGERATE (GERMANY). 9.1 Prepare blank 1) Hold the red end of the capillary and fill the capillary 2/3 – 3/4 of the total volume of the capillary with distilled water (about 40-45μL). - Page 11 Bilirubin Meter LABM-A10 9.3 Prepare sample 1) Hold the red end of the capillary and fill the capillary 2/3 – 3/4 of the total volume of the capillary with blood (about 40-45μL). 2) Hold the red end of the capillary by 2 fingers and put the other end into sealing putty.
-
Page 12: Software Operations
Bilirubin Meter LABM-A10 Software Operations 10.1 Operation Meter 1) Connect the power supply, and switch on power. The meter will display as: Figure-6 2) After 3s, the meter will display as: Figure-7 3) Remove the capillary from the measurement cell. The meter starts to test the status of the main wavelength and sub-wavelength. - Page 13 Bilirubin Meter LABM-A10 If an auto check is passed, the meter will display as: Figure-10 Press ← or → to select different functions: 1) Test sample 2) Test blank 3) Calibration 4) Auto check Press ENTER to confirm the function selection and go to the next menu.
- Page 14 Bilirubin Meter LABM-A10 2) Modify the calibrator concentration in this menu. 3) Select the digit that needs to be modified by press← and →, press ↑ and ↓ to increase or decrease it. 4) Press ENTER to confirm, then the meter display as: Figure-13 5) Press ↑...
- Page 15 Bilirubin Meter LABM-A10 3) Remove the sample from the measurement cell, after about 5s, the meter will display: Figure-16 4) Indicate that the meter is ready for the next test. Note: The capillary will be inserted after the string “insert sample” is displayed.
- Page 16 Bilirubin Meter LABM-A10 6) Filter 2 is the signal intensity of reference wavelength; the range is 22000-28000. If it is lower than 22000, you must check the meter status. The reading can be increased by increasing the AV: Vlin=Vlin0 × (1+AV/10) Vlin is the reading with Av, Vlin0 is the reading when Av=00 7) Press ←...
-
Page 17: Accessories
1 piece Thermal print Paper Roll 2 pieces RS232 Cable 1 piece Dust Cover 1 piece Standard capillary 100 pieces The seal plate 1 piece Quatro House, Lyon Way, Camberley, Surrey GU16 7ER United Kingdom Email: info@labtron.com | Website: www.labtron.com...
Need help?
Do you have a question about the LABM-A10 and is the answer not in the manual?
Questions and answers