
Related Manuals for cef ESTO-Inverse


Summary of Contents for cef ESTO-Inverse
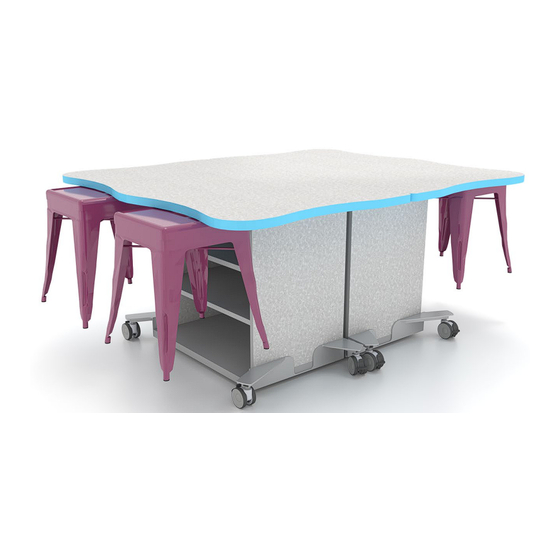
- Page 1 © Copyright 2024 ESTO- Inverse Assembly Instructions For any assistance please call 1.800.255.9189...
-
Page 2: Tools Needed
ESTO Inverse - Assembly Instructions For any assistance please call 1.800.255.9189 Components What’s in the Box! • TABLETOP • TABLE BASE Hardware Kit • LEFT & RIGHT METAL FEET (WITH CASTERS ATTACHED) • (16) SILVER ZN BOLTS • (4) SILVER PHILLIPS HEAD SCREWS •... -
Page 3: Parts & Hardware
ESTO Inverse - Assembly Instructions For any assistance please call 1.800.255.9189 For any assistance please call 1.800.255.9189 Components Parts & Hardware Feet Base Tabletop (w/ casters attached) (Bottom shown) Silver ¼-20 x 20mm .625 30mm silver phillips Silver washers for Screw B Thread w/ Serrations ZN Bolts head screw... -
Page 4: Let's Get Started
ESTO Inverse - Assembly Instructions For any assistance please call 1.800.255.9189 For any assistance please call 1.800.255.9189 Time to Assemble Let’s Get Started! Backside Base Frontside Feet Align Unwrap Once the pre-drilled the feet and base the pre-drilled holes on the base with (shown above). - Page 5 ESTO Inverse - Assembly Instructions For any assistance please call 1.800.255.9189 For any assistance please call 1.800.255.9189 Time to Assemble Let’s Get Started! *Please note that if the base has bins or shelves they may need to be removed to allow room to screw in the tabletop Now, Once...
- Page 6 ESTO Inverse - Assembly Instructions For any assistance please call 1.800.255.9189 For any assistance please call 1.800.255.9189 Completion Yay! Hand tighten the screws (B) first. Now, finish tightening them using a drill with a phillips head bit. Your table is now complete and Repeat and make sure that ready to use! Above is an image of the ESTO the top is secured.
Need help?
Do you have a question about the ESTO-Inverse and is the answer not in the manual?
Questions and answers