Table of Contents
Advertisement
Quick Links
Advertisement
Table of Contents

Related Manuals for NEC VT460K


Summary of Contents for NEC VT460K
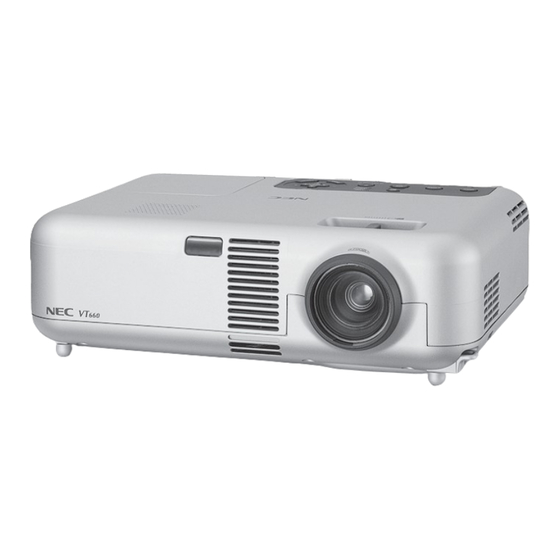
- Page 1 Portable Projector VT660K/VT460K VT560 User’s Manual...
-
Page 2: Important Information
Please read this manual carefully before using your NEC VT660K/ The Federal Communications Commission does not allow any VT460K/VT560 Projector and keep the manual handy for future refer- modifications or changes to the unit EXCEPT those specified ence. Your serial number is located on the bottom of your projector. -
Page 3: What's In The Box
For Europe only glass may be scattered in the lamp case. Do not touch them as the Guarantee policy pieces of glass may cause injury. If this happens, contact your NEC dealer for lamp replacement. -
Page 4: Table Of Contents
TABLE OF CONTENTS Important Information ............. E-2 MAINTENANCE ............. E-30 Safety Cautions ....................... E-2 Replacing the Lamp ...................... E-30 What's in the Box? ......................E-3 Cleaning ........................E-31 Cleaning or Replacing the Filter ................. E-31 INTRODUCTION .............. E-5 Cleaning the Cabinet and the Lens ................E-31 Introduction to the Projector ................... -
Page 5: Introduction
VT460K/VT560 Projector view. If the section doesn't apply, you can skip it. The VT660K/VT460K/VT560 is one of the very best projectors avail- • IBM is a trademark or registered trademark of International Business able today. The VT660K/VT460K/VT560 enables you to project precise Machines Corporation. -
Page 6: Part Names Of The Projector
Part Names of the Projector Controls (See page E-7) Monaural Speaker (1W) Zoom Lever Lamp Cover (See page E-30) Focus Ring Lamp Cover Screw Lens Ventilation (outlet) Adjustable Tilt Foot Lever Heated air is exhausted from here (See page E-18) Adjustable Tilt Foot Adjustable Tilt Foot Lever (See page E-18) -
Page 7: Top Features
11. SELECT GHFE / Volume Buttons Top Features GH : Use these buttons to select the menu of the item you wish to adjust. 2 3 4 FE : Use these buttons to change the level of a selected menu item. A press of the E button executes the selection. -
Page 8: Terminal Panel Features
Terminal Panel Features 1. RGB IN / Component Input Connector (Mini D-Sub 15 Pin) Connect your computer or other analog RGB equipment such as IBM compatible or Macintosh computers. Use the supplied RGB cable to connect to your computer. This also serves as a component input connector that allows you to connect a component video output of component equipment such as a DVD player. -
Page 9: Part Names Of The Remote Control
9. MENU Button Part Names of the Remote Control Displays the menu for various settings and adjustments. NOTE: If you are using a Macintosh computer, you can click either the CANCEL (right-click) or ENTER (left-click) button to activate the mouse. 10. -
Page 10: Battery Installation
Battery Installation Remote Control Precautions 1. Press firmly and slide the battery cover off. • Handle the remote control carefully. • If the remote control gets wet, wipe it dry immediately. • Avoid excessive heat and humidity. • If you will not be using the remote control for a long time, remove the batteries. -
Page 11: Installation And Connections
INSTALLATION AND CONNECTIONS This section describes how to set up your projector and how to connect video and audio sources. Your projector is simple to set up and use. But before you get started, you must first: 1 Set up a screen and the projector. 2 Connect your computer or video equip- ment to the projector. -
Page 12: Throw Distance And Screen Size
Using a mirror to reflect your projector's image enables you to enjoy a fied technician. Contact your NEC dealer for more information. much larger image. Contact your NEC dealer if you need a mirror. If * Do not attempt to install the projector yourself. -
Page 13: Making Connections
Making Connections NOTE: When using with a notebook PC, be sure to connect between the projector and the notebook PC before turning on the power to the notebook PC. In most cases signal cannot be output from RGB output unless the notebook PC is turned on after connecting with the projector. * If the screen goes blank while using your remote control, it may be the result of the computer's screen-saver or power management software. -
Page 14: To Connect Scart Output (Rgb
SCART is a standard European audio-visual connector for TVs, VCRs and DVD players. It is also referred to as Euro-connector. NOTE: The ADP-SC1 SCART adapter is obtainable from your NEC dealer in Eu- rope. Contact your NEC dealer in Europe for more information. -
Page 15: Connecting Your Dvd Player
Connecting Your DVD Player RGB IN Optional 15-pin-to-RCA (female) 3 cable (ADP-CV1) Component video RCA 3 cable (not supplied) Audio Equipment DVD player AUDIO IN AUDIO OUT Component Audio cable (not supplied) You can connect your projector to a DVD player with component output For a DVD player without component video (Y,Cb,Cr) output, use or Video output. -
Page 16: Connecting Your Vcr Or Laser Disc Player
Connecting Your VCR or Laser Disc Player Video cable (not supplied) S-Video cable (not supplied) Audio equipment VCR/ Laser disc player AUDIO IN AUDIO OUT Audio cable S-VIDEO OUT (not supplied) VIDEO OUT Use common RCA cables (not provided) to connect your VCR, laser NOTE: Refer to your VCR or laser disc player owner's manual for more informa- disc player or document camera to your projector. -
Page 17: Projecting An Image (Basic Operation
PROJECTING AN IMAGE (BASIC OPERATION) This section describes how to turn on the projector and to project a 2. Press the ENTER button to execute the selection. picture onto the screen. Turning on the Projector NOTE: • The projector has two power switches: main power switch and POWER (ON/ STAND BY) button (POWER ON and OFF on the remote control). -
Page 18: Selecting A Source
Selecting a Source Adjusting the Picture Size and Position Place your projector on a flat level surface and ensure that the projector is square to the screen. Selecting the computer or video source Using the Remote Control Lift the front edge of the projector to center the image vertically. * If the projected image does not appear square to the screen then use the Keystone feature for proper adjustment. -
Page 19: Correcting The Vertical Keystone Distortion
CAUTION 2. Turn off the Auto Keystone function. Do not use the tilt-foot for purposes other than originally intended. Misuses such as gripping the tilt-foot or hanging on the wall can cause damage to the projector. Zoom Use the ZOOM lever to finely adjust the image size on the screen. Use the SELECT H button to select “Image”... -
Page 20: Optimizing Rgb Picture Automatically
Optimizing RGB Picture Automatically Turning off the Projector Adjusting the Image Using Auto Adjust To turn off the projector: Optimizing RGB image automatically First, press the POWER (ON/STAND BY) button on the projector cabi- Press the Auto Adjust button to optimize an RGB image automatically. net or the POWER OFF button on the remote control. -
Page 21: Convenient Features
CONVENIENT FEATURES Using the Remote Mouse Function When using the USB Port The remote mouse function can only be used with a Windows 98, Win- The built-in remote mouse function enables you to operate your dows Me, Windows XP, Windows 2000 or Mac OS operating system. computer's mouse functions from the remote control (Computer mode). -
Page 22: Turning Off The Image And Sound
Turning off the Image and Sound Getting the Information Press the PIC-MUTE button to turn off the image and sound for a short You get the information about the signal and projector settings. period of time. Press again to restore the image and sound. HELP PIC-MUTE SELECT... -
Page 23: Using On-Screen Menu
USING ON-SCREEN MENU 6. Repeat steps 2-5 to adjust an additional item, or press the MENU Basic Menu Operation button to close the menu. Using the Menus NOTE: The on-screen menu may not be displayed correctly while interlaced mo- tion video image is projected. 1. -
Page 24: List Of Menu Items
List of Menu Items Picture Brightness Contrast Sharpness Color Picture Management Presentation, Video, Movie, Graphic, sRGB User Base Setting Presentation, Video, Movie, Graphic, sRGB White Balance Brightness R,G,B Contrast R,G,B Gamma Correction Dynamic, Black Detail, Natural Image Auto Keystone On, Off Keystone Keystone Save On, Off... -
Page 25: Menu Elements
Menu Elements Title Slide bar Radio button Source Highlight Check mark Solid triangle Key symbol Thermometer symbol Menu windows or dialog boxes typically have the following elements: Title ....Indicates the menu title. Highlight ..... Indicates the selected menu or item. Source .... -
Page 26: Menu Descriptions & Functions
User Adjust (when using User ) Menu Descriptions & Functions When selecting user adjustable presetting (User), the submenu will be displayed. Picture You can customize each gamma or color. To do so, first select “User” and press the ENTER button, and then proceed the following steps. Selecting Base Setting <Base Setting>... -
Page 27: Selecting Aspect Ratio [Aspect Ratio
Selecting Aspect Ratio [ Aspect Ratio] Selecting Lamp Mode [Lamp Mode] Aspect Ratio allows you to select the best Aspect mode to display This feature enables you to select two brightness modes of the lamp: your source image. You can also display the Aspect Ratio window by Normal and Eco modes. -
Page 28: Disabling The Cabinet Buttons [Control Panel Key Lock
2. Type in a combination of the four SELECT buttons ( GHFE ) and NOTE: press the ENTER button. * The security disable mode is maintained until the main power is turned off (by setting the main power switch to “O” or unplugging the power cable). NOTE: A keyword must be four to 10 digits in length. -
Page 29: Enabling Auto Adjust [Auto Adjust
Source Index Remaining Lamp Time (%)* mines the best resolution for the current RGB input signal to project Horizontal Frequency Lamp Hour Meter (H) an image using NEC’s Advanced AccuBlend Intelligent Pixel Blend- Vertical Frequency Filter Usage ing Technology. Sync Polarity Projector Usage The image can be automatically adjusted for position and stability;... -
Page 30: Maintenance
Replacing the Lamp CAUTION Do not use a lamp other than the NEC replacement lamp (VT60LP). After your lamp has been operating for 2000 hours (up to 3000 hours in Order this from your NEC dealer. Eco mode) or longer, the LAMP indicator in the cabinet will blink red and the message will appear. - Page 31 3. Reinstall the new filter cover. Cleaning Cleaning or Replacing the Filter The air-filter sponge keeps the inside of the projector from dust or dirt and should be cleaned after every 100 hours of operation (more often in dusty conditions). If the filter is dirty or clogged, your projector may over- heat.
-
Page 32: Troubleshooting
TROUBLESHOOTING This section helps you resolve problems you may encounter while setting up or using the projector. Power Indicator Indicator Condition Projector Condition Note The main power is off. – Blinking light Green 0.5 sec On, The projector is getting ready Wait for a moment. - Page 33 Common Problems & Solutions Problem Check These Items Does not turn on • Check that the power cable is plugged in and that the power button on the projector cabinet or the remote control is on. See pages E-16 and 17. •...
-
Page 34: Specifications
Power Consumption VT660K/VT460K: 7.5W in Standby mode / 270 W in Lamp Normal mode / 220 W in Lamp Eco mode VT560: 7.5W in Standby mode / 260 W in Lamp Normal mode / 220 W in Lamp Eco mode... -
Page 35: Cabinet Dimensions
APPENDIX Cabinet Dimensions 89(3.5") 310(12.2") Lens center 73.5(2.9") Lens center Unit = mm (inch) Pin Assignments of D-Sub RGB Input Connector Mini D-Sub 15 Pin Connector Pin No. RGB Signal (Analog) YCbCr Signal Green or Sync on Green Blue Signal Level Ground Video signal : 0.7Vp-p (Analog) Ground... -
Page 36: Compatible Input Signal List
# : Images in above flagged with # are compressed with Advanced AccuBlend on VT660K/VT560. @ : Images in above flagged with @ are compressed with Advanced AccuBlend on VT460K. NOTE: Some composite sync signals may not be displayed correctly. -
Page 37: Pc Control Codes
PC Control Codes Cable Connection Communication Protocol Baud rate: 19200 bps Data length: 8 bits Function Code Data Parity: No parity POWER ON 02H 00H 00H 00H 00H 02H Stop bit: One bit POWER OFF 02H 01H 00H 00H 00H 03H X on/off: None INPUT SELECT RGB... -
Page 38: Travelcare Guide
6) Problems or damage caused by expendable supplies or devices TravelCare Guide connected to the product other than those designated by NEC. 7) Problems caused by natural consumption, wear or deterioration TravelCare - a service for international travelers of parts under normal usage conditions. - Page 39 (Regions Covered) United Arab Emirates (Regions Covered) Japan* Samir Photographic Supplies Address: P.O.Box 599, Jeddah 21421, Saudi Arabia NEC Hong Kong Ltd. Telephone: +966 2 6828219 Address: 11th Floor, Tower B, New Mandarin Plaza, 14 Fax Line: +966 2 6830820...
- Page 40 P-1/ Date: TO: NEC or NEC's Authorized Service Station: (Company & Name with signature) Dear Sir (s), I would like to apply your TravelCare Service Program based on attached registration and qualification sheet and agree with your following conditions, and also the Service fee will be charged to my credit card account, if I don't return the Loan units within the specified period.
- Page 41 3) Any fault in the attachments or associated products or components (whether or not supplied by NEC or its agents which do not form part of the Product covered by this warranty); 4) Any act of God, fire, flood, war, act of violence or any similar occur- rence;...
Need help?
Do you have a question about the VT460K and is the answer not in the manual?
Questions and answers