NEC VT460 User Manual
Nec vt460: users manual
Hide thumbs
Also See for VT460:
- Quick connect manual (2 pages) ,
- Specifications (2 pages) ,
- Important information manual (38 pages)
Table of Contents
Advertisement
Advertisement
Table of Contents

Related Manuals for NEC VT460


Summary of Contents for NEC VT460
- Page 1 Portable Projector VT660/VT560/VT460 User’s Manual...
-
Page 2: Limited Warranty
5. In the event a product is returned to NEC Solutions for warranty service, and it is determined that there is no product defect or that the product condition is not covered by this limited war- ranty, a diagnostic service fee may be charged to the customer. -
Page 3: Declaration Of Conformity
We hereby declare that the equipment specified above conforms to the technical standards as specified in the FCC Rules. NEC Solutions (America), Inc. 1250 N. Arlington Heights Road Itasca, Illinois 60143 (630) 467-5000 LCD Projector Class B Peripheral VT660, VT560 and VT460... -
Page 4: Important Information
Safety Cautions Precautions Please read this manual carefully before using your NEC VT660/VT560/ VT460 Projector and keep the manual handy for future reference. Your serial number is located on the bottom of your projector. Record it here: CAUTION To turn off main power, be sure to remove the plug from power outlet. -
Page 5: What's In The Box
8. Handle the power cable carefully and avoid excessive bending. A damaged cord can cause electric shock or fire. 9. If the projector is not to be used for an extended period of time, disconnect the plug from the power outlet. -
Page 6: Table Of Contents
Remote Control Precautions ... E-10 Operating Range for Wireless Remote Control ... E-10 INSTALLATION AND CONNECTIONS ... E-11 Setting Up the Screen and the Projector ... E-11 Selecting a Location ... E-11 Throw Distance and Screen Size ... E-12 Making Connections ... E-13 Connecting Your PC or Macintosh Computer ... -
Page 7: Introduction To The Projector
Congratulations on Your Purchase of The VT660/VT560/ VT460 Projector The VT660/VT560/VT460 is one of the very best projectors available today. The VT660/VT560/VT460 enables you to project precise images up to 300 inches across (measured diagonally) from your PC or Macintosh computer (desktop or notebook), VCR, DVD player, docu- ment camera, or a laser disc player. -
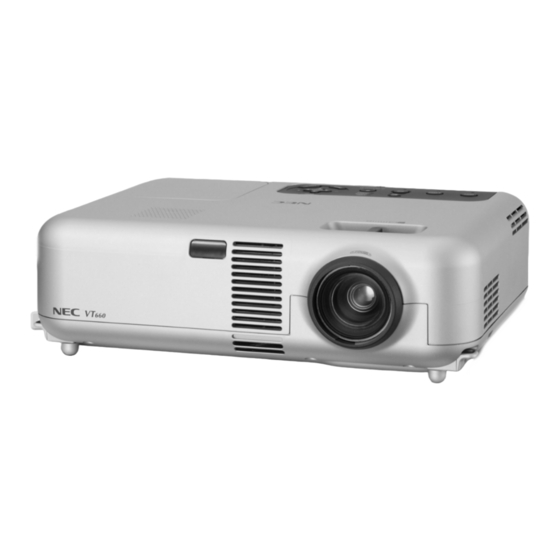
Page 8: Part Names Of The Projector
Kensington Microware Inc. The logo is Attaching the supplied carrying handle You can carry the projector by attaching the supplied carrying handle securely to the projector. To attach the supplied carrying handle, use the supplied flathead screw- driver and two screws. -
Page 9: Top Features
Use this button to turn the power on and off when the main power is supplied and the projector is in standby mode. To turn on the projector, press and hold this button for a minimum of two seconds. To turn off the projector, press this button twice. -
Page 10: Terminal Panel Features
8. PC CONTROL Port (DIN 8 Pin) Use this port to connect your PC to control your projector. This enables you to use your PC and serial communication protocol to control the projector. If you are writing your own program,... -
Page 11: Part Names Of The Remote Control
3. POWER ON Button When the main power is on, you can use this button to turn your projector on. NOTE: To turn on the projector, press and hold the POWER ON button for a minimum of two seconds. 4. POWER OFF Button You can use this button to turn your projector off. -
Page 12: Battery Installation
22 feet/7 m and within a 60-degree angle of the remote sensor on the projector cabinet. • The projector will not respond if there are objects between the re- mote control and the sensor, or if strong light falls on the sensor. -
Page 13: Installation And Connections
The further your projector is from the screen or wall, the larger the image. The minimum size the image can be is approximately 21" (0.53 m) measured diagonally when the projector is roughly 27.6 inches (0.7 m) from the wall or screen. The largest the image can be is 300" (7.6 m) when the projector is about 393.7 inches (10 m) from the wall or screen. -
Page 14: Throw Distance And Screen Size
Throw Distance and Screen Size The following shows the proper relative positions of the projector and screen. Refer to the table to determine the position of installation. Distance Chart Screen Width Screen Diagonal Screen Height ( B ) ( D ) -
Page 15: Making Connections
Making Connections NOTE: When using with a notebook PC, be sure to connect between the projector and the notebook PC before turning on the power to the notebook PC. In most cases signal cannot be output from RGB output unless the notebook PC is turned on after connecting with the projector. -
Page 16: To Connect Scart Output (Rgb
SCART is a standard European audio-visual connector for TVs, VCRs and DVD players. It is also referred to as Euro-connector. NOTE: The ADP-SC1 SCART adapter is obtainable from your NEC dealer in Eu- rope. Contact your NEC dealer in Europe for more information. -
Page 17: Connecting Your Dvd Player
Connecting Your DVD Player Audio Equipment AUDIO IN You can connect your projector to a DVD player with component output or Video output. To do so, simply: 1. Turn off the power to your projector and DVD player. 2. If your DVD player has the component video (Y,Cb,Cr) output, use a... -
Page 18: Connecting Your Vcr Or Laser Disc Player
To make these connections, simply: 1. Turn off the power to the projector and VCR, laser disc player or document camera. 2. Connect one end of your RCA cable to the video output connector on the back of your VCR or laser disc player, connect the other end to the Video input on your projector. -
Page 19: Projecting An Image (Basic Operation
Failure to do so may cause damage to the projector. To turn on the main power to the projector, press the Main Power switch to the ON position ( I ). -
Page 20: Selecting A Source
Using the cabinet buttons Press any one of the RGB, VIDEO or S-VIDEO buttons. NOTE: If no input signal is available, the projector will display a blue background (factory preset). Adjusting the Picture Size and Position Place your projector on a flat level surface and ensure that the projector is square to the screen. -
Page 21: Correcting The Vertical Keystone Distortion
Note that the vertical keystone angle can be corrected between 30 de- grees upward and 30 degrees downward of projector tilt from level. NOTE: Keystone correction angle could be less than 30 degrees for some sig- nals that have a high resolution or frequency such as UXGA. -
Page 22: Optimizing Rgb Picture Automatically
Turning off the Projector To turn off the projector: First, press the POWER (ON/STAND BY) but- ton on the projector cabinet or the POWER OFF button on the remote control. The “Power Off / Are you sure?” message will appear. -
Page 23: Convenient Features
• If no buttons are pressed within 60 seconds, the PJ button's light goes out to indicate that you are in the Computer mode. To enable the projector menu operation again, press the PJ button to light red. -
Page 24: Turning Off The Image And Sound
1. Press the MAGNIFY (+) button to magnify the picture. To move the magnified image, use the SELECT button. 2. Return the image to the original size. Getting the Information You get the information about the signal and projector settings. HELP Display Information MAGNIFY... -
Page 25: Using On-Screen Menu
NOTE: The on-screen menu may not be displayed correctly while interlaced mo- tion video image is projected. 1. Press the MENU button on the remote control or projector cabinet to display the Menu. 2. Press the SELECT GH buttons on the remote control or the projec- tor cabinet to highlight the menu for the item you want to adjust or set. -
Page 26: List Of Menu Items
Off, Low, High Auto Adjust On, Off Vertical Horizontal Clock Phase Source Index, Horizontal Frequency, Vertical Frequency, Sync Polarity Signal Type, Video Type, Sync Type, Interlace Remaining Lamp Time, Lamp Hour Meter, Filter Usage, Projector Usage Current Signal All Data E-24... -
Page 27: Menu Elements
Menu Elements Source Highlight Menu windows or dialog boxes typically have the following elements: Title ... Indicates the menu title. Highlight ... Indicates the selected menu or item. Source ... Indicates the currently selected source. Solid triangle ... Indicates further choices are available. A highlighted triangle indicates the item is active. -
Page 28: Brightness/Contrast/Sharpness/Color/Hue
Black Detail ... For dark portions of a picture Natural ... Normal settings Image Enabling Auto Keystone <Auto Keystone> This feature allows the projector to detect its tilt and correct vertical distortion automatically. To turn on the Auto Keystone feature, select “On”. Correcting Vertical Keystone Distortion Manually <Keystone>... -
Page 29: Selecting Aspect Ratio [ Aspect Ratio]
This option allows you to select two modes for fan speed: high-speed mode and normal speed mode. When you wish to cool down the temperature inside the projector quickly, select “On”. NOTE: Enable High Speed Fan mode if you continue to use the projector for consecutive days. E-27 ness). -
Page 30: Page2
Normally select “RGB/Component” and the projector automatically detects a component signal. However there may be some compo- nent signals that the projector is unable to detect. If this is the case, select “Component”. Select “Scart” for the European Scart. <Video & S-Video System Select>... -
Page 31: Default
Resets the lamp clock back to zero. Selecting this option displays submenu for a confirmation. NOTE: The projector will turn off and go into standby mode after 2100 hours (up to 3100 hours in Eco mode) of service. If this happens, press the “Help” button on the remote control for ten seconds to reset the lamp clock back to zero. -
Page 32: Maintenance
3. Insert a new lamp housing until the lamp housing is plugged into the socket. CAUTION Do not use a lamp other than the NEC replacement lamp (VT60LP). Order this from your NEC dealer. Secure it in place with the two screws. -
Page 33: Cleaning
Cleaning Cleaning or Replacing the Filter The air-filter sponge keeps the inside of the projector from dust or dirt and should be cleaned after every 100 hours of operation (more often in dusty conditions). If the filter is dirty or clogged, your projector may over- heat. -
Page 34: Troubleshooting
TROUBLESHOOTING This section helps you resolve problems you may encounter while setting up or using the projector. Power Indicator Indicator Condition Blinking light Green blinking Orange blinking Green Steady light Orange Status Indicator Indicator Condition Blinking light Red blinking Green blinking... - Page 35 • Make sure there are no obstacles between you and the projector. • Stand within 22 feet (7 m) of the projector. See page E-10. • Make sure that you are in the Projector mode and the PJ button lights in red. If not, press the PJ button. See page E-21.
-
Page 36: Specifications
Horizontal Resolution NTSC / NTSC4.43/PAL/PAL-M/PAL-N/PAL60: 550 TV lines SECAM: 350 TV lines YCbCr: 800 TV lines RGB: VT660/VT560 / 1024 dots (H) 768 dots (V), VT460 / 800 dots (H) 600 dots (V) External Control RS232, IR Sync Compatibility Separate Sync / Composite Sync / Sync on G... -
Page 37: Cabinet Dimensions
APPENDIX Cabinet Dimensions 89(3.5") Pin Assignments of D-Sub RGB Input Connector Mini D-Sub 15 Pin Connector Signal Level Video signal : 0.7Vp-p (Analog) Sync signal : TTL level 310(12.2") Pin No. RGB Signal (Analog) Green or Sync on Green Blue Ground Ground Red Ground... -
Page 38: Compatible Input Signal List
# : Images in above flagged with # are compressed with Advanced AccuBlend on VT660/VT560. @ : Images in above flagged with @ are compressed with Advanced AccuBlend on VT460. NOTE: Some composite sync signals may not be displayed correctly. -
Page 39: Cable Connection
Parity: Stop bit: X on/off: Communications procedure: PC Control Connector (DIN-8P) To GND of PC NOTE: Pins 2, 3, 5, 6 and 8 are used inside the projector. E–37 19200 bps 8 bits No parity One bit None Full duplex... -
Page 40: Travelcare Guide
TravelCare Guide TravelCare - a service for international travelers This product is eligible for "TravelCare", NEC's unique international war- ranty. Please note that TravelCare coverage differs in part from coverage un- der the warranty included with the product. Services offered with TravelCare... - Page 41 +81 465 85 2393 Email Address: support_pjweb@nevt.nec.co.jp WEB Address: http://www.nec-pj.com (Regions Covered) Japan* NEC Hong Kong Ltd. Address: 11th Floor, Tower B, New Mandarin Plaza, 14 Science Museum Road, Tsim Sha Tsui East, Kowloon, Hong Kong Telephone: +852 2369 0335...
- Page 42 Date: TO: NEC or NEC's Authorized Service Station: (Company & Name with signature) Dear Sir (s), I would like to apply your TravelCare Service Program based on attached registration and qualification sheet and agree with your following conditions, and also the Service fee will be charged to my credit card account, if I don't return the Loan units within the specified period.
- Page 43 3) Any fault in the attachments or associated products or components (whether or not supplied by NEC or its agents which do not form part of the Product covered by this warranty); 4) Any act of God, fire, flood, war, act of violence or any similar occur- rence;...
- Page 44 7N950141 E-41...
Need help?
Do you have a question about the VT460 and is the answer not in the manual?
Questions and answers