Table of Contents
Advertisement
Quick Links
Download this manual
See also:
User Manual
Digital@nywhere-ATSC Installation Manual
Chapter 1: Digital@nywhere-ATSC Hardware Installation .............................................................................. 2
1.1 Package Contents ................................................................................................................................. 2
1.2 System Requirements........................................................................................................................... 2
1.3 Hardware Installation........................................................................................................................... 2
Chapter 2 : Digital@nywhere-ATSC Drivers And Utilities Setup..................................................................... 3
Chapter 3: Power Cinema Software Installation................................................................................................ 5
Chapter 4: Remote Control Layout .................................................................................................................... 8
Contents
1
V1.10
Advertisement
Table of Contents

Related Manuals for MSI Digital@nywhere-ATSC


Summary of Contents for MSI Digital@nywhere-ATSC
- Page 1 Chapter 1: Digital@nywhere-ATSC Hardware Installation ................2 1.1 Package Contents ..........................2 1.2 System Requirements........................... 2 1.3 Hardware Installation........................... 2 Chapter 2 : Digital@nywhere-ATSC Drivers And Utilities Setup..............3 Chapter 3: Power Cinema Software Installation....................5 Chapter 4: Remote Control Layout ........................8...
-
Page 2: Chapter 1: Digital@Nywhere-Atsc Hardware Installation
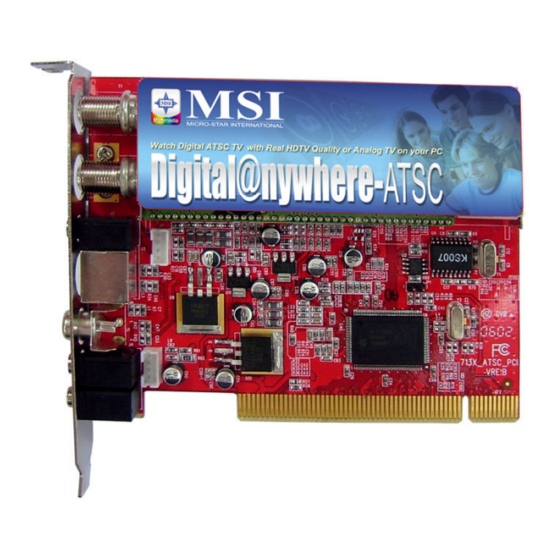
Chapter 1: Digital@nywhere-ATSC Hardware Installation 1.1 Package Contents Unpack your Digital@nywhere-ATSC HDTV package and make sure that all items are included. The following items should be included in your package: Digital@nywhere-ATSC PCI Card Remote control and remote sensor Audio cable... -
Page 3: Chapter 2 : Digital@Nywhere-Atsc Drivers And Utilities Setup
Chapter 2 : Digital@nywhere-ATSC Drivers And Utilities Setup The Digital@nywhere-ATSC package comes with complete Windows software utilities. These utilities can be found on the installation CD included in the package. Before installation, we recommend that you exit all background programs. These include applications such as anti-virus software and system monitoring applications. - Page 4 Check “Next” to install the BDA drivers. Click “Start” to begin installing MSI Digital@nywhere-ATSC BDA driver, please wait for a minute. Choose “Yes, I want to restart my computer now” and click “Finish” to restart your computer and activate the drivers.
-
Page 5: Chapter 3: Power Cinema Software Installation
Chapter 3: Power Cinema Software Installation After the drivers are installed, install “Power Cinema” software by following the steps below. 1. Click “Power Cinema” from autorun then the installation wizard of Power Cinema will guide you through installation. 2. Select the language you want to install. 3. - Page 6 4. Read the license agreement and click “Yes” to install Power Cinema. 5. Enter the User Name, Company Name and CD-Key, then click “Next” to install. 6. Click “Next” to install or click “Browse” to select the folder you want to install.
- Page 7 7. Select the folder and click “Next” to continue. 8. Click “Next” to install CyberLink Power Cinema on your computer. 9. Click “Finish”. Note: For user manual of Power Cinema, click “Browse” and choose Power Cinema folder.
-
Page 8: Chapter 4: Remote Control Layout
Chapter 4: Remote Control Layout :Power key :Time Shifting :Standby :Stop :Number Keys (0~9) :Record :Back :Fast Rewind & Forward :Enter :Previous & Next Chapter :Channel Up / Down :Pause & Play :Volume Up / Down :Stop :Mute :Back to previous :Stereo :Enter TV Manual :View the TV recorded list... - Page 9 Key Definitions Description MCE 2005 PowerCinema Put the system in standby/ wake the system Number Keys (0~9) Back previous step Enter Stereo Switch Video Source Zoon In / Out Shut Down Mouse Control Pad or Arrow keys Enter Time Shifting Stop Record Fast Rewind &...
- Page 10 Hot Key MCE 2005 PowerCinema Back to previous page Escape current screen Enter TV Manual Capture photo Record TV list Enter TV Manual View captured photo Information of Electronic Program Guide Enter Video Manual View Captured photo View recorded Music Enter Video Manual Guide TELTXT/ClosedCaption...
- Page 11 CyberLink PowerCinema 4 User ’s Guide...
- Page 12 Copyright and Disclaimer All rights reserved. No part of this publication may be reproduced, stored in a retrieval system, or transmitted in any form or by any means electronic, mechanical, photocopying, recording, or otherwise without the prior written permission of CyberLink Corporation. To the extent allowed by law, POWERCINEMA IS PROVIDED “AS IS”, WITHOUT WARRANTY OF ANY KIND, EITHER EXPRESS OR IMPLIED, INCLUDING WITHOUT LIMITATION ANY WARRANTY FOR...
-
Page 13: Table Of Contents
Contents Overview ......................1 Home Page ...................1 Navigation Controls ................2 Browsing for Media Content..............2 Player Controls for Mouse Use ............3 Remote Control ..................3 Settings....................4 General Settings ................4 Display Settings ................5 TV ........................6 Watching TV..................6 Instant Replay ..................7 TV Recording Schedules ..............7 TV Preview ..................7 TV Settings ..................8 Signal Settings................8... -
Page 14: Overview
CyberLink PowerCinema Chapter 1: Overview PowerCinema is an integrated multimedia player. The Home page displays the available media types, which you can scroll through using your mouse's scroll wheel, the keyboard up/down arrows, and the Up/Down buttons on the remote. To begin enjoying media, select a media type on the Home page. -
Page 15: Navigation Controls
CyberLink PowerCinema Navigation Controls The navigation bar across the top of the window contains a number of buttons for navigating around the PowerCinema program. Select the Home icon to return to the Home page. Select the Back icon to return to a previous page. The Minimize, Full Screen/ Window, and Close buttons have standard Windows behavior. -
Page 16: Player Controls For Mouse Use
CyberLink PowerCinema Player Controls for Mouse Use To play a media file, select its thumbnail (or icon) in the content browsing area. The player control panel appears whenever you move the mouse, then automatically disappears several seconds after the mouse stops moving. Standard playback buttons include Stop, Play/Pause, Previous, Rewind, Fast Forward, and Next. -
Page 17: Settings
CyberLink PowerCinema Settings Selecting Settings on the Home page opens a page of options for configuring PowerCinema. General Settings PowerCinema Help opens this help system. Display Settings opens a page with options for configuring your display device. (See "Display Settings" on page 5.) Audio Settings opens a page with options for configuring... -
Page 18: Display Settings
CyberLink PowerCinema Display Settings Use the Screen Ratio to indicate if you have a standard (4:3) or widescreen (16:9) display. 16:9 (or 4:3) Movie Display Type determines how movies and videos are converted to fit the screen when they do not match the screen ratio. Letterbox keeps the video display undistorted and fills the extra space with black bars. -
Page 19: Watching Tv
CyberLink PowerCinema Chapter 2: PowerCinema allows you to watch TV on your computer. You can watch TV programs, schedule recordings, and watch recorded TV shows. Select TV on the Home page to open the main TV page. Watching TV Select Video Input to choose the source of your TV broadcasts. The TV program will be displayed in display window. -
Page 20: Instant Replay
CyberLink PowerCinema Instant Replay By default, the instant replay function is enabled in PowerCinema. To create an instant replay, PowerCinema records the TV broadcast as a file, creating a slight lag between the broadcast and the TV content that you watch. You can navigate forward and backward to create an instant replay or to skip over commercials. -
Page 21: Tv Settings
CyberLink PowerCinema TV Settings TV settings are organized into the following topics: Signal Settings, Channel Settings, Recording Settings, and Guide Settings. Restore Default Settings returns all settings PowerCinema their original values. Signal Settings The Signal Mode option allows you to set your TV signal as Digital or Analog. In the Video Input option, select if your TV receives signals from an antenna or a cable. -
Page 22: Recording Settings
CyberLink PowerCinema disable a channel in the list, select it, then choose Deselect. Disabled channels are not available for watching when you return to the TV page. To rename a channel in the list, select it, choose Rename, then enter the new name. If you modify any settings on this page, you must select Apply for these changes to take effect. -
Page 23: Videos
CyberLink PowerCinema Chapter 3: Videos PowerCinema allows you to watch video files (in .dat, .mpg, .mpe, .mpv, .avi, .asf, .asx, .mpeg, .div, .divx, .wm, .wmv, .m1v, .m1s, .m2v, .vro, .vob, .dvr-ms, MPEG-1, and MPEG-2 formats) on your computer. (You may need to install a special driver to view .divx and .dvr-ms files.) Select Videos on the Home page to open the Videos function. -
Page 24: Video Settings
CyberLink PowerCinema through the drives and folders to locate the videos you want to watch. Video Settings The Default Video Folder option sets the folder that appears by default when the Videos function is opened. To change folders, click the arrow next to this option, then select a new folder.
Need help?
Do you have a question about the Digital@nywhere-ATSC and is the answer not in the manual?
Questions and answers