Advertisement
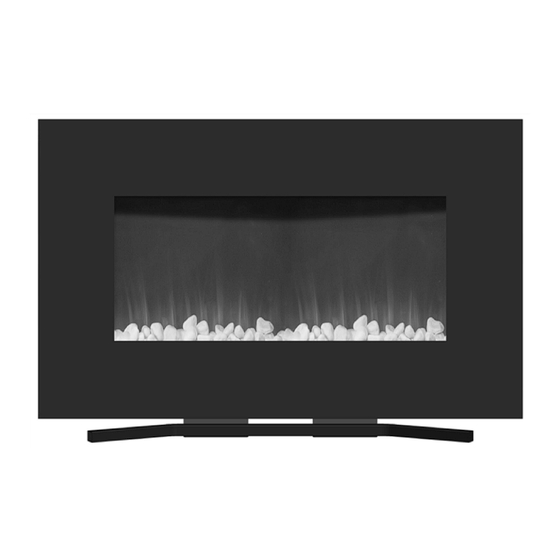
Flat Wall Mounted / Free stand Electric Fireplace
Read and understand this entire owner's manual, including all safety
information, before plugging in or using this product. Failure to do so could
WARNING
result in fire, electric shock, or serious personal injury.
Keep this owner's manual for future reference. If you sell or give this product
CAUTION
away, make sure this manual accompanies this product.
Model Number: WS-G-03
OWNER'S MANUAL
Wall Hanging Mode
Freestanding Mode
AC 220-240V 50HZ
1400-1600W
Advertisement
Table of Contents

Summary of Contents for Northwest WS-G-03
- Page 1 Flat Wall Mounted / Free stand Electric Fireplace Model Number: WS-G-03 OWNER’S MANUAL Wall Hanging Mode Freestanding Mode AC 220-240V 50HZ 1400-1600W Read and understand this entire owner’s manual, including all safety information, before plugging in or using this product. Failure to do so could WARNING result in fire, electric shock, or serious personal injury.
-
Page 2: Important Safety Information
IMPORTANT SAFETY INFORMATION! WARNING Read all instructions before using this heater! This heater is hot when in use. To avoid burns, DO NOT let bare skin touch hot surfaces. If provided, use handles when moving this heater. Keep combustible materials, such as furniture, pillows, bedding, papers, clothes, and curtains at least 3 feet (0.9m) from the front of the heater, and keep them away from the sides and rear. - Page 3 WARNING For residential use only! NOT for commercial use! Any commercial or public use of this heater voids all warranties, and could cause injury. This product is not intended to be a primary heat source. It is for supplemental heat only. ...
-
Page 4: Parts And Hardware
Preparation This product includes a GLASS panel! Always use extreme caution when handling glass. Failure to do so could result in personal injury or property damage. Remove all parts and hardware from the carton and place them on a clean, soft, dry surface. Parts and assembly steps are grouped for free-standing or wall-hanging use. -
Page 5: Installation And Assembly
Installation and Assembly Step 1. Find a safe location. Rear View of Fireplace Minimum clearance on each side: 19.7” (50 cm). Minimum 39.4” Minimum clearance below: (100 cm) 19.7” (50 cm). Minimum clearance above: 39.4” (100 cm). 19.7” 19.7” Minimum clearance from the front (50 cm) (50 cm) and sides: 19.7”... - Page 6 STEP2 ) Using the three wood screws (B) to fix the wall bracket , with wood screws thread the wall bracket and to lock with the drywall anchors, please tighten all wood screws.
- Page 7 STEP 3) Have two people lift the fireplace machine up and insert the hooks ( 2 hooks on back of fireplace box) to the wall bracket slot. STEP 4) With the fireplace installed safely, then using screws driver to lock the bracket and fireplace with two ST5x10 (D) screws in both sides.Check the appliance for stability ensuring that the appliance will not pull free from the wall.
- Page 8 Installation for Pebbles/Crystals...
- Page 9 NOTE: To install decorative pebbles, follow these steps. Have a capable adult help you. STEP 5A. While one person holds the glass panel, remove the two screws at the top edge of the fireplace with a Phillips (+) screwdriver. STEP 5B. Together, carefully remove the front glass panel and set it aside on a clean soft surface. STEP 5C.
-
Page 10: Operation
Operation Read and understand this entire owner’s manual, including all safety information, before plugging in or using this product. Failure to do so could result in electric shock, fire, serious injury, or death. Power Make sure the ON/OFF switch, located on the left side panel, is in the OFF position. Plug the power cord into a 220-240 Volt 15 Amp grounded outlet (see IMPORTANT SAFETY INFORMATION on Pages 2 and 3). - Page 11 COLOR button: Makes the color flame 1. Press once. Flame color effect gets effect changing. changing. NOTE: color effect stays on until power 2. Press again until desired setting is button is turned off. Color flame effect reached.total 10 colours. must be on for heater to turn on.
-
Page 12: Care And Maintenance
NEVER dispose of batteries in fire. Failure to observe this precaution may result in an explosion. Dispose of batteries at your local hazardous material processing center. Care and Maintenance Cleaning ALWAYS turn the heater OFF and unplug the power cord from the outlet before cleaning, performing maintenance, or moving this fireplace. -
Page 13: Troubleshooting
Troubleshooting WARNING DISCONNECT THE APPLIANCE COMPLETELY AND LET COOL PRIOR TO ANY SERVICE. ONLY A QUALIFIED SERVICE PERSON SHOULD SERVICE AND REPAIR THIS ELECTRIC APPLIANCE. Problem Possible Cause Solution 1. Reset switch by turning 1. Fireplace turns off 1. Fireplace has overheated main power switch off and safety device has and will not turn on. - Page 14 1. Turn unit off and unplug unit 7. Heater does not 1. Thermal switch has been for 10 minutes. Plug back in provide heat when tripped. turned on. and turn unit on. If plug cannot be reached, follow directions for tripped circuit breaker.


Need help?
Do you have a question about the WS-G-03 and is the answer not in the manual?
Questions and answers