Leaf Aptus II Installation Manual
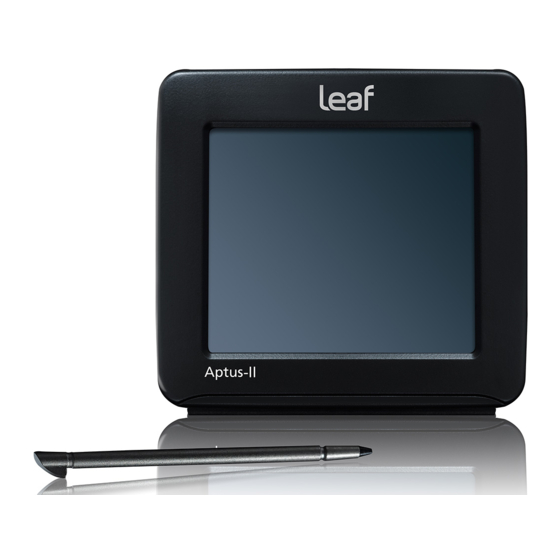
Digital camera back
Hide thumbs
Also See for Aptus II:
- User manual (80 pages) ,
- Installation manual (80 pages) ,
- Calibration manual (12 pages)
Table of Contents
Advertisement
Quick Links
Advertisement
Chapters
Table of Contents

Related Manuals for Leaf Aptus II


Summary of Contents for Leaf Aptus II
-
Page 1: Installation Guide
Leaf Aptus-ll Installation Guide 653-00991E-EN Rev A 731-00426E-EN Rev A... -
Page 3: Fcc Compliance
FCC Compliance Any Kodak equipment referred to in this document has been tested and found to comply with the limits for a Class A digital device, pursuant to part 15 of the FCC Rules. These limits are designed to provide reasonable protection against harmful interference when the equipment is operated in a commercial environment. -
Page 4: Limitation Of Liability
You understand and agree that, except as may be stated specifically in your contract, Kodak shall not be liable for any direct, indirect, incidental, special, consequential or exemplary damages, including but not limited to, damages for loss of profits, goodwill, use, data or other intangible losses (even if Kodak has been advised of the possibility of such damages), resulting from: (i) the use or the inability to use the product or software;... -
Page 5: Obtaining Warranty Service
Leaf Limited Warranty Warranty Coverage Leaf warrants the Leaf product against defects in materials and workmanship for a period of one (1) year from the date of original retail purchase. Should you discover a defect, Leaf will, as its option, repair or exchange the Leaf product at no charge to you provided that you notify Leaf during the warranty period. -
Page 7: Table Of Contents
Contents Safety Precautions 1 Introduction About This Guide ............................. 2 Product Overview ............................. 2 2 Using the Portable Hardware Items Required for the Installation ......................6 Inserting the Compact Flash ........................9 Removing the Compact Flash ......................... 10 Inserting the Battery ..........................11 Removing the Battery .......................... - Page 8 Leaf Aptus Installation Guide 5 Hasselblad H1 Before Getting Started ........................... 40 Items Required for the Installation ....................40 Quick Installation Reference ........................40 Installation Procedures..........................42 Installing the Leaf Aptus Mask ......................42 Attaching the Leaf Digital Camera Back to the Camera Body ............43 Connecting the Cables ........................
- Page 9 Contents xiii 9 Mamiya RZ67/RZ67ProII/ RZ67ProIID Before Getting Started..........................80 Items Required for the Installation....................80 Quick Installation Reference........................81 Installation Procedures..........................83 Installing the Focusing Screen Mask ....................83 Attaching the Leaf Digital Camera Back to the Camera Body ............84 Connecting the Cables ........................
-
Page 11: Safety Precautions
Safety Precautions Caring for the Leaf Aptus Digital Camera Back........xvi Battery Label Caution Statement............xvii Charger Safety Information..............xvii... - Page 12 Safety Precautions Caring for the Leaf Aptus Digital Camera Back WARNING: Never open or disassemble any of the Leaf Aptus digital camera back parts, in particular the protective infrared (IR) filter glass. Figure 1: Protective IR filter glass on the underside of the Leaf Aptus digital camera back Note: For information about cleaning the protective IR filter glass, see Chapter 12, “Caring for the IR Filter Glass”.
- Page 13 Battery Label Caution Statement xvii Battery Label Caution Statement The battery label caution statement is located on each battery. WARNING: Battery can explode, leak, or catch on fire if exposed to high temperatures or fire, if opened, or if disassembled. Use the battery with the Leaf Aptus digital camera back only.
- Page 14 xviii Safety Precautions below 0°C/32°F will render the battery inoperative. If you are planning to shoot in an environment at these temperatures, carry the battery pack in a pocket to keep it warm, then attach it just prior to shooting. •...
- Page 15 Mesures de sécurité Précautions pour le dos numérique Leaf Aptus ........xix Précautions d’utilisation de la batterie ..........xxi Informations relatives à la sécurité du chargeur ........xxi...
- Page 16 Mesures de sécurité Précautions pour le dos numérique Leaf Aptus AVERTISSEMENT : ne jamais ouvrir ou démonter les pièces du dos numérique Leaf Aptus, en particulier le verre filtrant de protection infrarouge (IR). Figure 1: verre filtrant IR sur le côté inférieur du dos numérique Leaf Aptus Remarque : pour plus d’information sur le nettoyage du verre filtrant IR, voir Caring for the IR Filter Glass (Précautions pour le Verre filtrant IR) page 103 de ce document.
- Page 17 Précautions d’utilisation de la batteri Précautions d’utilisation de la batterie Les précautions d’utilisation de la batterie sont visibles sur chaque batterie. AVERTISSEMENT : la batterie peut exploser, fuir ou prendre feu si elle est exposée à des températures élevées ou à une flamme, si elle est ouverte ou démontée.
- Page 18 xxii Mesures de sécurité • Les packs de batterie au lithium sont petits mais leur puissance est importante. Cependant, s’ils sont exposés à une température excessivement basse (au-dessous de 10°C/50°F), le temps effectif de fonctionnement diminue considérablement. Une exposition à des températures inférieures à...
- Page 19 Sicherheitshinweise Pflege des Rückteils der Leaf Aptus-Digitalkamera ......xxiv Warnhinweis für Akkus ..............xxiv Sicherheitshinweise zu Ladegeräten ..........xxv...
- Page 20 xxiv Sicherheitshinweise Pflege des Rückteils der Leaf Aptus-Digitalkamera ACHTUNG: Die Komponenten des Rückteils der Leaf Aptus-Digitalkamera dürfen unter keinen Umständen geöffnet oder zerlegt werden. Das gilt vor allem für das Infrarot-Filterglas. Abbildung 1: Infrarot-Filterglas unten am Rückteil der Leaf Aptus-Digitalkamera Hinweis: Nähere Informationen zum Reinigen des Infrarot-Filterglases finden Sie im Abschnitt Caring for the IR Filter Glass (Pflegehinweise für das Infrarot- Filterglas) auf Seite 103 des vorliegenden Dokuments.
- Page 21 Sicherheitshinweise zu Ladegeräten Sicherheitshinweise zu Ladegeräten ACHTUNG: Wenn der Akku Feuer ausgesetzt wird, kann er explodieren oder giftige Chemikalien freisetzen. Akku nur mit dem angegebenen Netzanschluss verwenden. Keine metallischen Gegenstände an die Anschlüsse des Ladegeräts halten. Verletzungsgefahr! Es sind keine vom Benutzer zu wartenden Komponenten vorhanden.
- Page 22 xxvi Sicherheitshinweise • Für den Transport des Akkus empfiehlt sich eine Plastiktüte. • Wenn die Umgebungstemperatur beim Aufladen gering ist, kann der Ladevorgang länger dauern oder überhaupt nicht funktionieren. Es wird daher empfohlen, den Akku bei Zimmertemperatur (10 bis 30 °C) aufzuladen. •...
- Page 23 Precauciones en materia de seguridad Cuidado del respaldo para cámaras digitales Leaf Aptus....xxviii Etiqueta con instrucciones de precaución de la batería .....xxix Información de seguridad del cargador ..........xxix...
- Page 24 xxviii Precauciones en materia de seguridad Cuidado del respaldo para cámaras digitales Leaf Aptus ADVERTENCIA: No se debe abrir ni desmontar nunca ninguna de las piezas del respaldo para cámaras digitales Leaf Aptus, especialmente el vidrio del filtro protector contra infrarrojos (IR). Ilustración 1: Vidrio del filtro protector contra infrarrojos de la parte inferior del respaldo para cámaras digitales Leaf Aptus Nota: Para obtener información sobre la limpieza del vidrio del filtro protector...
- Page 25 Etiqueta con instrucciones de precaución de la batería xxix Etiqueta con instrucciones de precaución de la batería La etiqueta con instrucciones de precaución de la batería se encuentra en todas las baterías. ADVERTENCIA: La batería podría explotar o arder y su contenido podría derramarse si se expusiera a una temperatura elevada o al fuego, así...
- Page 26 Precauciones en materia de seguridad • Las baterías de litio son pequeñas pero tienen gran capacidad de potencia. Sin embargo, si la somete a temperaturas muy bajas (por debajo de los 10 ºC), el tiempo de funcionamiento del dispositivo se reduce considerablemente. La exposición a temperaturas por debajo de los 0 ºC inutilizaría la batería.
- Page 27 Misure di sicurezza Manutenzione del retro della fotocamera digitale Leaf Aptus ..xxxii Dichiarazione di attenzione sull'etichetta della batteria....xxxii Informazioni sulla sicurezza del caricabatteria.........xxxiii...
- Page 28 xxxii Misure di sicurezza Manutenzione del retro della fotocamera digitale Leaf Aptus ATTENZIONE: non aprire o smontare le parti del retro della fotocamera digitale Leaf Aptus, in particolare il vetro del filtro protettivo a infrarossi (IR). Figura 1: Vetro del filtro protettivo a infrarossi situato sul lato inferiore del retro della fotocamera digitale Leaf Aptus Nota: per informazioni sulla pulizia del vetro del filtro protettivo a infrarossi, vedere Caring for the IR Filter Glass (Manutenzione del vetro del filtro a infrarossi)
- Page 29 Informazioni sulla sicurezza del caricabatteria xxxiii Informazioni sulla sicurezza del caricabatteria ATTENZIONE: se smaltite nel fuoco, è possibile che le batterie esplodano o rilascino sostanze chimiche tossiche. Utilizzare esclusivamente gli alimentatori e le batterie specificati. Per prevenire ferite o bruciature, evitare che oggetti in metallo entrino in contatto con i terminali del caricabatteria.
- Page 30 xxxiv Misure di sicurezza • Trasportare il blocco batteria utilizzando un sacchetto di plastica. • Se la temperatura circostante è bassa durante il processo di ricarica, è possibile che quest'ultimo richieda più tempo oppure che non venga eseguito. Si consiglia di caricare il blocco batteria a temperatura ambiente (compresa tra 10 °C e 30 °C).
- Page 31 Veiligheidsmaatregelen De Leaf Aptus digitale camera achterwand veilig gebruiken ...xxxvi Waarschuwingslabel voor de batterij ..........xxxvii Veiligheidsinformatie voor de batterijlader........xxxvii...
- Page 32 xxxvi Veiligheidsmaatregelen De Leaf Aptus digitale camera achterwand veilig gebruiken WAARSCHUWING: Open of haal de onderdelen van de Leaf Aptus digitale camera achterwand, in bijzonder het infrarode (IR) beschermglas, nooit uit elkaar. Afbeelding 1: Het IR beschermglas onderaan de Leaf Aptus digitale camera achterwand Opmerking: Zie Caring for the IR Filter Glass (Het IR beschermglas schoon houden) op pagina 103 in dit document voor meer informatie over het reinigen...
- Page 33 Waarschuwingslabel voor de batterij xxxvii Waarschuwingslabel voor de batterij Op iedere batterij is het volgende waarschuwingslabel aangebracht. WAARSCHUWING: De batterij kan ontploffen, gaan lekken of vuur vatten wanneer deze wordt blootgesteld aan vuur of hoge temperaturen, of wanneer deze wordt geopend of uit elkaar wordt gehaald. Gebruik de batterij alleen in de Leaf Aptus digitale camera achterwand.
- Page 34 Veiligheidsmaatregelen • Lithiumbatterijen zijn klein maar hebben een grote voedingscapaciteit. Als u ze echter blootstelt aan lage temperaturen (onder 10°C), kan de effectieve werkingsduur aanzienlijk korter worden. Bij blootstelling aan temperaturen onder de 0°C zal de batterij niet meer werken. Als u van plan bent te fotograferen in een omgeving met dergelijke temperaturen, kunt u de batterij het beste in uw zak bewaren zodat de batterij warm blijft en deze pas plaatsen vlak voor het fotograferen.
- Page 35 Precauções de segurança Cuidados com o back da câmera digital Leaf Aptus......xl Etiqueta com instrução de cuidado com a bateria ......xli Informações de segurança do carregador ..........xli...
- Page 36 Precauções de segurança Cuidados com o back da câmera digital Leaf Aptus AVISO: Nunca abra ou desmonte nenhuma parte do back da câmera digital Leaf Aptus, principalmente o vidro do filtro protetor contra infravermelho (IV). Figura 1: Vidro de filtro protetor contra infravermelho na parte inferior do back da câmera digital Leaf Aptus Observação: Para informações sobre como limpar o vidro de filtro protetor contra infravermelho, consulte Caring for the IR Filter Glass (Cuidados com...
- Page 37 Etiqueta com instrução de cuidado com a bateria Etiqueta com instrução de cuidado com a bateria A etiqueta com instrução de cuidado com a bateria está localizada em cada bateria. AVISO: A bateria poderá explodir, vazar ou pegar fogo se for exposta a altas temperaturas ou ao fogo, ou se for aberta ou desmontada.
- Page 38 xlii Precauções de segurança • As baterias de lítio são pequenas, mas têm grande capacidade de carga. Entretanto, se expostas ao frio extremo (abaixo de 10 °C), o tempo operacional efetivo diminui de forma significativa. A exposição a temperaturas abaixo de 0 °C torna inoperante a bateria. Se câmera for usada em um ambiente com essas temperaturas, carregue a bateria em um bolso para mantê-la aquecida e só...
- Page 39 Правила техники безопасности Leaf Aptus ....xliv х о д з а з а д н и к о м д л я ц и ф р о в о й к а м е р ы ..........xlv П р е д у п р е ж д е н и е н а а к к у м у л я т о р е ..xlv С...
- Page 40 xliv р а в и л а т е х н и к и б е з о п а с н о с т и Leaf Aptus х о д з а з а д н и к о м д л я ц и ф р о в о й к а м е р ы Р...
- Page 41 р е д у п р е ж д е н и е н а а к к у м у л я т о р е р е д у п р е ж д е н и е н а а к к у м у л я т о р е Н...
- Page 42 xlvi р а в и л а т е х н и к и б е з о п а с н о с т и • С л е д у е т и з б е г а т ь в о з д е й с т в и я р я м ы х с о л н е ч н ы х л у ч е й и в...
- Page 43 安全预防措施 保护 Leaf Aptus 数码相机后背 ............xlviii 电池标签上的警告声明 ................xlix 充电器安全信息 ..................xlix...
- Page 44 安全预防措施 xlviii 保护 Leaf Aptus 数码相机后背 警告: 切勿打开或拆卸任何 Leaf Aptus 数码相机后背部件,特别是保护性的 红外线 (IR) 过滤透镜。 图 1: Leaf Aptus 数码相机后背下侧的保护性红外线过滤透镜 注意: 有关清洁保护性红外线过滤透镜的信息,请参阅本文档 103 页上的 Caring for the IR Filter Glass (保护红外线过滤透镜) 。 不要把 Leaf Aptus 数码相机后背暴露在极端的温度条件下,例如低 于 0C/ 32F 或高于 40C/104F。 不要把...
- Page 45 电池标签上的警告声明 xlix 电池标签上的警告声明 每节电池上都有电池标签警告声明。 警告: 如果将电池暴露在高温下或火中、打开或拆卸,可能会爆炸、漏液或 着火。 只在 Leaf Aptus 数码相机后背使用该电池。 该电池不应用于其他设 备。 充电器安全信息 警告: 如果被置于明火内,电池可能会爆炸或释放有毒化学物。 请仅使用指 定的电源和电池。 为防止人身伤害或烧毁电池,请不要让金属物体接触充电器 端子。 充电器内没有用户可以修理的部件。 请勿拆卸。 警告: 为降低触电危险,请不要移开顶盖 (或后盖) 。 充电器内没有用户可 以修理的部件。 如需维修,请向专业维修人员求助。 • 不要使用该充电器对 Aptus 数码相机后背专用锂离子电池以外的 其它充电电池进行充电。 否则可能导致失火或爆炸。 • 切勿以任何方式拆卸或改装充电器。 • 使充电器远离潮气和水。 • 不要摔落,或者强烈撞击或震动充电器。...
- Page 46 安全预防措施 • 携带电池时,请将其放在塑料包内。 • 如果充电时周围温度很低,充电时间可能延长或者无法充电。 建 议您在室温 (10°C 至 30°C)下对电池进行充电。 • 不要短路,以免烧毁电池。 • 把充电器放在儿童伸手拿不到的地方。 • 充电一完成就拔出充电器的电源。 • 只使用原装适配器 12V 直流电源或车载蓄电池对充电器供电。 • 保持所有触点清洁。 • 不要对任何触点施加过大的力。 • 不要把电池连在充电器上过久。...
- Page 47 安全上のご注意 Leaf Aptus デジタル カメラ バックのお手入れ..........lii バッテリー注意事項ラベル ................liii 充電池の安全性に関する情報 ..............liii...
- Page 48 安全上のご注意 Leaf Aptus デジタル カメラ バックのお手入れ 警告: Leaf Aptus デジタル カメラ バックの部品、特に赤外線(IR)保護フィルター ガラスを開けたり分解したりしないでください。 図 1: Leaf Aptus デジタル カメラ バック裏面の IR 保護フィルター ガラス 注意: IR 保護フィルター ガラスの清掃については、このドキュメントの 103 ページ にある「Caring for the IR Filter Glass(IR フィルター ガラスのお手入れ) 」を参照して ください。 Leaf Aptus デジタル カメラ バックを極度の温度条件(0 ℃ 以下または 40 ℃ 以上)で使用しないでください。...
- Page 49 バッテリー注意事項ラベル liii バッテリー注意事項ラベル バッテリー注意事項ラベルは、各バッテリー上に記載されています。 警告: バッテリーを加熱または焼却したり、開けたり分解したりすると、爆発、液漏 れ、引火などが起こる危険があります。 バッテリーは、Leaf Aptus デジタル カメラ バックのみにご使用ください。 バッテリーを他のデバイスに使用しないでください。 充電池の安全性に関する情報 警告: バッテリーを焼却すると破裂したり有毒ガスが発生する恐れがあります。仕様 にしたがった電源とバッテリーのみを使用してください。怪我ややけどを防ぐため、 充電器の接点に金属が触れないようにしてください。この製品にはお客様が修理でき る部分はありませんので、分解しないでください。 警告: 感電する恐れがありますので、カバー(または背面パネル)を取り外さないで ください。内部にお客様が修理できる部分はありません。修理については専門のサー ビス担当者にお問い合わせください。 • この充電器は、Aptus デジタル カメラ用リチウム イオン バッテリー パック以外のバッテリー パックの充電に使用しないでください。 火災 や破裂の原因になります。 • 充電器を分解したり、改造したりしないでください。 • 充電器を湿気の多い場所で使用したり、水などの液体が触れないよう にしてください。 • 充電器を落としたり、衝撃や振動を与えないでください。 •...
- Page 50 安全上のご注意 • リチウム バッテリー パックは小型で大容量の製品です。 ただし、 10 ℃ 以下の寒冷地で使用する場合、動作時間は著しく短縮されます。0 ℃ 以下の環境で使用すると、バッテリーが機能しない場合もあります。 これらの環境で撮影する場合は、バッテリー パックをポケットなどに 入れて保温し、撮影直前にカメラに装着してください。 • 運搬の際はバッテリー パックをビニール袋に入れてください。 • 充電中の周囲の温度が低いと、充電に時間がかかったり、まったく充 電されない場合があります。 バッテリー パックは室温 (10 ~ 30 ℃) の 場所で充電することをお勧めします。 • 発火する恐れがありますので、バッテリーをショートさせないでくだ さい。 • 充電器を子供の手の届かないところに保管してください。 • 充電が完了したら、電源から充電器を取り外してください。 • 充電する場合は、12V DC アダプターまたはカー チャージャーのみを ご使用ください。...
-
Page 51: Introduction
Introduction About This Guide................2 Product Overview................2... -
Page 52: About This Guide
Chapter 1 – Introduction About This Guide This guide includes the necessary instructions for installing a Leaf® Aptus digital camera back. Each stage in the installation process is explained in the guide as follows: Chapter 2 Using the Portable Read this chapter to learn how to insert and Hardware. - Page 53 Chapter 1 – Introduction raw HDR format (cHDR) that uses lossless compression to reduce file size, and a completely new Leaf Capture application enhance workflow and teamwork both on location and in the studio. Note: The Leaf Capture application, supplied with your Leaf Aptus digital camera back, enables you to capture, view, and manipulate an image so that you can produce a finished product in a single session.
-
Page 55: Using The Portable Hardware
Using the Portable Hardware Items Required for the Installation ............6 Inserting the Compact Flash..............9 Removing the Compact Flash............10 Inserting the Battery................11 Removing the Battery................12 Connecting the Leaf Digital Camera Back to a Power Supply.....13 Using the Stylus ................14 Storing the Leaf Aptus Digital Camera Back ........15 Installing the Digital Magazine ............15 Attaching the Camera Adaptor to the Camera Body ......16 Inserting the Batteries in the Leaf Digital Magazine ......17... -
Page 56: Items Required For The Installation
Chapter 2 – Using the Portable Hardware Items Required for the Installation The following table describes what is included in the Leaf Aptus digital camera back kit and which items in the kit are required for the installation. Important: To avoid installation and operation problems, use only the accessories supplied in the Leaf digital camera back kit. - Page 57 Items Required for the Installation Kit Contents Required for Installation Installation Guide Cleaning supplies (cleaning liquid, cleaning wipes, and (keep on tweezers) hand) External power adaptor Diffusion filter Gray card Case for safe storage of your digital camera back Two batteries Fast charger for lithium ion batteries...
- Page 58 Chapter 2 – Using the Portable Hardware Kit Contents Required for Installation 12V DC power supply Car lead Three cables for the battery charger Cover for the LCD touch screen Back cover Cover for the battery slot Stylus (spare)
-
Page 59: Inserting The Compact Flash
Inserting the Compact Flash Inserting the Compact Flash Open the compact flash door. Open the door Figure 1: The compact flash door. Insert the compact flash. Compact flash Figure 2: Insert the compact flash... -
Page 60: Removing The Compact Flash
Chapter 2 – Using the Portable Hardware Removing the Compact Flash Open the compact flash door, and then press the release button. Release button Figure 3: The compact flash release button... -
Page 61: Inserting The Battery
Inserting the Battery Inserting the Battery Press the button on the underside of the Leaf Aptus digital camera back to remove the battery slot cover. Figure 4: Removing the battery slot cover Press the battery into the recess on the underside of the Leaf Aptus digital camera back, and then slide it across until it snaps into place. -
Page 62: Removing The Battery
Chapter 2 – Using the Portable Hardware Removing the Battery Press the battery release button, and then slide the battery out. Release button Figure 6: Removing the battery... -
Page 63: Connecting The Leaf Digital Camera Back To A Power Supply
Connecting the Leaf Digital Camera Back to a Power Supply Connecting the Leaf Digital Camera Back to a Power Supply Insert the end of the external power adaptor into the FW port on the Leaf Aptus digital camera back. Figure 7: Insert the external power supply adaptor Connect the other end of the external power adaptor to the 12V DC power supply. -
Page 64: Using The Stylus
Chapter 2 – Using the Portable Hardware Using the Stylus The Leaf Aptus digital camera back is supplied with a stylus. Use the stylus to tap the touch screen. Figure 8: The stylus To remove the stylus for use, slide it out of the slot located at the top of the Leaf Aptus digital camera back. -
Page 65: Storing The Leaf Aptus Digital Camera Back
Storing the Leaf Aptus Digital Camera Back Storing the Leaf Aptus Digital Camera Back To protect your digital camera back, store it in the case supplied. Ensure that you place the digital camera back in the case with the sensor cover facing upward. -
Page 66: Attaching The Camera Adaptor To The Camera Body
Chapter 2 – Using the Portable Hardware Attaching the Camera Adaptor to the Camera Body Place the camera adaptor on the bottom of the camera body. Align the screw hole on the adaptor with the screw hole on the camera body (see the illustration Inserting the Batteries in the Leaf Digital Magazine on page 17). -
Page 67: Inserting The Batteries In The Leaf Digital Magazine
Installing the Digital Magazine Inserting the Batteries in the Leaf Digital Magazine Insert the charged batteries into the Leaf digital magazine by placing them on the unit so that the hooks on the side of the batteries fit into the slots on the unit (see Figure 11). Figure 11: Inserting batteries into a Leaf digital magazine Push the batteries in until you hear a click and the batteries lock into place. -
Page 68: Attaching And Removing The Leaf Digital Magazine
Chapter 2 – Using the Portable Hardware Attaching and Removing the Leaf Digital Magazine Important: Only attach/remove a Leaf digital magazine when the Leaf Aptus digital camera back is attached. While holding the Leaf digital magazine with the batteries facing down, slide the Leaf digital magazine into the adaptor at the bottom of the camera body. - Page 69 Installing the Digital Magazine To remove the Leaf digital magazine from the digital camera body: While pressing the release button (see Figure 13) on the side of the camera adaptor, slide the Leaf digital magazine forward. Release button Figure 13: Removing the digital magazine...
-
Page 70: Connecting The Leaf Digital Magazine Firewire Cables
Chapter 2 – Using the Portable Hardware Connecting the Leaf Digital Magazine FireWire Cables WARNING: Incorrectly inserting the Leaf DM FireWire cable connector into the FW port will damage Leaf Aptus. Connect one end of the Leaf DM FireWire cable to the FW port on Leaf Aptus. -
Page 71: Switching The Leaf Digital Magazine On/Off
Using the Tripod U-adaptor Switching the Leaf Digital Magazine ON/OFF Press the button on the left side of the Leaf digital magazine for a few seconds until the green light turns on, and then off. On/Off switch Figure 15: Switching the digital magazine on and off Using the Tripod U-adaptor With the Tripod U-adaptor you can mount the camera body and the Leaf digital magazine on a tripod. - Page 72 Chapter 2 – Using the Portable Hardware To remove from the tripod: Open the locking lever on the side of the Tripod U-adaptor (see 1 in the illustration Mounting the camera and digital magazine attached on to a tripod. on page 22). Slide the safety lever (see 3 in the illustration Mounting the camera and digital magazine attached on to a tripod.
-
Page 73: Connecting The Leaf Digital Magazine To A Dc Power Supply
Using the Tripod U-adaptor Connecting the Leaf Digital Magazine to a DC Power Supply Connect one end of the DC power supply cable to the DC-IN port on the Leaf digital magazine, and the other end to the power outlet. Note: When using the power supply, you do not need to use batteries. - Page 74 Chapter 2 – Using the Portable Hardware...
-
Page 75: Charging The Batteries
Charging the Batteries Charging the Batteries ..............26 Charging the Battery Using the Hähnel MCL103 .......26 Charging the Battery Using the Digital Magazine ......28... -
Page 76: Charging The Battery Using The Hähnel Mcl103
Chapter 3 – Charging the Batteries Charging the Batteries You can charge the lithium ion battery used with the Leaf Aptus camera back using the MCL103 battery charger provided. If you use a Leaf digital magazine, you can charge the battery using the digital magazine battery charger. - Page 77 Charging the Batteries Figure 1: Connecting the hähnel MCL103 battery charger Insert the battery with contacts facing down and slide the battery fully down into the contacts. Once charging begins, an indicator light is turns on. The indicator light begins to flash when the battery is almost charged. Charging is complete when the indicator light turns off.
-
Page 78: Charging The Battery Using The Digital Magazine
Chapter 3 – Charging the Batteries Charging the Battery Using the Digital Magazine Attention: Before performing these procedures, refer to the Safety Precautions at the beginning of this guide. Connect the battery charger with the 12V DC power supply to the power outlet. - Page 79 Charging the Batteries Attention: If the LED does not light up once the batteries are connected, check the power supply and all contacts. A gentle push against the charger housing may be required to make contact. To remove the batteries: Remove the lock-in adaptor.
- Page 81 Mamiya 645 AF-D Before Getting Started ..............32 Items Required for the Installation .............32 Quick Installation Reference ..............32 Installation Procedures ..............34 Attaching the Leaf Digital Camera Back to the Camera Body.....36 Connecting the Cables..............37 Removing the Leaf Digital Camera Back from the Camera Body ..38...
-
Page 82: Mamiya 645 Af-D
Chapter 4 – Mamiya 645 AF-D Before Getting Started This chapter describes the Leaf Aptus digital camera back installation for the Mamiya 645 AF-D camera. Items Required for the Installation For a detailed list of the items required for installation, see Items Required for the Installation on page 6. - Page 83 Quick Installation Reference [1] Flash Sync socket [3] Camera Control socket FireWire port Camera-to-Back Sync socket Figure 1: The Leaf Aptus digital camera back ports and sockets Figure 2: The Leaf Aptus digital camera back on a Mamiya 645 AF-D camera.
-
Page 84: Installation Procedures
Chapter 4 – Mamiya 645 AF-D Installation Procedures The procedures in this section together constitute the basic installation process. Installing the Focusing Screen The focusing screen enables you to view the exact area that the Leaf Aptus digital camera back captures. Before you can install the supplied focusing screen, you must remove the camera’s original focusing screen. - Page 85 Installation Procedures Remove the original focusing screen from the focusing screen frame by grasping the tab on the edge of the screen with the tweezers, and then gently pulling up and out. Figure 4: Removing the original focusing screen Important: Be careful not to touch or damage the mirror. To attach the supplied focusing screen: Using the supplied tweezers, hold the focusing screen tab and place the focusing screen on the focusing screen frame.
-
Page 86: Attaching The Leaf Digital Camera Back To The Camera Body
Chapter 4 – Mamiya 645 AF-D Using the tweezers, push the focusing screen frame upwards until you hear a click. Important: Never apply pressure on other parts as this might affect focus. Handle the focusing screen surfaces with care. They are delicate and easily damaged. -
Page 87: Connecting The Cables
Installation Procedures Connecting the Cables Connecting the Flash Sync Cable If you want to use flash or strobe lighting, connect the Flash Sync cable to the Flash Sync socket of the Mamiya 645 AF-D camera. Flash Sync Socket Flash Sync Cable Figure 7: Connecting the Flash Sync cable to the Mamiya 645 AF-D camera Connecting the FireWire Cable For information about connecting the FireWire cable, see Chapter 11,... -
Page 88: Removing The Leaf Digital Camera Back From The Camera Body
Chapter 4 – Mamiya 645 AF-D Removing the Leaf Digital Camera Back from the Camera Body Place the camera on a steady, flat surface. Turn the camera off. Disconnect the FireWire cable. Slide and press the Release button on to the left side. Release Button Figure 8: Removing the Leaf Aptus digital camera back from a Mamiya 645 AF-D camera... - Page 89 Hasselblad H1 Before Getting Started ..............40 Items Required for the Installation .............40 Quick Installation Reference ..............40 Installing the Leaf Aptus Mask ............42 Installation Procedures ..............42 Attaching the Leaf Digital Camera Back to the Camera Body.....43 Connecting the Cables..............44 Removing the Leaf Digital Camera Back From the Camera Body..45...
-
Page 90: Before Getting Started
Chapter 5 – Hasselblad H1 Before Getting Started This chapter describes the Leaf Aptus digital camera back installation for the Hasselblad H1 camera. Items Required for the Installation For a detailed list of the items required for installation, see Items Required for the Installation on page 6. -
Page 91: Quick Installation Reference
Quick Installation Reference [1] Flash Sync socket [3] Camera Control socket FireWire port Camera-to-Back Sync socke Figure 1: The Leaf Aptus digital camera back ports and sockets Figure 2: The Leaf Aptus digital camera back on a Hasselblad H1 camera body... -
Page 92: Installation Procedures
Chapter 5 – Hasselblad H1 Installation Procedures The procedures in this section together constitute the basic installation process. Installing the Leaf Aptus Mask The Leaf Aptus mask enables you to view the exact area that the Leaf Aptus digital camera back captures. Before you can install the mask, you must remove the camera’s viewfinder. -
Page 93: Attaching The Leaf Digital Camera Back To The Camera Body
Installation Procedures Attaching the Leaf Digital Camera Back to the Camera Body Mount the camera body on a tripod. Remove the protective cover plate from the digital camera back. Position the magazine retention groove onto the magazine support on the camera body. Swing the digital camera back toward the camera body and firmly press it into place until you hear a click. -
Page 94: Connecting The Cables
Chapter 5 – Hasselblad H1 Connecting the Cables Connecting the Flash Sync Cable Note: Connecting the Flash Sync cable is optional. Connect the Flash Sync cable to the Flash Sync socket of the Hasselblad H1 camera body. Flash Sync socket Flash Sync cable Figure 5: Connecting a Flash Sync Cable to a Hasselblad H1 Connecting the FireWire Cable... -
Page 95: Removing The Leaf Digital Camera Back From The Camera Body
Installation Procedures Removing the Leaf Digital Camera Back From the Camera Body Place the camera on a steady, flat surface. Turn the camera off. Disconnect the FireWire cable. Press gently on the center of the magazine release button, twist it clockwise until it stops (1), and then press the button firmly inwards toward the camera body (2) to release Leaf Aptus. - Page 97 Hasselblad (500 Series) Before Getting Started ..............48 Items Required for the Installation .............48 Quick Installation Reference ..............49 Installation Procedures ..............51 Installing the Focusing Screen Mask ..........51 Attaching the Leaf Digital Camera Back to the Camera Body.....52 Connecting the Cables..............54 Removing the Leaf Digital Camera Back From the Camera Body..57...
-
Page 98: Before Getting Started
Chapter 6 – Hasselblad (500 Series) Before Getting Started This chapter describes the Leaf Aptus digital camera back installation for the Hasselblad (500 series). Items Required for the Installation For a detailed list of the items required for installation, see Items Required for the Installation on page 6. -
Page 99: Quick Installation Reference
Quick Installation Reference Quick Installation Reference Install the focusing screen mask. Remove the protective cover from the digital camera back and mount the back onto the camera body. Connect the Camera-to-Back Sync cable between the camera lens and Leaf Aptus If you are working in tethered mode, go straight to step 5. - Page 100 Chapter 6 – Hasselblad (500 Series) [1] Flash Sync socket [3] Camera Control socket FireWire port Camera-to-Back Sync socket Figure 1: Ports and sockets on the Leaf Aptus digital camera back Figure 2: The Leaf Aptus digital camera back with a Hasselblad (500 series) camera...
-
Page 101: Installation Procedures
Installation Procedures Installation Procedures The procedures in this section together constitute the basic installation process. Installing the Focusing Screen Mask The focusing screen mask enables you to view the exact area that the digital camera back captures. Remove the viewfinder from the camera body according to the manufacturer’s instructions. -
Page 102: Attaching The Leaf Digital Camera Back To The Camera Body
Chapter 6 – Hasselblad (500 Series) Attaching the Leaf Digital Camera Back to the Camera Body Mount the Hasselblad camera on a tripod. Remove the protective cover plate from the digital camera back. Connect the digital camera back to the camera body in either portrait or landscape orientation. - Page 103 Installation Procedures Notes: To switch from landscape to portrait orientation, remove the Leaf Aptus digital camera back and rotate it 90° counterclockwise, then attach it again to the camera body. For Hasselblad 555 ELD users—Insert the Release button into the Dig Release port.
-
Page 104: Connecting The Cables
Chapter 6 – Hasselblad (500 Series) Connecting the Cables Connecting the Camera-to-Back Sync Cable Insert one end of the Camera-to-Back Sync cable into the Hasselblad Lens Flash socket. Insert the other end of the cable into the Camera-to-Back Sync socket on Leaf Aptus. - Page 105 Installation Procedures Connecting the Camera Control Cable Notes: This section is for users of Hasselblad 553ELX, 503CW + winder, and 503EL-M cameras only. The Camera Control cable should be used in Remote mode only when you trigger the camera from the application. The Camera Control cable is not supplied with Leaf Aptus.
-
Page 106: Connecting The Firewire Cable
Chapter 6 – Hasselblad (500 Series) Figure 8: Connecting a Camera Control cable to a Hasselblad 503CW camera Connecting the FireWire Cable For information about connecting the FireWire cable, see Chapter 11, Working in Tethered Mode. -
Page 107: Removing The Leaf Digital Camera Back From The Camera Body
Installation Procedures Removing the Leaf Digital Camera Back From the Camera Body Place the camera on a flat, steady surface. If any of the following cables are connected, disconnect them: • FireWire cable • Camera-to-Back Sync cable • Flash Sync cable Slide the Release button to the right side. - Page 109 Contax 645 AF Before Getting Started ..............60 Quick Installation Reference ..............60 Installation Procedures ..............62 Attaching the Leaf Digital Camera Back to the Camera Body.....64 Connecting the Cables..............65 Removing the Leaf Digital Camera Back From the Camera Body..66...
-
Page 110: Before Getting Started
Chapter 7 – Contax 645 AF Before Getting Started This chapter describes the Leaf Aptus digital camera back installation for the Contax 645 AF camera. Items Required for the Installation For a detailed list of the items required for installation, see Items Required for the Installation on page 6. - Page 111 Quick Installation Reference Flash Sync socket [3] Camera Control socket FireWire port [4] Camera-to-Back Sync socket Figure 1: The Leaf Aptus digital camera back ports and sockets Figure 2: The Leaf Aptus digital camera back with a Contax 645AF camera...
-
Page 112: Installing The Focusing Screen
Chapter 7 – Contax 645 AF Installation Procedures The procedures in this section together constitute the basic installation process. Installing the Focusing Screen The focusing screen enables you to view the exact area that the Leaf Aptus digital camera back captures. Before you can install the supplied focusing screen, you must remove the camera’s original focusing screen. - Page 113 Installation Procedures Press the focusing screen down gently, until it locks into place with a click. Important: Do not press or bend the screen pressing spring directly, it may damage the camera. Never touch the surface of the focusing screen. If there is dust on the screen, use a blower or soft lens brush to remove it.
-
Page 114: Attaching The Leaf Digital Camera Back To The Camera Body
Chapter 7 – Contax 645 AF Attaching the Leaf Digital Camera Back to the Camera Body Mount the Contax 645 AF camera body on a tripod. Remove the protective cover plate from the Leaf Aptus digital camera back. Attach the Leaf Aptus digital camera back to the camera body by moving the Leaf Aptus digital camera back toward the camera body and check that the camera’s support hooks fit into the slots on the Leaf Aptus digital camera back. -
Page 115: Connecting The Cables
Installation Procedures Connecting the Cables Connecting the Flash Sync Cable Note: Connecting the Flash Sync cable is optional. Connect the Flash Sync cable to the Flash Sync socket of the Contax 645 AF. Flash Sync socket Flash Sync cable Figure 5: Connecting the Flash Sync cable to a Contax 645 AF camera. Connecting the FireWire Cable For information about the connecting the FireWire cable, see Chapter 11, Working in Tethered Mode. -
Page 116: Removing The Leaf Digital Camera Back From The Camera Body
Chapter 7 – Contax 645 AF Removing the Leaf Digital Camera Back From the Camera Body Place the camera on a steady, flat surface. Turn the camera off. Disconnect the FireWire cable. Slide and press the release button on the Leaf Aptus digital camera back to the left side. -
Page 117: Attaching The Leaf Digital Camera Back To The Camera Body
Installation Procedures Attaching the Leaf Digital Camera Back to the Camera Body Mount the Contax 645 AF camera body on a tripod. Remove the protective cover plate from the Leaf Aptus digital camera back. Attach the Leaf Aptus digital camera back to the camera body by moving the Leaf Aptus digital camera back toward the camera body and check that the camera’s support hooks fit into the slots on the Leaf Aptus digital camera back. - Page 119 Mamiya RB Before Getting Started ..............70 Items Required for the Installation .............70 Quick Installation Reference ..............71 Installation Procedures ..............73 Attaching the Leaf Digital Camera Back to the Camera Body.....74 Connecting the Cables..............76 Removing the Leaf Digital Camera Back from the Camera Body ..77 Connecting the FireWire Cable............77...
-
Page 120: Before Getting Started
Chapter 8 – Mamiya RB Before Getting Started This chapter describes the Leaf Aptus digital camera back installation for the Mamiya RB camera. Items Required for the Installation For a detailed list of the items required for installation, see Items Required for the Installation on page 6. -
Page 121: Quick Installation Reference
Quick Installation Reference Quick Installation Reference Install the focusing screen mask into the viewfinder. Mount the adaptor plate on the camera body. Remove the protective cover from the Leaf Aptus digital camera back. Attach the digital camera back to the adaptor plate. Connect the Camera-to-Back Sync cable between the camera lens and the Leaf Aptus digital camera back f you are working in tethered... - Page 122 Chapter 8 – Mamiya RB [1] Flash Sync socket [3] Camera Control socket FireWire port Camera-to-Back Sync socket Figure 1: Ports and sockets on the Leaf Aptus digital camera back Figure 2: The Leaf Aptus digital camera back on a Mamiya RB camera...
-
Page 123: Installation Procedures
Installation Procedures Installation Procedures The procedures in this section together constitute the basic installation process. Installing the Frame Mask The frame mask enables you to view the exact area that the Leaf Aptus digital camera back captures. Remove the viewfinder from the camera body according to the manufacturer’s instructions. -
Page 124: Attaching The Leaf Digital Camera Back To The Camera Body
Chapter 8 – Mamiya RB Attaching the Leaf Digital Camera Back to the Camera Body Mount the Mamiya RB camera on a tripod. Flip the locking lever on the camera body from left to right into the Open position. Attach the Mamiya RB adaptor plate to the camera body. Insert the four studs on the adaptor into the four holes on the camera body. - Page 125 Installation Procedures Figure 5: Attaching the Leaf Aptus digital camera back to a Mamiya RB camera...
-
Page 126: Connecting The Cables
Chapter 8 – Mamiya RB Connecting the Cables Connecting the Camera-to-Back Sync Cable Insert one end of the cable into the Mamiya Lens Flash socket. Insert the opposite end of the cable into the Camera-to-Back Sync socket on the adaptor plate. Figure 6: Connecting a Camera-to-Back Sync cable to Leaf Aptus Connecting the Flash Sync Cable Note: You can use only external flash or strobe light with Leaf Aptus. -
Page 127: Removing The Leaf Digital Camera Back From The Camera Body
Installation Procedures Connecting the FireWire Cable For information about connecting the FireWire cable, see Chapter 11, Working in Tethered Mode. Removing the Leaf Digital Camera Back from the Camera Body Place the camera on a solid, steady surface. If any of the following cables are connected, disconnect them: •... - Page 129 Mamiya RZ67/ RZ67ProII/ RZ67ProIID Before Getting Started ..............80 Quick Installation Reference ..............81 Installation Procedures ..............83 Installing the Focusing Screen Mask ..........83 Attaching the Leaf Digital Camera Back to the Camera Body.....84 Connecting the Cables..............86 Removing the Leaf Digital Camera Back From the Camera Body..88...
-
Page 130: Before Getting Started
Chapter 9 – Mamiya RZ67/RZ67ProII/ RZ67ProIID Before Getting Started This chapter describes the Leaf Aptus digital camera back installation for the Mamiya RZ67, Mamiya RZ67ProII, and Mamiya RZ67 ProIID cameras. Items Required for the Installation For a detailed list of the items required for installation, see Items Required for the Installation on page 6. -
Page 131: Quick Installation Reference
Quick Installation Reference Quick Installation Reference Install the focusing screen mask into the viewfinder. Mount the adaptor plate on the camera body. The procedure is the same for both the Hasselblad and Mamiya adaptor plates. Note: You can use either a universal or 645AFD Leaf Aptus adaptor plate. Remove the protective cover from the Leaf Aptus digital camera back. - Page 132 Chapter 9 – Mamiya RZ67/RZ67ProII/ RZ67ProIID [1] Flash Sync socket [3] Camera Control socket FireWire port Camera-to-Back Sync socket Figure 1: Ports and sockets on the Leaf Aptus digital camera back Figure 2: The Leaf Aptus digital camera back on a Mamiya RZ67 camera...
-
Page 133: Installation Procedures
Installation Procedures Installation Procedures The procedures in this section together constitute the basic installation process. Installing the Focusing Screen Mask The focusing screen mask enables you to view the exact area that Leaf Aptus digital camera back captures. Remove the viewfinder from the camera body according to the manufacturer’s instructions. -
Page 134: Attaching The Leaf Digital Camera Back To The Camera Body
Chapter 9 – Mamiya RZ67/RZ67ProII/ RZ67ProIID Attaching the Leaf Digital Camera Back to the Camera Body Mount the Mamiya RZ67, Mamiya RZ67ProII, or Mamiya RZ67 ProIID camera on a tripod. Insert the four studs on the Mamiya camera body into the four holes on the adaptor. - Page 135 Installation Procedures Multiple/Revolving Lever Figure 5: Locking the Leaf Aptus digital camera back into position Note: Make sure the Multiple/Revolving lever is set to M. To change the orientation of Leaf Aptus: Switch the Multiple/Revolving lever on the side of the Mamiya RZ67 camera to position.
-
Page 136: Connecting The Cables
Chapter 9 – Mamiya RZ67/RZ67ProII/ RZ67ProIID Connecting the Cables This section contains procedures for connecting various cables for use with the Mamiya RZ67 camera. Connecting the Camera Control Cable Note: Make sure the lever on the Camera Control cable is in O position. Insert one end of the Camera Control cable (lever facing down) into the Mamiya release socket on the front of the camera. - Page 137 Installation Procedures Connecting the Camera-to-Back Sync Cable Insert one end of the Camera-to-Back Sync cable into the Mamiya Lens Flash socket. Insert the other end of the cable into the Camera-to-Back Sync socket on the adaptor plate. Figure 7: Connecting a Camera-to-Back Sync cable to Leaf Aptus Connecting the Flash Sync Cable Note: The Leaf Aptus digital camera back together with the Flash Sync cable is only suitable for use with external flash or strobe lighting.
-
Page 138: Removing The Leaf Digital Camera Back From The Camera Body
Chapter 9 – Mamiya RZ67/RZ67ProII/ RZ67ProIID Figure 8: Connecting a Flash Sync Cable to Leaf Aptus Connecting the FireWire Cable For information about connecting the FireWire cable, see Chapter 11, Working in Tethered Mode. Removing the Leaf Digital Camera Back From the Camera Body Place the camera on a steady, flat surface. - Page 139 Installation Procedures Release Button Figure 9: Removing the Leaf Aptus digital camera back from Mamiya 645 AF-D camera Tilt the camera back away from the camera body to remove it.
- Page 141 Large Format Before Getting Started ..............92 Items Required for the Installation .............92 Quick Installation Reference ..............93 Using a Mechanical Shutter Lens............96 Large format cable with a mechanical shutter lens ......97...
-
Page 142: Before Getting Started
Chapter 10 – Large Format Before Getting Started This chapter describes the Leaf Aptus digital camera back installation for large format cameras and other view cameras. With the Rollei electronic shutter and the Rollei Lens Control unit, the Leaf Capture application enables you to change shutter speed and lens aperture on the large format camera from the application. -
Page 143: Quick Installation Reference
Quick Installation Reference Quick Installation Reference Figure 1: Connecting the Leaf Aptus digital camera back to a large format camera and Rollei Lens Control... -
Page 144: The Digital Camera Back On A Large Format Camera With A Rollei Electronic Shutter
Chapter 10 – Large Format The Digital Camera Back on a Large Format Camera with a Rollei Electronic Shutter Make sure the camera is securely mounted on a tripod. Attach the lens with the Rollei shutter to the large format camera. Attach the Graflok adaptor to the backside of the camera and secure it. - Page 145 Quick Installation Reference Connect the FireWire cable between the computer and Leaf Aptus. After you connect the cable, the application automatically connects to Leaf Aptus. When the connection is established, the LED indicator on the digital camera back turns from orange to green. Notes: If you want to work with an external flash, connect the Flash Sync cable between the Leaf Aptus digital camera back and the flash or strobe unit.
-
Page 146: Using A Mechanical Shutter Lens
Chapter 10 – Large Format Using a Mechanical Shutter Lens Make sure the camera is securely mounted on a tripod. Attach the mechanical shutter lens to the large format camera. Attach the Graflock adaptor to the back of the camera and secure it. Remove the protective cover from Leaf Aptus. -
Page 147: Large Format Cable With A Mechanical Shutter Lens
Quick Installation Reference Figure 2: Large format cable with a mechanical shutter lens... -
Page 149: Working In Tethered Mode
Working in Tethered Mode Connecting the FireWire Cable............100 Attaching the Repeater ..............101... -
Page 150: Connecting The Firewire Cable
Chapter 11 – Working in Tethered Mode Connecting the FireWire Cable Important: The information in this chapter is relevant to all cameras in this installation guide. Follow the specific installation procedures for the camera you are using. It is important that you connect the FireWire cable correctly in order not to cause unnecessary damage. -
Page 151: Attaching The Repeater
Attaching the Repeater Connect the other end of the cable to the port on the computer. Tip: When you connect the FireWire cable after you start the Leaf Capture application, the application automatically connects to the Leaf Aptus digital camera back and recognizes the connected camera type. Attaching the Repeater Notes: Attaching the repeater is optional. -
Page 153: Caring For The Ir Filter Glass
Caring for the IR Filter Glass Importance of the Protective IR Filter Glass ........104 Cleaning the Protective IR Filter Glass ..........105... -
Page 154: Importance Of The Protective Ir Filter Glass
Chapter 12 – Caring for the IR Filter Glass Importance of the Protective IR Filter Glass The Leaf Aptus digital camera back has a protective IR filter glass over the sensor. The sensor is the most important and expensive part of your Leaf Aptus. -
Page 155: Cleaning The Protective Ir Filter Glass
Importance of the Protective IR Filter Glass Cleaning the Protective IR Filter Glass Remove any condensation that may be inside the ionized nitrogen sprayer nozzle. Spray the protective IR filter glass with ionized nitrogen to remove large dust particles. Fold a cleaning wipe to fit the width of the protective IR filter glass (see image sequence). - Page 156 Chapter 12 – Caring for the IR Filter Glass Figure 2: Cleaning protective IR filter glass If necessary, repeat the cleaning procedure until the protective IR filter glass is clean. Important: • Never use the dry cloth for cleaning. • Never clean the protective IR filter glass with the window or lens cleaner. The residues from these products may permanently cloud the glass plate.
-
Page 157: Attaching The Diffusion Filter
Attaching the Diffusion Filter Attaching the Diffusion Filter to the Camera ........108... -
Page 158: Attaching The Diffusion Filter To The Camera
Chapter 13 – Attaching the Diffusion Filter Attaching the Diffusion Filter to the Camera Note: Attaching the Diffusion Filter is optional. The Diffusion Filter can be used to generate custom gain files in order to supplement and enhance the gain files contained in your calibration software.
Need help?
Do you have a question about the Aptus II and is the answer not in the manual?
Questions and answers