
Related Manuals for ROYAL CLIMA RCI-E28HN


Summary of Contents for ROYAL CLIMA RCI-E28HN
-
Page 1: Table Of Contents
Air Conditioner ServiceManual Royal ClimaInverter air conditioner Service Manual 2018 Models RCI-E28HN RCI-E37HN RCI-E54HN RCI-E72HN CONTENTS 1. Important Notice 2. Product Dimensions 3. Refrigeration cycle diagram 4. Operation details 5. Wiring diagram 6. Explosion view and parts 7. Precaution 8. Names of parts 9. -
Page 2: Important Notice
Air Conditioner ServiceManual 1. Important Notice Thisservicemanualisintendedforusebyindividualspossessingadequatebackgro undsofelectrical,electronicandmechanicalexperience.Anyattempttorepairthea ppliancemayresultinpersonalinjuryandpropertydamage.Themanufacturerorsel lercannotberesponsiblefortheinterpretationofthisinformation,norcanitassumea nyliabilityinconnectionwithitsuse. Theinformation,specificationsandparameteraresubjecttochangeduetotechnical modificationorimprovementwithoutanypriornotice.Theaccuratespecificationsar epresentedonthenameplatelabel. Howtoorderspareparts Tohaveyourorderfilledpromptlyandcorrectly,pleasefurnishthefollowinginformati ModelNo.withIndoororOutdoor No.intheExplosionView PartName Thequantityyouordered... -
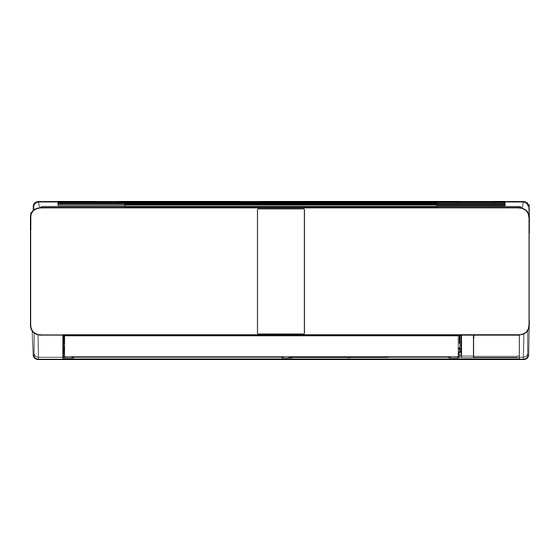
Page 3: Product Dimensions
Air Conditioner ServiceManual 2. Product Dimensions Indoor Unit: Outdoor Unit: Model 439.2 277.8 1033 753.5... -
Page 4: Cooling Only
Air Conditioner ServiceManual 3. Refrigeration cycle diagram Cooling only L iq u id s id e 2 - w a y v a lv e C a p illa r y H e a t e x c h a n g e H e a t e x c h a n g e ( E v a p o r a to r ) ( c o n d e n s e r ) -
Page 5: Remote Controller
Air Conditioner ServiceManual 4. Operation details Remote controller ON/OFF button To switch the conditioner on and off. ECO button In cooling mode,press this button ,the temperature ℃ will increase 2 on the base of setting temperature: In heating mode, press this button, the temperature ℃... - Page 6 Air Conditioner ServiceManual 3minutesdelayforcompressor---Thecompressorisceasedfor3minutesbeforerestartingtobalancethepr essureintherefrigerationcycleinordertoprotectthecompressor. 2minutesdelayfor4-wayvalve---The4-wayvalvewillbeceasedfor2minuteslateaftercompressort opreventtherefrigerant-gasabnormalnoisewhentheHEATINGoperation isOFF or switch tothe other operationmode. (2) Dischargetemperatureprotection Thereisatemperaturesensorontopofcompressor,whentemperatureontopofcompressorexceededth elimit,systemcontrolwillshutdownthecompressorandthedisplayboardwillshow the errorcode. (3) Lowervoltageprotection WhenACvoltage ≤158Vandkeep itfor 10seconds, unitwillbe shutdown forprotection. (4) Overvoltage protection WhenACvoltage≥260V,unitwill beshutdownandrecoverwhileAC≤255V. (5) Overcurrentprotection Whenthecurrentof outdoor unit isoverload, controller shutdown...
- Page 7 Air Conditioner ServiceManual ℃ Ifunitrunin“cooling”modeandoutdoortemperatureislessthan-2 ,the controllerwillshutdowncompressorandshowerrorcode,whiletheambienttemperatureisover1 ℃ ,thecompr essorwillrunautomatically. (3) Autofancontrolincoolingmode Incoolingmode(includecoolingin“Ifeel”mode),fanspeedisdeterminedbyδt,asthefollowing diagram: δtcomeup δtcomedown ℃ RT-ST High fan Min fan Low fan 4.“DRY”ModeOperation (1) The system forDRYoperation usedthe same refrigerant circle asthe cooling one. (2) WhenthesystemoperatesinDRYmode,atfirstitoperatesincoolingmode,thesettemperature(ST)is“R T-2℃”.Afterthat,t hesystemwilloperateincoolingmodewithlowestfanspeedfor30minutes and then change to middle speed for 30seconds as a cycle.Duringthecourseofthisoperation,you can’t use remote controller to adjust the fan speed but you can control the vane direction.
- Page 8 Air Conditioner ServiceManual Min fan Low fan (3) 4-wayvalvecontrol In heating mode,4-way valve willpower onaheadof compressorfor 5seconds,and cut offfor2minuteslaterthancompressor.4-wayvalvewillnotpoweroffunlessthemachineto beswitched off,modechanged oron theprocessof defrosting. (4) Defrosting Defrosting is controlledby the microprocessor. When oneofthefollowing conditionsis satisfied, unit comes into defrosting: ℃ a.
-
Page 9: Emergency Operation
Air Conditioner ServiceManual Theindoorfanspeedissetatlowspeed,thepowerlampandthesleeplampison,thedisplay of temperature will close after5 minutes. WhenselectingCOOLING/DRYoperationwithSLEEPmode,thesettemperaturewillberaised by1℃1 hourlaterand by2℃2 hourlater. WhenselectingHEATINGoperationwithSLEEPmode,thesettemperaturewillbedroppedby1℃1 hourlaterand2℃2 hourslater. After the System operates in SLEEPmodefor8 hours,it will stopautomatically. 6. EMERGENCYOperation WhentheEMERGENCYOperationswitchispressedone time,COOLINGmodeisselectedandiftheEMERGENCYOperationswitchpressagain within 3s,HEATING modeselected,whilepress onceagain, the unit will switch off. Whentheremotecontrollermissing,failedorthebatteriesrundown,presstheEMERGENCYOperatio nswitch on front of the indoor unit forfunction test. - Page 10 Air Conditioner ServiceManual Indoorroom temperature sensor (IRT) RUN-1time/8s Indoor coiltemperaturesensor (IPT) RUN-2times/8s Outdoor coil temperature sensor (OPT) RUN-3times/8s Systemabnormity RUN-4times/8s Model configuration wrong RUN-5times/8s Indoor fanmotor fault RUN-6times/8s Outdoortemperaturesensor RUN-7times/8s Exhaust temp. sensor RUN-8times/8s RUN-9times/8s IPM drive and module fault Outdoor fan motor fault (DC motor) RUN-10times/8s Current sensor fault...
- Page 11 Air Conditioner ServiceManual Display on outdoor power source board: blink time (n) Failure IPM protection Overvoltage /lower voltage Overcurrent Exhaust overtemperature protection Outdoor coil overtemperature protection Drive fault and protection (V1,VP1) Communication fault with indoor unit Compressor overheat fault (compressor top switch) Short-circuit / open-circuit fault of outdoor temperature sensor Short circuit / open-circuit fault of outdoor heat exchanger temperature sensor...
-
Page 12: Wiring Diagram
Air Conditioner ServiceManual 6.Wiring diagram MODEL:RCI-E28HN,RCI-E37HN INDOORUNIT: OUTDOORUNIT... - Page 13 Air Conditioner ServiceManual MODEL:RCI-E54HN INDOOR UNIT OUTDOOR UNIT...
- Page 14 Air Conditioner ServiceManual MODEL : RCI-E72HN INDOOR UNIT OUTDOOR UNIT...
-
Page 15: Explosion View And Parts
Air Conditioner ServiceManual 7. Explosion view and parts Mode:RCI-E28HN/IN,RCI-E37HN/IN, RCI-E54HN/IN INDOORUNIT:... - Page 16 Air Conditioner ServiceManual Parts List Indoor Unit- RCI-E28HN/IN Q’ty Part No. Part Name Remark 1080030003 Installation Plate 1080320807AC Base 1070020017AA Cross Fan 1070100010 Bearing Mount 211230474 Evaporator 210736244 Water Drainage Assembly 1070321035 Vertical Vane Assembly 1070251841AN Face Frame 1070321022AC Screw Cover...
- Page 17 Air Conditioner ServiceManual Indoor Unit- RCI-E37HN/IN Q’ty Part No. Part Name Remark 1080030008 Installation Plate 1080320806AC Base 1070020026AA Cross Fan 1070100010 Bearing Mount 211205800 Evaporator 210704823B Water Drainage Assembly 1070321035 Vertical Vane Assembly 1070321440B Face Frame 1070321022AC Screw Cover 1070320109 Air Filter 210705783A Front Panel...
- Page 18 Air Conditioner ServiceManual Indoor Unit- RCI-E54HN/IN Q’ty Part No. Part Name Remark 1080030021 Installation Plate 1070350872AD Base 1070020024AA Cross Fan 1070100010 Bearing Mount 211205865 Evaporator 1070450385AH Water Drainage Assembly 1070350141 Vertical Vane Assembly 1070450390AK Face Frame 1070350135AF Screw Cover 1070450397 Air Filter 210705784B Front Panel...
- Page 19 Air Conditioner ServiceManual Mode:RCI-E72HN/IN INDOORUNIT:...
- Page 20 Air Conditioner ServiceManual Indoor Unit- RCI-E72HN/IN Q’ty Part No. Part Name Remark 1080030001 Installation Plate 1080320810AC Base 1070020014AA Cross Fan 1070100010 Bearing Mount 211206020 Evaporator 1070701048AF Water Drainage Assembly 1070701050 Vertical Vane Assembly A 1070701051 Vertical Vane Assembly B 1070701060AL Face Frame 1073073232A Screw Cover...
- Page 21 Air Conditioner ServiceManual Mode:RCI-E28HN/OUT,RCI-E37HN/OUT OUTDOORUNIT:...
- Page 22 Air Conditioner ServiceManual Model:RCI-E28HN/OUT Q’ty Part No. Part Name Remark 1071990039 Grille 1080320105 Top cover 211202308A Condenser 1080050004 Outdoor motor supporter 1170040058 Outdoor motor 1070030050AA Propeller fan 1080050001 Left grille supporter 210800274 Front plate 1070251931 Fan guard 211230505 Compressor and accessories...
- Page 23 Air Conditioner ServiceManual Model:RCI-E37HN/OUT Q’ty Part No. Part Name Remark 1071990039 Grille 1080320105 Top cover 211230380 Condenser 1080050004 Outdoor motor supporter 1170040058 Outdoor motor 1070030050AA Propeller fan 1080050001 Left grille supporter 210800274 Front plate 1070251931 Fan guard 211230505 Compressor and accessories 1120110016 4-way valve 211231930...
- Page 24 Air Conditioner ServiceManual Mode:RCI-E54HN/OUT,RCI-E72HN/OUT OUTDOORUNIT:...
- Page 25 Air Conditioner ServiceManual Outdoor Unit- RCI-E54HN/OUT Q’ty Part No. Part Name Remark 1083520101 Grille 1081990056 Top Cover 214115531 Condenser 1081990060 Outdoor Motor Supporter 1170040118 Outdoor Motor 1070030040AA Propeller Fan 1081990053 Left Grille Supporter 1081990058 Front Plate 1071990096 Fan Guard 1100060147 Compressor And It Accessories 1120500226 4-way Valve...
- Page 26 Air Conditioner ServiceManual Indoor Unit- RCI-E72HN Q’ty Part No. Part Name Remark 1081990041 Grille 1081990038 Top Cover 1110061374 Condenser 1081990042 Outdoor Motor Supporter 1091990052 Outdoor Motor 1170120146AA Propeller Fan 1081990040 Left Grille Supporter 210800277 Front Plate 1070251945 Fan Guard 1100060146 Compressor And It Accessories 1120110017 4-way Valve...
-
Page 27: Precaution
Air Conditioner ServiceManual 8. Precaution 8.1SAFETYRULESANDRECOMMENDATIONSFORTHE INSTALLATION Readthisguidebeforeinstallingandusingtheappliance. Duringtheinstallationoftheindoorandoutdoorunitstheaccesstotheworkingareashouldbeforbidde ntochildren. Unforeseeableaccidentscouldhappen. Makesurethatthebaseoftheoutdoorunitisfirmlyfixed. Checkthataircannotentertherefrigerantsystemandcheckforrefrigerantleakswhenmovingtheairc onditioner. Checkthataircannotentertherefrigerantsystemandcheckforrefrigerantleakswhenmovingtheairc onditioner. Theratingsofthefuseinstalledinthebuiltin-controlunitareT5A/250V. Theusermustprotecttheindoorunitwithafuseofsuitablecapacityforthemaximuminputcurrentorwith anotheroverloadprotectiondevice. Ensurethatthemains voltage corresponds tothat stamped on therating plate. Keepthe switch orpower plug clean. Insert the power plug correctly andfirmly into the socket, thereby avoiding the risk ofelectricshock or fire due toinsufficient contact. - Page 28 Air Conditioner ServiceManual mental capabilities or lack of experience and knowledge ifthey have been givensupervisionor instructionconcerning ofthe appliancein safe understandthehazardsinvolved.Childrenshallnot play with the appliance. Cleaning and usermaintenance shall not be made by childrenwithout supervision. 8.2 SAFETYRULESANDRECOMMENDATIONSFORTHEUSER Do not tryto install the conditioner alone; alwayscontact specialized technical personnel. Cleaning andmaintenance must becarried out by specializedtechnical personnel.
- Page 29 Air Conditioner ServiceManual commonsense andcaution are therefore alwaysrecommended for installation, operation and maintenance. Ensurethattheapplianceisdisconnectedfromthepowersupplywhenitwillremaininoperativeforalongperiod and before carrying out any cleaning or maintenance. Selecting the most suitable temperaturecan preventdamage to the appliance. 8.3 SAFETYRULESANDPROHIBITIONS Donot bend, tugor compress the power cordsincethis could damage it.Electricalshocks or fireareprobably duetoa damagedpowercord.Specializedtechnical personnel only must replace adamagedpower cord.
-
Page 30: Names Of Parts
Air Conditioner ServiceManual 9.Names of parts INDOOR UNIT Indoorunit 2-3 4 Name Front panel Airfilter Special filter(option) Display PCB Vertical vane Horizontal vane Remotecontroller Outdoor unit Name Air outlet grille Electronic box cover 2-way valve 3-way valve OUTD OOR UNIT... -
Page 31: Installation
Air Conditioner ServiceManual 10.Installation manual 10.1 InstallationDetails Connectingpipelength Pipe size(Inch) Model Liquid RCI-E28HN RCI-E37HN RCI-E54HN RCI-E72HN Indoor unit Outdoor unit Pipe l ength is Pi pe length is 15 meters Max. 15 meters Max. In do o r unit Outdoor unit... -
Page 32: Installation For The First Time
Air Conditioner ServiceManual Installationforthefirst time 10.2 Indoor unit corridors orcommunal areas. Installthe indoor unit levelon a strong wall that isnot subject tovibrations The inletandoutlet portsshouldnot beobstructed:the air shouldbe able to blow all Mounting plate over the room. Do not install the unit neara source ofheat,steam, 150mm or flammable gas. - Page 33 Air Conditioner ServiceManual bepulled out if necessary. Install the indoor unitat a heightofatleast2.5m fromtheground. To install, proceed as follows: 10.2.1 Installation of the mountingplate. By using alevel, put the mounting plate in aperfect square position vertically andhorizontally. Drill32mmdeepholesinthewalltofixtheplate. Insert the plastic anchors intothe hole. Fixthemountingplatebyusingtheprovidedtapping screws.
- Page 34 Air Conditioner ServiceManual 7).An efficientearth connection must beensured. 8).If the power cable is damaged, it must be replaced by an authorized ServiceCentre. 10.2.4 Refrigerant piping connection The piping can berunin the 3 directions indicatedby numbers in the picture.When the piping is runin direction 1or 3, cuta notch along thegroove onthe side of the indoor unit with acutter.
- Page 35 Air Conditioner ServiceManual 4).If the piping isinstalled to the right, the pipes,power cableand drain hose must be lagged andsecured ontothe rearof the unit with a pipeconnection. Insert the pipe connectioninto the relative slot. Pressto join the pipeconnection tothebase. 10.2.8 Electronic connections 1.
- Page 36 Air Conditioner ServiceManual...
-
Page 37: Trouble Shooting
Air Conditioner ServiceManual 11. Trouble shooting 11.1 Outdoor controldiagram RCI-E28HN, RCI-E37HN RCI-E54HN, RCI-E72HN Indoor control system Outdoor power source board Indoor control board IPM module Storage of working Communication with outdoor Signal parameters unit wire Indoor fan control Communication with... - Page 38 Air Conditioner ServiceManual 11.2The structure of ODU PCB RCI-E28HN, RCI-E37HN Switch power supply AC motor Rectifyingfilteringcircuit 4-way valve Indictor Sensor EEPROM Filtercircuit Compressor driving Communication circuit forheavy current RCI-E54HN, RCI-E72HN Power supply board PFC board AC Motor Inverter board Compressor connect...
- Page 39 Air Conditioner ServiceManual 11.3Current flow Power supply live Neutral compressor Outdoor unit Indoor unit PCB wire Communication Ground Indoor unit outdoor unit 11.4 Examples of repairing 11.4.1 DisplayE1 or E2 Cause: Roomtemperaturesensor (IRT)and Indoor pipe(coil) temperature sensor(IPT) or indoor mainPCB fault.
- Page 40 Air Conditioner ServiceManual 2) Check the indoor fan motor wire connected tothePCB(CN3, CN4), if loose please connectagain. startupcapacitancevalue, if capacitance incorrect,replacewith a newcapacitor. 3) Checkthe 4) Measure theresistance on thetwo ends of indoor fan motor, if short or brokenplease replace theindoor fan motor.
- Page 41 Air Conditioner ServiceManual Any of 2 pins should be no short circuit IGBTany of 2 pins should be no short circuit No short circuit 6) TesttheDCvoltagebetweenDC+andDC-.Ifthevoltageisapprox300Vor0V,pleasereplaceoutdoorPCB. 11.4.5DisplayEA Cause: Current sensor faultSolution: Check forrefrigerant leakage, tofindthe leakage point and recharge therefrigerant. Current sampling circuit broken on theoutdoor PCBand replace outdoor PCB.
- Page 42 Air Conditioner ServiceManual Heat radiation problem easily happened while the screw is not fixed tightly. 11.4.7DisplayEU. Cause: Voltage sensor fault. Solution:Please replace outdoorPCB. 11.4.8DisplayEE Cause: EEPROM fault Solution: Shut down power supplyand reenergize it, if the fault remains there, check theEEPROMinstallation, if no problem, please replaceindoor PCB or...
-
Page 43: Malfunction(Parts) Checkmethod
Air Conditioner ServiceManual 11.5MALFUNCTION(PARTS) CHECKMETHOD 11.5.1Procedurefor determining defective outdoorunitIPM/compressor Thefollowingflowchartshowsaprocedureforlocatingthecauseofamalfunctionwhenthecompressordoesnotstar tup anda DCovercurrent indicationerror occurs. Use the remote operates the air conditioner Connects wire Does the wire Does compressor start up again connects right Compressor star up Does low or high press Open valve opened Does indoor unit LED... - Page 44 Air Conditioner ServiceManual 11.5.3 E0,E5 Error Replace inverter board and power Display E5 Start supply board or outdoor PCB assembly Display E0 Display E5 Display E5 Shut off power and supply Shut off power and Replace inverter board observe 10 Mins supply again againand Display E0...
- Page 45 Air Conditioner ServiceManual 11.6THERMISTORTEMPERATURECHARACTERISTICS 1.Indoorunitandoutdoorexchangetemperatureandoutside airtemperaturesensortemperaturecharacteristics TEMP. Resistance Voltageof TEMP. Resistance Voltageof TEMP. Resistance Voltageof (℃) (k Ohm) resistance (℃) (kOhm) resistance (℃) (kOhm) resistance 63.513 4.628 7.447 2.968 1.464 1.115 60.135 4.609 7.148 2.918 1.418 1.088 56.956 4.589 6.863 2.868 1.374 1.061...
- Page 46 Air Conditioner ServiceManual TH1:indoorroomtemperaturesensorandoutsideairtemperaturesensor TH2:indoorexchangetemperaturesensorandoutsideexchangetemperaturesensor Beforemeasuringresistance,disconnectconnectorsasshownabove. 2. Outdoorunitsensortemperaturecharacteristics TEMP. R min R(t) R max TEMP. R min R(t) R max TEMP. R min R(t) R max (k Ohm) (k Ohm) (k Ohm) (℃) (k Ohm) (k Ohm) (k Ohm) (℃) (k Ohm) (k Ohm) (k Ohm)
- Page 47 Air Conditioner ServiceManual 63.74 70.48 77.87 6.309 6.655 7.013 1.073 1.12 1.168 60.69 67.05 6.08 6.409 6.748 1.042 1.089 1.136 57.81 63.8 70.34 5.861 6.173 6.495 1.013 1.058 1.104 55.08 60.72 66.88 5.651 5.947 6.253 0.9833 1.028 1.074 52.49 57.81 63.61 5.449 5.73...
-
Page 48: Disassembly Procedure
Air Conditioner ServiceManual 12.DISASSEMBL YPROCEDURE If,incarryingoutrepairsandmodifications,theworkrequirestheuseofarc-andflame-producingapparatus,such aswelding,brazingandsolderingequipment,thisworkshallonlybestartedaftertheroomshavebeenthoroughly ventilated.Whiletheworkisbeingcarriedout,themechanicalventilation,ifany,shallbekeptinconstantoperation andallwindowsanddoorskeptopen.Inthecaseofrepairstopartsoftherefrigerantcircuit,itmaybenecessarythat notonlytheworkmanbutalsoasecondpersonshallbepresentforobservationandassistance.Necessaryprotec tiveequipmentshallbeavailableand,inthecaseofopenflamesorarcs,fireextinguishingapparatusshallberead ytohand.Weldingandbrazingshallbecarriedoutbyqualifiedworkmen. [1]INDOORUNIT Content Picture Openthe front panelandremoveit. Remove1screwsfixing on theterminal cover. Removethe terminal cover. Slideoutthe2airfilters. - Page 49 Air Conditioner ServiceManual Take out the vane from the water drainage assembly. Take out the screw coverand removescrewsfixing ontheframe. Unfastenthefrontpanelandpullforwarditslightly.(2ci rcledpositionshooked.) Take off the display PCB cover.
- Page 50 Air Conditioner ServiceManual Take out the face frame. Remove 2 screws and take out the electronic box cover.
- Page 51 Air Conditioner ServiceManual Remove the3 screwsandthe4 connectors and remove thecontrolbox. Take out the water drainage assemble.
- Page 52 Air Conditioner ServiceManual Remove 4 screws and the In And Out Pipe Fixer. Take out the evaporator Loosenthescrewofcrossflowfanandseparatethecr ossflowfanandthefanmotor Ring Remark: Whenassembling,insertthecrossflowfantothering position.
- Page 53 Air Conditioner ServiceManual [2]OUTDOOR UNIT: Content Picture Remove the fixed screw and controlboxcover. Take out the2 screwsontherightsideoftopplate. Take out screwsontheleftsideoftopplate. Thescrewsofthefrontofafrontpanelremoved.
- Page 54 Air Conditioner ServiceManual Thescrewsontheright, front leftsideoffront plateremoved. Thescrewsontheleft backsideofgrille supporterremoved. Thescrewsontherightsideofrightplateremoved...
- Page 55 Air Conditioner ServiceManual Unscrewthe4screwsonthebacksideofrightplateandr emovedtherightplate. Removethescrewsfixed onthecontrolbox. Removethereactorinthecontrolbox. Removethescrewsfixedthecontrolbox. Removethescrewsfixedthebulkheadplate.
- Page 56 Air Conditioner ServiceManual Removethecompressorcovers1and2. Removethenut,andremovetheterminalcover. Removetheleadwireandthecovergasket. Removethecompressorcover Removethe3thermistors. Removetheoutdoorfan...
- Page 57 Air Conditioner ServiceManual Takeoffleadwiresfromterminalassembly. (Bluewire,Brownwire,Blackwire) Takeoffscrew(earth). Take offearthleadwire(green/yellow)fromelectronicbox. Takeoffthe screws Take off the supporters...
Need help?
Do you have a question about the RCI-E28HN and is the answer not in the manual?
Questions and answers