
Related Manuals for ROYAL CLIMA RM-F52CN-E


Summary of Contents for ROYAL CLIMA RM-F52CN-E
- Page 1 Portable Air-conditioner Service Manual For Model : RM-F52CN-E Please read this user’s manual carefully to ensure proper use, maintenance and installation...
-
Page 2: The Name Of Each Part And Its Function
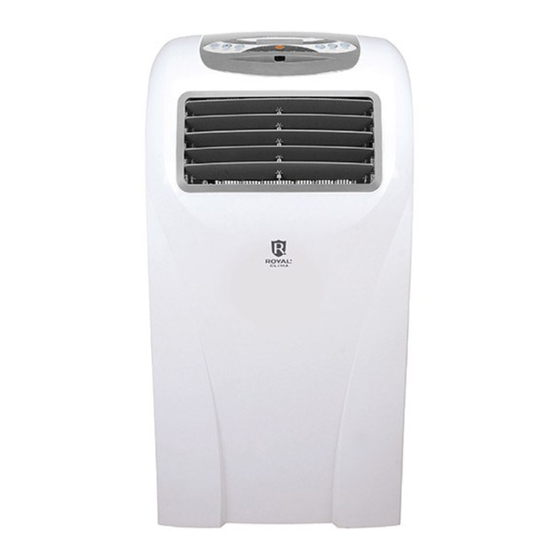
THE NAME OF EACH PART AND ITS FUNCTION FRONT... - Page 3 BACK THE NAME OF EACH PART AND ITS FUNCTION ON/OFF Button Press this button will turn the machine ON or TIMER Button MODE Button Press this button to set the time Press this button will select for switch-on, switch-off or to among the modes of auto delete the timing.
-
Page 4: Use Of Control Panel
Appearance and Function of Remote Controller 1. POWER On/Off switch MODE selector 2. MODE 3. TIMER Hourly programming 4. SPEED Fan speed selector 5. TEMP+ Temperature selector up 6. TEMP- Temperature selector down USE OF CONTROL PANEL POWER SOURCE The AC socket must be firm and reliable. Don’t connect the portable air-conditioner to a multiply socket outlet which is also being used for other electrical appliances. -
Page 5: Cooling Operation
Mode Dehumidify Cooling Set Temperature 23℃ 25℃ COOLING OPERATION 1. Repeatedly press ”MODE” button to choose the cooling mode, LED window will show “ ”. During the cooling operation, always place the duct through an open window to exhaust warm air from the room. -
Page 6: Maintenance & Service
this condition, when the water full indicator lamp lights up, please connect a drain hose to the lower fixing clip, then all the water in the water tank will drain outside. The unit can also work well. MAINTENANCE/SERVICE MAINTENANCE METHODS Pull the plug out of the socket before cleaning. - Page 7 MAINTENANCE/SERVICE KEEP SURFACE CLEAN Clean the surface of the unit with a damp cloth, then dry using a duster or similar. RESERVATION METHODS END OF SEASON OPERATIONS 1. To remove the stopper of continuous water drainage. Then operate the unit in fan mode for half a day until the pipe dry.
-
Page 8: Safety Cautions
SAFETYCAUTIONS Do not use the unit in a very narrow room with obstacle so as to avoid breakdown. Do not use the unit where the sunlight is shining directly onto it so as to avoid surface color changing Do not use the unit in water not near water, avoiding leakage of electricity. Do not use the unit in water or near water, avoiding leakage of electricity. -
Page 9: Troubleshooting
Do not spray with insecticide or other chemicals as the plastic case may be deformed. FEATURES OF HEATING OPERATION MODE When the air conditioner heats the room air, the compressor does not work, PTC electric tube works. TROUBLESHOOTING Before seeking repair or service, please firstly check the following. Trouble Check Action... -
Page 10: Installation
Selection of installation location Put the portable air condition in a flat location where the air outlets cannot Be covered up, place the unit no less than 50cm(20 inch) away from a wall or Other obstacle. The air exhaust duct mounting method 1) Fix the square end of the exhaust dust to the exhaust terminal of the unit 2) Put the other end (discharge) to the nearest window Attention: The length Of the air exhaust between 500mm-1500mm,use the Min... - Page 11 If the air exhaust requires bending, see below. INSTALLATION Incorrect hose mounting (air exhaust bend too large, easily cause malfunction.)
- Page 12 Window Kit Installation Your window kit has been designed to fit most standard “vertical” and “horizontal” window application. However, it may be necessary for you to improvise/modify some aspects of the installation procedures for certain types of windows. Please refer to below figs for minimum and maximum window openings.
- Page 13 INSTALLATION Installation Accessories Description Installation accessories Flexible exhaust hose-----------------------1/set Flexible exhaust hose connector-----------1/set Cycle exhaust adapter-----------------------1/set...
- Page 14 Wiring Diagram...
- Page 15 Explosive View...
Need help?
Do you have a question about the RM-F52CN-E and is the answer not in the manual?
Questions and answers