Advertisement
Quick Links
Things to know before starting Swave ESC
Carefully read this manual and examine the equipment to become familiar with the device before attempting to install,
operate, service, or maintain it..
Please refrain from soldering the cables and installing them if you do not agree with the following terms. Connecting the
wires to the ESC will be considered as acceptance.
Please ensure that all other peripheral devices are functioning correctly before submitting a support request. The Ensotech
warranty does not cover alterations to the product not performed by us; damage due to unusual or non-recommended use ;
damage caused by factors beyond our control.
For product features, technical specifications, visual attributes and accessories, please visit the product description in the
Ensotech shop.
Mounting Cables (Swave-E2/W/W2/W3/W3C)
The photo below shows the back side of the Swave-W3 / W3C. There is an open hole designed to accommodate a black
electronic component. It is recommended not to cover this area when applying double-sided adhesive tape to prevent the
component from being pulled off when removing the tape..
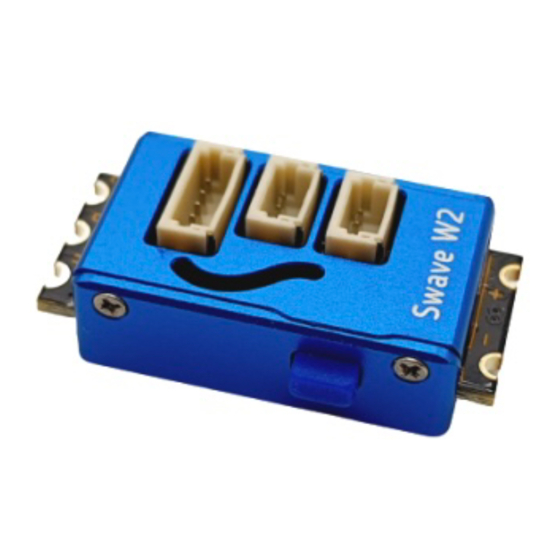
Sensor Cable
SWAVE-E2 / E3C / W / W2 / W3 / W3C
A B C
On / Off
-
+
User Manual
202420901/ENG/中文
Receiver Cable
Programming Cable
V3.0
Advertisement

Related Manuals for ENSOTECH Swave-E2


Summary of Contents for ENSOTECH Swave-E2
- Page 1 ESC will be considered as acceptance. Please ensure that all other peripheral devices are functioning correctly before submitting a support request. The Ensotech warranty does not cover alterations to the product not performed by us; damage due to unusual or non-recommended use ;...
- Page 2 Type of Programming Cable (Purchase Separately) Wire for Android Wire for IOS Bluetooth for Android Bluetooth for IOS Swave-E UARTLINK Swave-E2 UARTLINK II & III ENSO BLUETH ENSO BLUETH-2 ENSO BLUETH / ENSO BLUETH-2 / Swave-E3C UARTLINK II & III...
- Page 3 If you are unfamiliar with soldering, please get assistance from people with good soldering skills. You may request Ensotech to pre-solder the cable if ordering from Ensotech online shop. Just leave us a message during the checkout process. Double-check that the positive and negative are identical to the battery connector also the motor A/B/C phases.
- Page 4 THROTTLE CALIBRATION (must be done at first-time use and after firmware update) STEP 1 Turn on the transmitter. Connect a fully charged battery to the ESC and connect to a motor with or without a sensor cable. STEP 2 (Full Reverse/brake) position calibration Pull the trigger to full REVERSE and hold in position and then turn on ESC.
- Page 5 Used ESC and Motor must not dispose of household waste. Customers are obliged to dispose to appropriate collecting points. This manual is published by Ensotech Limited. It reflects the current technical specification at the time of print. We reserve the right to change the technical or physical specifications without notice.
- Page 6 使用手册 SWAVE-E2 / E3C / W / W2 / W3 / W3C 1:28 迷你摇控车 V3.0 202420901/ENG/中文 使用 Swave 电调前须知 在尝试安装、操作、维修或维护设备之前,请仔细阅读本手册并熟悉设备。如果您不同意以下内容,请不要焊接电缆并 将其安装在车辆上。 已焊接的电调一律视为接受本产品。 在请求支持前,请先终检查其他电子设备是否正常工作。 Ensotech 保修不包括使用非本司认可的第三方设备, 更改产品 用途、改装而导致的产品损坏或任何超出我们控制范围的因素导致的产品损坏。 有关产品特性、技术规格、外型和配件,请访问 Ensotech 纲店中的产品说明。 接线图 (Swave-E2/W/W2/W3/W3C) A B C 接收线 设定线 开关 有感线 下图是 Swave-W3 / W3 的背面。 有一个开孔的元器件。 当需要贴上双面贴时建议不要覆盖,以防撕掉双面贴时扯下零...
- Page 7 如使用在 Type-C USB 手机, 需配搭带 OTG 功能的转接头 接上或除下设定线前先前关闭电调。 有线设定线 Android 有线设定线 IOS 电调 安卓手机用无线篮牙设定线 IOS 手机用无线篮牙设定线 Swave-E UARTLINK 没有 没有 Swave-E2 UARTLINK II & III ENSO BLUETH ENSO BLUETH-2 ENSO BLUETH / ENSO BLUETH-2 / Swave-E3C UARTLINK II & III ENSO BLUETH-MT ENSO BLUETH-MT Swave-W UARTLINK II &...
- Page 8 使用酒精或元器件清洁剂清洁焊盘,然后每个焊盘预镀锡. 电路板使用厚铜因此导热非常快. 焊线时每单个焊盘作业时间应不超过两秒钟, 不然高温会溶掉旁边元器件的焊锡. 最好的处理方式是焊好一条线后先等一回, 等电路板冷却下来才去焊另一条线. 注意千万不要晃动尝试加快冷却, 应 该平稳的等待自然冷却.. 不要使用含高银成份的焊钖. 这种锡黏合度太强在车子碰击时可能会扯烂电路板的铜片. 再三细看检查焊锡没有接触到旁边的元器件. 如果您对焊接不太懂,请向具有良好焊接技能的人寻求帮助。 如果从 Ensotech 纲店购买,您可以在付款过程中留 下信息要求 Ensotech 帮忙预焊。 再次检查电池端正极和负极是否跟电调正确对接. 马达一样是否 A/B/C 极都是正确对接. 没必要使用过粗且无法容纳到焊槽中的电缆线对于性能是没帮助的。AWG 16 及以下的线径足以提供最佳电流流 动。 电池插 Ensotech 建议不要使用 JST 型电池插因為它的缺陷包括: 高电阻, 不适用于大电流类型的设备...
- Page 9 油门中位校准 (初次使用和固件更新后需再次校准油门中位) 第一步, 打开发射机. 然后将电池连接电调. 马达可连接或不连接感应线 第二步 (全开杀车/后退油门校准) 将油门拉至全开杀车/退后并保持。 打开电调, 红灯和蓝灯闪烁三次, 然后蓝灯熄灭, 红灯亮起同时一声蜂鸣声。 然后马 上进行第三步。 BEEP Full Reverse Neutral point 第三步 (全开油门校准) 将油门拉到全开位置并保持, 红灯熄灭,篮灯亮起同时两下蜂鸣声。然后马上进行第四步。 BEEP BEEP Neutral Full point Throttle 第四步 (中位校准) 篮灯一直在亮将, 松开油门自然回到发射器中位, 这时候, 等待三下蜂鸣声同时红灯闪亮一次. BEEP BEEP BEEP Neutral Full point Throttle...
- Page 10 注册商标 ENSOTECH 是 Ensotech Limited 的注册商标。 本手册中提及的其他品牌通过版权保护其各自所有者. 维修 http://www.ensotech.ltd/download/Ensotech_RMA_request_form.pdf 下载维修申请书 连购买收据和产品寄回本司 安硕科技有限公司 香港, 荃湾, 沙咀道 23 号, 昌兴盛中心, 6 楼, F 室 电话: +852-34211446 电邮: support@ensotech.ltd https://shop.ensotech.ltd/ 有关详细维修条款请参考本司纲店 废物处理: 破损或无法使用是危险废物,必须按照规定进行处理。 电调和电机不得丢弃生活垃圾。 将其丢弃到适当的收集点. 本手册由 Ensotech Limited 出版。 它反映了印刷时的当前技术规范。Ensotech Limited 保留更改技术或物理规格的 权利,恕不另行通知。...
Need help?
Do you have a question about the Swave-E2 and is the answer not in the manual?
Questions and answers