
Related Manuals for ESAB Rebel EMP 285 Pulse


Summary of Contents for ESAB Rebel EMP 285 Pulse
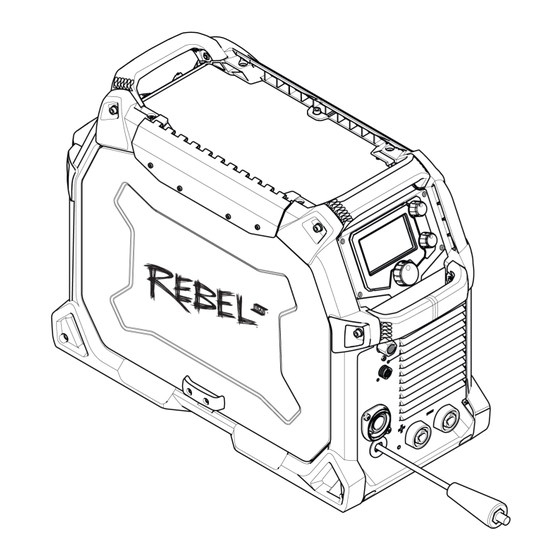
- Page 1 Rebel EMP 285 Pulse Instruction manual Valid for: Serial number: CD423YY-XXXXXX 0448 342 001 US 20241014...
-
Page 2: Table Of Contents
MMA / SMAW / Stick mode: Advanced ....................6.13 Lift-TIG mode: Basic .................... 6.14 Lift-TIG mode: Advanced ........................6.15 Settings .................... 6.16 User manual information ....................6.17 Icon reference guide 0448 342 001 - 2 - © ESAB AB 2024... - Page 3 TABLE OF CONTENTS .......................... MAINTENANCE ....................Routine maintenance ................Cleaning the wire drive assembly ............Rebel EMP 285 Pulse power side maintenance ..................... Torch liner maintenance ........................ TROUBLESHOOTING ...................... Preliminary checks ..........User interface (UI) software displayed error codes .......................
-
Page 4: Safety
6. Protect other personnel from arc rays and hot sparks with a suitable non-flammable partition or curtains. 7. Use goggles over safety glasses when chipping slag or grinding. Chipped slag may be hot and can fly far. Bystanders should also wear goggles over safety glasses. 0448 342 001 - 4 - © ESAB AB 2024... -
Page 5: Fires And Explosions
EMF around welding cables and welding machines. Therefore: 1. Welders with pacemakers should consult their physician before welding. EMF may interfere with some pacemakers. 2. Exposure to EMF may have other health effects which are unknown. 0448 342 001 - 5 - © ESAB AB 2024... -
Page 6: Fumes And Gases
2. Have only qualified people remove covers for maintenance and troubleshooting as necessary 3. Keep hands, hair, loose clothing and tools away from moving parts. 4. Reinstall panels or covers and close doors when service is finished and before starting the unit. 0448 342 001 - 6 - © ESAB AB 2024... -
Page 7: User Responsibility
ANSI Z87.1, "Occupational and Educational Personal Eye and Face Protection Devices" User responsibility Users of ESAB equipment have the ultimate responsibility for ensuring that anyone who works on or near the equipment observes all the relevant safety precautions. Safety precautions must meet the requirements that apply to this type of equipment. - Page 8 Keep your head out of the fumes. • Use ventilation, extraction at the arc, or both, to take fumes and gases away from your breathing zone and the general area. 0448 342 001 - 8 - © ESAB AB 2024...
-
Page 9: Fire Hazard
As the person responsible for the equipment, it is your responsibility to obtain information on approved collection stations. For further information contact the nearest ESAB dealer. 0448 342 001 - 9 - © ESAB AB 2024... -
Page 10: California Proposition 65 Warning
California to cause cancer and birth defects or other reproductive harm. Wash hands after use. For more information, go to www.P65Warnings.ca.gov. ESAB has an assortment of welding accessories and personal protection equipment for purchase. For ordering information contact your local ESAB dealer or visit us on our website. 0448 342 001 - 10 -... -
Page 11: Introduction
The Rebel EMP 285 Pulse features a 4.33 in color TFT (Thin Film Transistor) user interface (UI) display which provides quick and easy selection of weld process and parameters, suitable for both newly trained and intermediate-level users. -
Page 12: Technical Data
3 TECHNICAL DATA TECHNICAL DATA Rebel EMP 285 Pulse Voltage 460 V ± 10%, 3~ 50/60 Hz 575 V ± 10%, 3~ 50/60 Hz Primary current 18.0 A 15.0 A MIG / MAG / GMAW MIG / MAG / GMAW 9.8 A... - Page 13 3 TECHNICAL DATA Rebel EMP 285 Pulse Aluminum 0.031 - 0.047 in Wire feed speed 4.26 - 66.6 ft/min Maximum gas pressure 110 psi Wire spool size 3.93 - 11.8 in Maximum wire spool weight 45.19 lb Dimensions l × w × h 27 ×...
-
Page 14: Installation
C. Minimum 7.87 in If permanent installation leave enough room to open door and access spool side. WARNING! Secure the equipment - particularly if the ground is uneven or sloping. 0448 342 001 - 14 - © ESAB AB 2024... -
Page 15: Lifting Instructions
• Correctly earthed (electrically) in accordance with local regulations. • Connected to the correct size power point and fuse as tables below. 1. Rating plate with mains supply connection data. 0448 342 001 - 15 - © ESAB AB 2024... -
Page 16: Recommended Fuse Sizes And Minimum Cable Area
(Lock-out/Tagging) in the "Open" position before removing input power fuses. Connection/disconnection should be carried out by competent persons. Rebel EMP 285 Pulse Supply voltage (3~ 50/60 Hz) 460 V ± 10%, 575 V ± 10%... -
Page 17: Operation
The power source has two outputs, a positive welding terminal (+) and a negative welding terminal (-), for connecting welding and return cables. The output to which the welding cable is connected depends on the welding method or type of electrode used. 0448 342 001 - 17 - © ESAB AB 2024... -
Page 18: Polarity Change
Tighten the spool bolt to prevent it from sliding off the hub. Rebel EMP 285 Pulse can be used with bobbin sizes of 3.93 in, 7.87 in, and 11.81 in. See "TECHNICAL DATA" chapter for suitable wire dimensions for each wire type. -
Page 19: Installing And Replacing Wire
NOTE! If installing aluminum wire, see "Welding with aluminum wire" chapter. The Rebel EMP 285 Pulse handles spool sizes of 3.93 in, 7.87 in, and 11.81 in. See "TECHNICAL DATA" chapter for suitable wire dimensions for each wire type. 0448 342 001 - 19 - ©... -
Page 20: Installing Wire
Too long a torch liner risks damage to the wire-feed assembly if forced to fit when attempting to connect the torch to the power unit. Refer to the torch manual for instructions for torch liner replacement. 0448 342 001 - 20 - © ESAB AB 2024... - Page 21 10)Set and verify the wire feed tension for correct wire feed pressure, see "Setting wire feed pressure" chapter. After completion, close the wire spool side cover of the power source. 0448 342 001 - 21 - © ESAB AB 2024...
-
Page 22: Removing Wire
To MIG / MAG / GMAW weld with aluminum wire, use optional spool torch or push-pull torch for the best results. Refer to the specific torch instruction manual for the correct set up. 0448 342 001 - 22 - © ESAB AB 2024... -
Page 23: Setting Feed Roll Pressure
1/16 Pressure setting Wire material Fe, Ss Tensioner arm 1 Tensioner arm 2 3–3.5 Cored Tensioner arm 1 Tensioner arm 2 2.5–3 1. Tensioner arm 1 2. Tensioner arm 2 0448 342 001 - 23 - © ESAB AB 2024... -
Page 24: Spool Hub Brake
2) Unlock the feed rolls by rotating the feed roll quick lock (A) for each feed roll. 3) Remove the pressure from the feed roll pressure arms (C) by rotating the wire tensioner arms outward. 4) Remove the feed rolls and install the new ones. 0448 342 001 - 24 - © ESAB AB 2024... -
Page 25: Removing/Installing/Adjusting Wire Feed Guides
4) Lock the new wire inlet guide into place using the wire guide quick lock (A). Center wire guide 1) To remover the center wire guide, pinch the center of the wire guide and pull out the guide (A). 0448 342 001 - 25 - © ESAB AB 2024... -
Page 26: Shielding Gas
). Stainless steel can be welded with mixed gas (Ar + CO ) or trimix (He + Ar + CO ). Aluminum and silicon bronze use pure argon gas (Ar). In the sMIG 0448 342 001 - 26 - © ESAB AB 2024... -
Page 27: Duty Cycle
4 minutes out of every 10-minute period. The remaining time, 6 minutes, the power source must be allowed to cool down. Figure 27: Example of 40 % duty cycle 0448 342 001 - 27 - © ESAB AB 2024... -
Page 28: User Interface
8. User manual 9. Dialog box sMIG mode: Basic 1. Home screen selection 2. Information 3. Memory 4. Material selection 5. Wire feed speed indication 6. Material thickness indication 7. Dialog box 0448 342 001 - 28 - © ESAB AB 2024... -
Page 29: Smig Mode: Advanced
7. Dialog box Manual MIG mode: Advanced 1. Home screen selection 2. Information 3. Memory 4. Material selection 5. Parameters 6. Wire feed speed indication 7. Voltage indication 8. Dialog box 0448 342 001 - 29 - © ESAB AB 2024... -
Page 30: Pulse Mig Mode: Basic
5. MIG / spool / pushpull torch 6. Spot time on adjustment (disabled) 7. Spot on / off 8. Burn back 9. Hotstart WFS 10. Hotstart time 11. Crater WFS 12. Crater time 0448 342 001 - 30 - © ESAB AB 2024... -
Page 31: Flux Cored Wire Mode: Basic
2. Information 3. Memory 4. Amperage indication 5. Output voltage indication 6. Dialog box 7. Output ON/OFF indication Blue user interface background changes to orange when the output is "ON" (enabled). 0448 342 001 - 31 - © ESAB AB 2024... -
Page 32: Mma / Smaw / Stick Mode: Advanced
2. Information 3. Memory 4. Amperage indication 5. Dialog box 6.14 Lift-TIG mode: Advanced 1. Home screen selection 2. Information 3. Memory 4. Parameters 5. Amperage indication 6. Dialog box 0448 342 001 - 32 - © ESAB AB 2024... -
Page 33: Settings
For spray and flux core welding, traditional burn back is recommended. When burn back time is set to zero, SCT automatically is enabled. A non-zero burn back setting will disable SCT. 0448 342 001 - 33 - © ESAB AB 2024... - Page 34 Push pull torch Manual FCAW Parameters Manual MIG / MAG / GMAW Percent MMA / SMAW / Stick Pre-flow Smart MIG / MAG / GMAW Post-flow Lift TIG / GTAW Seconds Saving 0448 342 001 - 34 - © ESAB AB 2024...
- Page 35 Volts 4T, Trigger Hold/Lock User manual Amps Material thickness indication Arc force Voltage trim indication Downslope Advanced Settings Hot start Basic Settings Arc dynamics Language selection Memory Stick electrode selection 0448 342 001 - 35 - © ESAB AB 2024...
- Page 36 Unit of Measure Wire diameter Bead profile, concave Bead profile, convex Gas selection Hot start time Creep start Mild steel Hotstart WFS Crater WFS Crater time Output ON / OFF Aluminum indication Stainless steel 0448 342 001 - 36 - © ESAB AB 2024...
-
Page 37: Maintenance
Cleaning the wire drive assembly Best practice is to clean the wire drive assembly each time the wire spool is replaced. WARNING! Always use hand and eye protection when cleaning. 0448 342 001 - 37 - © ESAB AB 2024... - Page 38 9) Close the feed roll pressure arm and secure them with the tensioner arms. 10)Feed the wire through the torch until the wire exits the contact tip. 11) Close wire feed compartment door. 0448 342 001 - 38 - © ESAB AB 2024...
-
Page 39: Rebel Emp 285 Pulse Power Side Maintenance
NOTE! Because of the electro-static sensitive components and exposed circuit boards, any maintenance on this side should be done by an authorized ESAB service technician. Torch liner maintenance Refer to the torch instruction manual for replacement of the conduit liner. -
Page 40: Troubleshooting
Make sure you are using the correct polarity. The electrode holder welding problems is usually connected to the positive polarity and the work lead to the negative polarity. Consult the electrode data sheet. 0448 342 001 - 40 - © ESAB AB 2024... -
Page 41: User Interface (Ui) Software Displayed Error Codes
Critical - If occurred at power-up under no-load condition. DC Bus (400 V) fault droop under load, PFC not supplying 400 V to inverter. Output voltage is above VRD levels when VRD switch is active. 005 – (reserved) 0448 342 001 - 41 - © ESAB AB 2024... - Page 42 The image read from the flash is corrupted Failed two attempts of saving user memory to permanent memory in SPI flash. Failed two attempts of recovering user memory permanent memory from SPI flash. 0448 342 001 - 42 - © ESAB AB 2024...
-
Page 43: Ordering Spare Parts
Spare parts and wear parts can be ordered through your nearest ESAB dealer, see esab.com. When ordering, please state product type, serial number, designation and spare part number in accordance with the spare parts list. -
Page 44: Diagram
4. Primary inverter on power board 12. Control board 5. Main transformer 13. User interface (UI) 6. Ferrite cores 14. Wire feeder 7. Output diode assembly 15. Gas valves 8. Current sensor 16. Fans 0448 342 001 - 44 - © ESAB AB 2024... -
Page 45: Ordering Numbers
APPENDIX ORDERING NUMBERS Ordering number Description Notes 0558 102 556 Rebel EMP 285 Pulse 0448 344 001 Spare parts list 0448 342 001 - 45 - © ESAB AB 2024... -
Page 46: Wear Parts
0.045 (1.2) 0.045 (1.2) 0445850006 0.052 (1.4) 0.062 (1.6) V-K-knurled Part no. Size in. (mm) 0445850030 0.035 (0.9) 0.045 (1.2) 0445850032 0.045 (1.2) 0.052 (1.4) 0445850033 0.062 (1.6) 0.062 (1.6) 0448 342 001 - 46 - © ESAB AB 2024... - Page 47 Fe/SS/C 0.024 (0.6) 0.062 (1.6) 0446080881 0.030 (0.8) 0.062 (1.6) Wire outlet guide Part no. Wire Size in. (mm) 0445830881 Fe/SS/C 0.024 (0.6) 0.062 (1.6) 0445830885 0.030 (0.8) 0.062 (1.6) 0448 342 001 - 47 - © ESAB AB 2024...
-
Page 48: Accessories
APPENDIX ACCESSORIES 0700026610 ESAB Heliarc SR-17 gas cooled 3.8 m, 5/8” gas, OKC 50 0700026611 ESAB Heliarc SR-17 gas cooled 7.6 m, 5/8” gas, OKC 50 0700026620 ESAB Heliarc SR-26 gas cooled 3.8 m, 5/8” gas, OKC 50 0700026621 ESAB Heliarc SR-26 gas cooled 7.6 m, 5/8” gas, OKC 50 0700025534 ESAB Heliarc SR-B 20 water cooled 3.8 m, OKC 50... - Page 49 OKC 50 cable connector, female (2 ea.) W4013900 Gas hose 5/8 in 18 RH fittings, 3m 0781-2703 Victor GRF400-320 flow gauge regulator for CO2 0781-9411 Victor GF-250-50-580 flow gauge regulator for Ar/CO2 0448 342 001 - 49 - © ESAB AB 2024...
- Page 50 For contact information visit http://esab.com ESAB Corporation, 2800 Airport Road Denton, TX 76207, USA, Phone +1 800 378 8123 manuals.esab.com...
Need help?
Do you have a question about the Rebel EMP 285 Pulse and is the answer not in the manual?
Questions and answers