Table of Contents
Advertisement
Quick Links
Advertisement
Table of Contents

Summary of Contents for Alliums AP-016
- Page 1 USER MANUAL PORTABLE 1080P PROJECTOR WITH BLUETOOTH MODEL: AP-016 / AP-016B...
- Page 2 Copyright © 2023, Alliums, Australia. All Rights Reserved.
-
Page 3: Table Of Contents
CONTENTS IMPORTANT SAFEGUARDS ACCESSORIES LIST PROJECTOR OVERVIEW SPECIFICATIONS MULTIMEDIA SUPPORTED FORMATS REMOTE CONTROL SWITCHING MACHINE OPERATION STANDARD SETTING IMAGE FOCUSING USE OF THE PROJECTOR SOURCE SETTINGS MULTIMEDIA MENU SETTINGS BLUETOOTH SETTINGS DEFECTIVE PRODUCTS & RETURNS PLEASE READ THROUGH THIS USER’S MANUAL FOR PROPER USE OF THIS PRODUCT. -
Page 4: Important Safeguards
IMPORTANT SAFEGUARDS Please read the manual carefully before operating projector. To ensure stable power supply, please use standard power cord. Please use the power supply and cable indicated on the rating label. The projector should be kept away from cloths, sofas and anything that may block the ventilation scoop. -
Page 5: Projector Overview
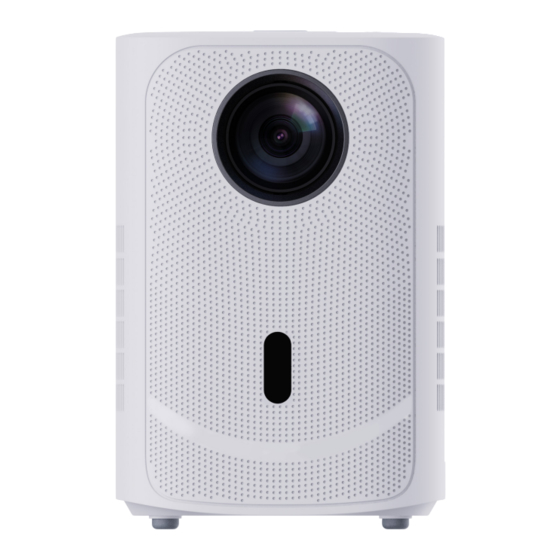
PROJECTOR OVERVIEW Lens Speaker IR Receiver Air Outlet Headphone Jack CoolingWindow USB Port CoolingWindow HDMI Port Power Socket IR Receiver Note: Lightly press the dust net, the dust net will pop up, just take out the dust net and clean it. - Page 6 PROJECTOR OVERVIEW Power Key Bracket Holes (1/4 inch nut*l, depth 6mm), Supports Hoisting Bottom Label...
-
Page 7: Specifications
SPECIFICATIONS MODEL MULTIMEDIA PROJECTOR LAMP IMAGE SYSTEM INPUT VOLTAGE AC100-240 V 50/60HZ WEIGHT 1.3 KG WORKING TEMP 0-35°C INPUT PORT HDMI /USB OUTPUT PORT HEADPHONE ASPECT RATIO 16:9 / 4:3 120X156X178MM SIZE OPERATION MODE MANUAL/ REMOTE CONTROL MULTIMEDIA SUPPORTED FORMATS In different angle you put the projector, the projection will Deformation like a trapezoid, use the keystone correction to make it correctly. -
Page 8: Remote Control
REMOTE CONTROL... -
Page 9: Switching Machine Operation
SWITCHING MACHINE OPERATION Power On: Step 1: Press the power button on the body or the power button on the remote control; the indicator light will turn blue and steady. Step 2: After 2 seconds, the projector starts to start. The image appears on the screen. -
Page 10: Standard Setting
STANDARD SETTING Refer to the data in the table below to place the projector away from the projection screen according to the preset graphic size. When installing, put the projector on a solid, stable countertop. The airframe should be well-ventilated. Do not cover or block the vents. -
Page 11: Image Focusing
IMAGE FOCUSING Image Focusing When the newly installed projector is used for the first time, the image will be blurred, and it is necessary to focus the picture; Manual Focus When the picture is blurred, press the focus keys "F+" and" F- "on the remote control to adjust the lens’s focal length or long-press the focus button until the picture is clear. -
Page 12: Use Of The Projector
USE OF THE PROJECTOR Source Settings Step 1: Select the source you want in the main interface. Step 2: Press OK button on the remote control to enter corresponding source interface. Note: When the projector is in the no signal interface, please press the source button on the remote control to select the home page or other source. -
Page 13: Menu Settings
USE OF THE PROJECTOR Menu Settings Select Setting in the main interface, first press left/right keys to select sub-menu, second set up the mode you need, finally press OK key to confirm Submenu: PICTURE: Picture Mode/ Contrast/ Brightness/ Color/ Tint/ Sharpness/ Zoom/ Color Temperature/ Noise Reduction. -
Page 14: Bluetooth Settings
USE OF THE PROJECTOR Bluetooth Settings (Note: Bluetooth function only supports Bluetooth version) Step 1: Select "SETTING" in the home screen; Step 2: After entering the interface, select "OPTION" and then find Bluetooth; Step 3: Enter the Bluetooth interface, turn on or off the Bluetooth via the "Left/Right"... -
Page 15: Defective Products & Returns
DEFECTIVE PRODUCTS & RETURNS Proved defective products meeting the specified warranty period should be contacted by customer support via www.alliums.com.au addressing your order number. Make sure not to dispose of your product before contacting us. Once our customer support team has approved your request, please return the unit with its order number. - Page 16 Questions or Concerns? support@alliums.com.au...


Need help?
Do you have a question about the AP-016 and is the answer not in the manual?
Questions and answers