
Related Manuals for Heat Storm HS-1500-KP


Summary of Contents for Heat Storm HS-1500-KP
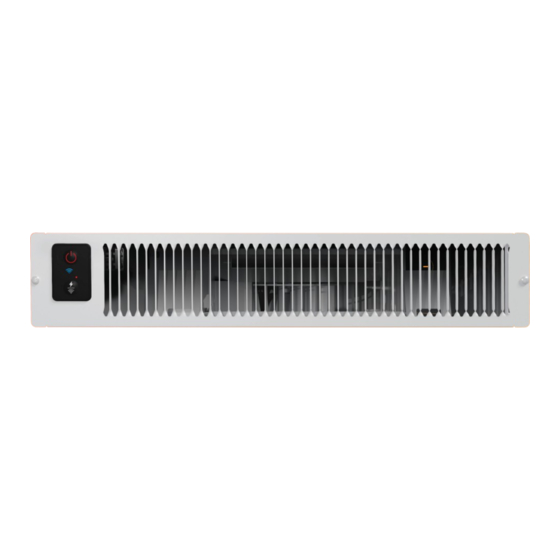
- Page 1 User manual Model: HS-1500-KP 1500 W | Forced air In-wall or under cabinent smart heater...
-
Page 2: Table Of Contents
Troubleshooting guide �����������������������������������������������������������������������������16 Return policy ���������������������������������������������������������������������������������������������18 1-year limited warranty ���������������������������������������������������������������������������18 Thank you and congratulations on your Heat Storm Heater! Please read and keep all safety and use instructions. Should you have any questions or concerns, please don't hesitate to reach out to us at 435-752-6611 or cs@heatstorm�com�... -
Page 3: Important Instructions
• Heat Storm Infrared Heaters are considered to be an appliance� Each heater and appliance should be on its own circuit� •... - Page 4 CAUTION • To prevent electric shock, match the wide blade of the plug to the wide slot and fully insert� • Turn off and wait for the fan to stop before disconnecting� • Do not insert foreign objects into ventilation or exhaust openings to prevent electric shock, fire, or heater damage.
-
Page 5: Battery Warning
BATTERY WARNING • The remote contains a lithium button/coin cell battery� If a new or used lithium button/coin cell battery is swallowed or enters the body, it can cause severe internal burns and can lead to death in as little as 2 hours� If you think batteries have been swallowed or placed inside any part of the body, seek immediate medical attention�... -
Page 6: Installation Instructions
Basement or garage use The heater can be utilized in a finished basement with drywall and carpet� For other scenarios, consider Heat Storm Outdoor Infrared Heaters� Visit heatstorm�com for details� Vaulted or cathedral ceilings The heater can be used with vaulted or cathedral ceilings� However, initial room heating may take longer�... -
Page 7: Power Connection Guidelines
This heater is wired for an outlet or the cord can be cut to hardwire the heater� Heat Storm Infrared Heaters are considered to be an appliance� Each heater and appliance should be on its own circuit� Plug the heater directly into a wall outlet; do not use extension cords, surge protectors, or relocatable power taps�... - Page 8 STEP 1: INSERT MOUNTING BRACKET Create a hole Cut a rectangular hole in wood or gypsum board with the following dimensions: 3 3/4" high, 18 1/2" cm wide, and at least 12" deep. Ensure there is at least 20" of space between the hole and any nearby cabinets or walls, and install a built-in electrical socket inside the hole for easy connection�...
- Page 9 Not hardwiring? Plug the heater in and skip to Step 3 (page 11) STEP 2: HARDWIRE HEATER (OPTIONAL) Remove heater top Remove all screws on the top and side of the heater as shown in the picture� Then, slide the top cover backward to remove it�...
- Page 10 Remove hole cover Use a screwdriver to remove the hole cover� Once removed, feed your wire into the box, ensuring that the wires are stripped and ready for connection� Connect wires Disconnect the current power cord and connect the 120V AC power supply according to the original wiring method used for the power cord�...
-
Page 11: Step 3: Install Heater
STEP 3: INSTALL HEATER Install the heating base Slide the heater into the rectangular hole and secure it in place using the two ST4�0x25mm screws from the kit� Operations & controls Power ON/OFF Press the power icon to alternate between on(red) and off (white)�... - Page 12 Change working mode Press the lightning/Wi-Fi button to toggle between low, auto, and high working modes� Low mode | Green • Heater runs at 50% power, effectively halving the wattage� Auto mode | White • Heater runs at full power until it's within 2 degrees of the set temperature�...
-
Page 13: Remote Control
Selecting Celsius or Fahrenheit Navigate to the Me section in the app� Tap the settings icon in the top right corner� Select Temperature Unit to change the temperature unit� REMOTE CONTROL Power The remote will function the same as the buttons on your unit� If you Working mode have any questions on how a function works, please refer to the previous... -
Page 14: Wi-Fi Setup
Wi-Fi® setup SMART LIFE APP Manage your Heat Storm Smart Heater conveniently anytime and anywhere you desire. With just a tap of your finger, you can adjust temperatures, create schedules, set a child lock, and ensure warmth according to your preferences�... -
Page 15: Easy Connect
EASY CONNECT *Ensure your phone's Wi-Fi, Bluetooth®, and location functions are all activated. Add device When the machine is on, press and hold the Wi-Fi/sun button on the control panel for 5 seconds until the Wi-Fi indicator light begins flashing slowly. Add the appliance in the app: i�... -
Page 16: Troubleshooting Guide
Troubleshooting guide RECALIBRATING YOUR HEATER If your heater is not working like normal, try resetting it� Heaters are like other electronics, sometimes they need a reboot (refer to the factory reset on page 11)� If an issue persists, contact customer service at 435-752-6611�... -
Page 17: Thermostat Calibration
2. Adjust the Heat Storm's thermostat with the slider to reach the same temperature as your central HVAC� NOTE: Generally, Heat Storm heater thermostats are more precise than home central thermostats. Adjusting your Heat Storm heater to align with your central system may result in reduced efficiency. BURNING PLASTIC SMELL A light plastic odor is normal for new, unused heaters�... -
Page 18: Return Policy
Returns & exchanges Eligibility Returns are available for items purchased from heatstorm�com if the following conditions are met: 1. Returned within 30 days of receiving the order� 2. In new condition with the original packaging with manuals and accessories� 3. Proof of purchase is provided� Shipping &... - Page 19 WARRANTY REDEMPTION Reach out to Heat Storm customer service at 435-752-6611 during the warranty period� Please have your sales receipt, purchase location, and product model information ready� Troubleshooting support will be offered over the phone�...
- Page 20 Need help? 435-752-6611 cs@heatstorm�com heatstorm�com...
Need help?
Do you have a question about the HS-1500-KP and is the answer not in the manual?
Questions and answers