Table of Contents
Advertisement
Quick Links
Item #1010065844
Model #MBC30
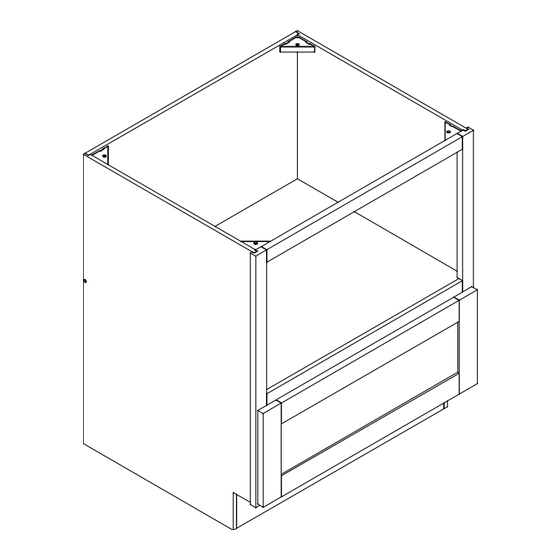
USE AND CARE GUIDE
MICROWAVE BASE CABINET
Questions, problems, missing parts? Before returning to the store,
call Hampton Bay Customer Service
8 a.m. – 7 p.m., EST, Monday – Friday, 9 a.m. – 6 p.m., EST, Saturday
1-855-HD-HAMPTON
HAMPTONBAY.COM
THANK YOU
We appreciate the trust and confidence you have placed in Hampton Bay through the purchase of this [PRODUCT]. We strive to
continually create quality products designed to enhance your home. Visit us online to see our full line of products available for your
home improvement needs. Thank you for choosing Hampton Bay!
INTERNAL USE
Advertisement
Table of Contents

Related Manuals for HAMPTON BAY MBC30


Summary of Contents for HAMPTON BAY MBC30
- Page 1 THANK YOU We appreciate the trust and confidence you have placed in Hampton Bay through the purchase of this [PRODUCT]. We strive to continually create quality products designed to enhance your home. Visit us online to see our full line of products available for your home improvement needs.
-
Page 2: Table Of Contents
Table of Contents Safety Information ............2 Cabinet Assembly ............5 Warranty ..............2 Drawer Box Assembly ..........10 Pre-Assembly .............. 3 Care and Cleaning ............ 14 Before You Begin ............. 3 Tools required ............3 Hardware Included ........... 3 Package Contents ............ -
Page 3: Pre-Assembly
Pre-Assembly BEFORE YOU BEGIN Compare all parts with the Hardware Included and Package Contents sections. If any part is missing or damaged, do not assemble this product. Contact Customer Service. Assemble the cabinet on a soft surface such as carpet or the cardboard container of this product. TOOLS REQUIRED Rubber Phillips... -
Page 4: Package Contents
Pre-Assembly PACKAGE CONTENTS Part Description Quantity Back Panel Side Panel Face Frame Middle/Bottom Panel Toe Kick Drawer Back Drawer Side Drawer Front Drawer Bottom INTERNAL USE... -
Page 5: Cabinet Assembly
Cabinet Assembly Attaching the posts to the panels ¨ Align six posts (AA) with pre-drilled holes on each of the panels and frame (A – B – C) and secure with six screws (BB) on each panel and frame (A – B – C). Attaching the side panels into the face frame ¨... - Page 6 Cabinet Assembly Attaching the middle and bottom panels ¨ Slide the middle and bottom (D) panels into grooves in the sides. ¨ Snap six corner locks (CC) over the posts to secure the face frame (C) and side panels (B) as shown (two corner locks (CC) on the bottom, two under the middle panel and two on the top).
- Page 7 Cabinet Assembly NOTE: If installing on a laminate countertop, orient the top corner locks (CC) in the opposite direction. Bottom corner lock assembly will be the same for all countertop types. ¨ If installing a laminate countertop, the top four corner locks (CC) should be oriented as shown ¨...
- Page 8 Cabinet Assembly Attaching the toe kick ¨ Slide the toe kick (E) into the grooves of the side panels (B) so that it sits flush with the bottom of the cabinet. ¨ Insert two screws (BB) into the pocket holes to secure the toe kick (E) to the sides. Securing the back and side panels ¨...
- Page 9 Cabinet Assembly Attaching the remaining corner locks ¨ Lift the cabinet to a normal standing position. ¨ Attach remaining two corner locks (CC) under the middle panel (D), and insert four screws (BB) through the holes in the corner locks (CC). HAMPTONBAY.COM Please contact 1-855-HD-HAMPTON for further assistance.
-
Page 10: Drawer Box Assembly
Drawer Box Assembly Attaching the drawer sides ¨ Place the drawer front (H) face down on a smooth surface that will not scratch or damage the face of the drawer, such as a towel or piece of cardboard (1) from the packaging. ¨... - Page 11 Drawer Box Assembly Attaching the drawer back ¨ Use a rubber mallet to tap the drawer back (F) into place. To fit the drawer back on, drawer sides will have to flex outwards slightly. ¨ Insert two more screws (BB) into the countersunk holes on each side. Fully tighten all four screws. Attaching the drawer glide attachments ¨...
- Page 12 Drawer Box Assembly Attaching the drawer glides ¨ Install the HH into the pre-drilled hole and secure with screws (GG) then install the drawer glides (FF) by sliding them into the drawer glide holders (HH). Pull the drawer glides (FF) out until the front reaches the face frame and secure with a screw (GG).
- Page 13 Drawer Box Assembly (OPTIONAL) Adjusting the drawer front ¨ Drawer fronts can be adjusted by turning the knobs on drawer glide attachments. Drawer fronts can be moved left, right, up, and down on each side until they are level. Attaching silicone pads ¨...
-
Page 14: Care And Cleaning
Care and Cleaning □ For normal spills, a damp cloth is sufficient. Dry the surface immediately. □ Doors can be cleaned with most general purpose household cleaners. □ Do not use caustic agents and/or abrasive scrubbers, or oven cleaners. □ Cabinets can be cleaned with a damp sponge or cloth using soapy water, or most general purpose household cleaners. - Page 15 Questions, problems, missing parts? Before returning to the store, call Hampton Bay Customer Service 8 a.m. – 7 p.m., EST, Monday – Friday, 9 a.m. – 6 p.m., EST, Saturday 1-855-HD-HAMPTON HAMPTONBAY.COM Retain this manual for future use. INTERNAL USE...
Need help?
Do you have a question about the MBC30 and is the answer not in the manual?
Questions and answers