Table of Contents
Advertisement
Contents
Front . . . . . . . . . . . . . . . . . . . . . . . . . . . . . . . . . . . . . . . . . . . . . . . . . . . . . . . . . . . . . 2
Left Side . . . . . . . . . . . . . . . . . . . . . . . . . . . . . . . . . . . . . . . . . . . . . . . . . . . . . . . . . . 4
Right Side . . . . . . . . . . . . . . . . . . . . . . . . . . . . . . . . . . . . . . . . . . . . . . . . . . . . . . . . . 5
Back . . . . . . . . . . . . . . . . . . . . . . . . . . . . . . . . . . . . . . . . . . . . . . . . . . . . . . . . . . . . . . 6
Bottom . . . . . . . . . . . . . . . . . . . . . . . . . . . . . . . . . . . . . . . . . . . . . . . . . . . . . . . . . . . . 8
Keyboard area . . . . . . . . . . . . . . . . . . . . . . . . . . . . . . . . . . . . . . . . . . . . . . . . . . . . . 10
Identifying your model . . . . . . . . . . . . . . . . . . . . . . . . . . . . . . . . . . . . . . . . . . . . . . . 12
Accessories . . . . . . . . . . . . . . . . . . . . . . . . . . . . . . . . . . . . . . . . . . . . . . . . . . . . . . . 13
Connecting the AC adapter . . . . . . . . . . . . . . . . . . . . . . . . . . . . . . . . . . . . . . . . . . . 16
Protecting from power source problems . . . . . . . . . . . . . . . . . . . . . . . . . . . . . . 18
Starting your notebook . . . . . . . . . . . . . . . . . . . . . . . . . . . . . . . . . . . . . . . . . . . . . . 19
Waking up your notebook . . . . . . . . . . . . . . . . . . . . . . . . . . . . . . . . . . . . . . . . . 19
Turning off your notebook . . . . . . . . . . . . . . . . . . . . . . . . . . . . . . . . . . . . . . . . . 20
Switching user accounts in Windows XP . . . . . . . . . . . . . . . . . . . . . . . . . . . . . . . . 21
Status indicators . . . . . . . . . . . . . . . . . . . . . . . . . . . . . . . . . . . . . . . . . . . . . . . . . . . 23
Using the keyboard . . . . . . . . . . . . . . . . . . . . . . . . . . . . . . . . . . . . . . . . . . . . . . . . . 24
Keys . . . . . . . . . . . . . . . . . . . . . . . . . . . . . . . . . . . . . . . . . . . . . . . . . . . . . . . . . 25
System key combinations . . . . . . . . . . . . . . . . . . . . . . . . . . . . . . . . . . . . . . . . . 26
Using the EZ Pad touchpad . . . . . . . . . . . . . . . . . . . . . . . . . . . . . . . . . . . . . . . . . . 28
Using the touchpad . . . . . . . . . . . . . . . . . . . . . . . . . . . . . . . . . . . . . . . . . . . . . . 29
Connecting the modem . . . . . . . . . . . . . . . . . . . . . . . . . . . . . . . . . . . . . . . . . . . . . . 31
Connecting to an Ethernet network . . . . . . . . . . . . . . . . . . . . . . . . . . . . . . . . . . . . 32
Broadband Internet connections . . . . . . . . . . . . . . . . . . . . . . . . . . . . . . . . . . . . 32
Installing a printer, scanner, or other peripheral device . . . . . . . . . . . . . . . . . . . . . 33
HelpSpot . . . . . . . . . . . . . . . . . . . . . . . . . . . . . . . . . . . . . . . . . . . . . . . . . . . . . . . . . 36
HelpSpot Videos . . . . . . . . . . . . . . . . . . . . . . . . . . . . . . . . . . . . . . . . . . . . . . . . 38
Online help . . . . . . . . . . . . . . . . . . . . . . . . . . . . . . . . . . . . . . . . . . . . . . . . . . . . . . . 39
Gateway Web site . . . . . . . . . . . . . . . . . . . . . . . . . . . . . . . . . . . . . . . . . . . . . . . . . . 40
About the Windows environment . . . . . . . . . . . . . . . . . . . . . . . . . . . . . . . . . . . . . . 42
Using the desktop . . . . . . . . . . . . . . . . . . . . . . . . . . . . . . . . . . . . . . . . . . . . . . . . . . 43
Using the Start menu . . . . . . . . . . . . . . . . . . . . . . . . . . . . . . . . . . . . . . . . . . . . 44
Identifying Window items . . . . . . . . . . . . . . . . . . . . . . . . . . . . . . . . . . . . . . . . . . . . . 45
. . . . . . . . . . . . . . . . . . . . . . . . . . . . . . . . . . . . . . . . . . . . . . . . . . 15
. . . . . . . . . . . . . . . . . . . . . . . . . . . . . . . . . . . . . . . . . . . . . . . . . . . . 35
. . . . . . . . . . . . . . . . . . . . . . . . . . . . . . . . . . . . . . . . . . . . . . . . 41
. . . . . . . . . . . . . . . . . . . . . . . . . . 1
i
Advertisement
Table of Contents
Troubleshooting

Related Manuals for Gateway Solo 5350


Summary of Contents for Gateway Solo 5350
-
Page 1: Table Of Contents
Gateway Web site ........ - Page 2 Working with files and folders .........47 Viewing drives .
- Page 3 Listening to Internet radio ......... 94 Using advanced features .
- Page 4 11 Upgrading Your Notebook ........139 Adding PC Cards .
- Page 5 For more information ..........218 14 Moving from Your Old Computer .
- Page 6 Telephone support ..........276 Before calling Gateway Technical Support ......276 Telephone numbers .
-
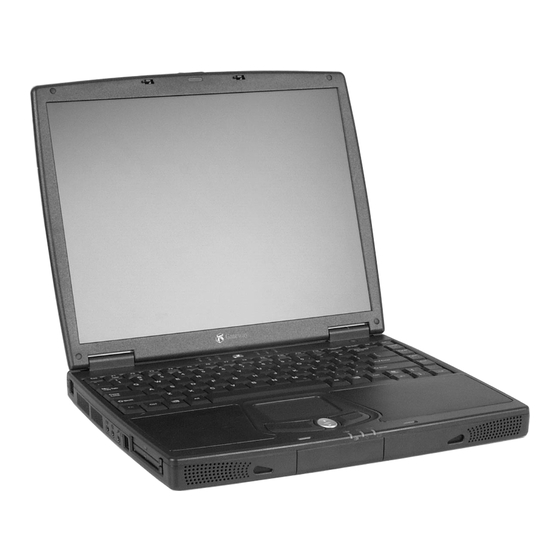
Page 7: Checking Out Your Gateway Solo 5350
Checking Out Your Gateway Solo 5350 Tips & Tricks To access the contents of this guide while you are traveling, download an electronic copy from www.gateway.com/support/manlib/. www.gateway.com... -
Page 8: Front
Chapter 1: Checking Out Your Gateway Solo 5350 Front Power Speaker Release Speaker indicator latch Hot-swap Battery charge indicator indicator Component Icon Description Speakers Provide audio output. Speakers are disabled while headphones are connected. Release latch Open the notebook cover by sliding the release latch to the right. - Page 9 Orange light indicates that the battery is charging. Red light indicates that the battery is low. No light indicates that the system is running on the battery because the AC adapter is either not connected or is not providing power. www.gateway.com...
-
Page 10: Left Side
Chapter 1: Checking Out Your Gateway Solo 5350 Left Side Ethernet Ventilation fan Line in jack Modem jack PC Card jack (do not block) eject buttons Speaker jack PC Card slots Microphone jack Component Icon Description Ethernet jack Plug an Ethernet 10/100 network cable into this jack. For more information, see “Connecting to an Ethernet network”... -
Page 11: Right Side
Use this bay for a second battery, or a CD, CD-RW, DVD, diskette, LS-120, or second hard drive. For more information, see “Changing bay modules” on page 142. Eject button Press the eject button to open the module tray. www.gateway.com... -
Page 12: Back
Chapter 1: Checking Out Your Gateway Solo 5350 Back PS/2 Parallel Docking Monitor Power port port port port connector TV out Kensington ports jack lock slot Serial port Component Icon Description Kensington™ lock slot Secure your computer to an object by connecting a Kensington cable lock to this slot. - Page 13 Plug USB (Universal Serial Bus) devices (such as a USB Iomega™ Zip™ drive, scanner, or camera) into these port. Serial port Plug a serial device (such as a digital camera) into this port. Power connector Plug the AC power adapter cable into this connector. www.gateway.com...
-
Page 14: Bottom
Chapter 1: Checking Out Your Gateway Solo 5350 Bottom System Module label Module latch Battery latch Main battery Hard Memory Battery drive meter Component Icon Description Module bay Use this bay for a second battery, or a CD, CD-RW, DVD, diskette, LS-120, or second hard drive. - Page 15 Install as many as two SO-DIMM memory modules into the slots in this bay. For more information, see “Installing memory” on page 146. System label Includes the product model number and serial number. For more information, see “Identifying your model” on page 12. www.gateway.com...
-
Page 16: Keyboard Area
Chapter 1: Checking Out Your Gateway Solo 5350 Keyboard area Power button Status indicators Keyboard Microphone Touchpad Component Description Power button Press to turn the power on or off. For more information on configuring the power button mode, see “Changing power settings” on page 114. - Page 17 “Safety, Regulatory, and Legal Information” on page 281 for general wireless regulatory and safety guidelines. To find out if your system has an internal wireless device, check the label (see “Identifying your model” on page 12). www.gateway.com...
-
Page 18: Identifying Your Model
Chapter 1: Checking Out Your Gateway Solo 5350 Identifying your model The label on the bottom of your computer contains information that identifies your notebook model. Gateway Technical Support will need this information if you call for assistance. Important The label shown below is for informational purposes only. -
Page 19: Accessories
Accessories Accessories Gateway offers accessories that can help you make the most of using your notebook. Batteries and automobile/airplane power adapters If you run your notebook on battery power for extended periods, you may want to buy an additional battery so that you can swap batteries when necessary. - Page 20 Chapter 1: Checking Out Your Gateway Solo 5350 Printers You can attach many types of printers to your computer. The most common types are inkjet and laser printers, which print in color or black and white. Inkjet printers and cartridges are relatively inexpensive, but usually they are slower than laser printers.
-
Page 21: Getting Started
Getting Started This chapter provides basic information about your Gateway notebook. Read this chapter to find out: How to connect the AC power adapter How to start and turn off your notebook How to use the keyboard How to use the EZ Pad™ touchpad... -
Page 22: Connecting The Ac Adapter
Connect the power cord to the AC adapter. Warning Replace the power cord if it becomes damaged. The replacement cord must be of the same type and voltage rating as the original cord or the notebook may be damaged. www.gateway.com... - Page 23 Warning Do not attempt to disassemble the AC adapter. The AC adapter has no user-replaceable or user-serviceable parts inside. The AC adapter has dangerous voltages that can cause serious injury or death. Contact Gateway about returning defective AC adapters. www.gateway.com...
-
Page 24: Protecting From Power Source Problems
If you have a cable modem, use a surge protector that has an antenna/cable TV jack. During an electrical storm, unplug both the surge protector and the modem. www.gateway.com... -
Page 25: Starting Your Notebook
Standby. While in Standby, the power indicator flashes. If your notebook is in Standby mode, “wake” it up by pressing the power button. For more information on changing power-saving settings, see “Managing Power” on page 105. www.gateway.com... -
Page 26: Turning Off Your Notebook
, then click Shut Down If for some reason you cannot use the Turn Off Computer or Shut Down option in Windows to shut down your notebook, press and hold the power button for about five seconds, then release. www.gateway.com... -
Page 27: Switching User Accounts In Windows Xp
To add, delete, or modify user accounts in Windows XP: Click , select , then double-click . The User Start Control Panel User Accounts Accounts window opens. Follow the on-screen prompts to add, delete, or modify a user account. www.gateway.com... - Page 28 The Windows Switch User logon screen opens. Select the user account that you want to activate. When you switch between users, any programs that were running for the previous user continue to run. www.gateway.com...
-
Page 29: Status Indicators
Turns on when the standard 1.44 MB diskette drive is in use. Caps Lock Turns on when Caps Lock is activated. Pad Lock Turns on when the embedded numeric keypad is activated. Scroll Lock Turns on when Scroll Lock is activated. www.gateway.com... -
Page 30: Using The Keyboard
You can attach an external keyboard to the notebook using a USB or PS/2 port. You do not need to shut down the notebook to connect a keyboard. Function keys/System keys Volume keys/Navigation keys Windows Numeric Application Arrow keys/ keypad Brightness controls www.gateway.com... -
Page 31: Keys
Press for quick access to shortcut menus and help assistants in Windows. Arrow keys Press these keys to move the cursor up, down, right, or left. Brightness controls Press these green-colored keys in combination with the F key to control the screen brightness. www.gateway.com... -
Page 32: System Key Combinations
(This function is only available in some programs.) Pause execution of a DOS program. (This function is only available in some programs.) Stop the currently running DOS program. (This function is only available in some programs.) Increase the brightness of the display. www.gateway.com... - Page 33 Using the keyboard Press F and this To... function key... Decrease the brightness of the display. Mute the sound. Press the key combination again to restore the sound. Increase volume. Decrease volume. www.gateway.com...
-
Page 34: Using The Ez Pad Touchpad
The EZ Pad™ touchpad consists of a touchpad, a rocker switch, and two buttons. Touchpad Rocker switch Left Right touchpad touchpad button button When you move your finger on the touchpad, the pointer (arrow) on the screen moves in the same direction. www.gateway.com... -
Page 35: Using The Touchpad
You can assign a function to the rocker switch between the touchpad buttons on the Solo 5350. This function can be to scroll up or down, maximize or minimize the active window, or open and close the Start menu. For more information about programming the rocker switch, see “Changing the... - Page 36 Press the left button and hold it down, then use the touchpad to move (drag) the object to the appropriate part of the screen. Release the button to drop the object where you want it. www.gateway.com...
-
Page 37: Connecting The Modem
Insert the other end of the modem cable into a telephone wall jack. The modem will not work with digital or PBX telephone lines. Start your notebook, then start your communications software. www.gateway.com... -
Page 38: Connecting To An Ethernet Network
You can use your computer’s Ethernet jack for more than just networking. Many broadband Internet connections, such as cable modems and DSL modems, connect to your computer’s Ethernet jack. For more information, see “Using the Internet” on page 63 and “Networking Your Notebook” on page 171. www.gateway.com... -
Page 39: Installing A Printer, Scanner, Or Other Peripheral Device
(USB), serial, and parallel. These ports are used for connecting peripheral devices such as printers, scanners, and digital cameras to your computer. For more information about port locations, see “Checking Out Your Gateway Solo 5350” on page 1. USB ports support plug-and-play and hot swapping, which means that your computer will usually recognize such a device whenever you plug it into the appropriate port. - Page 40 Chapter 2: Getting Started www.gateway.com...
-
Page 41: Getting Help
This chapter tells you about additional information resources available to help you use your computer, including: ™ HelpSpot Online help Gateway Web site Tips & Tricks To access the contents of this guide while you are traveling, download an electronic copy from www.gateway.com/support/manlib/. -
Page 42: Helpspot
Help information, troubleshooters, instructional videos, and automated support. Use HelpSpot to answer questions about Windows and to help you quickly discover and use the many features of your Gateway computer. To start HelpSpot: Click , then select . - Page 43 HelpSpot You can find help information by clicking a link, performing a search, or browsing the index. To learn about using your Gateway computer, your mouse, and other topics, click the link on the HelpSpot main Getting Started page. www.gateway.com...
-
Page 44: Helpspot Videos
HelpSpot contains several short videos to help introduce you to new concepts or show you how to perform various tasks. To play a HelpSpot video: To watch a video in HelpSpot, click on the HelpSpot home Video Tutorials page, then click a video title. The video plays. www.gateway.com... -
Page 45: Online Help
Help by clicking a button. Help You can search for information by viewing the help contents, checking the index, searching for a topic or keyword, or browsing through the online help. www.gateway.com... -
Page 46: Gateway Web Site
Chapter 3: Getting Help Gateway Web site Gateway provides a variety of information on its Web site to help you use your computer. Visit the Gateway Web site at www.gateway.com for: Technical documentation and product manuals Technical tips and support, including online chat services... -
Page 47: Windows Basics
Read this chapter to get basic information on how to: Work on the Windows desktop Manage files and folders Work with documents Use shortcuts Help and For more information on Windows, click Start, then select Support Help and Support or Help. www.gateway.com... -
Page 48: About The Windows Environment
The desktop is like the top of a real desk. Think of the desktop as your personalized work space where you open programs and perform other tasks. Your desktop may be different from the example shown below, depending on how your computer is set up. www.gateway.com... -
Page 49: Using The Desktop
The Recycle Bin is where files, folders, and programs that you discarded are stored. You must empty the Recycle Bin to permanently delete them from your computer. For instructions on how to use the Recycle Bin, see “Deleting files and folders” on page 50. www.gateway.com... -
Page 50: Using The Start Menu
All Programs When you move the mouse pointer over any menu item that has an arrow next to it, another menu, or submenu, opens and reveals related files, programs, or commands. Click a file or program to open it. www.gateway.com... -
Page 51: Identifying Window Items
When you double-click the icon for a drive, folder, file, or program, a window opens on the desktop. This example shows the Local Disk (C:) window, which opens after double-clicking the icon in the My Computer Local Disk (C:) window. Title bar Close Menu bar Maximize Minimize www.gateway.com... - Page 52 Clicking the maximize button again restores the window to its former size. Clicking the close button closes the active window or program. Selecting an item on the menu bar starts an action such as Print or Save. www.gateway.com...
-
Page 53: Working With Files And Folders
To view the drives on your computer: In Windows XP, click , then select from the Start menu. Start My Computer - OR - In Windows 2000 or Windows 98, double-click the icon on My Computer the desktop. Drives www.gateway.com... -
Page 54: Creating Folders
Folders Files To create a folder: In Windows XP, click , then select from the Start menu. Start My Computer - OR - In Windows 2000 or Windows 98, double-click the icon on My Computer the desktop. www.gateway.com... -
Page 55: Copying And Moving Files And Folders
To copy a file or folder to another folder: Right-click (press the right mouse button) the file or folder that you want to copy. A pop-up menu opens on the desktop. Select from the pop-up menu. Copy Open the destination folder. www.gateway.com... -
Page 56: Deleting Files And Folders
In My Computer or Windows Explorer, select the files or folders that you want to delete. For instructions on how to select multiple files and folders, see “Shortcuts” on page 62. Select , then . Windows moves the files and folders to the File Delete Recycle Bin. www.gateway.com... - Page 57 The Recycle Bin window Recycle Bin opens. Select , then . Windows asks you if you are sure that File Empty Recycle Bin you want to empty the bin. Click . Windows permanently deletes all files in the Recycle Bin. www.gateway.com...
-
Page 58: Browsing For Files And Folders
Double-click the drive or folder that you think contains the file or folder that you want to find. Continue double-clicking folders and their subfolders until you find the file or folder you want. (If you do not see the contents of a folder, click Show the contents of this folder www.gateway.com... -
Page 59: Searching For Files
Time period in which it was created or modified You can also combine search criteria to refine searches. Files and folders found using these utilities can be opened, copied, cut, renamed, or deleted directly from the list in the results window. www.gateway.com... -
Page 60: Using The Windows Xp Or Windows 2000 Search Utility
If you type all of the name, Search will list all files and folders of that name. If you type part of the name, Search will list all of the file and folder names containing the letters you typed. www.gateway.com... - Page 61 Search can find files meeting more criteria than file name. You can narrow your search by selecting the search options that you want. You can search by the: Date the file was created or modified. Size of the file. Type of file, such as a program or a text document. www.gateway.com...
-
Page 62: Using The Windows 98 Find Utility
If you type all of the name, Find will list all files and folders of that name. If you type part of the name, Find will list all of the file and folder names containing the letters you typed. www.gateway.com... - Page 63 Date during a specific period. searches for files of a specific size. Size searches for files of a specific type, such as a program or a text Type document. www.gateway.com...
-
Page 64: Working With Documents
Help and Support or Help. To create a new document: Click , then select , then . Microsoft Word Start All Programs Microsoft Word starts and a blank document opens. Select , then select . The New Document pane opens. File Document pane www.gateway.com... -
Page 65: Saving A Document
Help and Support or Help. To save a document in Microsoft Word: Select , then . The Save As dialog box opens. File Save Select the folder in which you plan to save the file from the list. Save in www.gateway.com... -
Page 66: Opening A Document
Help and Support or Help. To open a document in Microsoft Word: Click , then select , then . Microsoft Word Start All Programs Microsoft Word starts and a blank document opens. Select , then File Open www.gateway.com... -
Page 67: Printing A Document
Make sure that the printer is turned on and loaded with paper. Start Microsoft Word and open a document. Select , then . The Print dialog box opens. File Print Select the print options, then click . The document prints. www.gateway.com... -
Page 68: Shortcuts
Rename a file or folder Select the file or folder, press F2, type the new name, then press E NTER Press A + F4. Close the active window or program Press A Switch to a different file, folder, or running program www.gateway.com... -
Page 69: Using The Internet
Internet This chapter provides information about the Internet and the World Wide ® Web, and tells you how to set up the America Online Internet service so that you can send and receive e-mail and access other Internet resources. www.gateway.com... -
Page 70: Learning About The Internet
Internet and your e-mail messages. A Web browser – a program that displays information from the World Wide Web. An e-mail program – a program that lets you create, send, and receive e-mail messages over the Internet. www.gateway.com... -
Page 71: Setting Up An Internet Account
To set up an Internet account with America Online: Select , then select , then Start All Programs America Online Follow the on-screen instructions. After setting up your account, you can connect to the Internet and access your e-mail services. www.gateway.com... -
Page 72: Accessing Your Internet Account
ISP account, you may have to pay for the time that you are connected, even if you are not at the computer. If you are using a service other than America Online, check with your ISP for the correct procedure for disconnecting. www.gateway.com... -
Page 73: Using The World Wide Web
You can identify a link by moving the mouse pointer over it. If the pointer changes to a hand, the item is a link. To learn more about using the Web browser features, select in the menu Help bar. page Link Linked Web page www.gateway.com... -
Page 74: Connecting To A Web Site
To go to a different Web site, type the address (called a URL for “Universal Resource Locator”) in the browser address bar (for example www.gateway.com) then click on the browser address bar. - OR - On the current Web page, click a link to a Web site. -
Page 75: Downloading Files
Internet conditions. Open the folder that you created. Install or view the downloaded file by double-clicking it. If applicable, follow the instructions provided on the Web site to run or install the program. www.gateway.com... -
Page 76: Using E-Mail
To send e-mail using America Online: Connect to your America Online account. Click Write Type the e-mail address of the recipient you want to send e-mail to in box. Send To Type the subject of your e-mail in the box. Subject www.gateway.com... -
Page 77: Checking Your E-Mail
Help and Support or Help. To check your e-mail using America Online: Connect to your America Online account. Click Read For more information about managing and organizing your e-mail messages, see the online help in your e-mail program. www.gateway.com... - Page 78 Chapter 5: Using the Internet www.gateway.com...
-
Page 79: Using Multimedia
This chapter provides information on using the multimedia capabilities of your notebook. Read this chapter to learn how to: Use the diskette drive Use the CD/DVD drive Play CDs and DVDs Record and play audio files Use Media Player Use MusicMatch View the display on a television www.gateway.com... -
Page 80: Using Diskettes
My Computer To remove the diskette, make sure the drive activity indicator or diskette drive indicator (see “Status indicators” on page 23) is off, then press the diskette eject button. www.gateway.com... -
Page 81: Using The Cd/Dvd Drive
If the disc has two playable sides, place the disc so that the name of the side you want to play is facing up. Push the tray in until it is closed. www.gateway.com... -
Page 82: Adjusting The Volume In Windows Xp
Help and Support. To adjust the overall volume level using hardware controls: On the keyboard, press the volume system key combination F to change the volume, or press the mute system key combination to turn off all sound. www.gateway.com... - Page 83 Sounds, Speech, and Audio Devices Select . The Sounds and Audio Devices Properties Adjust the system volume dialog box opens. On the Volume tab, drag the slider to change the volume Device Volume or click to select the check box, then click Mute www.gateway.com...
- Page 84 The Master Advanced Device volume Volume dialog box opens. If the device you want to adjust does not appear in the Master Volume dialog box, select , select the audio device you want Options Properties to adjust, then click www.gateway.com...
- Page 85 Drag the volume level and balance sliders for the device you want to adjust, then close the window. For more information about the volume controls, select Help in the Master Volume dialog box. Click in the top right corner of the Master Volume dialog box. www.gateway.com...
-
Page 86: Adjusting The Volume In Windows 2000 And Windows 98
- OR - Click the speaker icon on the taskbar, then drag the slider to change the volume or click to select the check box. Mute www.gateway.com... - Page 87 Options Properties to adjust, then click Drag the volume level and balance sliders for the device you want to adjust, then close the window. For more information about the volume controls, select in the Volume Control dialog box. Help www.gateway.com...
-
Page 88: Listening To Cds In Windows Xp And Windows 2000
The Windows Media Player opens. When the media player opens, click (play). Play Volume Stop Previous Mute Next If you do not hear audio or you want to change the volume, see “Adjusting the volume in Windows XP” on page 76 www.gateway.com... -
Page 89: Listening To Cds In Windows 98
CD Player click (play). Pause Play Stop Rewind Next Skip Eject Previous Forward If you do not hear audio or you want to change the volume, see “Adjusting the volume in Windows 2000 and Windows 98” on page 80. www.gateway.com... -
Page 90: Recording And Playing Audio
(record), then speak into the microphone. When you finish recording, click (stop). Select , then . The Save As dialog box opens. File Save As Name the recording, specify the path, then click . The recording is Save saved. www.gateway.com... - Page 91 Open the Sound Recorder. Select , then . The Open dialog box opens. File Open Select the file you want to play back, then click Open Play the file by clicking (play), then stop playing the file by clicking (stop). www.gateway.com...
-
Page 92: Playing Audio And Video Files With The Windows Media Player
In Windows 2000 or Windows 98, click , then select Start Programs , then Accessories Entertainment Windows Media Player The Windows Media Player opens. Video file information Video screen Play Stop Select , then . The Open dialog box opens. File Open www.gateway.com... -
Page 93: Playing A Dvd
Insert a DVD into the DVD drive, then click (play). The DVD plays. To control the DVD or adjust the volume, use the controls in the DVD player. For more information on using the DVD player, see its online help. www.gateway.com... -
Page 94: Using Musicmatch
You can use the MusicMatch program to play music CDs. To play a music CD in Windows XP: Insert the music CD into the CD/DVD drive on your computer. The first time you insert a CD, the Audio CD dialog box opens. www.gateway.com... - Page 95 To play a music CD in Windows 2000 and Windows 98: Double-click the icon on your desktop. MusicMatch musicmatch JUKEBOX opens. Insert the music CD into the CD/DVD drive on your computer, then click tab. The names of the music tracks appear in the playlist area. Click (play). www.gateway.com...
-
Page 96: Creating Music Files
Insert a CD into the CD/DVD drive, then click (record). The Recorder window opens. In the Recorder window, select the tracks you want to record, then click ). The tracks that you selected are copied as MP3 files to your REC. computer’s hard drive. www.gateway.com... -
Page 97: Editing Track Information
In the library window, right-click the file, then select . The Edit Track Tag(s) Edit Track Tag dialog box opens. Enter information such as track title, lead artist, album, and genre. Click . The new track information is displayed in the MusicMatch playlist, music library, and recorder. www.gateway.com... -
Page 98: Building A Music Library
Dragging and Dropping – Drag and drop files from Windows Explorer or your desktop to the music library. Downloading files from the Internet – When you are connected to the Internet, MP3 files that you download are automatically added to your music library. www.gateway.com... - Page 99 Changing the music library display settings To change the music library display settings: In MusicMatch, select , then . The Settings window opens. Options Settings Click the tab. Music Library Select the categories that you want to display in the columns, then click www.gateway.com...
-
Page 100: Listening To Internet Radio
Chapter 6: Using Multimedia Listening to Internet radio Use the Radio feature in MusicMatch to listen to Internet Radio stations. To listen to an Internet radio station: Connect to the Internet, then in MusicMatch, click Radio Stations The Radio window opens. www.gateway.com... -
Page 101: Using Advanced Features
Select a radio station, then click . MusicMatch connects to the station. Play Using advanced features You can also use MusicMatch to create your own music CDs and to download MP3 files to your portable MP3 player. See the MusicMatch online Help. www.gateway.com... -
Page 102: Viewing The Display On A Television
, then select . Click Start Control Panel Appearance and Themes - OR - In Windows 2000 or Windows 98, click , then select , then Start Settings Control Panel. Click/Double-click the icon. The Display Properties dialog box Display opens. www.gateway.com... - Page 103 For more information on customizing screen settings, see “Adjusting the screen and desktop settings” on page 126. Click the button. The Default Monitor and Intel Graphics Advanced Controller dialog box opens. Click the tab. Intel Graphics Technology www.gateway.com...
- Page 104 Click the button. Important If the TV symbol is grayed out, the system has not detected a television. Make sure that the television is turned on and connected correctly. Select the settings that apply to your television. Click Apply Click www.gateway.com...
-
Page 105: Sending And Receiving Faxes
Create and send a new fax Fax a document you created in another program Receive, view, and print a fax Help and For more information on using the fax functions in Support PhoneTools, click Start, then select Help and Support. www.gateway.com... -
Page 106: Setting Up Your Cover Page
This identifier information is required by law. You can identifier enter up to 20 characters in the text box. We suggest using eight characters for your identifier name, followed by 12 characters for your telephone number. www.gateway.com... - Page 107 If you want to replace the PhoneTools logo with one of your own, click the import button then select a picture for the logo. The picture must be saved in a supported format (.BMP, .DGR, .GIF, .JPG, .PCX, .T31, or .TIF) and be small enough to fit in the logo box. Click www.gateway.com...
-
Page 108: Sending A Fax
Chapter 7: Sending and Receiving Faxes Sending a fax To send a fax: If PhoneTools is not open, click , then select Start All Programs PhoneTools then PhoneTools Click . The Send Fax Wizard opens. Send Fax www.gateway.com... - Page 109 Finish opens. Click . PhoneTools dials the fax number and sends your fax. Send Important If for any reason you receive a failed transmission message, select Send, then Outbox. Right-click the fax that was not sent to modify it. www.gateway.com...
-
Page 110: Faxing From Programs
PhoneTools. To view a fax, click , then double-click the fax you want to view. Fax Inbox The fax viewer opens, where you can view and print the fax. www.gateway.com... -
Page 111: Managing Power
This chapter shows you how to: Check and recharge the battery Change batteries Recalibrate the battery Install a second battery Extend the life of the battery by conserving battery power and using alternate power sources Change power-saving settings www.gateway.com... -
Page 112: Monitoring The Battery Charge
Waiting for a Low Battery warning message to appear. If your battery charge indicators display what looks like an inaccurate charge, you may need to recalibrate the battery. For more information, see “Recalibrating the battery” on page 108. www.gateway.com... -
Page 113: Recharging The Battery
To externally recharge the secondary battery: Plug the Gateway Solo 5350 AC power adapter into the secondary battery’s power connection. The battery begins charging, and the battery charge indicator turns red. -
Page 114: Recalibrating The Battery
After the battery has been fully discharged and the notebook has turned itself off, re-connect the AC adapter and fully recharge your battery. Recharging may take several hours. After the battery finishes recharging, the battery meter displays accurate battery charge. www.gateway.com... -
Page 115: Changing Batteries
Warning Danger of explosion if battery is incorrectly replaced. Replace only with the Gateway Solo 5350 Li-Ion battery. Discard used batteries according to the manufacturer’s instructions. The battery used in this device may present a fire or chemical burn hazard if mishandled. -
Page 116: Installing A Second Battery
AC power. Warning Danger of explosion if battery is incorrectly replaced. Replace only with the Gateway Solo 5350 Li-Ion battery. Discard used batteries according to the manufacturer’s instructions. The battery used in this device may present a fire or chemical burn hazard if mishandled. - Page 117 Changing batteries Firmly push the second battery straight into the bay until the latch clicks into place. Open your notebook and resume working. www.gateway.com...
-
Page 118: Extending Battery Life
Save the battery for times when you cannot use a power adapter. To find AC power outlets in airports, look for them next to support pillars, in large areas such as boarding gates, and under banks of telephones. www.gateway.com... -
Page 119: Changing Power Modes
, then click Hibernate. HIFT - OR - In Windows 2000 or Windows 98, click Start, then select Shut Down, Hibernate, then click OK. In Standby or Exit Standby or Press the power button. Hibernate mode Hibernate mode www.gateway.com... -
Page 120: Changing Power Settings
In Windows XP, click , then select . Click Start Control Panel Performance and Maintenance - OR - In Windows 2000 or Windows 98, click , then select , then Start Settings . The Control Panel window opens. Control Panel www.gateway.com... - Page 121 Power Options Properties dialog box opens. Select a power scheme from the list. Power Scheme - OR - Set the timers, then save your custom power scheme by clicking Save As and typing a name for the scheme. Save the changes by clicking www.gateway.com...
-
Page 122: Changing Alarm Options
, then Start Settings . The Control Panel window opens. Control Panel Click/Double-click the icon. The Power Options Power Management Power Options Properties dialog box opens. Click the tab. Alarms Adjust the alarm settings, then save the changes by clicking www.gateway.com... -
Page 123: Changing Advanced Power Management Settings
. The Control Panel window opens. Control Panel Click/Double-click the icon. The Power Options Power Management Power Options Properties dialog box opens. Click the tab. Advanced Select a power savings mode to be activated by the power button, then save the changes by clicking www.gateway.com... -
Page 124: Using Hibernate Mode
Power Options Properties dialog box opens. Click the tab. Hibernate Select the check box, then click . Hibernate mode Enable hibernation Apply is now an option you can select on the Advanced tab and in the Turn Off Computer dialog box. www.gateway.com... -
Page 125: Changing Speedstep Settings
To change SpeedStep settings in Windows 2000 and Windows 98: Click , then select , then . The Control Panel Start Settings Control Panel window opens. Double-click the icon. The Power Power Options Power Management Options Properties dialog box opens. www.gateway.com... - Page 126 To turn off the SpeedStep technology control, click , select Advanced check box, then click Disable Intel SpeedStep technology control To remove the SpeedStep icon from the taskbar, click Advanced select the check box, then click Remove icon from taskbar Click www.gateway.com...
-
Page 127: Travel Tips
Using your radio frequency wireless connections Transferring files Protecting your notebook from loss and theft Managing your notebook’s power efficiently Tips & Tricks To access the contents of this guide while you are traveling, download an electronic copy from www.gateway.com/support/manlib/. www.gateway.com... -
Page 128: Modem
Wireless communication can interfere with equipment on commercial aircraft. Current aviation regulations require wireless devices to be turned off while traveling in an airplane. IEEE 802.11B (also known as wireless Ethernet or WiFi) communication devices are examples of devices which use wireless to communicate. www.gateway.com... -
Page 129: Files
The password feature is very secure, with no easy way to recover a forgotten password. If you forget your password, you must return your notebook to Gateway for service. Call Gateway Technical Support for instructions. www.gateway.com... -
Page 130: Power
For information on conserving battery power, see “Conserving battery power” on page 112. For information on using alternate power sources, see “Using alternate power sources” on page 112. For information on monitoring the battery charge, see “Monitoring the battery charge” on page 106. www.gateway.com... -
Page 131: Customizing Your Notebook
Customizing Your Notebook This chapter provides information about customizing your notebook by changing settings in Windows. You can: Change screen and display settings Change the background and screen saver Adjust the touchpad settings www.gateway.com... -
Page 132: Adjusting The Screen And Desktop Settings
16-bit High Color, if necessary. Help and For more information on adjusting the color depth, click Support Start, then select Help and Support or Help. www.gateway.com... - Page 133 Settings Select a setting from the list. Color Quality Colors To save your changes in Windows XP, click , then click - OR - To save your changes in Windows 2000 or Windows 98, click , then click again. www.gateway.com...
-
Page 134: Adjusting The Screen Resolution
, then select . Click Start Control Panel Appearance and Themes - OR - In Windows 2000 or Windows 98, click , then select , then Start Settings Control Panel. Click/Double-click the icon. The Display Properties dialog box Display opens. www.gateway.com... - Page 135 Screen Resolution Screen area To save your changes in Windows XP, click , then click - OR - To save your changes in Windows 2000 or Windows 98, click , then click again. www.gateway.com...
-
Page 136: Applying A Color Scheme
Start, then select Help and Support or Help. To select a color scheme in Windows XP: Click , then select . Click Start Control Panel Appearance and Themes Click , then click the tab. Display Appearance Select a scheme from the list, then click Color Scheme www.gateway.com... - Page 137 Click , type a name for the new scheme, then click Save As Select a color scheme from the list. An example of the scheme Scheme appears in the area above the list. Click www.gateway.com...
-
Page 138: Changing The Desktop Background
To change the desktop background in Windows XP: Click , then select . Click Start Control Panel Appearance and Themes Click , then click the tab. Display Desktop www.gateway.com... - Page 139 Start, then select Help and Support or Help. To change the background in Windows 2000 or Windows 98: Click , then select , then The Control Panel Start Settings Control Panel. window opens. Click/Double-click the icon. The Display Properties dialog box Display opens. www.gateway.com...
- Page 140 If the picture you chose does not cover the entire screen and you did not choose to tile the image in Step 5, you can change the solid color behind the picture by clicking , selecting a pattern from the Pattern Pattern list, then clicking Click www.gateway.com...
-
Page 141: Selecting A Screen Saver
, then select . Click Start Control Panel Appearance and Themes - OR - In Windows 2000 or Windows 98, click , then select , then Start Settings Control Panel. Click/Double-click the icon. The Display Properties dialog box Display opens. www.gateway.com... - Page 142 On resume, display Welcome check box. screen If you want to change the time before the screen saver is activated, click the up or down arrows next to the box. Wait Click www.gateway.com...
-
Page 143: Changing The Touchpad Settings
Click one of the tabs to change your touchpad settings. To assign a function to the rocker switch, click the tab. Button Actions Select the function for the top and bottom rocker buttons from the lists. Click to save changes. www.gateway.com... - Page 144 Chapter 10: Customizing Your Notebook www.gateway.com...
-
Page 145: Upgrading Your Notebook
Upgrading Your Notebook This chapter provides information about adding hardware devices to your notebook, including: PC Cards Bay modules Memory Hard drive www.gateway.com... -
Page 146: Adding Pc Cards
For more information on adding PC Cards, click Start, then Support select Help and Support or Help. To insert a PC Card: Push the card firmly into the PC Card slot label-side up until the outer edge of the card is flush with the side of the notebook. www.gateway.com... - Page 147 PC Card name and click Stop -OR- Turn off the notebook. Release the eject button by pressing the PC Card eject button once. Eject the PC Card by pressing the eject button again. www.gateway.com...
-
Page 148: Changing Bay Modules
Module bay Module bay latch Important When changing modules while the notebook is turned on, you must run the BayManager before replacing the module. When changing modules while the notebook is turned off, you do not need to run BayManager. www.gateway.com... - Page 149 4. If your notebook is on, double-click the BaySwap icon on the taskbar, then click Remove/Swap When prompted, close the cover and turn your notebook over. Slide and hold the release latch, then pull the module straight out. www.gateway.com...
- Page 150 Chapter 11: Upgrading Your Notebook Push the new module straight into the bay until it clicks into place. Open the notebook. If your notebook is on, click the button in the BaySwap dialog box. If your notebook is off, turn it on. www.gateway.com...
-
Page 151: Preventing Static Electricity Discharge
Always hold expansion cards by their edges or their metal mounting brackets. Avoid touching the edge connectors and components on the cards. Never slide expansion cards or components over any surface. www.gateway.com... -
Page 152: Installing Memory
109 and “Installing a second battery” on page 110. Warning Disconnect the power adapter, remove the battery, and disconnect the modem cable before you remove the memory bay cover. Replace the cover before you restore power or reconnect the modem cable. www.gateway.com... - Page 153 Installing memory Remove the memory bay cover screws, and then remove the memory bay cover. www.gateway.com...
- Page 154 Chapter 11: Upgrading Your Notebook If you are removing a module, gently press outward on both clips at either end of the memory module until the module tilts upward. Pull the memory module out of the slot. www.gateway.com...
- Page 155 Important Use only PC133 (133 MHz) memory modules. Gently push the module down until it clicks in place. Replace the memory bay cover and cover screws, insert the battery, connect the AC adapter, and turn on your notebook. www.gateway.com...
-
Page 156: Replacing The Main Hard Drive
Remove the hard drive screw, then pull the drive kit straight out from the notebook. Place the new hard drive kit in the bay, slide it into the connector, then replace the screw to secure the hard drive to the notebook. www.gateway.com... -
Page 157: Using The Port Replicator And Docking Station
The port replicator also gives you access to additional ports not found on the notebook. Important The port replicator may include ports that are not supported by the Solo 5350. www.gateway.com... -
Page 158: Front
Chapter 12: Using the Port Replicator and Docking Station Front Release latch Docking port Docking posts www.gateway.com... -
Page 159: Left Side
Kensington cable slots lock to these slots. Connect the lock here to secure only the port replicator (left slot). Connect the lock here to secure both the port replicator and the notebook (right slot). www.gateway.com... -
Page 160: Back
Line out jack Plug an external audio device (such as a stereo) into this jack so you can play your notebook audio through that device. Parallel port Plug a parallel device (such as a printer) into this port. www.gateway.com... - Page 161 S-Video device. S/PDIF jack Plug a standard RCA cable into this jack and the jack on a digital audio device. Power connector Plug the AC adapter into this connector. Use only the AC adapter for your particular model. www.gateway.com...
-
Page 162: Right Side
Description PS/2 mouse port Plug a PS/2 mouse into this port. Important! You will not be able to use your touchpad while a mouse is plugged into this port. PS/2 keyboard Plug a PS/2 keyboard into this port. port www.gateway.com... -
Page 163: Connecting To The Port Replicator
To attach your notebook to the port replicator: Connect external devices to the ports on the port replicator. Lift the release latch on the port replicator. Align the connector holes on the bottom of your notebook with the docking posts on the port replicator. www.gateway.com... - Page 164 . The Undock Computer menu Start Undock Computer item appears in the Start menu only while the notebook is docked. Lift the release latch on the port replicator until the notebook is disconnected, then lift the notebook away from the docking posts. www.gateway.com...
-
Page 165: Checking Out The Docking Station
It also provides additional ports and other expansion features. Important The docking station may include ports that are not supported by the Solo 5350. Front Docking port Release latch... -
Page 166: Left Side
Kensington cable slots lock to these slots. Connect the lock here to secure only the docking station (left slot). Connect the lock here to secure both the docking station and the notebook (right slot). www.gateway.com... -
Page 167: Back
TV or VCR so you can view your notebook display on a TV using NTSC/PAL Composite Video. TV in (Composite Video) Not functional with your notebook. jack Parallel port Plug a parallel device (such as a printer) into this port. www.gateway.com... - Page 168 Not functional with your notebook. S-Video out jack Plug a standard S-Video cable into this jack and the jack on an S-Video device. Power connector Plug the AC adapter into this connector. Use only the AC adapter for your particular model. www.gateway.com...
-
Page 169: Right Side
Checking out the docking station Right side Power button Headphone PS/2 keyboard port jack Microphone jack PS/2 mouse port PC Card slots Line in jack Line out jack www.gateway.com... - Page 170 Plug a PS/2 mouse into this port. Important! You will not be able to use your touchpad while a mouse is plugged into this port. PS/2 keyboard port Plug a PS/2 keyboard into this port. Power button Use this as an alternate power button. www.gateway.com...
-
Page 171: Connecting To The Docking Station
Refer to the docking station’s packing materials for first-time setup instructions. Connect external devices to the docking station. Lift the release latch on the docking station. Align the connector holes on the bottom of your notebook with the connector posts on the docking station. www.gateway.com... - Page 172 The Undock Computer menu item appears in the Start menu only while the notebook is docked. Lift the release latch on the docking station until the notebook is disconnected. Lift the notebook off of the docking posts. www.gateway.com...
-
Page 173: Installing A Pci Card In The Docking Station
Kensington lock slot. To install a PCI card: Remove your notebook from the docking station. Unplug all cables, including the power cord. Remove the screw on the back of the docking station. www.gateway.com... - Page 174 Chapter 12: Using the Port Replicator and Docking Station Lift the release latch on the docking station, then slide the cover straight back and lift it off. www.gateway.com...
- Page 175 If your card requires access for cables, push out the side panel cover and store it in a safe place. Remove the retaining screw from the card bracket in the card bay. Install the PCI card in the card slot. Secure the card by replacing the retaining screw. www.gateway.com...
- Page 176 Chapter 12: Using the Port Replicator and Docking Station Replace the cover by setting it flat on the docking station and sliding it forward into place. Do not tilt the cover. Replace the screw that secures the cover to the docking station. www.gateway.com...
-
Page 177: Networking Your Notebook
Internet connection among the connected computers. This chapter contains information about: Benefits of using a network in your home, small office, or home office Example network Types of network connections Using wireless networking Purchasing additional network equipment www.gateway.com... -
Page 178: The Benefits Of Using A Network
In addition, you can map a drive from a computer on the network to a drive on another computer, and access the file as if it were located on the hard drive of the computer you are using. www.gateway.com... -
Page 179: Sharing Peripheral Devices
Playing multi-player games With a home network, you can play multi-player games. Load a game like Microsoft Midtown Madness 2 on your computers, and in minutes, you and your friends can race in competing cars through the streets of San Francisco. www.gateway.com... -
Page 180: Example Network
A network connects all your computers and other devices so that you can share files, programs, peripheral devices, and much more from any computer in your home or office. The picture below shows an example of a home network. www.gateway.com... -
Page 181: Selecting A Network Connection
Selecting a network connection Selecting a network connection One of the biggest decisions you will need to make when creating your network is what type of connection you will use. Gateway supports both wired and wireless connections. Wired connections HPNA (Home Phoneline Networking Alliance) and Ethernet are two popular types of wired LANs. -
Page 182: Wireless Connections
HPNA 2.0 or standard Ethernet. In addition, this type of network allows you the freedom to move about your home or office with your computer. For example, you can take your notebook computer from your home office to your patio without having a telephone or Ethernet jack available. www.gateway.com... -
Page 183: Assessing Your Connection Needs
Network speed is more important than cost savings You have a combination of Windows-based computers and non-Windows-based computers that are used for drive sharing, printing to a single printer, or surfing the Internet Your notebook computer has an Ethernet jack for connecting to the network www.gateway.com... - Page 184 You have several Windows-based computers that are used for drive sharing, printing to a single printer, or surfing the Internet Your notebook computer has wireless Ethernet (IEEE 802.11b) for networking Your connection speed needs are less than 11000 Kbps (see “Comparing data transfer speed” on page 179) www.gateway.com...
-
Page 185: Comparing Data Transfer Speed
Printer Sharing 80-200 Kbps Broadband Internet 100-1000 Kbps File Sharing 300-40000 Kbps MPEG Video Streaming 4000-8000 Kbps The following table shows the Gateway-supported network type and the maximum speed of each. Connection Type Rated Maximum Speed HPNA 2.0 Wired 10000 Kbps... - Page 186 A comparison of the two tables on the previous page shows that HPNA 2.0, Ethernet, and wireless Ethernet can handle most programs on a network. If you anticipate using a combination of programs that regularly exceed 10000 Kbps, you should consider installing Fast Ethernet for your connection. www.gateway.com...
-
Page 187: Using A Wireless Network
“Safety, Regulatory, and Legal Information” on page 281 for general wireless regulatory and safety guidelines. To find out if your system has an internal wireless device, check the label (see “Identifying your model” on page 12). www.gateway.com... -
Page 188: Using Wireless Ethernet In Windows Xp
Make sure you read each screen in the wizard and make your selections based on your particular network situation. www.gateway.com... - Page 189 Click on the Network Setup Wizard icon on the Windows XP taskbar. -OR- Click , then select , then Start All Programs, Communications Network Setup . The Network Setup Wizard opens. Wizard Click to continue through the wizard. Next www.gateway.com...
- Page 190 Chapter 13: Networking Your Notebook Click . The following screen opens. Next Click to select the checkbox, then Ignore disconnected network hardware click . The following screen opens. Next www.gateway.com...
- Page 191 -OR- Click for a list of additional methods, then make a selection and Other click . The following screen opens. Next Select , then click . The Let me choose the connections to my network Next following screen opens. www.gateway.com...
- Page 192 Click to select the checkbox, then click Wireless Network Connection Next The following screen opens. Enter a description of the computer and the name by which the computer will be identified on the network, then click . The following screen Next opens. www.gateway.com...
- Page 193 To configure Windows XP to use the wireless Ethernet network: Click , then select Start Control Panel Click . The Network and Internet Network and Internet Connections Connections window opens. Click . The Network Connections window opens. Network Connections www.gateway.com...
- Page 194 Chapter 13: Networking Your Notebook Right-click Wireless Network Connection Select . The Wireless Network Connection Properties dialog box Properties opens. Select , then click . The Internet Protocol Internet Protocol (TCP/IP) Properties (TCP/IP) Properties dialog box opens. www.gateway.com...
- Page 195 If you are required to enter an IP Address and Subnet Mask, ask your network system administrator for the correct values. Click to close the Internet Protocol (TCP/IP) Properties dialog box. Click to close the Wireless Network Connection Properties dialog box. Click to close the Network Connections window. www.gateway.com...
- Page 196 . The Network and Internet Network and Internet Connections Connections window opens. Click . The Network Connections window opens. Network Connections Right-click Wireless Network Connection Select to turn on wireless Ethernet or to turn off wireless Enable Disable Ethernet. www.gateway.com...
- Page 197 To create an access point wireless Ethernet network: Click , then select Start Control Panel Click . The Network and Internet Network and Internet Connections Connections window opens. Click . The Network Connections window opens. Network Connections Right-click Wireless Network Connection www.gateway.com...
- Page 198 Chapter 13: Networking Your Notebook Select . The Connect to Wireless Network View Available Wireless Networks dialog box opens. Select . The Wireless Network Connection Properties dialog box Advanced opens. www.gateway.com...
- Page 199 Using a wireless network Click the tab. Wireless Networks www.gateway.com...
- Page 200 40 bits (5 characters) Key length Select from the list. Key index (advanced) Make sure that the check box is not Network Authentication (Shared mode) selected. Make sure that the network check This is a computer-to-computer (ad hoc) box is not selected. www.gateway.com...
- Page 201 Using a wireless network Click to close the Wireless Network Properties dialog box. Click the tab. General Select , then click . The Internet Protocol Internet Protocol (TCP/IP) Properties (TCP/IP) Properties dialog box opens. www.gateway.com...
- Page 202 If you are required to enter an IP Address and Subnet Mask, ask your network system administrator for the correct values. Click to close the Internet Protocol (TCP/IP) Properties dialog box. Click to close the Wireless Network Connection Properties dialog box. www.gateway.com...
- Page 203 To create a peer-to-peer wireless Ethernet network: Click , then select Start Control Panel Click . The Network and Internet Network and Internet Connections Connections window opens. Click . The Network Connections window opens. Network Connections Right-click Wireless Network Connection www.gateway.com...
- Page 204 Chapter 13: Networking Your Notebook Select . The Connect to Wireless Network View Available Wireless Networks dialog box opens. Select . The Wireless Network Connection Properties dialog box Advanced opens. www.gateway.com...
- Page 205 Using a wireless network Click the tab. Wireless Networks www.gateway.com...
- Page 206 Example: Adhoc. Click the network check box. This is a computer-to-computer (ad hoc) If an encryption key has been agreed to by the other members of your network, enter this value. Click to close the Wireless Network Properties dialog box. www.gateway.com...
- Page 207 Using a wireless network Click the tab. General Select , then click . The Internet Protocol Internet Protocol (TCP/IP) Properties (TCP/IP) Properties dialog box opens. Click the tab. General www.gateway.com...
- Page 208 To connect to an existing wireless Ethernet network: Click , then select Start Control Panel Click . The Network and Internet Network and Internet Connections Connections window opens. Click . The Network Connections window opens. Network Connections Right-click Wireless Network Connection www.gateway.com...
- Page 209 To check signal strength of your wireless Ethernet network: Click , then select Start Control Panel Click . The Network and Internet Network and Internet Connections Connections window opens. Click . The Network Connections window opens. Network Connections Right-click Wireless Network Connection www.gateway.com...
- Page 210 Important Signal strength is affected by the distance between your wireless network devices, by radio interference, and interference from natural obstructions such as walls, floors, and doors. www.gateway.com...
-
Page 211: Using Wireless Ethernet In Windows 2000 And Windows 98
, then . If Client Start Programs ORiNOCO Client Manager Manager is not listed on your Start menu, you will need to install it. To install the ORiNOCO Client Manager: Complete the instructions in “Reinstalling programs” on page 251. www.gateway.com... - Page 212 To configure your wireless Ethernet client manager: Click , then select , then . The Start Programs ORiNOCO Client Manager ORiNOCO Client Manager window opens. Select , then . The Add/Edit Configuration Profile Actions Add/Edit Profile dialog box opens. www.gateway.com...
- Page 213 Contact your network system administrator or refer to the access point documentation for more information about using this network type. Residential Gateway - Use this network type if you are setting up or joining a wireless network that is using a residential gateway to access the Internet.
- Page 214 Peer-to-Peer Group - Use this network type if you are setting up or joining a temporary or permanent computer-to-computer network for sharing files and peripheral devices. This type of network does not include an access point into a wired network. www.gateway.com...
- Page 215 If you are connecting to a residential gateway network, enter the residential gateway identifier number for the network name and the last five characters of the residential gateway identifier number as the encryption key.
- Page 216 Windows with the name of the notebook and the workgroup to which it belongs. To identify this notebook on the network: Click , then select , then . The Control Panel Start Settings Control Panel window opens. Double-click the icon. The Network dialog box opens. Network www.gateway.com...
- Page 217 Enter a description of the notebook. This description lets other network users identify who this notebook belongs to. Click www.gateway.com...
- Page 218 Click , then select , then . The Control Panel Start Settings Control Panel window opens. If you do not see the Network icon, click view all Control Panel options Double-click the icon. The Network dialog box opens. Network www.gateway.com...
- Page 219 Subnet Mask Important If you are required to enter an IP Address and Subnet Mask, ask your network system administrator for the correct values. Click to close the TCP/IP Properties dialog box. Click to close the Network dialog box. www.gateway.com...
- Page 220 The status box in the middle provides status and error messages. Important Signal strength is affected by the distance between your wireless network devices, by radio interference, and interference due to natural obstructions such as walls, floors, and doors. www.gateway.com...
- Page 221 To access a different wireless Ethernet network: Right-click the ORiNOCO Client Manager icon on the taskbar. Select , then the profile that you have set up for the Configuration Profile new network. www.gateway.com...
-
Page 222: Purchasing Additional Network Equipment
An HPNA PC Card installed in each notebook computer Modem cable going from each computer to the closest telephone jack Important All HPNA components should be HPNA 2.0. A mixture of HPNA 1.0 and HPNA 2.0 components will result in your network running at a slower speed. www.gateway.com... -
Page 223: Ethernet
Ethernet cable going from each computer to the hub or switch Important All Ethernet components should be either standard Ethernet (10 Mbps) or Fast Ethernet (100 Mbps). A mixture of Ethernet and Fast Ethernet components will result in your network running at the slower speed. www.gateway.com... -
Page 224: Wireless Ethernet
Wireless Ethernet PC card Wireless Ethernet Access Point For more information For more information about the Gateway Connected Home or networking an office, discuss your particular needs with your Gateway Country Store representative. In addition, several books and Internet sites are dedicated to networking. -
Page 225: Moving From Your Old Computer
The wizard also moves specific files or entire folders, such as My Documents, My Pictures, and Favorites. To open the Files and Settings Transfer Wizard: Click , select , then Start All Programs Accessories System Tools Files and Settings Transfer Wizard www.gateway.com... -
Page 226: Transferring Files
File type File usually ends in... Documents .DOC, .TXT, .RTF, .HTM, .HTML, .DOT Spreadsheets .XLS, .XLT, .TXT Pictures .JPG, .BMP, .GIF, .PDF, .PCT, .TIF, .PNG Movies .MPEG, .MPG, .AVI, .GIF, .MOV Sound and Music .WAV, .CDA, .MP3, .MID, .MIDI www.gateway.com... -
Page 227: Transferring Internet Settings
ISP to see if they have an updated version of their software, and install it on your new computer. If you use MSN as your ISP, or if you know your ISP settings, use the Windows Internet Connection Wizard. www.gateway.com... -
Page 228: Reinstalling Your Old Printer Or Scanner
Newer devices, however, usually require your original software installation CDs or diskettes. Reinstalling a USB printer or scanner USB devices may have special installation instructions. Refer to your USB device’s installation guide. www.gateway.com... - Page 229 Install your printer by following the on-screen instructions. Refer to your peripheral device’s user guide for installation information and tips. Because most installation software is periodically updated, you should also check the manufacturer’s Web site for driver updates. www.gateway.com...
-
Page 230: Reinstalling Your Old Programs
Remember to check the manufacturer’s Web site for important program updates. Tips & Tricks If your new computer comes with a newer version of a program, it is usually best to use the newer version than to reinstall the old one. www.gateway.com... -
Page 231: Maintaining Your Notebook
As a general rule, your computer is safest at temperatures that are comfortable for you. Keep all liquids away from your computer. When spilled onto computer components, almost any liquid can result in extremely expensive repairs that are not covered under your warranty. www.gateway.com... - Page 232 Scan hard drive for errors page 235 Defragment hard drive page 237 Back up files page 239 Recalibrate the battery page 108 Clean computer case page 241 Clean keyboard page 242 Clean screen page 242 Clean mouse page 242 www.gateway.com...
-
Page 233: Creating An Emergency Startup Diskette
Place a blank diskette labeled Startup into the diskette drive. Click , then select . The My Computer window opens. Start My Computer Right-click , then select . The Format 3½ Floppy (A:) 3½ Floppy (A:) Format dialog box opens. www.gateway.com... - Page 234 If the diskette drive is not installed on your notebook, see “Changing bay modules” on page 142. Click , then select , then . The Control Panel Start Settings Control Panel window opens. Click/Double-click the icon. The Add/Remove Add/Remove Programs Programs Properties dialog box opens. www.gateway.com...
- Page 235 Create Disk it into the diskette drive. Place a blank diskette labeled Startup into the diskette drive. Click . Windows copies files to the emergency startup diskette. When Windows finishes copying files, remove the diskette from the diskette drive. www.gateway.com...
- Page 236 To prevent the diskette from being erased or infected by viruses, you should write-protect it by sliding the write-protect tab up. Not write- Write- protected protected Store your emergency startup diskette in a safe place with your other backup software media. www.gateway.com...
-
Page 237: Protecting Your Computer From Viruses
, then select , then Start All Programs Norton AntiVirus Norton . Norton AntiVirus opens. AntiVirus 2002 Click Scan for Viruses Select the type of scan you want to make in the Scan area, then under Actions, click Scan www.gateway.com... - Page 238 , then Start All Programs Norton AntiVirus LiveUpdate - . The LiveUpdate wizard opens. Norton AntiVirus Follow the on-screen instructions to update your Norton AntiVirus program with the latest virus protection files. When the program has finished updating, click Finish www.gateway.com...
-
Page 239: Managing Hard Drive Space
, then select Start My Computer - OR - In Windows 2000 or Windows 98, double-click the icon. My Computer Right-click the drive that you want to check for available file space, then select . Drive space information appears. Properties www.gateway.com... -
Page 240: Using Disk Cleanup
My Computer window opens. Right-click the hard drive that you want to delete files from, then select . The System Properties dialog box opens at the tab. Properties General Click . The Disk Cleanup dialog box opens. Disk Cleanup www.gateway.com... -
Page 241: Checking The Hard Drive For Errors
, then select Start My Computer - OR - In Windows 2000 or Windows 98, double-click the icon. My Computer Right-click the hard drive that you want to check for errors, then select . The System Properties dialog box opens. Properties www.gateway.com... - Page 242 This process may take several minutes. Correct any problems that are found by following the on-screen instructions. After Windows has finished checking the drive for errors, it provides a summary of the problems that it found. Click www.gateway.com...
-
Page 243: Defragmenting The Hard Drive
, then select Start My Computer - OR - In Windows 2000 or Windows 98, double-click the icon. My Computer Right-click the hard drive that you want to defragment, then select . The System Properties dialog box opens. Properties www.gateway.com... - Page 244 Click the tab. Tools Click Defragment Now If Disk Defragmenter does not start automatically, click Start Defragment Disk Defragmenter shows its progress on the screen. When finished, Disk Defragmenter asks if you want to quit the program. Click Close www.gateway.com...
-
Page 245: Backing Up Files
Zip drive, to do a complete hard drive backup. If you do not have a high-capacity backup device and you want to purchase one, you can contact Gateway’s Add-on Sales department or visit our Web site at www.gateway.com. Help and... -
Page 246: Using The Scheduled Task Wizard
. The Scheduled Tasks Wizard opens. Add Scheduled Task Click , then select the Scheduled Task Wizard option you want to Next create and follow the screen prompts to customize the task. Your computer must be on during scheduled Important tasks www.gateway.com... -
Page 247: Cleaning Your Computer
With the computer turned off and unplugged, brush the dust away from the vents with a damp cloth. Be careful not to drip any water into the vents. Do not attempt to clean dust from inside the computer. www.gateway.com... -
Page 248: Cleaning The Keyboard
Help and For a video demonstration on cleaning the mouse, click Support Start, then select Help and Support. To clean your mouse: Turn the mouse upside down. Rotate the retaining ring on the bottom of the mouse counter-clockwise. www.gateway.com... - Page 249 Remove the retaining ring and mouse ball. Remove any dust, lint, or dirt from the mouse ball with a soft cloth. Clean the mouse rollers with a cotton swab dipped in isopropyl alcohol. Replace the mouse ball and lock the retaining ring into place. www.gateway.com...
- Page 250 Chapter 15: Maintaining Your Notebook www.gateway.com...
-
Page 251: Restoring Software
Device drivers are programs that control devices such as monitors, CD/DVD drives, and modems. Drivers translate information between computer devices and programs. Drivers for your original computer hardware are installed at Gateway. If you install a new device, you need to install the drivers provided by the device manufacturer. - Page 252 Follow any additional on-screen instructions. Depending on the device driver you are reinstalling, you may only need to restart your computer to complete the installation. However, if a setup wizard opens when you restart your computer, follow the on-screen instructions. www.gateway.com...
-
Page 253: Updating Device Drivers In Windows
If your system came equipped with a wireless device, only use the drivers approved for the country the device will be used in. See the Gateway System Restoration Kit or the Gateway Technical Support Web site. If your system came equipped with an internal embedded wireless device, see “Safety, Regulatory, and Legal... - Page 254 Install available updated device drivers by following the on-screen instructions. Depending on the device driver you are updating, you may only need to restart your computer to complete the installation. However, if a setup wizard opens when you restart your computer, follow the on-screen instructions. www.gateway.com...
-
Page 255: Reinstalling Windows
Place Disc 2 of the System Restoration Kit in the CD/DVD drive. If you have an additional recordable/rewritable CD drive, make sure you do not put the System Restoration CD in it. Restart the computer. Follow the on-screen instructions. www.gateway.com... - Page 256 The Windows 2000 Setup menu opens. Follow the on-screen instructions. The on-screen instructions step you through the operating system installation. When you are finished reinstalling Windows 2000, reinstall your device drivers by following the instructions in “Reinstalling device drivers in Windows” on page 245. www.gateway.com...
-
Page 257: Reinstalling Programs
If there is a Find More button at the bottom of the window, complete the list of available programs by clicking and following the Find More on-screen instructions. Click , then select multiple programs to reinstall. Automatic Installation - OR - Click , then select a single program to reinstall. Manual Installation www.gateway.com... - Page 258 However, if a setup wizard opens when you restart your computer, follow the on-screen instructions. To reinstall a program from a CD: Place the program CD in your CD/DVD drive. Complete the program reinstallation by following the instructions included with the program CD. www.gateway.com...
-
Page 259: Troubleshooting
If the suggestions in this chapter do not correct the problem, see “Getting Help” on page 35 for more information about how to get help. Help and For more information on troubleshooting, click Start, then Support select Help and Support or Help. www.gateway.com... -
Page 260: Safety Guidelines
AC power adapter are connected. Make sure you are correctly grounded before accessing internal components. For more information about preventing damage from static electricity, see “Preventing static electricity discharge” on page 145. www.gateway.com... -
Page 261: Troubleshooting
Make sure that your hard drive is not full. If an error message appears on the screen, write down the exact message. The message may help Gateway Technical Support in diagnosing and fixing the problem. If you added or removed modules or peripheral devices, review the installation procedures you performed and make sure you followed each instruction. -
Page 262: Software Support Tools
This support tool is available from HelpSpot or by clicking , then selecting Start , then All Programs Gateway Utilities Help and For more information on PC Doctor, click Start, then select Support Help and Support or Help. www.gateway.com... -
Page 263: Cd/Dvd Drive
, and Mute check boxes are Master Out CD Audio MIDI Digital Wave not selected. For more information about the mute setting, see “Adjusting the volume in Windows 2000 and Windows 98” on page 80. www.gateway.com... - Page 264 The regional code for the disc is on the disc, disc documentation, or packaging. To clean a CD or DVD: Wipe from the center to the edge, not around in a circle, using a product made especially for the purpose. www.gateway.com...
-
Page 265: Device Installation
Control Panel window opens. Double-click the icon, then click the tab. The System Device Manager Device Manager opens. Click , then click . The Computer Properties dialog Computer Properties box opens and displays the IRQs and their hardware assignments. www.gateway.com... -
Page 266: Diskette Drive
Diskette drive The diskette drive is not recognized Shut down and restart your computer. The diskette drive may not be completely inserted into the drive bay. Press the drive into the bay, then try to access the diskette again. www.gateway.com... -
Page 267: Error-Checking
Error-checking fixes errors on the hard drive to minimize data loss. To prevent Error-checking from running when you start your computer, make sure you always shut down by selecting from the Turn Off Computer Shut Down Start menu. www.gateway.com... -
Page 268: File Management
You receive a “Data error” message This may be the result of a defective area on the hard drive. To fix hard drive problems, run the Error-checking or ScanDisk program. For more information, see “Checking the hard drive for errors” on page 235. www.gateway.com... -
Page 269: Internet
Double-check the URL or try a different URL. If the error message still appears, disconnect from the ISP connection and close your browser, then reconnect and open the browser. If you still get the error, your ISP may be having technical difficulties. www.gateway.com... -
Page 270: Keyboard
A keyboard character keeps repeating or you receive a “Keyboard stuck” or “Key failure” error message Make sure that nothing is resting on the keyboard. Make sure a key is not stuck. Press each key to loosen a key that might be stuck, then restart the computer. www.gateway.com... -
Page 271: Lcd Panel
Make sure that the modem cable is less than 6 feet (1.8 meters) long. Remove any line splitters or surge protectors from your telephone line, then check for a dial tone by plugging a working telephone into the telephone wall jack. www.gateway.com... - Page 272 When the dial tone stops, listen for line noise. Wiggle the modem cable to see if that makes a difference. Make sure the connectors are free from corrosion and all screws in the wall or telephone wall jack are secure. www.gateway.com...
- Page 273 48K. Your ISP may not support 48K uploads. You can check modem connection speeds and dial-up network (DUN) connections by accessing the gateway.your.way dial-up server. The server also contains drivers, patches, and updates for current Gateway hardware and software.
- Page 274 Chapter 17: Troubleshooting To access the gateway.your.way dial-up server: Insert Disc 1 of the System Restoration Kit. Select Help Click , then follow the on-screen instructions. Support Web Site To check your modem connection speed, select the option. Direct Dial...
- Page 275 If no modem information is available, a white screen appears with no data, or if you get an error, the modem did not pass diagnostics. Contact Gateway technical support. The modem is noisy when it dials and connects When your modem tries to connect to another modem, it begins handshaking.
-
Page 276: Mouse
You cannot connect to your company network Every network is unique. Contact your company computer department or network administrator for help. If your system came equipped with an internal wireless device, do not operate the wireless device unless the system is fully assembled. www.gateway.com... -
Page 277: Passwords
The password feature (which is set in the BIOS Setup utility) is very secure, with no easy way to recover a forgotten password. You must return your computer for repair. Call Gateway Technical Support for instructions. PC Cards You installed a PC Card and now your computer is having problems Make sure you have correctly installed required software for the PC Card. -
Page 278: Printer
Faxes Switch to Classic View Click/double-click the icon. The Printers and Faxes Printers and Faxes window opens. Right-click the name of the printer you want to be the default printer, then select Set as Default Printer www.gateway.com... - Page 279 Click , then select , then Start Settings Printer Double-click the icon for the printer you want to use. Select . If there is a option on the menu, click Printer Use Printer Offline to clear the check mark. www.gateway.com...
-
Page 280: Scandisk
Windows 2000 and Windows 98” on page 80. Touchpad The touchpad is not working Make sure a PS/2 mouse is not plugged into the PS/2 jack on the notebook, the docking station, or the port replicator. Plugging in a PS/2 mouse disables the touchpad. www.gateway.com... -
Page 281: Video
LCD screens. Gateway’s inspection standards keep these to a minimum. If you feel these pixels are unacceptably numerous or dense on your display, contact Gateway Technical Support to identify whether a repair or replacement is justified based on the number of pixels affected. -
Page 282: Telephone Support
If you have recently installed hardware or software, make sure that you have installed it according to the instructions provided with it. If you did not purchase the hardware or software from Gateway, refer to the manufacturer documentation and technical support resources. -
Page 283: Telephone Numbers
900-555-4695 (charged to tutorial service your telephone bill) Gateway Talk to a Gateway Technical Support 800-846-2301 (US) Technical representative about a non-tutorial technical 800-846-3609 (Canada Support support question. (Refer to “Before calling and Puerto Rico) Gateway Technical Support”... -
Page 284: Tutoring And Training
This user's guide The software publisher's Web site Tutoring For help on using hardware or software that came with your Gateway computer, contact Gateway's fee-based tutorial hotline: 800-229-1103 (rate charged per minute; charged to a major credit card) 900-555-4695 (rate charged per minute; charged to your telephone bill) -
Page 285: Training
Online Training More than 450 online courses are available from www.learnatgateway.com/ from Learn@Gateway. All you have to do is go online Learn@Gateway and log in. You select the subject matter, and the learning format (self-paced tutorials or virtual classrooms), all from the comfort of your computer. - Page 286 Chapter 17: Troubleshooting www.gateway.com...
-
Page 287: A Safety, Regulatory, And Legal Information
Legal Information Important safety information Your Gateway system is designed and tested to meet the latest standards for safety of information technology equipment. However, to ensure safe use of this product, it is important that the safety instructions marked on the product and in the documentation are followed. - Page 288 The system was dropped or the cabinet is damaged. The system performance changes. Replacement parts and accessories Use only replacement parts and accessories recommended by Gateway. Important Do not use Gateway products in areas classified as hazardous locations. Such areas include patient care areas of medical and dental facilities, oxygen-laden environments, or industrial facilities.
-
Page 289: Regulatory Compliance Statements
Gateway believes these devices are safe for use. Regardless of the power levels, care should be taken to minimize human contact during normal operation. - Page 290 Warning Wireless devices are not user serviceable. Do not modify them in any way. Modification to a wireless device will void the authorization to use it. Please contact Gateway for service. Warning Only use drivers approved for the country in which the device will be used.
-
Page 291: United States Of America
Wireless devices are not user serviceable. Do not modify them in any way. Modification to a wireless device will void the authorization to use it. Contact Gateway for service. Unintentional emitter per FCC Part 15 This device has been tested and found to comply with the limits for a Class B digital device, pursuant to Part 15 of the FCC rules. - Page 292 (1) this device may not cause harmful interference, and (2) this device must accept any interference received, including interference that may cause undesired operation. Caution Changes or modifications not expressly approved by Gateway could void the FCC compliance and negate your authority to operate the product. www.gateway.com...
- Page 293 Refer to your fax communication software documentation for details on how to comply with the fax-branding requirement. www.gateway.com...
- Page 294 Wireless devices are not user serviceable. Do not modify them in any way. Modification to a wireless device will void the authorization to use it. Contact Gateway for service. Unintentional emitter per ICES-003 This digital apparatus does not exceed the Class B limits for radio noise emissions from digital apparatus as set out in the radio interference regulations of Industry Canada.
- Page 295 The termination on an interface may consist of any combination of devices subject only to the requirement that the sum of the Ringer Equivalence Numbers of all the devices does not exceed 5. www.gateway.com...
-
Page 296: European Union
- ETS 300 328-2 (if fitted with a 2.4 GHz band embedded wireless device) - ETS 301 489-1 (if fitted with a 2.4 GHz band embedded wireless device) - ETS 301 489-17 (if fitted with a 2.4 GHz band embedded wireless device) www.gateway.com... - Page 297 Iceland, Liechtenstein, Norway and Switzerland European States with restrictions on use: In France, the frequency range is restricted to 2446-2483.5 MHz for devices above 10 mW transmitting power such as wireless LAN. Accept EU No limitations at this time. www.gateway.com...
- Page 298 However, due to differences between the individual PSTNs provided in different countries, the approval does not, of itself, give an unconditional assurance of successful operation on every PSTN termination point. In the event of problems, you should contact Gateway Technical Support.
- Page 299 Make sure that there are no other devices in your area using the same frequency band. Change the channel, location, or discontinue device use if you are interfering with any other radio station. Contact Gateway if you have any problems with this device. 2.4DS4 www.gateway.com...
- Page 300 Voluntary Control Council for Interference by Information Technology Equipment aimed at preventing radio interference in such residential areas. When used near a radio or TV receiver, it may become the cause of radio interference. Read instructions for correct handling. www.gateway.com...
- Page 301 5 seconds between the end of one call attempt and the beginning of another. The equipment shall be set to make sure that calls are answered between 3 and 30 seconds of receipt of ringing. www.gateway.com...
-
Page 302: Laser Safety Statement
Appendix A: Safety, Regulatory, and Legal Information Laser safety statement All Gateway systems equipped with CD and DVD drives comply with the appropriate safety standards, including IEC 825. The laser devices in these components are classified as “Class 1 Laser Products” under a US Department of Health and Human Services (DHHS) Radiation Performance Standard. - Page 303 For the latest product updates, consult the Gateway Web site at www.gateway.com. In no event will Gateway be liable for direct, indirect, special, exemplary, incidental, or consequential damages resulting from any defect or omission in this manual, even if advised of the possibility of such damages.
- Page 304 Appendix A: Safety, Regulatory, and Legal Information www.gateway.com...
-
Page 305: Index
Index installing installing second AC adapter managing power connecting meter connector monitoring charge damaged recalibrating defective recharging international adapters release latch accessories secondary safety precautions bays America Online battery application key hard drive arrow keys memory AU file module audio second battery digital jack BaySwap... - Page 306 color changing depth changing number of video out changing scheme copying composite video (TV) out jack files and folders text and graphics connecting copyright notice modem Customer Service to Ethernet Accounting to Internet Sales to TV Warranty connections customizing analog out cutting audio files and folders...
- Page 307 Gateway Web site sending help emergency startup diskette HelpSpot EmPower power adapter online help Error-checking documents Ethernet creating connecting opening jack printing external audio jack saving external monitor double-clicking EZ Pad touchpad downloading dragging drivers reinstalling in Windows 2000 Fast Ethernet...
- Page 308 PC Cards port PCI card Gateway port replicator Web address second battery Web site second hard drive Gateway Connected Home Internet shopping list connecting to gateway.your.way dial-up server requirements to access sharing access Internet connection hard drive broadband checking for errors on...
- Page 309 S/PDIF line protector speaker line tester TV out lock video out Kensington joystick port maintenance Kensington cable lock checking the hard drive for errors lock slot key combinations cleaning component exteriors keyboard cleaning the case cleaning cleaning the keyboard port cleaning the mouse shortcuts cleaning the screen...
- Page 310 Module bay NTSC/PAL out monitor (VGA) port numeric keypad mouse cleaning port online help troubleshooting opening moving documents files files Internet settings folders pointer programs screen objects option bays MP3 file changing modules creating release latches editing track information ORiNOCO Client Manager playing configuring streaming...
- Page 311 USB support for sharing pointer troubleshooting moving printing documents port replicator programs attaching notebook closing separating notebook opening ports reinstalling docking PS/2 port game joystick keyboard radio MIDI listening with MusicMatch monitor (VGA) Radio Approval authorities mouse radio frequency wireless connections parallel printer PS/2...
- Page 312 CD/DVD drive safety precautions diskette drive shortcut menus hard drive accessing memory shortcuts second battery closing programs second hard drive closing windows resolution copying changing cutting right-clicking deleting files and folders keyboard pasting S/PDIF renaming files and folders safety selecting items in a list general precautions small office network guidelines for troubleshooting...
- Page 313 Pad Lock troubleshooting power training Scroll Lock second battery classroom second hard drive Learn@Gateway support tool Learning Libraries PC Doctor transferring surge protector files Suspend Internet settings S-Video out travel tips system identification label...
- Page 314 Windows 2000 mute setting up in Windows 98 setting up in Windows XP turning off waking up your notebook turning on WAV file World Wide Web (WWW) Web browser downloading files Web page write-protection for diskettes Web site connecting to Gateway...
Need help?
Do you have a question about the Solo 5350 and is the answer not in the manual?
Questions and answers