Advertisement
Table of Contents
8612335COM
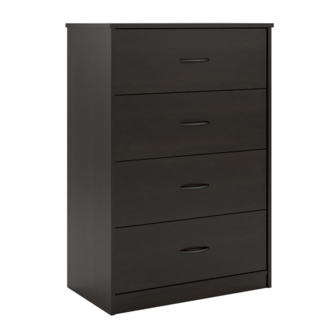
4 Drawer Dresser
Date of Purchase ___ / ___ / ___
Lot Number:
THIS INSTRUCTION BOOKLET CONTAINS IMPORTANT SAFETY INFORMATION. PLEASE READ AND KEEP FOR FUTURE REFERENCE.
Secure Your Furniture
Keep your home and family safe
with the wall anchor kit that is
included with the product.
Serious or fatal crushing injuries can
occur from
g furniture.
WARNING: Manufacturer assumes no liability
for improper
on or excessive loads
placed on screws or bracket. This wall anchor
is not a subs tute for proper adult supervision.
Do Not Return This Product!
Contact our customer service team for help rst.
Call: 1-800-489-3351 (toll free)
Monday-Friday 9am - 5pm CST
Visit: www.ameriwoodhome.com
Easy
Assembly Di culty Meter
Follow Ameriwood Home
B348612335COM01MP
Tough
You
Tube
Advertisement
Table of Contents

Related Manuals for Ameriwood HOME 8612335COM


Summary of Contents for Ameriwood HOME 8612335COM
- Page 1 Easy Tough Assembly Di culty Meter Serious or fatal crushing injuries can occur from g furniture. Follow Ameriwood Home WARNING: Manufacturer assumes no liability for improper on or excessive loads placed on screws or bracket. This wall anchor Tube is not a subs tute for proper adult supervision.
-
Page 2: Helpful Hints
Contact Us! Do NOT return this product! Contact our friendly customer service team t for help. Assembly Tips Call us! 1-800-489-3351 Monday-Friday 9am - 5pm CST Tube Visit ameriwoodhome.com to view the limited warranty valid in the U.S. and Canada. Helpful Hints PEOPLE NEEDED FOR ASSEMBLY: 1-2 ESTIMATED ASSEMBLY TIME: 2 HOUR... -
Page 3: Before You Start
Before You Start Read through each step carefully and follow the proper order Separate and count all your parts and hardware Give yourself enough room for the assembly process Have the following tools: Flat Head Screwdriver, #2 Phillips Head Screwdriver and Hammer Cau on: If using a power drill or power screwdriver for screwing, please be aware to slow down and stop when screw is ght. - Page 4 Not actual size Back T8612335030MP T8612335050MP Right Panel Le Panel (x4) T8612335010MP T8612335020MP Drawer Front T8612335040MP T8612335060MP (x4) (x4) (x8) Support Drawer Back Drawe Drawer Side T8612335090MP T8612335100MP T8612335080MP T8612335070MP This part is paperboard construction. It is not made from wood, but is required for the assembly of your unit.
- Page 5 Not actual size This part is paperboard is not made from wood, but is required for the assembly of your unit. ameriwoodhome.com...
-
Page 6: Part List
Hardware Bag Reference number : 28612335COM0MP Part List Actual Size (x12) (x24) (x12) (x56) (x46) TMP5007 TMP5101 TMP8002 TMP11080 TMP12120 cam lock wood dowel screw 7/16" pan screw cam bolt (x18) (x16) (x8) (x4) TMP4703 TMP21970 TMP12700 TMP53600 3/4" pan screw nail drive fastener angle bracket... - Page 7 STEP 1 (x4) (x1) TMP5101 TMP84050 Do not fully tighten this screw. ameriwoodhome.com...
- Page 8 STEP 2 (x8) (x22) (x8) (x4) TMP5007 TMP8002 TMP12120 TMP53600 ameriwoodhome.com...
- Page 9 STEP 3 mark with a "CL" et member (x4) (x4) (x1) (x16) (x2) TMP56740 TMP11080 TMP5101 TMP5007 TMP8002 Quick Assembly Proper orientation of CAM LOCK ed edge ameriwoodhome.com...
- Page 10 STEP 4 mark with a "CR" right cabinet member (x1) (x16) (x4) (x4) (x2) TMP56740 TMP5101 TMP8002 TMP11080 TMP5007 Quick Assembly Proper orientation of CAM LOCK ed edge ameriwoodhome.com...
- Page 11 STEP 5 ished edge ameriwoodhome.com...
- Page 12 STEP 6 nished edge ameriwoodhome.com...
- Page 13 STEP 7 nished edge ameriwoodhome.com...
- Page 14 STEP 8 ameriwoodhome.com...
- Page 15 STEP 9 (x6) (x18) TMP12120 TMP4703 IMPORTANT! THE BACK PANEL IS A STRUCTURAL PART OF THIS UNIT AND MUST BE INSTALLED PROPERLY. With the help of another person, carefully turn your unit over on its front side. Make sure the unit is square.
- Page 16 STEP 10 (x8) (x16) TMP54520 TMP12120 Line up the drawer bracket (11) with the holes in the drawer sides as shown and a ach with screws (5). bracket orienta bracket orienta on ameriwoodhome.com...
- Page 17 STEP 11 (x16) TMP12120 Be sure to center the groove in the drawer sides (G) with the groove in the drawer front (F). Please note, you will repeat this step for each of the 4 drawers. ameriwoodhome.com...
- Page 18 STEP 12 (x16) TMP21970 Note: You will eed to tap the drive fa te er (7) with a hammer to ecurely fa te . hed urface ameriwoodhome.com...
- Page 19 STEP 13 (x8) (x4) TMP12700 TMP50680 ameriwoodhome.com...
- Page 20 STEP 14 rawer member right drawer member (x24) (x4) TMP56740 TMP11080 Using screws (4), a h the drawer slide to drawer box as show. screw position ameriwoodhome.com...
- Page 21 STEP 15 For Masonry, Concrete, or other wall materials: Consult your local hardware store for appropriate anchors to securely attach the safety bracket. (x1) TMP84050 IMPORTANT: THIS UNIT MUST BE SECURE TO THE WALL TO HELP PREVENT TIPOVER. FOLLOW THESE INSTRUCTIONS TO INSTALL THE ANTI-TIPPING SAFETY BRACKET PROVIDED WITH THIS PRODUCT.
-
Page 23: Maximum Loads
Maximum Loads This unit has been designed to support the maximum loads shown. Exceeding these load limits could cause sagging, instability, product collapse, and/or serious injury. 25 lbs 11.3 kg (each drawer) 50 lbs 22.7 kg Warning: Risk of injury to persons - do not place a television on this furniture. This furniture is not approved for use with a television.
Need help?
Do you have a question about the 8612335COM and is the answer not in the manual?
Questions and answers