Table of Contents
Advertisement
Available languages
Available languages
Quick Links
Advertisement
Chapters
Table of Contents

Related Manuals for Britax One4Life Slim


Summary of Contents for Britax One4Life Slim
- Page 1 One4Life Slim User Guide Guía del Usuario...
- Page 2 Britax®, ClickTight®, Safecell® and One4Life are trademarks owned by Britax Child Safety, Inc. All rights reserved. ©2024 Britax Child Safety, Inc. This product and its components are subject to change without notice. Printed in China. Britax®, ClickTight® , Safecell® y One4Life son marcas comerciales propiedad de Britax Child Safety, Inc.
-
Page 3: Table Of Contents
Child Restraint Overview ..........2 Safety Information ............4 Important Notes ...............5 Registration ...................6 Certification .................. 7 Vehicle Compatibility Guidelines .......8 Vehicle Buckle Positions ...........8 Vehicle Seating Positions ..........9 Vehicle head restraint ............9 Incompatible Vehicle Seat Belts ......10 Using the Lower Anchors and Tethers for Children (LATCH) .............. -
Page 4: Child Restraint Overview
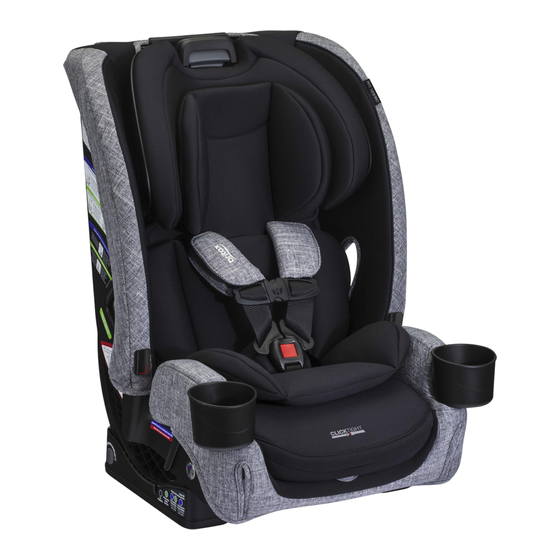
Child Restraint Overview Front View Harness and Head 14. Lower Connector Restraint Adjuster Adjuster Release Button (LATCH Head Infant Insert component) 3. Comfort Pads 15. Lower Connector 4. Harness Straps Strap (LATCH 5. Chest Clip component) 6. Buckle 16. Serial Number & Manufactured Date Belly Pad Label... - Page 5 Back View 22. Head Restraint 32. Car Seat Base 23. Carry Handle 33. SafeCell® Technology 24. Booster Mode Upper 34. V-Shaped Tether Shoulder Belt Guide Hook 25. V-Shaped Tether 35. Forward-facing Adjuster Belt Path 26. V-Shaped Tether Strap 27. Shell 28.
-
Page 6: Safety Information
• DO NOT use any infant inserts with children weighing over 20 lbs (9.1 kg) rear-facing. • DO NOT use any infant inserts forward-facing. • Britax strongly recommends that children should remain in a child restraint with a 5-point harness until reaching the maximum weight or height allowed. -
Page 7: Important Notes
(10) years. See the Serial Number and Manufactured Date Label on the child restraint (page 2). • The use of non-Britax covers, inserts, toys, accessories or tightening devices is not approved by Britax. Their use could cause this child restraint not to perform as intended in a crash. -
Page 8: Registration
Britax Child Safety, Inc., PO Box 91167, Allentown, PA 18109-9925. You can also register online at us.britax.com/registration or by calling 888-427- 4829. -
Page 9: Certification
For your convenience, record all the information about your child restraint below. Refer to the Serial Number & Manufactured Date Label for all information (see page Model Name and Number:____________________________ Serial Number: _______________________________________ Batch Number: _______________________________________ Date of Manufacture: _________________________________ Certification Motor Vehicles This child restraint system conforms to all applicable... -
Page 10: Vehicle Compatibility Guidelines
For forward-facing aircraft installation: Recline this child restraint (see page 19) to position 8 and place forward-facing on the aircraft seat. 2. Slide the aircraft lap belt into the forward-facing belt path under the cover with the ClickTight in the closed position. -
Page 11: Vehicle Seating Positions
Vehicle Seating Positions WARNING! DO NOT place child seat rear-facing in a seating position with a frontal air bag. DEATH or SERIOUS INJURY can occur. Owners of vehicles with front passenger side air bags should refer to their owner’s manual for child restraint installation instructions. -
Page 12: Incompatible Vehicle Seat Belts
Lap-shoulder belts with Motorized, automatic top or bottom anchor vehicle seat belts. points on the vehicle door. NOTE: This Britax child restraint is not compatible with inflatable lap-shoulder belts. -
Page 13: Using The Lower Anchors And Tethers For Children (Latch)
Failure to follow the guidelines below may cause the child restraint not to perform as intended. • Britax strongly recommends that the tether be used when installing the child restraint forward facing. Using the tether will improve the stability of your child restraint and reduce the risk of injury. -
Page 14: The Tether As A Crash Indicator
Tether anchor locations vary from vehicle to vehicle. Check your vehicle owner’s manual for tether anchor capacities and look for the tether anchor symbol shown in the diagram to help identify where the tether anchor points are located in your vehicle. The Tether as a Crash Indicator The tether can indicate when the child restraint has been in a moderate or severe crash (see “Important... -
Page 15: Child Restraint Functions
3 in 3 in Acceptable Acceptable rear-facing forward-facing Acceptable Booster Mode Harness Mode Booster Mode Overhang is not allowed in booster mode. In booster mode, the base of the child restraint must fit completely on the vehicle seat. Child Restraint Functions Harness and Head Restraint Adjuster Adjusting Harness Positions and Head Restraint Squeeze the harness and... - Page 16 Using the Harness Buckle To Fasten: Insert one tongue at a time into the buckle. Proper connection is confirmed with a click after inserting each buckle tongue. To Release: Press the release button and pull the tongues from the buckle. NOTE: Periodically clean the buckle to ensure proper operation.
-
Page 17: Chest Clip
4. Turn the metal bracket sideways and push it up through the slot in the ClickTight and the slot in the seat cover. 5. Route the buckle strap through the desired position and pull the buckle strap retainer completely through the seat pan cover and seat pan slot. -
Page 18: Infant Inserts
Infant Inserts Head Infant Insert Lower Infant Insert Middle Infant Insert WARNING! • Head infant insert MUST be used with middle infant insert. • The head infant insert, middle infant insert or lower infant insert MAY be used with children weighing 5-20 lbs (2.3- 9.1 kg) rear-facing. -
Page 19: Anti-Rebound Bar (Arb) (Select Models)
Removing the Cup Holder Cap Insert a flat head screw driver in the cup holder cap slot on the outer side of the cup holder cap and pull the cup holder cap away from the seat. NOTE: Store the two (2) cup holder caps or cup holders for future use. - Page 20 Installing the Anti-Rebound Bar Open the ClickTight. a. Lift the front cover flap. b. Squeeze the ClickTight release buttons. 2. Insert the anti-rebound bar into the two openings at the front of the seat. 3. Attach the cover the four (4) elastic bands to the tabs on the shell.
-
Page 21: Recline Button
2. Unhook elastic bands from the front of the seat. 3. Push the anti- rebound bar release button and pull the anti-rebound bar away from the seat. Repeat on the other side. Recline Button The seat has nine (9) recline positions. Reclining the Seat in Harness Mode Push the recline button on either side of the... -
Page 22: Recline Indicator
Recline Indicator IMPORTANT: Car seat base MUST be flat on vehicle seat and MUST be parallel to vehicle seat. The vehicle MUST be on level ground. DO NOT use recline position “B” when using the seat in harness mode. Recline MUST be in position “B” when seat is used in booster mode. - Page 23 Forward-Facing Harness Installations Use the recline indicator on the child restraint to help achieve an acceptable recline angle for forward facing: • Recline indicator arrow tip must be in striped blue- green section. • Recline indicator arrow tip can NOT be in the solid blue or black sections.
-
Page 24: Rear-Facing Installation
Rear-Facing Installation Child Fit Britax strongly recommends that children ride rear- facing to the highest weight or height specified. Use rear-facing only: • with harness straps in closest position below the child’s shoulders, and • with children weighing 5 - 50 lbs (2.3 - 22.7 kg) and whose... - Page 25 2. Place child restraint rear-facing on the vehicle seat so that the car seat base is flat and parallel to the vehicle seat. NOTE: Ensure that no more than 3” (7.6 cm) 3 in of the base hangs over the edge of the vehicle seat (see pages 12 - 13) 3.
- Page 26 8. Ensure both gray ClickTight release buttons are visible. NOTE: If it is difficult close you may have removed much slack. Rear-Facing Installation with Lap-Shoulder Belt 9 Both closed locked symbols are completely visible. 9 Recline indicator is still within the correct section for rear-facing, after child is secured.
-
Page 27: Lower Connectors Installation
Lower Connectors Installation Open the ClickTight. a. Lift the front cover flap. b. Squeeze the ClickTight release buttons. 2. Remove the lower connectors from storage clips. a. Press the spring tab and push the connector back while rotating down and forward off the anchor point. - Page 28 8. Pull the end of the lower connector strap to remove slack. 9. Close the ClickTight over the lower anchor strap. 10. Ensure both gray ClickTight release buttons are visible. NOTE: If it is difficult to close you may have removed too much slack.
-
Page 29: Lap Belt Installation
Lap Belt Installation Recline the unoccupied child restraint to appropriate position (see pages 19 - 20). 2. Place child restraint rear-facing on the vehicle seat so that the car seat base is flat and parallel to the vehicle seat. NOTE: Ensure that no more than 3”... - Page 30 Close the ClickTight over the vehicle belt. 8. Ensure both gray ClickTight release buttons are visible. NOTE: If it is difficult to close you may have removed too much slack. Close the ClickTight over the vehicle seat belt. Rear-Facing Installation with Lap Belt 9 Both closed locked symbols are completely visible.
-
Page 31: Forward-Facing Installation
Forward-Facing Installation Child Fit Britax strongly recommends: • children should be secured with a harness system to the highest weight or height specified; and • children ride rear-facing to the highest weight or height specified; and • the tether be used when installing the child restraint forward facing. - Page 32 Recline the unoccupied child restraint to appropriate position (see pages 19 - 20). 4. Place child restraint forward-facing on the vehicle seat so that the car seat base is flat and parallel to the vehicle seat. NOTE: Ensure that no more than 3”...
- Page 33 10. Ensure both gray ClickTight release buttons are visible. NOTE: If it is difficult close you may have removed much slack. 11. Attach the tether hook to the vehicle’s tether anchor (check the vehicle owner’s manual for location). 12. Pull the loose tether strap end to remove slack and secure excess webbing with...
-
Page 34: Latch Installation
LATCH Installation Extend the tether by lifting on the tether adjuster. 2. Unhook the tether hook from the back of the child restraint and place it over the seat back. Open the ClickTight. a. Lift the front cover flap. b. Squeeze the ClickTight release buttons. - Page 35 10. Pull the end of the lower connector strap to remove slack. 11. Close the ClickTight over the lower anchor strap. 12. Ensure both gray ClickTight release buttons are visible. NOTE: If it is difficult to close you may have removed too much slack.
-
Page 36: Lap Belt Installation
Lap Belt Installation Extend the tether by lifting on the tether adjuster. 2. Unhook the tether hook from the back of the child restraint and place it over the seat back. 3. Recline the unoccupied child restraint to appropriate position (see pages 19 - 20). - Page 37 9. Close the ClickTight over the vehicle seat belt. 10. Ensure both gray ClickTight release buttons are visible. NOTE: If it is difficult close you may have removed much slack. 11. Attach the tether hook to the vehicle’s tether anchor (check the vehicle owner’s manual for location).
-
Page 38: Booster Mode Installation
Booster Mode Installation Child Fit Britax strongly recommends that children should remain in a child restraint with a 5-point harness until reaching the maximum weight or height allowed. Use in booster mode only: • in recline position “B”, and Ear Level •... - Page 39 4. Open the ClickTight. a. Lift the front cover flap. b. Squeeze the ClickTight release buttons. 5. Remove the lower connectors from storage clips. a. Press the spring tab and push the connector back while rotating down and forward off the anchor point.
- Page 40 12. Ensure both gray ClickTight release buttons are visible. NOTE: If it is difficult to close you may have removed too much slack. 13. Attach the tether hook to the vehicle’s tether anchor (check the vehicle owner’s manual for location). 14.
-
Page 41: Securing Your Child
Securing Your Child Harness Mode Make the proper adjustments to the harness and buckle (see pages 13 - 15). 2. Loosen the harness. a. Press harness release button. b. Pull both harness straps forward. 3. Open the chest clip. a. Press tabs. b. - Page 42 Fasten the harness and the buckle. NOTE: Proper connection is confirmed with a click after inserting each buckle tongue. 8. Check for proper harness height and pull any excess slack up to the child’s shoulder area before tightening. Note: Refer to rear- facing child fit on page 22 or forward-facing child fit on page 29.
-
Page 43: Booster Mode
Booster Mode Warning! IMPORTANT: Use only the vehicle’s lap and shoulder belt system when restraining the child in this booster seat. WARNING! • ONLY use the shoulder belt holder with the lap- shoulder vehicle belt for booster mode. • Do NOT route the shoulder belt below BOTH shoulder belt holders. - Page 44 6. Ensure the vehicle belt is positioned below the shoulder belt holder. IMPORTANT: Do NOT route the shoulder belt below BOTH shoulder belt holders. Only use the shoulder belt holder on the vehicle buckle side. Adjust the head restraint so that the vehicle shoulder belt lays straight across the child’s chest.
-
Page 45: Switching Between Harness And Booster
Switching between Harness and Booster Harness Mode to Booster Mode NOTE: It is not necessary to use lower anchors and tether to position this child restraint in booster mode. If using the lower anchors and tether to position this child restraint in booster mode, it is recommended to follow Booster Mode Installation before storing the harness. - Page 46 5. Fold the top part of seat pan cover over and position the harness straps behind the seat pan cover. 6. Fasten the chest clip Seat Pan Cover and move the chest clip to the middle of the back rest. Storing the harness Back Rest...
-
Page 47: Booster Mode To Harness Mode
11. Turn the metal bracket sideways and push it up through the slot in the ClickTight and the slot in the seat cover. 12. Place the buckle horizontally on top of the raised section of the seat shell (in the center). - Page 48 4. Remove buckle tongues from comfort pads. Reattach comfort pads above chest clip. 5. Open the chest clip. 6. Flip the seat pan cover up. Pull the harness strap from behind the seat pan cover Flip the head restraint cover back down. 8.
-
Page 49: Maintenance
Maintenance IMPORTANT: Before each use, check this child restraint and its components to make sure they are in good condition and good working order. NOTE: If removing cover to wash, see Cleaning section on page 56. Removing the Head Restraint Cover Loosen the harness. - Page 50 Replacing the Head Restraint Cover Raise the head restraint to the highest position. 2. Tuck the head restraint cover under and around the head restraint foam. 3. Attach the elastic strap on the head restraint adjuster. 4. Route the harness through the head restraint cover slots and attach the...
- Page 51 2. Open the ClickTight. a. Lift the front cover flap. b. Squeeze the ClickTight release buttons. 3. Remove the buckle and belly pad. a. Turn the buckle strap retainer sideways and push it up through the seat pan and seat pan cover. b.
- Page 52 4. Attach the two (2) elastic straps under the seat pan. 5. Route the buckle strap through the desired position and pull the buckle strap retainer completely through the seat pan cover and seat pan slot. Refer to Adjusting Buckle Position page 14.
- Page 53 5. Unsnap the plastic snaps located at the back inside the Clicktight. 6. Unhook elastic strap located at the top of the rear-facing/ booster mode belt path inside the ClickTight. Untuck the fabric pockets under the rear-facing belt path on each side. 8.
- Page 54 2. Attach the elastic strap around the carry handle. 3. Snap the snaps at the back of the child restraint. 4. Open the ClickTight. a. Lift the front cover flap. b. Squeeze the ClickTight release buttons. 5. Tuck the shell side cover around the shoulder belt holder.
- Page 55 Removing the Lower Seat Cover Remove the cup holders or cup holder caps (see pages 16-17). 2. Open the ClickTight. a. Lift the front cover flap. b. Squeeze the ClickTight release buttons. 3. Unhook elastic straps from the front of the seat slots.
- Page 56 3. Pull the cover around the front of the shell. a. Attach the snaps on each side. b. Tuck the plastic tabs under the seat. 4. Reattach the cup holders or the cup holders cap. 5. Close Clicktight. Removing the Anti-Rebound Bar Cover Open the ClickTight.
- Page 57 Replacing the Anti-Rebound Bar Cover Slide the anti-rebound bar cover onto the anti-rebound bar. 2. Attach the elastic straps onto the plastic tabs. 3. Insert the anti-rebound bar into the two openings at the front of the seat. 4. Attach the cover elastic bands to the tabs on the shell.
-
Page 58: Cleaning
• TOWEL DRY. • If care label indicates machine washable, • DO NOT use abrasive always refer to us.britax. cleaners. com/faqs for important care information. • Before washing, ensure all the hook and loop fasteners are secured. -
Page 59: Warranty
Britax. Their use could cause this child restraint to fail safety standards or not perform as intended in a crash. Their use also may void the Britax warranty. To make a claim under this warranty, you must contact Britax... -
Page 60: Arbitration Agreement
YOU HAVE THE RIGHT TO OPT OUT OF THIS ARBITRATION AGREEMENT, BUT YOU MUST EXERCISE THIS RIGHT WITHIN THIRTY (30) DAYS OF YOUR PURCHASE OF A BRITAX PRODUCT. If you do not wish to be bound by this Arbitration Agreement, you must... - Page 61 The arbitrator shall not consolidate the claims of multiple parties unless you and Britax agree to do so. At the timely request of any party, the arbitrator shall provide a written explanation for the award.
- Page 62 Arbitration Agreement. If for any reason a dispute proceeds in court rather than in arbitration, you and Britax each waive any right to a jury trial.
- Page 63 Vista general del sistema de retención infantil .. 2 Información de seguridad ............4 Advertencia ......................4 Notas Importantes ..................5 Registro ........................7 Certificación ....................7 Pautas de compatibilidad de vehículos ......9 Posiciones de la hebilla del vehículo .......9 Posiciones de asiento del vehículo ........9 Reposacabezas del vehículo ..........10 Cinturones de seguridad de vehículos incompatibles 10 Uso del sistema de anclajes inferiores y correas...
-
Page 64: Vista General Del Sistema De Retención Infantil
Vista general del sistema de retención infantil Vista Frontal Ajustador del arnés y del inferior (componente reposacabezas LATCH) Cojín infantil para la 15. Correa del conector cabeza inferior (componente Almohadillas del Arnés LATCH) Correas del arnés 16. Número de serie y etiqueta con fecha de Broche de pecho fabricación (bajo la... - Page 65 Vista Posterior 22. Reposacabezas 32. Base del asiento para niños 23. Manija para el transporte 33. Tecnología SafeCell® 24. Guía para el cinturón 34. Gancho de la correa de sujeción en forma del hombro modo de asiento elevador de V 35.
-
Page 66: Información De Seguridad
• NO utilice ningún tipo de cojín infantil al estar orientado hacia delante. • Britax recomienda encarecidamente que los niños usen un sistema de retención infantil con un arnés de 5 puntos hasta que alcancen el peso o la altura máximos permitidos. -
Page 67: Notas Importantes
(página 2 ). • El uso de fundas, cojines, juguetes, accesorios, o dispositivos de ajuste no fabricados por Britax no está aprobado por Britax. Su uso podría causar que este sistema de retención infantil no funcione según lo previsto en un choque. - Page 68 • Este sistema de retención infantil sólo puede utilizarse en las siguientes clases de vehículos: vehículos de pasajeros multipropósito, turismos o camiones. NUNCA use este sistema de retención infantil en aplicaciones no certificadas, incluyendo: botes, vehículos de baja velocidad (LSV), vehículos todo terreno (ATV), carritos de golf. •...
-
Page 69: Registro
Britax Child Safety, Inc. PO Box 91167, Allentown, PA 18109-9925. También puede inscribirse en línea en us.britax.com/registration o llamando al 888- 427-4829. - Page 70 Para la instalación en aeronaves orientados hacia atrás: Recline este sistema de retención infantil (consulte la página 19) ) y colóquelo orientado hacia atras en el asiento del avión. 2. Deslice el cinturón de cadera de la aeronave por las guías del cinturón al estar orientado hacia atrás sobre la cubierta con ClickTight en...
-
Page 71: Pautas De Compatibilidad De Vehículos
Pautas de compatibilidad de vehículos Posiciones de la hebilla del vehículo ¡ADVERTENCIA! La posición de la hebilla del cinturón del vehículo puede afectar negativamente la estabilidad del sistema de retención infantil. Si la hebilla del vehículo está cerca de la posición incorrecta cuando el cinturón del vehículo esté... -
Page 72: Reposacabezas Del Vehículo
Cinturones de cadera Cinturones de y hombros con puntos seguridad motorizados de anclaje superiores o y automáticos para inferiores en la puerta vehículos. del vehículo. NOTA: Este sistema de retención infantil Britax no es compatible con cinturones inflables de cadera y hombros. -
Page 73: Uso Del Sistema De Anclajes Inferiores Y Correas De Sujeción Para Niños (Latch)
El incumplimiento de las pautas que se indican a continuación puede provocar que el sistema de retención infantil no funcione correctamente. • Britax recomienda encarecidamente usar la correa de sujeción cuando se instala el sistema de retención infantil orientado hacia adelante. El uso de la correa de sujeción mejorará... -
Page 74: La Correa De Sujeción Como Un Indicador De
ubicaciones anclaje amarre varían según vehículo. Consulte el manual del propietario de su vehículo sobre las capacidades de los anclajes de amarre y busque el símbolo del anclaje de amarre que se muestra diagrama para poder identificar dónde está ubicado el punto de anclaje de amarre superior en su vehículo. -
Page 75: Funciones Del Sistema De Retención Infantil
7,6 cm 7,6 cm Orientado Orientado hacia hacia adelante atrás aceptable Acceptable aceptable Modo de asiento Modo Arnés elevador Modo de asiento elevador No se permite que sobresalga en el modo de asiento elevador. En el modo de asiento elevador, la base del sistema de retención infantil debe encajar completamente en el asiento del vehículo. - Page 76 Uso de la hebilla del arnés Para abrochar: Inserte una lengüeta por vez en la hebilla. La conexión adecuada se confirma con un clic después de insertar cada lengüeta de la hebilla. Para desbloquear: Presione el botón de desbloqueo y retire las lengüetas de la hebilla.
-
Page 77: Cierre De Pecho
4. Gire el retenedor de la correa de la hebilla hacia los lados y páselo por la ranura de la bandeja del asiento y la cubierta de la bandeja del asiento. 5. Ponga la correa de la hebilla en la posición deseada y tire el retenedor de la correa de la hebilla... -
Page 78: Cojines Para Bebé
Cojines para Bebé Cojín infantil para la cabeza Cojín infantil inferior Cojín infantil intermedio ¡ADVERTENCIA! • El cojín infantil para la cabeza DEBE utilizarse con el cojín infantil intermedio. • El cojín infantil para la cabeza, el cojín infantil intermedio o el cojín inferior PUEDEN utilizarse con niños que pesen entre 2,3 y 9,1 kg (5 a 20 lb) orientados hacia atrás. -
Page 79: Barra Anti-Rebote (Modelos Seleccionados)
Extracción de la tapa del portavasos Inserte un destornillador de cabeza plana en la ranura del portavasos situada en el lado exterior de la tapa del portavasos y tire de la tapa del portavasos. NOTA: Guarde las dos (2) tapas de los portavasos o portavasos para uso futuro. - Page 80 Instalación de la barra anti-rebote Abra ClickTight. a. Levante la solapa de la cubierta delantera. b. Presione los botones de liberación de ClickTight. 2. Inserte la barra anti-rebote en los dos orificios que se encuentran en el frente del asiento. 3.
-
Page 81: Botón De Reclinación
2. Desenganche las bandas elásticas de la parte delantera del asiento. 3. Pulse el botón de liberación de la barra anti-rebote y tire de ella hacia fuera. Repita en el otro lado. Botón de reclinación El asiento tiene nueve (9) posiciones reclinables. Cómo reclinar el asiento en el modo arnés Presione el botón de reclinación en... -
Page 82: Indicador De Reclinación
Indicador de reclinación IMPORTANTE: LA base del sistema de retención infantil DEBE quedar plana en el asiento del vehículo y paralela al asiento del vehículo. EL vehículo DEBE estar en un terreno nivelado. No utilice la posición “B” cuando utilice el asiento en modo arnés. - Page 83 Instalaciones del arnés orientados hacia delante Use el indicador de reclinación del sistema de retención infantil a fin de ayudar a lograr un ángulo de reclinación aceptable para la orientación hacia adelante. • La punta de la flecha indicadora de reclinación debe estar en el área de rayas azules y verdes.
-
Page 84: Instalación Con Orientación Hacia Atrás
Instalación con orientación hacia atrás Ajuste del niño Britax recomienda encarecidamente que los niños viajen con orientación hacia atrás hasta que alcancen el peso o la altura más altos especificados. Use la orientación hacia atrás: • con las correas del arnés en la posición más cercana por... - Page 85 2. Coloque el sistema de retención infantil con orientación hacia atrás en el asiento del vehículo, de modo que la base del sistema de retención infantil quede plana al asiento 7,6 cm y paralela al asiento del vehículo. NOTA: Asegúrese de que no más de 7,6 cm (3 in) de la base sobresalgan del borde...
-
Page 86: Lista De Verificación
8. Asegúrese de que ambos botones de liberación gris ClickTight estén visibles. NOTA: Si es difícil de cerrar, es posible que haya quitado mucho sobrante. Instalación orientada hacia atrás con cinturón para cadera y hombros LISTA DE VERIFICACIÓN 9 Los dos símbolos de bloqueo cerrado están completamente visibles. -
Page 87: Instalación De Los Connectores Inferiores
Instalación de los connectores inferiores Abra ClickTight. Levante la solapa de la cubierta delantera. Presione los botones de liberación de ClickTight. Retire los conectores inferiores de los clips de almacenamiento. Presione la lengüeta con muelle y empuje el conector hacia atrás mientras gira hacia abajo y hacia delante fuera del... - Page 88 Tire del extremo de la correa del conector inferior para quitar el sobrante. Cierre ClickTight sobre la correa del conector inferior. 10. Asegúrese de que ambos botones de liberación gris ClickTight estén visibles. NOTA: Si es difícil de cerrar, es posible que haya quitado mucho sobrante.
-
Page 89: Instalación Con Cinturón De Cadera
Instalación con cinturón de cadera Recline el sistema de retención infantil desocupado a la posición adecuada (ver las páginas 19 -20). Coloque el sistema de retención infantil orientado hacia atrás en el asiento del vehículo, de modo que la base del sistema de retención infantil quede plana al asiento y paralela al asiento del... - Page 90 Cierre ClickTight sobre el cinturón de seguridad del vehículo 8. Asegúrese de que ambos botones de liberación gris ClickTight estén visibles. NOTA: Si es difícil de cerrar, es posible que haya quitado mucho sobrante.`Cierre ClickTight sobre el cinturón de seguridad del vehículo.
-
Page 91: Instalación Con Orientación Hacia Adelante
Instalación con orientación hacia adelante Ajuste del niño Britax recomienda encarecidamente: • que los niños deben estar asegurados con un sistema de arnés al peso o altura más altos especificados; y • que los niños viajen con orientación HACIA ATRÁS hasta que excedan los límites de peso o altura... - Page 92 3. Recline el sistema de retención infantil desocupado a la posición adecuada (ver las páginas 19 -20). 4. Coloque el sistema de retención infantil orientado hacia delante en el asiento del vehículo, de modo que la base del sistema de retención infantil quede plana al asiento y paralela al asiento del vehículo.
- Page 93 10. Asegúrese de que ambos botones de liberación gris ClickTight estén visibles. NOTA: Si es difícil de cerrar, es posible que haya quitado mucho sobrante 11. Conecte el gancho de sujeción a el anclaje de sujeción del vehículo (consulte el manual del propietario de su vehículo para encontrar la...
-
Page 94: Instalación Del Sistema Latch
Instalación del Sistema LATCH Extienda la correa de sujeción levantando el ajustador del sujeción. Desenganche el gancho de la correa de sujeción de la parte trasera del sistema de retención infantil y colóquelo sobre el sistema de retención infantil. Abra ClickTight. Levante la solapa de la cubierta delantera. - Page 95 10. Tire del extremo de la correa del conector inferior para quitar el sobrante. Cierre ClickTight sobre la correa del conector inferior. 12. Asegúrese de que ambos botones de liberación gris ClickTight estén visibles. NOTA: Si es difícil de cerrar, es posible que haya quitado mucho sobrante.
-
Page 96: Instalación Con Cinturón De Cadera
Instalación con cinturón de cadera Extienda la correa de sujeción levantando el ajustador del sujeción. 2. Desenganche el gancho de la correa de sujeción de la parte trasera del sistema de retención infantil y colóquelo sobre el sistema de retención infantil. - Page 97 9. Cierre ClickTight sobre el cinturón de seguridad del vehículo 10. Asegúrese de que ambos botones de liberación gris ClickTight estén visibles. NOTA: Si es difícil de cerrar, es posible que haya quitado mucho sobrante 11. Fije el gancho de sujeción a el anclaje de sujeción del vehículo (consulte el...
-
Page 98: Instalación Del Modo De Asiento Elevador
Instalación del modo de asiento elevador Ajuste del niño Britax recomienda encarecidamente que los niños permanezcan en un sistema de retención infantil con un arnés de 5 puntos hasta alcanzar la altura o el peso máximo permitido. Utilice solo en el modo de asiento elevador: Nivel del oído... - Page 99 Abra ClickTight. Levante la solapa de la cubierta delantera. Presione los botones de liberación de ClickTight. Retire los conectores inferiores de los clips de almacenamiento. Presione la lengüeta con muelle y empuje el conector hacia atrás mientras gira hacia abajo y hacia delante fuera del punto de anclaje.
- Page 100 12. Asegúrese de que ambos botones de liberación gris ClickTight estén visibles. NOTA: Si es difícil de cerrar, es posible que haya quitado mucho sobrante. 13. Conecte el gancho de la correa de sujeción al ancla de sujeción del vehículo (consulte el manual del propietario de su vehículo para encontrar la ubicación).
-
Page 101: Cómo Sujetar Al Niño
Cómo Sujetar al Niño Modo Arness Haga los ajustes adecuados al arnés y a la hebilla (páginas 13 a 14). 2. Afloje el arnés. a. Levante el botón de liberación del arnés. b. Jale ambas correas del arnés hacia delante. 3. - Page 102 Abroche el arnés a la hebilla. NOTA: La conexión adecuada se confirma con un clic después de insertar cada lengüeta de la hebilla. 8. Revise la altura adecuada del arnés y retire cualquier exceso de holgura hasta el área de los hombros del niño antes de ajustarlo.
-
Page 103: Modo Se Asiento Elevador
Modo se asiento elevador IMPORTANTE: ¡Advertencia! Solo debe usarse el cinturón de banda horizontal y transversal cuando se esté sujetando al niño utilizando el modo regulable. ¡ADVERTENCIA! • Utilice SÓLO el soporte del cinturón de hombro con el cinturón de cadera-hombro del vehículo para el modo de asiento elevador. - Page 104 6. Asegúrese de que el cinturón del vehículo está colocado debajo del soporte del cinturón de hombro. IMPORTANTE: NO coloque el cinturón de hombro por debajo de AMBOS soportes del cinturón de hombro. Utilice únicamente el soporte del cinturón de hombro del lado de la hebilla del vehículo.
-
Page 105: Cambio Entre Los Modos Arnés Y De Asiento
Cambio entre los modos arnés y de asiento elevador Modo arnés al Modo de asiento elevador NOTA: No es necesario utilizar los anclajes inferiores y la correa de sujeción superior para colocar este sistema de retención infantil en el modo de asiento elevador. Si utiliza los anclajes inferiores y la correa de sujeción superior para colocar este sistema de retención infantil en el modo de asiento elevador, se recomienda seguir con la instalación del modo de asiento... - Page 106 5. Doble la parte superior de la cubierta del asiento y coloque las correas del arnés detrás de la cubierta del asiento. cubierta del asiento 6. Abroche el clip de pecho y mueva el clip de pecho hasta la mitad del respaldo.
-
Page 107: Modo De Asiento Elevador Al Modo Arnés
Gire el retenedor de la correa de la hebilla hacia los lados y páselo por la ranura de la bandeja del asiento y la cubierta de la bandeja del asiento. 12. Coloque la hebilla horizontalmente en la parte superior de la sección elevada de la carcasa del asiento (en el centro). - Page 108 Quite las lengüetas de la hebilla de las almohadillas y vuelva a colocar las almohadillas de confort sobre el clip de pecho. Abra el clip de pecho. Voltee la cubierta de la bandeja del asiento hacia arriba . Voltee la cubierta del reposacabezas hacia abajo.
-
Page 109: Mantenimiento
Mantenimiento IMPORTANTE: Antes de cada uso, revise este sistema de retención infantil y sus componentes para asegurarse de que estén en buenas condiciones y que funcionen bien. NOTA: Si retira la cubierta para lavarla, consulte la sección Limpieza en la página 56. Cómo retirar la cubierta del reposacabezas Afloje el arnés. - Page 110 Cómo reemplazar la cubierta del reposacabezas Levante el reposacabezas a la posición más alta. 2. Inserte la cubierta del reposacabezas debajo y alrededor de la espuma del reposacabezas. 3. Coloque la correa elástica en el ajustador del reposacabezas. 4. Pase el arnés por las ranuras de la cubierta del reposacabezas y fije los cierres.
- Page 111 2. Abra ClickTight. a. Levante la solapa de la cubierta delantera. b. Presione los botones de liberación de ClickTight. 3. Quite la hebilla y la almohadilla para el vientre. a. Gire el retenedor de la correa de la hebilla hacia los lados y empújelo hacia arriba por la bandeja...
- Page 112 4. Coloque las dos (2) correas elásticas debajo de la bandeja del asiento. 5. Pase la correa de la hebilla por la posición deseada y tire del retenedor de la correa de la hebilla completamente a través de la cubierta del asiento y la ranura del asiento.
- Page 113 4. Abra ClickTight. a. Levante la solapa de la cubierta delantera. b. Presione los botones de liberación de ClickTight. 5. Desabroche los cierres de plástico situados en la parte posterior del interior del Clicktight. 6. Desenganche la correa elástica situada en la parte superior de la trayectoria del cinturón del modo de asiento...
- Page 114 Sustitución de la cubierta lateral de la carcasa Deslice la cubierta lateral de la carcasa sobre los paneles laterales del sistema de retención infantil. 2. Coloque la correa elástica alrededor del asa para llevar. 3. Encaje los broches en la parte posterior del sistema de retención infantil.
- Page 115 8. Coloque los broches de plástico situados en la parte posterior del interior del Clicktight. 9. Cierre el ClickTight. Cómo retirar la cubierta inferior del asiento Retire los portavasos o la tapa de los portavasos. (ver las paginas 16 - 17) 2.
- Page 116 Cómo volver a colocar la cubierta inferior del asiento Abra ClickTight. a. Levante la solapa de la cubierta delantera. b. Presione los botones de liberación de ClickTight. 2. Deslice la cubierta inferior de protección lateral sobre la guía de la correa orientada hacia atrás.
- Page 117 3. Pulse el botón de liberación de la barra anti-rebote y tire de ella hacia fuera. Repita en el otro lado. 4. Desenganche las pequeñas correas elásticas de las lengüetas de plástico. 5. Deslice la cubierta de la barra anti-rebote. Cómo volver a poner la cubierta de la barra anti-rebote Deslice la cubierta...
-
Page 118: Limpieza
• SEQUE CON TOALLA • Si la etiqueta de cuidado • NO use limpiadores indica que se puede abrasivos. lavar a máquina, siempre consulte us.britax.com/faqs para Arnés obtener información importante sobre el • LIMPIE CON ESPONJA el cuidado. arnés usando agua tibia •... -
Page 119: Garantía
Esta garantía le otorga derechos legales específicos y usted puede tener otros derechos, que varían de un estado a otro. Ni Britax, ni el minorista que venda este producto, autoriza a ninguna persona a crear para él cualquier otra garantía, obligación o responsabilidad en relación con este producto. -
Page 120: Acuerdo De Arbitraje
Britax (incluidas las disputas relacionadas con la comercialización o venta de productos Britax), entre otros, cualquier disposición en esta Guía de usuario o este Acuerdo de arbitraje... - Page 121 árbitro (“Honorarios de arbitraje”) en la medida en que tales Honorarios de arbitraje excedan los 200 $. Si Britax solicita arbitraje, entonces a su solicitud, Britax adelantará su parte de los Honorarios de arbitraje. En el caso de reclamos de 10 000 $...
- Page 122 El árbitro no consolidará los reclamos de varias partes, a menos que usted y Britax acuerden hacerlo. A solicitud oportuna de cualquiera de las partes, el árbitro proporcionará una explicación por escrito para el laudo.
- Page 124 Britax Child Safety, Inc. 4140 Pleasant Road 1-888-427-4829 Britax Child Safety, Inc. Fort Mill, SC 29708 USA 1-704-409-1699 A Britax Childcare company 4140 Pleasant Road us.britax.com 1-888-427-4829 Fort Mill, SC 29708 USA 1-704-409-1699 A Britax Childcare company us.britax.com...
Need help?
Do you have a question about the One4Life Slim and is the answer not in the manual?
Questions and answers