
Related Manuals for hawo hd 650 DE-V


Summary of Contents for hawo hd 650 DE-V
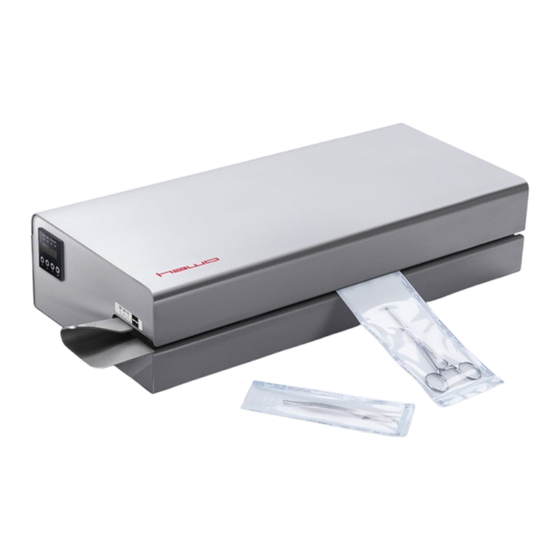
- Page 1 650 DE-V EcoPak 03/03S OPERATING INSTRUCTIONS Valid for device versions as of 01/2024 9,694,048 V1.01...
-
Page 2: Table Of Contents
EcoPak 03/03S Contents INTRODUCTION ..............................3 ................................3 REFACE ................................3 EGEND ..............................4 MPORTANT NOTICE ................................4 LEANING ............................5 AFETY INSTRUCTIONS BEFORE STARTING ............................7 ............................... 7 NTENDED USE ............................8 ESIGN AND FUNCTIONS 2.2.1 Sealing process sequence ........................... 8 ................................ -
Page 3: Introduction
EcoPak 03/03S Introduction 1 Introduction Preface First of all we would like to thank you for purchasing this sealing device. In these instructions you will find information about using the device, servicing and care. The sealing device is a microprocessor controlled rotary sealer for packaging sealable transparent pouches and reels (med. -
Page 4: Important Notice
EcoPak 03/03S Introduction Important notice In accordance with the intended use, the CE marking is displayed based on the EU directives. The Medical Device Directive 93/42/EEC and Medical Device Regulation 2017/745 (MDR) is not applicable to sealing devices. The limit values of IEC 60601-1 must not be applied in repeated electrical inspections. -
Page 5: Safety Instructions
EcoPak 03/03S Chapter 1 Safety instructions Our products are in a flawless condition in terms of safety technology when they leave the plant. To maintain this condition, the contents of these safety instructions as well as type plates, labelling and safety instructions attached to the device must be observed while handling the device (transport, storage, installation, commissioning, operation and maintenance). - Page 6 EcoPak 03/03S Chapter 1 The device must not be operated unsupervised. It is forbidden to operate the device under the influence of drugs or alcohol. Keep hair, clothing and gloves away from moving parts! Loose clothing, jewellery or long hair can be caught by moving parts. The device contains valuable materials that can be recycled and reused.
-
Page 7: Before Starting
Chapter 2 EcoPak 03/03S 2 Before starting Intended use SEALING MATERIALS Sealable paper pouches in accordance with EN ISO 11607-1/EN 868-4 Sealable pouches and tubes in accordance with EN ISO 11607- 1/EN 868-5 made of film and paper as per EN 868-3 Sealable pouches and tubes in accordance with ISO EN 11607- 1/EN 868-5 made of film and uncoated materials made of ®1... -
Page 8: Design And Functions
Chapter 2 EcoPak 03/03S Design and functions Controller Sealing edge adjustment Mains connection with fuse 2.2.1 Sealing process sequence Step 1: After the med. packaging has been inserted, the feed is automatically switched on. Step 2: The med. packaging is now fed and the sealing seam area is heated up to the set sealing temperature by the heating units located at the top and bottom. -
Page 9: Installation
Chapter 2 EcoPak 03/03S Installation The device must not be installed or operated in potentially explosive areas. Only use sockets that are equipped with a protective conductor and where the mains voltage is stable. The device may only be installed in a dry environment. Heavy dust, steam, dripping water or splashing water impair the function of the device. -
Page 10: Basic Functions
Chapter 3 EcoPak 03/03S Basic functions Switching on the device Controller Mains connection with fuse Plug the mains cable into the mains connection. Switch on the device with the mains switch in position "1". Set the required sealing temperature on the temperature controller as described in Chapter 3.8.1. -
Page 11: Operation
Chapter 3 EcoPak 03/03S Operation USB port for data Sealing edge adjustment recording Knurled screw Intelligent Scan Serial interface RS232 Step 1 Set the required sealing edge width. After loosening the knurled screw, the lower insertion plate can be continuously adjusted for sealing edge widths of 0 - 30mm. Step 2 Insert packaging... -
Page 12: Setting The Temperature Controller
Chapter 3 EcoPak 03/03S Setting the temperature controller General Switching on the sealing device Software version indicator Self-test runs for approx. 5 s (see Chapter 2.3) Configuration test (only for devices with external printer) Display current actual temperature Status messages in the top line: Printer available Heating mode Identification of the heater... -
Page 13: Functions Of The Buttons
Chapter 3 EcoPak 03/03S Functions of the buttons Switch printer off/on Enter personal Activation of "seal check" Menu level 1 identification Activation of menu level 2 Press 3 s Activation of menu level 3 Press 7 s Menu level 2 Set value 1 –... -
Page 14: Device Settings
Chapter 3 EcoPak 03/03S Device settings 3.8.1 Sealing temperature entry Factory setting: 1 = 120°C 2 = 135°C Press button 3s 3 = 190°C 4 = 190°C Select set value and change if necessary. Then confirm with the Enter key Confirm selection 3.8.2 Switching the printer off and on (only for devices with external printer) Display for 1s... -
Page 15: Personnel Code Entry
Chapter 3 EcoPak 03/03S 3.8.3 Personnel code entry Display for 1s Press the button Select new code Displays the current personnel code Confirm entry V 1.01 9,694,048 Page 15... -
Page 16: Data Input
Chapter 3 EcoPak 03/03S 3.8.4 Data input Activate Press button 7s Confirm selection Toggle to data entry Select data Access code Key lock Confirm selection Activated Enter 1 - 9999 Deactivated Confirm entry Enter 0 Expiry date Confirm selection Confirm entry Confirm entry Confirm entry V 1.01... - Page 17 Chapter 3 EcoPak 03/03S Confirm selection Date and time Enter the day Confirm entry Enter month Confirm entry Enter year Confirm entry Enter hour Confirm entry Enter minute Confirm entry Batch Confirm selection Enter 0000 - 9999 Package content quantity Confirm selection Enter 0 - 99 Confirm entry...
- Page 18 Chapter 3 EcoPak 03/03S Sterilisation type Confirm selection Select the sterilisation method Steam Ethylene oxide Confirm selection Formaldehyde Plasma Dry heat Ionising radiation Personnel code Confirm selection Confirm entry Select new code Displays the current personnel code V 1.01 9,694,048 Page 18...
- Page 19 Chapter 3 EcoPak 03/03S Batch counter Confirm selection Enter 0 - 9999 Confirm entry Select counting direction If the counting direction is selected downwards, a signal sounds on reaching the value 0 Counting direction upwards Confirm selection Switch off batch counter Counting direction downwards Switch off batch counter Standby...
- Page 20 Chapter 3 EcoPak 03/03S Operating data Confirm selection View operating hours and the absolute batch counter Select view Operating hours / piece counter Confirm selection Measurement units Confirm selection Select measurement units Confirm selection Measurement units - Europe Measurement units - USA Europe Temperature in °C Temperature in °F...
- Page 21 Chapter 3 EcoPak 03/03S Character width Confirm selection Confirm entry Enter 0 - 2 Depending on the selected setting, the characters are printed in different widths Enter A Automatic adjustment of the character size according to the width of the packaging and the length of the print line.
- Page 22 Chapter 3 EcoPak 03/03S Info field Confirm selection Input Confirm entry EntY = No field HIBC = HIBC code Sign = Signature field Language Confirm selection SBS symbols INTERNAL printer Confirm selection Enter 1 - 4 SBS symbols EXTERNAL printer Confirm selection Enter 1 - 4 V 1.01...
- Page 23 Chapter 3 EcoPak 03/03S Monitoring Confirm selection Personnel number Enter 0 – 60min Confirm entry When entering a time >0, personal number monitoring is activated and the motor can only ever be started if the personal number value is 1-9999 If the set time is reached, the personal number is automatically set to 0...
- Page 24 Chapter 3 EcoPak 03/03S Time format Confirm selection Select time format 24-hour time format Confirm selection 13:26 01:26 PM 12-hour time format V 1.01 9,694,048 Page 24...
-
Page 25: Print Data Selection (Only For Devices With External Printer)
Chapter 3 EcoPak 03/03S 3.8.5 Print data selection (only for devices with external printer) Activate Select data to be printed Confirm selection Press button 7s Switching of print data The printing sequence is set and cannot be changed. Sterilisation date Activated print data are always printed in this order. - Page 26 Chapter 3 EcoPak 03/03S Package content quantity Text V 1.01 9,694,048 Page 26...
- Page 27 PC. Please only use barcode scanners approved by hawo. hawo accepts no liability for damage caused by connecting and using other barcode scanners For further information, please contact your authorised service partner or the hawo.
-
Page 28: Sealing Seam Test - "Seal Check" (Only For Devices With External Printer)
Chapter 3 EcoPak 03/03S Sealing seam test – “Seal Check” (only for devices with external printer) 3.10 Test the process variables (temperature, contact pressure and sealing time [dwell]) with the "SEAL CHECK". Seal Check seal indicators are not suitable for packaging with side folds. This test should be performed before and after the daily working process and/or before/after each batch and can be documented by routine filing of the print-out. -
Page 29: Troubleshooting And Maintenance
Chapter 4 EcoPak 03/03S 4 Troubleshooting and maintenance Troubleshooting checklist The troubleshooting suggestions marked with a * may be carried out only by the manufacturer or an authorised service partner appointed by the manufacturer. Malfunction Possible cause Remedy Power supply -Power cable not plugged in Check the mains connection and, if necessary, plug into a different power outlet... -
Page 30: Customer Service
Customer service Your hawo customer service team is available from Mon-Fri 08:00 - 17:00 CET on the following number: +49 (0)6261 9770 -0. You are also welcome to send questions to the following e-mail address: service@hawo.com V 1.01... -
Page 31: Alarm Functions And Error Displays
Chapter 4 EcoPak 03/03S Alarm functions and error displays 4.3.1 Alarm functions Batch counter, set with counting direction downwards, has reached the value 0 Cancelling the alarm Set batch counter to a value > 0 set the counting direction of the batch counter to up Sealing temperature not within tolerance range... -
Page 32: Error Displays
Chapter 4 EcoPak 03/03S Error displays The troubleshooting suggestions marked with a * may be carried out only by the manufacturer or an authorised service partner appointed by the manufacturer. Sealing temperature out of tolerance Possible cause Remedy Temperature sensor defective Replace temperature sensor* Controller defective Replace controller*... -
Page 33: Maintenance/Calibration
Page 31: Maintenance and wear parts Page 32: Spare parts Enter the device number. S/N: 123456 Enter the device type. Type: hd 650 DE-V Enter address, fax number and order number. Mark items required. Enter quantity required. - Page 34 Chapter 4 EcoPak 03/03S Sender: Fax no. Your order No. _________________ Date _______________ Device type _________________ Serial number _______________ Designation Art. No.: Qty. PTFE strip on guide rail 6,105,138 PTFE strip heating die 6,105,125 ...
- Page 35 Chapter 4 EcoPak 03/03S Sender: Fax no. Your order No. _________________ Date _______________ Device type _________________ Serial number _______________ Designation Art. No.: Qty. Temperature controller 100 - 240V 6,564,051 SST module 1,461,014 Motor optical sensor 1,561,010 ...
-
Page 36: Replacement Parts Ordering - Allocation Of Article Numbers
Chapter 4 EcoPak 03/03S Replacement parts ordering – allocation of article numbers Heating die 6,564,023 1,616,049 6,105,125 1,616,050 6,105,125 6,564,018 Upper guide rail 6,181,012 PTFE strip 6.105.138 Lower guide rail PTFE strip 6.105.138 V 1.01 9,694,048 Page 36... -
Page 37: Replacement Parts Ordering - Comprehensive Overview
Chapter 4 EcoPak 03/03S Replacement parts ordering - comprehensive overview Pressure roller 2,230,008 Fan 6.212.029 Toothed belt transport 6,271,001 DMS module 1,410,018 SST module 1,461,014 Temperature controller 6,564,051 Power switch 6,522,049 + 6.562.009 V 1.01 9,694,048 Page 37... -
Page 38: Replacement Of Wear And Replacement Parts
Chapter 4 EcoPak 03/03S Replacement of wear and replacement parts Maintenance information Please use only genuine replacement parts Please use only genuine replacement parts Replacement of PTFE tape on guide rail Switch off the sealing device and DISCONNECT THE POWER PLUG! ... - Page 39 Chapter 4 EcoPak 03/03S Maintenance information Replace the pressure roller Switch off the sealing device and DISCONNECT THE POWER PLUG! Opening the housing Remove mounting screws for the upper guide rail and remove the guide rail. ...
-
Page 40: Adjusting The Process Parameters
EcoPak 03/03S Chapter 5 5 Adjusting the process parameters After adjusting, the sealing device must remain switched on for another 10 seconds! Temperature control Adjustment of temperature The temperatures 120°C and 200°C are measured one after another control must always be and the difference between the set value and the actual value is performed after replacing a corrected. - Page 41 EcoPak 03/03S Chapter 5 Select temperature adjustment Confirm selection The set temperature of the device is automatically set to 120°C Once the temperature has been reached, the device starts stabilising for 120 seconds. After this time has elapsed, enter the temperature which has been measured with the measuring device Confirm entry...
-
Page 42: Contact Pressure
EcoPak 03/03S Chapter 5 Contact pressure Press both buttons at the same time and switch on the sealing device Adjustment of contact pressure must always be performed after replacing the temperature controller, after replacing the DMA module and after replacing the pressure roller. Only then is the monitoring of the contact pressure active. - Page 43 EcoPak 03/03S Chapter 5 Procedure Turn screw to the left until the displayed value no longer changes Using the potentiometer set the 0-point of the DMS module to the value 005 By turning the screw the right, set the contact pressure to Confirm the setting 100N...
-
Page 44: Configuring Motor Monitoring
EcoPak 03/03S Chapter 5 Configuring motor monitoring Press both buttons at the same time and switch on the sealing device Configuration of the motor monitoring must always be performed after replacing the temperature controller, after replacing the motor and after replacing the tacho generator Only then is motor monitoring active... -
Page 45: Setting The Serial Interface Transmission Rate (Baud Rate)
EcoPak 03/03S Chapter 5 Setting the serial interface transmission rate (baud rate) Press both buttons at the same time and switch on the sealing device Power switch Confirm selection Select baud rate setting Select baud rate Confirm selection 9600Bd –115200Bd Example: Baud rate 9600Bd V 1.01 9,694,048... -
Page 46: Service Menu
EcoPak 03/03S Chapter 6 6 Service menu Data recording Activate Data logging is activated as soon as the "DLog" setting parameter is set to Press button 7s Login with 888 Functioning: If the controller detects a change at the input light barrier, certain predefined values are written sequentially to the plugged-in USB stick. -
Page 47: Motor Monitoring On / Off
EcoPak 03/03S Chapter 6 Motor monitoring ON / OFF Activate Press button 7s Login with 888 Switching of print data Motor monitoring ON or OFF Contact pressure monitoring ON / OFF Activate Press button 7s Login with 888 Pressure monitoring ON or OFF V 1.01 9,694,048 Page 47... -
Page 48: Measured Value Display
EcoPak 03/03S Chapter 6 Measured value display Activate Display of the actual values for: Temp: Actual temperature Measured controller value Pressure: Contact pressure MRFQ: Motor frequency in Hz Press button 7s Login with 888 Data management Display Description Activate Press button 7s Login with 888 Importing and exporting controller data and performing a... -
Page 49: Software Update
EcoPak 03/03S Chapter 6 6.5.2 Software update Software update of the controller via a USB stick, the following files are required on the USB stick: If a file with the name "DirectUpdate.txt" is found on the USB stick, the controller starts a software update immediately after recognising the USB stick. -
Page 50: Technical Data
EcoPak 03/03S Chapter 6 7 Technical data Circuit diagram and wiring diagram 230V~ Fuse 230V Fuse 115/100V 5AM PC Port Intelligent Scan Optical sensors 1,561,010 Gear motor 230V 1,212,020 ... -
Page 51: Circuit Diagram And Wiring Diagram 100 / 115V
EcoPak 03/03S Chapter 6 Circuit diagram and wiring diagram 100 / 115V~ Heating cartridge connection at 115/100V V 1.01 9,694,048 Page 51... -
Page 52: Specifications
EcoPak 03/03S Chapter 6 Specifications Connection data Mains connection [ V ] 100 / 115 / 230 Mains frequency [ Hz ] 50 / 60 Power consumption Max. [ W ] Heat ~ 350 Average ~ 160 Mains fuse 100 / 115V / 230V [ A ] 5 / 5 / 2 Mechanical system... -
Page 53: Declaration Of Conformity
EcoPak 03/03S Chapter 7 8 Declaration of conformity V 1.01 9,694,048 Page 53... - Page 54 GmbH hawo USA hawo ASIA Obere Au 2 – 4 150 North Michigan Avenue 25 International Business Park 74847 Obrigheim Floor #03-105 German Centre Germany Chicago IL 60601 Singapore 609916 T +49 (0) 6261 / 9770 - 0 T +1 312 585 8329 T +65 6433 5339 F +49 (0) 6261 / 9770 - 69...
Need help?
Do you have a question about the hd 650 DE-V and is the answer not in the manual?
Questions and answers