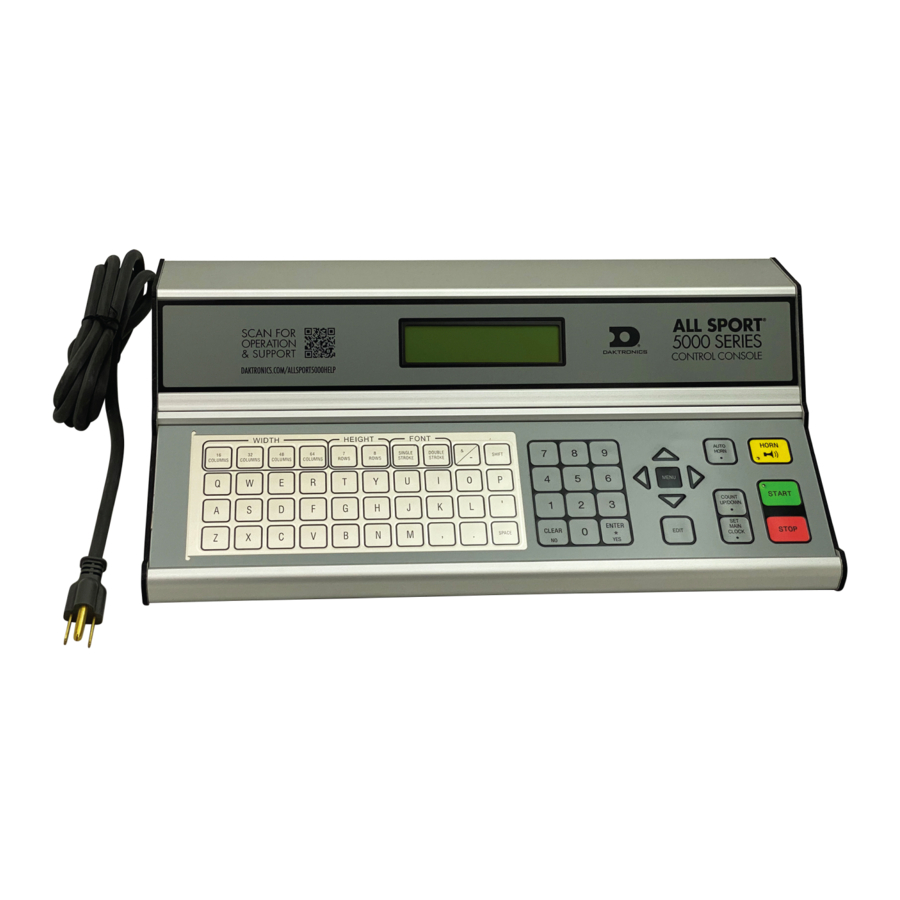
Daktronics All Sport 5000 Operation Manual
Control console
Hide thumbs
Also See for All Sport 5000:
- Operation manual (434 pages) ,
- Operation instructions (5 pages) ,
- Quick start manual (4 pages)

Related Manuals for Daktronics All Sport 5000


Summary of Contents for Daktronics All Sport 5000
-
Page 1: All Sport
® All Sport 5000 Control Console Operations Manual ED-11976 Rev 16 – 10 September 2007... - Page 2 – graphic, electronic, or mechanical, including photocopying, taping, or information storage and retrieval systems – without written permission of the publisher. ® ® ® ® All Sport , DakStats , OmniSport , Tuff Sport™ and Venus are trademarks of Daktronics, Inc.
-
Page 4: Table Of Contents
Table of Contents Section 1: Introduction ... 1 Important Safeguards...1 Console Overview...2 Revision History...2 Section 2: Basic Operation ... 21 Console Operation ...21 Sport Inserts ...21 Sport Insert Operation Concepts ...22 Start Up...23 Setting Radio Channels ...24 Single Controller Systems Channel Setting ...28 Multiple Controller w/Single Broadcast Group Channel Setting ...29 Multiple Controller w/Multiple Broadcast Systems Channel Setting ...30 Standard Keys ...31... - Page 5 Reset to First ...43 Reset Current Segment...43 Current Segment ...44 Default Settings...44 Edit ...44 Current Segment ...44 Menu ...44 New Code ...45 Warning Time ...45 Dim/Bright ...45 Section 4: Baseball Operations...47 Write the correct code number here...47 Baseball Keys ...47 Inning +1...47 Out +1 ...48 Batter, Average, Clear Batter/Average ...48...
- Page 6 Pitch and Speed Keys ...65 Pitch Keys...65 Display Speed ...65 Blank Time ...66 Speed ...66 Show MPH and Show KPH...66 Cycle MPH/KPH and Cycle KPH/MPH...66 Cycle Time...66 Pitch Count Keys (Home and Guest)...67 Clear Pitch Count...67 Display Home/Guest Count ...67 Menu...67 New Game ...67 New Code ...68...
- Page 7 Possession ...84 In Game/Out of Game...84 Delete Player...84 Player ...85 Individual Substitution...87 Mass Substitution...88 Edit ...89 Time Out ...89 Score +1, +2, +3, -1 ...89 Team Fouls +1 ...90 Period +1...90 Time Out On/Off...90 Menu ...91 New Game ...91 New Code ...91 Home Roster, Guest Roster...92 Display Menu...93 Edit Settings ...95...
- Page 8 Score +1, +2, +3, +6, -1...116 Quarter +1...117 Time Out On/Off ...117 Menu...118 New Game ...118 New Code ...118 Home Roster, Guest Roster ...119 Display Menu...121 Edit Settings...122 Time of Day ...123 Settings ...124 Main Clock ...124 Play Clock...125 Time Outs ...126 Center of Field Yard Line...127 Auto Calculate ...127 Select Captions ...128...
- Page 9 Penalty Times...145 Time Outs...146 Select Captions...147 Switch Output ...147 Default Settings...148 Section 10: Soccer Operations...149 10.1 Soccer Keys ...150 Time Out On/Off...150 Half +1 ...151 Time Out ...152 Score +1, -1...153 Other Increment and Decrement Keys...153 10.2 Edit ...153 Half +1 ...153 Time Out On/Off...154 Time Out ...154 Score +1, -1...155...
- Page 10 Points ...168 Set +1 ...168 Match Number +1...168 Matches Won ...169 11.3 Menu...169 New Game ...169 New Code ...169 Home Roster, Guest Roster ...170 Display Menu...171 Edit Settings...172 Time of Day ...173 11.4 Settings ...174 Main Clock ...174 Switch Output ...174 Default Settings ...175 Section 12: Track Operations ...
- Page 11 Player ...194 Individual Substitution...196 Mass Substitution...197 13.2 Edit ...198 Match Number +1, Games +1...198 Time Out ...198 Score +1, -1...199 Games Won +1 ...199 Aces, Kills, Blocks, and Digs ...199 Time Out On/Off...200 13.3 Menu ...200 New Game ...200 New Code ...201 Home Roster, Guest Roster...201 Display Menu...203 Edit Settings ...204...
- Page 12 Weight Class...226 Edit Settings...227 Time of Day ...227 14.4 Settings ...228 Main Clock ...228 Blood/Injury Time ...229 Weight Class...229 Select Captions ...230 Display Lines for Weight Class ...230 Display Team Score...230 Switch Output ...231 Section 15: Event Counter... 233 15.1 General Event Counter Information...233 15.2 Day and Time Event Countdown...233...
- Page 13 Default Settings...246 Section 17: Tae Kwon Do Operations...247 17.1 Tae kwon do Keys...247 D ...247 Gamjeom (G) ...247 Kyong-go (K)...248 Win ...248 √ ...248 Total On/Off ...248 Weight Class ...248 Round Length ...249 Rest Length ...249 Round Number...249 17.2 Menu ...249 New Game ...250 New Code ...250 Reset Round ...250...
- Page 14 18.4 Menu...264 New Game ...264 New Code ...265 Display Menu...265 Edit Settings...267 Time of Day ...267 18.5 Settings ...268 Main Clock ...268 Wazaari Time...268 Ippon Time...268 Medical Time...269 Switch Output ...269 Default Settings ...270 Section 19: Boxing Operations... 271 19.1 Boxing Keys ...271 Set Round Time/Set Rest Time...271 Round Number...271...
- Page 15 Extras +1 ...285 Extras -1...285 Wickets +1 ...285 Wickets -1 ...285 Overs +1...286 Overs -1...286 Inning #1, Inning #2...287 21.2 Edit ...287 Runs +1, +2, +3, -1 ...287 Extras +1, -1...287 Wickets +1, -1...288 Overs +1, -1 ...288 21.3 Menu ...288 New Game ...288 New Code ...289 Dimming ...289...
- Page 16 Indoor Model Numbers ...317 Outdoor Model Numbers ...321 Miscellaneous Model Numbers ...324 Custom Indoor Facility ...326 Custom Outdoor Facility ...326 Appendix D: Quick Reference... 327 ® All Sport 5000 ® All Sport 5000 ® All Sport 5000 ® All Sport 5000 ®...
-
Page 18: Section 1: Introduction
To fully understand this manual and the operation of the All Sport 5000 Series console; Daktronics recommends that all general sections be read in conjunction with specific sport(s). -
Page 19: 1.1 Console Overview
When opening the packages, inspect for shipping damage such as rattles and dents. See that all equipment is included as shown on the packing slip. Immediately report any deficiencies to Daktronics. Save all packing materials for shipping if warranty repair or exchange is needed. - Page 20 • Add indication of console running from battery backup. Add message at console power up to indicate that AC power was not connected. Add message to LCD and sound beeper when AC power lost • Make shot/play clock horn turn off with reset operation •...
- Page 21 Version 1.0.5 Release Date: 7 March 2000 • Track sport added • Test code 0001 added • Set TOD to 12:00 when start up so operators will set new time • Added caption control to basketball, volleyball, football, wrestling, and hockey •...
- Page 22 • The time out timer is blanked and the RTD sent when the timer is stopped • Formatted the specific TOD RTD item numbers as hh:mm:ss • Add PLR F PTS captions team name message center (TNMC) for the BB-3000 series scoreboard •...
- Page 23 • Fixed “ball on” function to exit when a key was pressed after an illegal key value • Fixed problem with hockey shots-on-goal and home player 1 penalty number • Fixed dimming problem causing scoreboard to blank when dim level was changed •...
- Page 24 • Modified pitch and speed routines to accept a faster pitch speed within 2 seconds of first reading • Modified auto racing code to use driver name from ChronX for RTD display purposes • Made several changes to RTD output table •...
- Page 25 • Added a new code 6402 for football on hockey 2024 boards • Changed auto racing pylon scoreboard outputs for pos 41-45 to use the correct RTD item numbers and display the correct information Version 1.4.1 Release Date: 1 March 2001 •...
- Page 26 • Added to judo to show the score, penalty, and medical status on the second line of the LCD • Added pitch count keys to pitch and speed code Version 1.4.4 Release Date: 26 July 2001 • Added alternative driver tables for reverse of white-blue to judo, karate, tae kwon do, at driver address 109,110,111 •...
- Page 27 • Added 32 column captions for BB-3000 boards for TMFLS/TOL at address 225 • Changed delete of penalty time in hockey so it will scroll penalty time 2 up instead of bringing in time from penalty time 3 Version 1.5.1 Release Date: 27 December 2001 •...
- Page 28 • Added full and partial timeouts to BB-2046 • Switched SOG and SAVES position on the BB-2046 as requested (by scoreboard design) • Resume game does not restore TOD clock correctly in hockey. Made all sports go to game clock on a new game or resume •...
- Page 29 • Added general stats to football for address 28 in code 6611 for the Fargodome • Changed the default mode to race mode in auto racing • Made codes 6000 and 1000 update the time on the display after doing a set time •...
- Page 30 • Added shot clock test to water polo and hockey • Made increment of period in set time so it would blank the quarter score if scoring by quarter • Added time-outs-left (TOL) to column 15 of the rushing/passing stats boards in football •...
- Page 31 • Added code 399 for rowing controller • Added weight class with H/G points for win on player foul stat panels to wrestling • Added code 8610 for 8-lane track timing • Added configuration to soccer for display of TOL or penalty •...
- Page 32 • Fixed team fouls on stats panels for line 6, guest side did not show on power up or resume game • Added a key to basketball to clear team fouls • Added the period text messages and period descriptions •...
- Page 33 • Added custom code 9606 for the San Francisco 49ers football board • Added code 9100 for BB-2139 basketball board with 12 electronic player name captions • Added period digit to soccer for a new SO-2013 board to address 14 (uses addresses 13 and 14) and also to hockey/lacrosse address 14 •...
- Page 34 • Added player names to volleyball and penalty times to hockey/handball for the European board codes 9200 and 9400. Added code 9409 for handball with three penalty times • Added display codes D7 and D8 to the compulink interface (code 555) for left and right KPH Version 2.1.1 Release Date: 10 March 2005...
- Page 35 • Changed baseball code to clear ball, strike, outs at top and bottom of inning, and clear of batter and average • Added a key to clear the batter number and batter average • Changed entering of average in baseball, so the value is padded with leading 0’s •...
- Page 36 • Added captions for baseball codes 5601 and 5602 to match the captions in football and soccer on address 226 • Added a separate warning time for the partial time outs in basketball • Fixed the advantage time in wrestling to update the home and guest advantage areas after an edit.
- Page 37 • Fixed a bug in edit of quarter scores in football and basketball. Locks up if a cold key is pressed when waiting for quarter # entry. • Changed baseball to show time/atbat/pitch on time digits and show HE/atbat/pitch on the HE digits. •...
-
Page 38: Section 2: Basic Operation
Section 2: Basic Operation Console Operation The console face consists of a 2-line x 16-character liquid crystal display (LED), sport specific insert, numeric keypad, operation keys, main clock keys, and LEDs for status. In most cases, the top line of the LCD shows the main clock time, direction the clock is counting, and when the main horn is sounding. -
Page 39: Sport Insert Operation Concepts
Sport Judo Karate Pitch and Speed Segment Timer Soccer Strikeout Tae kwon do Tennis Track Team Name (TNMC) Volleyball Water Polo Wrestling Sport Insert Operation Concepts A sport insert identifies the actions keys required in the normal course of operation for that specific sport. -
Page 40: Start Up
Start Up When the LCD Display is as shown, the following actions may be selected. LCD Display AS-5000 v1.0.0 ED-xxxxx PREV CODE nnnn RESUME GAME? nnn = last code selected SELECT CODE CODE nnnn nnnn = last code selected Basic Operations Action The console performs a self-test when it is powered on. -
Page 41: Setting Radio Channels
LCD Display Radio chan nn Enter or change nn = last radio channel used Setting Radio Channels Reference Drawings: Channel Selection; Single Control Console, Gen IV ... Drawing A-180566 Channel Selection; Single Broadcast Group; Gen IV... Drawing A-180922 Channel Selection; Multiple Broadcast Group, Gen IV ... Drawing A-180923 The radio receiver units used in the scoreboards have a channel-setting switch that can be set from 1 through 8 (channels 0, and 9-15 are not used). - Page 42 Each radio receiver will accept data sent from the broadcast channel of its respective broadcast group. This is selected by setting the transmitter radio (from the console) to the respective broadcast group (either 1, 2, 3 or 4). Every radio receiver will also accept data sent from the “Master Broadcast”...
- Page 43 LCD Display RADIO SETTINGS BCAST Y CHAN XX The LCD will toggle these screens Action The LCD shows the current radio settings along with a prompt to accept or modify these values. If the radio settings are correct press <ENTER> If these values are incorrect press <CLEAR>...
- Page 44 LCD Display Enter to accept clear to modify The bottom line shows the current setting Bcast group 1 radio chan 01 The default setting is Broadcast 1 Channel 1 Basic Operations (Continued from previous page) Action Edit the Broadcast Setting. Use the number keys to enter the desired broadcast group and press <ENTER>...
-
Page 45: Single Controller Systems Channel Setting
1 with the Broadcast 1 (BCAST 1) jumper set. If you suspect interference from a nearby Daktronics system, press <CLEAR> at the “RADIO SETTINGS” prompt to change the channel number. -
Page 46: Multiple Controller W/Single Broadcast Group Channel Setting
Broadcast 1 (BCAST 1) jumper set. If you suspect interference from a nearby Daktronics system, press < SETTINGS” prompt to change the channel number. Typically all multiple controller systems will use channel 1 for the first controller. All other controllers will use sequential channel settings (2-8). -
Page 47: Multiple Controller W/Multiple Broadcast Systems Channel Setting
Multiple Controller w/Multiple Broadcast Systems Channel Setting Typically all multiple controller systems will use Broadcast Group 1 Channel 1 for the first controller in Broadcast Group 1 and Broadcast Group 2 Channel 1 for the first controller in Broadcast Group 2. All other consoles in each group are added sequentially, using channels 2-4. -
Page 48: Standard Keys
LCD Display bcast group 1 radio chan 01 The bottom line shows default settings. Standard Keys The Quick Reference is located in Appendix C. Start < > is used to start the main clock. The green LED on the < START main clock is running. Stop < >... -
Page 49: Enter/Yes
Enter/Yes The < *> key has two functions: ENTER/YES • Completes an action. The asterisk is a reminder that this key is to be pressed when an asterisk appears on the LCD. • Serves as <YES> Clear/No The < > key has two functions: CLEAR/NO •... -
Page 50: Set Main Clock
Set Main Clock LCD Display MAIN CLOCK -SET CURR mm:ss.t* mm:ss.t = minutes, seconds, tenths of a second MAIN CLOCK -EDIT PERIOD mm:ss* mm:ss = minutes, seconds Basic Operations Action After the main clock has been stopped press <SET MAIN CLOCK> to display the current time of the main clock. - Page 51 LCD Display MAIN CLOCK -EDIT BREAK mm:ss * mm:ss = minutes, seconds MAIN CLOCK -EDIT mm:ss * mm:ss = minutes, seconds (Continued from previous page) Action Press <SET MAIN CLOCK> a third time or the down arrow key to display the configured time for break length.
- Page 52 LCD Display MAIN CLOCK -EDIT mm:ss * mm:ss = minutes, seconds MAIN CLOCK -EDIT Post mm:ss * mm:ss = minutes, seconds Basic Operations (Continued from previous page) Action Press <SET MAIN CLOCK> a fifth time or the down arrow key to display the configured time for pre- game length.
-
Page 53: Count Up/Down
Remote Start/Stop Controls Main Clock Control The remote Start/Stop control box plugs into J4 on the back of the All Sport 5000 console. This unit has a rocker switch for Start/Stop and a momentary button for horn. The Start/Stop switch starts and stops the main timer. The horn button sounds the horn as long as the button is pressed. -
Page 54: Shot Clock Control
Shot Clock Control The remote shot clock control box plugs into J7 on the back of the All Sport 5000 console. This unit has a rocker switch for Start/Stop and a momentary button for reset. When the reset button is pressed, the shot clock timer is changed to the reset value and stops the timer from decrementing. -
Page 55: Accessing The Segment Timer
Accessing the Segment Timer Refer to Section 3 for details on running this function of the All Sport 5000 console. Turn on the console. Enter the multi-purpose sport code used for the scoreboard in use and press < >. A list of sport codes can be found in Appendix B. -
Page 56: Section 3: Segment Timer
Section 3: Segment Timer Sport Insert: LL-2475 (Code 100 is for the dedicated Segment Timer) The Sport Insert drawing is located at the end of this section. The Quick Reference is located in Appendix D. Reference Drawings: Insert, Segment Timer ...Drawing A-129357 Refer to the information in Section 2 to start up the console and use the sport insert. -
Page 57: 3.2 Accessing Segment Timer
3.2 Accessing Segment Timer Turn on the console. Enter the multi-purpose sport code used for the scoreboard in use and press < >. A list of sport codes can be found in Appendix B. ENTER The segment timer program is accessed through the main menu of each individual sport. The allows the user to start the segment timer. -
Page 58: Segment Timer Keys
Segment Timer Keys Segment No Time The <SEGMENT NO TIME > key is used to edit each segment’s time. Select the segment to be edited, and enter the time desired. Follow the directions below to accomplish this. LCD Display SEGMENT: xx TIME EDIT xx = segment number SEGMENT: xx... -
Page 59: Last Segment
Last Segment This key sets the last segment in a range of segments to run when < LCD Display LAST SEGMENT nn = current last segment Interval Time The interval time is the time between each segment. The interval time can be displayed on the Guest Scoreboard digits using the <DISPLAY INTERVAL>... -
Page 60: Copy Range
Copy Range This key sets a range of segments to a specific value. LCD Display COPY: nn:nn* SEG xx to yy nn:nn = segment value to be copied xx = starting segment value yy = ending segment value Auto Stop This key is the auto stop function of the console. -
Page 61: Current Segment
Current Segment Press <CURRENT SEGMENT +1> to increment the segment number. Default Settings Write the settings for this installation in the space (Custom) provided. Setting Default First Segment Last Segment Warning Timer 00:00 Display Interval Auto Stop on Each Segment Auto Stop At Last Segment Edit... -
Page 62: New Code
New Code LCD Display MENU-MAIN NEW CODE? Warning Time LCD Display Warning time 00:00 00:00 = default Dim/Bright LCD Display MENU- Dimming level (0-9): nn% nn = current level None = bright <0> 90% = <1> 80% = <2> 70% = <3>... -
Page 64: Section 4: Baseball Operations
Section 4: Baseball Operations Sport Insert: LL-2438 The Sport Insert drawing is located at the end of this section. The Team Name insert and Block Diagram drawings are located in Appendix A. The Quick Reference is located in Appendix D. Reference Drawings: Insert, Baseball ...Drawing A-125061 Insert, Team Name ...Drawing A-125290... -
Page 65: Out +1
LCD Display INNING-+1 n = current setting Out +1 The current out number is displayed on the main LCD screen. Press < > to increment the current out number. OUT +1 Press < > to set the out value to 0 when the current value is 3. OUT +1 Notes: Refer to Subsection Auto Increment Inning. -
Page 66: Ball Count, Strike Count, Clear Count
Ball Count, Strike Count, Clear Count The < > and < BALL COUNT +1 Pressing the < CLEAR COUNT When the Auto Pitch Increment setting is on, the < < > keys automatically increment the ball and strike pitch count data of STRIKE COUNT +1 the team that is not at bat (AT BAT indicator off). -
Page 67: At Bat
At Bat The < > keys turn the home and guest at bat indicators on and off. It also clears the AT BAT ball, strike, and out count and sets batter and average to blank when the At Bat is turned on. LCD Display HOME at bat HOME at bat... -
Page 68: Hits, Errors, Left On Base
Hits, Errors, Left on Base The home and guest < HITS +1 increment their respective totals. < LCD Display hits: +1 HOME nn = current setting Pitch Count, Foul Balls, In Play The home and guest < PITCH COUNT BALLS +1 >, and <... -
Page 69: Runs
Runs The way that Runs are edited is determined by the Score By Inning setting. If Score By Inning is disabled, only the team total can be edited. If Score By Inning is enabled the total by inning can be edited and the team total is automatically updated. LCD Display team RUNS: edit nn = current setting... -
Page 70: Menu
Menu key allows the user to select from a list of options specific for each sport. The <MENU> up and down arrow keys allow the user to scroll through the menu list. Pressing a key other than the arrow keys, and other allowed keys exit the Menu function. <YES>, <NO>, function should be used at the beginning of each new game to edit the Home and MENU... -
Page 71: Home Roster, Guest Roster
Home Roster, Guest Roster Home Roster and Guest Roster are entered in the same way. Home Roster is used as an example. LCD Display MENU-ROSTER SELECT HOME HOME-TEAM NAME aaaaaaaaaaaaa* HOME-TEAM abbr aaaaaaaaaa* Action Press <YES> or the right or left arrow key to select the Home or Guest Roster submenu and show the first prompt on the LCD. -
Page 72: Display Menu
Pitcher Number home nn nn = current setting clear home pitches y/n? Display Menu The Display Menu allows the user to start and edit the segment timer or to change the brightness of the scoreboard. LCD Display MENU-MAIN ENTER DISPLAY MENU? Baseball Operations Enter the jersey number of the new pitcher and press <ENTER>. - Page 73 LCD Display MENU-DISPLAY RUN SEG TIMER Y/N EXIT GAME ARE YOU SURE Y/N Action Note: The segment timer function is disabled while the clock is running. Press <YES> to exit the sport code and run the segment timer program. Press <NO> or the down arrow key to scroll to the next selection.
-
Page 74: Edit Settings
MENU- Dimming level (0-9): nn% nn = current level None = bright <0> 90% = <1> 80% = <2> 70% = <3> 60% = <4> 50% = <5> 40% = <6> 30% = <7> 20% = <8> 10% = <9> Edit Settings LCD Display MENU-MAIN... -
Page 75: Settings
LCD Display MENU-TIME OF DAY 1*12, 2-24 HOUR MENU-TIME OF DAY TOD hh:mm:ss* hh:mm:ss = current setting MENU-TIME OF DAY 1*GAME 2-tod = current setting MENU-TIME OF DAY BLANK GAME DATA? Settings The user can edit the following settings when Edit Settings has been selected from the Main Menu. -
Page 76: Error Position
LCD Display MAIN CLOCK-TIME PERIOD hh:mm:ss hh:mm:ss = current setting Error Position On some scoreboards the < Error Position setting is on. LCD Display error position *on ← →off * = current setting Auto Increment Pitches When the Auto Pitch Increment setting is on and the AT BAT indicator for the batting team is on, the <... -
Page 77: Auto Increment Inning
Auto Increment Inning The < > key automatically increments the inning and resets the out number to zero OUT +1 when: • The Auto Inning Increment setting is on. • The Home AT BAT indicator is on. • The current out number is 3. The <... -
Page 78: Display Innings
Select SHIFT when real time data (RTD) is used to display the inning numbers. SHIFT moves all of the inning numbers and scores left one digit. The innings and scores automatically shift when < number of displayed innings. For example: Inning 1 2 3 4 5 6 7 8 9 10 Score... -
Page 79: Display Time
1 ← → 2 off Switch Output The All Sport 5000 series console has a switch that can be used to drive a number of different devices. The switch can be configured to operate under different settings. The default setting is 1-CLOCK= 0. -
Page 80: Default Settings
Setting 0-DISABLED SWITCH OUTPUT=n 0-DISABLED? n = current setting 1-CLOCK = 0 SWITCH OUTPUT=n 1-CLOCK =0? n = current setting 2-CLOCK STOP SWITCH OUTPUT=n 2-CLOCK STOP? n = current setting 3-MAIN HORN SWITCH OUTPUT=n 3-MAIN HORN? n = current setting Default Settings Write the settings for this installation in the space (Custom) provided. -
Page 82: Pitch And Speed
Section 5: Pitch and Speed Sport Insert: LL-2482 The Sport Insert drawing is located at the end of this section. The Quick Reference is located in Appendix D. Reference Drawings: Insert, Pitch Speed...Drawing A-130895 Refer to the information in Section 2 to start up the console and use the sport insert. Read Section 2 carefully to fully understand the following operation instructions. -
Page 83: Blank Time
Blank Time LCD Display BLANK TIME MM:SS MM:SS = current blank time Speed LCD Display EDIT SPEED nnn MPH nnn = current speed Show MPH and Show KPH The < > key displays the current pitch speed in miles per hour. The < SHOW MPH >... -
Page 84: Pitch Count Keys (Home And Guest)
Pitch Count Keys (Home and Guest) Pressing one of the pitch count keys will increment the value by one. To edit one of the values, use < > as described below. EDIT LCD Display H. Pitcher edit Strike: nnn nnn = current value Clear Pitch Count LCD Display G. -
Page 85: New Code
New Code LCD Display MENU-MAIN NEW CODE? Dimming Menu allows the user to change the brightness of the scoreboard. Dimming Menu LCD Display MENU- Dimming level (0-9): nn% nn = current level None = bright <0> 90% = <1> 80% = <2>... -
Page 86: Speed Adjust Coefficient
LCD Display STALKER GUN TYPE *SPORT←→PRO * = current setting Speed Adjust Coefficient LCD Display SPEED ADJUST .nnnn nnnn = current setting Angle Offset Coefficient 10° 0.9848 15° 0.9659 20° 0.9397 25° 0.9063 30° 0.866 Select Speed LCD Display Select Range Speed: >... -
Page 87: Speed Indicator
Speed Indicator LCD Display Select Indicator 1st NN* mph nn= current setting Select Indicator 2nd NN* mph nn= current setting Display Mode LCD Display DISPLAY MODE *AUTO←→MANUAL * = current setting Default Settings Write the settings for this installation in the space (Custom) provided. Setting Radar Gun Type Speed Adjust Coefficient... -
Page 88: Rtd Item Numbers
RTD Item Numbers The Pitch and speed program uses unique RTD item numbers to display speed and pitch information. Items 23-25 display either MPH or KPH depending on cycle and display settings. Item # Data MPH x100 MPH x10 MPH x1 4-19 Pitch type text –... -
Page 89: Frame Number And Pitch Types
Frame Number and Pitch Types The frame number sent with each RTD frame also represents the pitch type (for manual mode). The pitch types for each frame number are shown below. Standard RTD Port configuration: 1,200 Baud Rate, 8 Data Bits, and No Parity for the Jugs or Stalker Sport gun type. -
Page 90: Clock Console Operation
Section 6: Clock Console Operation Sport Insert 0G-136301 The Sport Insert drawing is located at the end of this section. The Quick Reference is located in Appendix D. Reference Drawings: Insert, Clock Console...Drawing A-136301 Refer to the information in Section 2 to start up the console and use the sport insert. Read Section 2 carefully to fully understand the following operation instructions. -
Page 91: Set Timer Time
Set Timer Time LCD Display PLAY CLOCK CURR – mm:ss mm:ss = current setting Set Reset Time 1 LCD Display PLAY CLOCK RESET 1 – mm:ss mm:ss = current setting Set Reset Time 2 LCD Display PLAY CLOCK RESET 2 – mm:ss mm:ss = current setting Timer Reset 1 <TIMER RESET 1>... -
Page 92: Settings
Settings Refer to Section 7 for Basketball Settings. Refer to Section 8 for Football Settings. Note: Only settings that apply to the operation of the main clock or shot/play clocks will affect the operation of the clock console. Clock Console Operation... -
Page 94: Section 7: Basketball Operations
Section 7: Basketball Operations Sport Insert: LL-2433 The Sport Insert drawing is located at the end of this section. The Team Name insert and Block Diagram drawings are located in Appendix A. The Quick Reference is located in Appendix D. Reference Drawings: Insert, Basketball...Drawing A-120121 Block Diagrams, A/S5000/3000, BB, VB &... -
Page 95: Basketball Keys
Basketball Keys Set Shot Time LCD Display SHOT CLOCK-EDIT CURRENT mm:ss* mm:ss = minutes, seconds SHOT CLOCK-EDIT RESET 1 mm:ss* mm:ss = minutes, seconds Action Press <SET SHOT TIME> to display the configured shot clock time length. To accept the shot clock time length press <YES>. To decline the selection of the shot clock time length press <NO>. -
Page 96: Recall Shot Time
LCD Display SHOT CLOCK-EDIT RESET 2 mm:ss* mm:ss = minutes, seconds Recall Shot Time LCD Display shot clock -Mode Recall Time Out On/Off < > stops and starts the time out clock. The length of both the full and TIME OUT ON/OFF partial time outs can also be changed when the time out clock is stopped. -
Page 97: Blank Player Foul
LCD Display TIME OUTs-SELECT FULL MM:SS mm:ss = minutes, seconds TIME OUT-SELECT PARTIAL MM:SS mm:ss = minutes, seconds Blank Player Foul Blanks the digits of the Player-Foul field of the scoreboard. Period +1 LCD Display PERIOD-+1 n = current setting Action Press <TIME OUT ON/OFF>... -
Page 98: Time Out
Time Out The home and guest < TIME OUT remaining and start the time out clock. The scoreboard indicator is turned on when the type of time out is selected (full or partial). The scoreboard indicator is turned off when the time out clock expires or is stopped. -
Page 99: Score +1, +2, +3, -1
Score +1, +2, +3, -1 The home and guest < SCORE +1 the team score and the < LCD Display TEAM SCORE-+1 HOME nnn = current setting TEAM SCORE-+1 HOME PLAYER nn* nn = current setting HOME PLAYER nn NOT FOUND, ADD? nn = current setting HOME PLAYER nn ROSTER FULL... -
Page 100: Team Fouls +1
Team Fouls +1 LCD Display TEAM FOULS-+1 HOME nn = current setting TEAM FOULS-+1 HOME PLAYER nn* nn = current setting HOME PLAYER nn NOT FOUND, ADD? nn = current setting HOME PLAYER nn ROSTER FULL nn = current setting HOME PLAYER nn FOULS nn, n = current setting... -
Page 101: Bonus
Bonus Note: Only the types of bonuses that were configured in the displayed on the LCD and available for selection. LCD Display HOME BONUS 1-ON-1 HOME BONUS 2-SHOT HOME BONUS Possession LCD Display HOME POSSESSION HOME POSSESSION In Game/Out of Game The <... -
Page 102: Player
Player Note: If player stats are being received from DSTI the keys PLAYER, IND SUB and MASS SUB will be disabled. The LCD will display the messages shown below when these keys are pressed. LCD Display STATS received Key disabled Exit stats mode Y/n? LCD Display... - Page 103 LCD Display HOME PLAYER nn S-I F-n* P-nn nn = player number S-I = in game S-o = out of game F-n = number of fouls P-nn = number of points HOME PLAYER nn DELETE PLAYER? (Continued from previous page) Action If the player is found, the player’s game status and statistics can be changed.
-
Page 104: Individual Substitution
Individual Substitution LCD Display IND SUB-HOME nn* in for nn* nn = current setting IND SUB-HOME SUB OK IND SUB-HOME SUB NOT MADE IND SUB-HOME NOT FOUND nn nn = current setting Basketball Operations Action When the home or guest <INDIV. SUB.> key is pressed, this prompt asks the jersey number of the player entering and leaving the game. -
Page 105: Mass Substitution
Mass Substitution LCD Display MASS SUB-HOME PLAYER 1 nn* nn = current setting mass SUB-HOME SUB OK MASS SUB-HOME DUPLICATE nn nn = current setting NOT FOUND,ADD? Player 1 nn = current setting Action After the home or guest <MASS SUB.> key is pressed the LCD will display a message on the LCD asking for the first of five player numbers that are going into the game. -
Page 106: Edit
Edit The < > key allows the user to select and edit the following scoreboard fields. EDIT Press < > and the key for the home or guest field to be edited. EDIT Time Out Note 1: Only the time outs configured in the LCD and available for selection. -
Page 107: Team Fouls +1
Team Fouls +1 LCD Display TEAM FOULS-EDIT HOME nn = current setting Period +1 LCD Display PERIOD-EDIT n = current setting Time Out On/Off LCD Display TIME OUTs-edit FULL MM:SS mm:ss = minutes, seconds TIME OUT- edit PARTIAL MM:SS mm:ss = minutes, seconds Action Press <EDIT>... -
Page 108: Menu
Menu The <MENU> key allows the user to select from a list of options specific for each sport. The up and down arrow keys allow the user to scroll through the menu list. Pressing a key other than <YES>, <NO>, the arrow keys, and other allowed keys, exit the Menu function. The MENU function should be used at the beginning of each new game to edit the Home and Guest Rosters. -
Page 109: Home Roster, Guest Roster
Home Roster, Guest Roster Home Roster and Guest Roster are entered in the same way. Home Roster is used as an example. LCD Display MENU-ROSTER SELECT HOME HOME-TEAM NAME aaaaaaaaaaaaa* HOME-TEAM abbr aaaaaaaaaa* Action Press <YES> or the right or left arrow key to select the Home or Guest Roster submenu and show the first prompt on the LCD. -
Page 110: Clear Stats
LCD Display MENU-HOME EDIT PLAYERS? MENU-HOME PLAYER 01 nn* nn = current setting MENU-HOME CLEAR STATS? Display Menu allows the user to start and edit the segment timer or to change the DISPLAY MENU brightness of the scoreboard. LCD Display MENU-MAIN ENTER DISPLAY MENU? Basketball Operations... - Page 111 LCD Display MENU-DISPLAY RUN SEG TIMER Y/N EXIT GAME ARE YOU SURE Y/N MENU- Dimming level (0-9): nn% nn = current level None = bright <0> 90% = <1> 80% = <2> 70% = <3> 60% = <4> 50% = <5>...
-
Page 112: Edit Settings
Edit Settings LCD Display MENU-MAIN edit SETTINGS? Time of Day LCD Display MENU-MAIN SELECT TOD? MENU-TIME OF DAY 1*12, 2-24 HOUR MENU-TIME OF DAY TOD hh:mm:ss* hh:mm:ss = current setting Basketball Operations Action Press <YES> or the right or left arrow key to select the Settings submenu and show the first prompt on the LCD. -
Page 113: Settings
LCD Display MENU-TIME OF DAY 1*GAME 2-tod * = current setting MENU-TIME OF DAY BLANK GAME DATA? Settings The user can edit the following settings when EDIT SETTINGS has been selected from the Main Menu. Number of Periods LCD Display NO. -
Page 114: Main Clock
Main Clock Note 1: The settings entered for Main Clock are used with the < Note 2: The period, break and overtime lengths are used differently depending on the direction of the main clock. For count down, the main clock is set to the selected length, decrements towards zero, and stops at zero. -
Page 115: Shot Clock
Shot Clock LCD Display MAIN CLOCK-TIME RESET mm:ss* mm:ss = current setting SHOT CLOCK-MODE SYNC W/ MAIN? SHOT CLOCK-MODE AUTO BLANK? Action This setting is used for the <RESET> button on the remote shot clock control console. Note: The current setting for the <RESET> time displays on the LCD until the first number key is pressed. -
Page 116: Time Outs
Time Outs Note 1: If a full or partial time out is not needed for the HOME or GUEST < enter zero for the number of time outs. Note 2: If a full or partial time out is not needed for < time. -
Page 117: Team Score
LCD Display TIME OUTS-MODE PARTIAL n = current setting TIME OUTS-TIME PARTIAL mm:ss* mm:ss = current setting TIME OUTS-MODE SHOW ON MAIN? n n = current setting Team Score LCD Display TEAM SCORE-MODE UPDATE PLAYER? (Continued from previous page) Action Enter the number of partial time outs on the number pad and press <ENTER>. -
Page 118: Team Fouls
Team Fouls LCD Display TEAM FOULS-MODE UPDATE PLAYER? TEAM FOULS-MODE 1-ON-1 BONUS nn* nn = current setting TEAM FOULS-MODE 2-SHOT BONUS nn* nn = current setting Select Captions LCD Display Select captions on 1 ← → 2 off Basketball Operations Action This feature must be enabled for all player-foul- points panels. -
Page 119: Select Team Foul Display
= current setting Switch Output The All Sport 5000 series console has a switch that can be used to drive a number of different devices. The switch can be configured to operate under different settings. The default setting is 1-CLOCK= 0. - Page 120 The possible settings for the switch output are as follows: Setting 0-DISABLED SWITCH OUTPUT=n 0-DISABLED? n = current setting 1-CLOCK = 0 SWITCH OUTPUT=n 1-CLOCK =0? n = current setting 2-CLOCK STOP SWITCH OUTPUT=n 2-CLOCK STOP? n = current setting 3-MAIN HORN SWITCH OUTPUT=n 3-MAIN HORN?
-
Page 121: Default Settings
Default Settings Write the settings for this installation in the space (Custom) provided. Setting Number of Periods Tenth of a Second Period Length Break Length Overtime Length Shot Clock Reset Shot Clock Sync with Shot Clock Auto Blank Full Time Outs Full Time Out Partial Time Outs Partial Time Out... -
Page 122: Section 8: Football Operations
Section 8: Football Operations Sport Insert: LL-2437 The Sport Insert drawing is located at the end of this section. The Team Name insert and Block Diagram drawings are located in Appendix A. The Quick Reference is located in Appendix D. Reference Drawings: Insert, Football ...Drawing A-122652 Block Diagrams, A/S5000/3000, Outdoor Sports ...Drawing A-124690... -
Page 123: Set Play Clock
LCD Display TIME OUT-SELECT FULL MM:SS mm:ss = minutes, seconds TIME OUT-SELECT PARTIAL MM:SS mm:ss = minutes, seconds Set Play Clock The PLAY CLOCK setting is used by the remote play clock console. The configured play clock times are set using the Note 1: When RESET ON STOP is set to yes (Y) the STOP switch automatically resets the play clock using the RESET 1 time and the RESET button uses the RESET 2 time. - Page 124 LCD Display PLAY CLOCK-EDIT CURR mm:ss mm:ss = minutes, seconds PLAY CLOCK-EDIT RESET 1 mm:ss mm:ss = minutes, seconds Football Options Action Press <SET PLAY CLOCK> to display the configured time for overtime length. To accept the play clock time length, press <YES>. To decline the selection of the play clock time length, press <NO>.
-
Page 125: Recall Last Down
LCD Display PLAY CLOCK-EDIT RESET 2 mm:ss mm:ss = minutes, seconds Recall Last Down The < RECALL LAST DOWN Possession values of the previous play if a new value has been incorrectly entered. If Auto Calculate is off, this function is disabled. When the LCD Display is as shown, the following actions may be selected. -
Page 126: Quarter +1
Quarter +1 LCD Display quarter-+1 n = current setting quarter-Swap → nn = current setting Yards To Go The <BALL ON> key is used to manually enter the field position (yard line) of the ball. LCD Display to go edit nn = current setting Down +1 LCD Display... -
Page 127: Ball On
Ball On The <BALL ON> key is used to manually enter the field position (yard line) of the ball. If Auto Calculate is on, SIDE OF FIELD LCD Display BALL ON nn* nn = current setting SIDE OF FIELD 1= ← 3= → BALL ON nn* nn = current setting First &... - Page 128 Note 1: Only the types (full or partial) of time outs that were configured in the EDIT SETTINGS function are displayed on the LCD and available for selection. Note 2: The up and down arrow keys can also be used to select the full and partial time outs. LCD Display TIME OUT-HOME FULL...
-
Page 129: Score +1, +2, +3, +6, -1
Score +1, +2, +3, +6, -1 The home and guest <SCORE +1>, <SCORE +2>, <SCORE +3> and <SCORE +6> keys are used to increment the team score and the <SCORE -1> key is used to decrement the team score. These keys will also blank the BALL ON, DOWN, and TO GO values when pressed. LCD Display TEAM SCORE-+1 HOME... - Page 130 LCD Display SIDE OF FIELD 1= ← 3= → BALL ON nn* nn = current setting BALL ON nn ⎥→ DOWN n TO GO nn nn = current setting TO GO IS 0 EDIT OR 1st & 10 Football Options (Continued from previous page) Action Selects the current side of field for ball placement.
-
Page 131: Yards Rushing
LCD Display BALL ON nn ILLEGAL VALUE nn = current setting Yards Rushing Press < YARDS RUSHING a play. LCD Display rushing -home yards nn* nn = current setting rushing -home 1=gain 3=loss rushing -home yds total nnn nnn = current setting (Continued from previous page) Action ILLEGAL VALUE displays when the BALL ON... -
Page 132: Yards Passing
Yards Passing Press < YARDS PASSING play. LCD Display passing -home yards nn nn = current setting Passing -home 1=gain 3=loss Passing -home yds total nnn nnn = current setting First Downs +1 LCD Display home +1 first downs nn nn = current setting Football Options >... -
Page 133: Edit
Edit key allows the user to select and edit the following scoreboard fields. <EDIT> Press and the key for the home or guest field to be edited. <EDIT> Time Out Note 1: Only the time outs configured in the LCD and available for selection. Note 2: The up and down arrow keys can also be used to select the full and partial time outs. -
Page 134: Quarter +1
Quarter +1 LCD Display quarter-EDIT n = current setting Time Out On/Off LCD Display TIME OUTs-edit FULL MM:SS mm:ss = minutes, seconds TIME OUT- edit PARTIAL MM:SS mm:ss = minutes, seconds Football Options Action Press <EDIT> <QUARTER +1> to display the current quarter setting. -
Page 135: Menu
Menu The <MENU> key allows the user to select from a list of options specific for each sport. The up and down arrow keys allow the user to scroll through the menu list. Pressing a key other than <YES>, <NO>, the arrow keys, and other allowed keys exits the Menu function. function should be used at the beginning of each new game to edit the Home and MENU Guest Rosters. -
Page 136: Home Roster, Guest Roster
Home Roster, Guest Roster Home Roster and Guest Roster are entered in the same way. Home Roster is used as an example. LCD Display MENU-ROSTER SELECT HOME HOME-TEAM NAME aaaaaaaaaaaaa* Football Options Action Press <YES> or the right or left arrow key to select the Home or Guest Roster submenu and show the first prompt on the LCD. - Page 137 LCD Display HOME-TEAM abbr aaaaaaaaaa* Action The TEAM NAME (LL-2441) insert must be installed to enter the Team Name Message Center (TNMC) settings. The TNMC is updated after each selection is completed. Use the COLUMNS, ROWS and STROKE keys to select the WIDTH, HEIGHT and FONT of the TNMC.
-
Page 138: The Display Menu
Display Menu allows the user to start and edit the segment timer or to change the DISPLAY MENU brightness of the scoreboard. LCD Display MENU-MAIN ENTER DISPLAY MENU? MENU-DISPLAY RUN SEG TIMER Y/N EXIT GAME ARE YOU SURE Y/N Football Options Action Press <YES>... -
Page 139: Edit Settings
LCD Display MENU- Dimming level (0-9): nn% nn = current level None = bright <0> 90% = <1> 80% = <2> 70% = <3> 60% = <4> 50% = <5> 40% = <6> 30% = <7> 20% = <8> 10% = <9>... -
Page 140: Time Of Day
Time of Day LCD Display MENU-MAIN SELECT TOD? MENU-TIME OF DAY 1*12, 2-24 HOUR MENU-TIME OF DAY TOD hh:mm:ss hh:mm:ss = current setting MENU-TIME OF DAY 1*GAME 2-tod * = current setting MENU-TIME OF DAY BLANK GAME DATA? Football Options Action Press <YES>... -
Page 141: Settings
Settings The user can edit the following settings when EDIT SETTINGS has been selected from the Main Menu. Main Clock Note 1: The settings entered for Main Clock are used with the Note 2: The period, break, and overtime lengths are used differently depending on the direction of the main clock. -
Page 142: Play Clock
LCD Display MAIN CLOCK-TIME OVERTIME mm:ss mm:ss = current setting Play Clock The PLAY CLOCK setting is used by the remote play clock console. Note 1: When RESET ON STOP is set to yes (Y) the STOP switch automatically resets the play clock using the RESET 1 time and the RESET button uses the RESET 2 time. -
Page 143: Time Outs
Time Outs Note 1: If a full or partial time out is not needed for the HOME or GUEST <TIME OUT> keys, enter zero for the number of time outs. Note 2: If a full or partial time out is not needed for <TIME OUT ON/OFF>, enter zero for the time. -
Page 144: Center Of Field Yard Line
LCD Display TIME OUTS-MODE SHOW ON MAIN? n n = current setting Center of Field Yard Line LCD Display Center field-set Yards nn nn = current setting Auto Calculate LCD Display BALL ON-MODE AUTO CALCULATE? Football Options (Continued from previous page) Action Press <YES>... -
Page 145: Select Captions
X = current setting Switch Output The All Sport 5000 series console has a switch that can be used to drive a number of different devices. The switch can be configured to operate under different settings. The default setting is 1-CLOCK= 0. - Page 146 The possible settings for the switch output are as follows: Setting 0-DISABLED SWITCH OUTPUT=n 0-DISABLED? n = current setting 1-CLOCK = 0 SWITCH OUTPUT=n 1-CLOCK =0? n = current setting 2-CLOCK STOP SWITCH OUTPUT=n 2-CLOCK STOP? n = current setting 3-MAIN HORN SWITCH OUTPUT=n 3-MAIN HORN?
-
Page 147: Default Settings
Default Settings Write the settings for this installation in the space (Custom) provided. Setting Default Tenth of a Second Period Length 8:00 Break Length 10:00 Overtime Length 5:00 Play Clock Reset 1 0:25 Play Clock Reset 2 0:25 Play Clock Reset On Stop Full Time Outs Full Time Out... -
Page 148: Section 9: Hockey Operations
Maintenance manual provided with the scoreboard. Shots on Goal Console Operation Enter code 4000 to use the All Sport 5000 console as a shots-on-goal console. All keys other than Home and Guest Shots on Goal +1 Goal -1 will be disabled. -
Page 149: Enable Penalty Clocks
LCD Display TIME OUT-SELECT FULL MM:SS mm:ss = minutes, seconds TIME OUT-SELECT PARTIAL MM:SS mm:ss = minutes, seconds Enable Penalty Clocks Press <ENABLE PENALTY CLOCKS> to allow the penalty clocks to count when the main clock is on. Disable Penalty Clocks Press <DISABLE PENALTY CLOCKS>... -
Page 150: Period +1
Period +1 LCD Display period +1 n = current setting Penalty LCD Display HOME penalty HOME penalty Time Out The home and guest <TIME OUT> remaining and start the time out clock. The scoreboard indicator is turned on when the type of time out is selected (full or partial). - Page 151 LCD Display TIME OUT-HOME FULL? n = current setting TIME OUT-HOME PARTIAL? n = current setting TIME OUT-HOME NO TIME OUTS Action Press <TIME OUT> to display the number of full time outs remaining. To accept the full time out and start the time out clock, press <YES>.
-
Page 152: Player Penalty
Player Penalty LCD Display home plyr/pen 1 pnn pn nn:nn nn = current setting home plyr/pen 1 pnn pn mm:ss nn = player number mm:ss = penalty time Hockey Options Action Press <PLAYER PENALTY> to add a new penalty or edit an existing penalty for the home or guest team. -
Page 153: Set Main Clock
Set Main Clock LCD Display MAIN CLOCK -SET CURR mm:ss.t* mm:ss.t = minutes, seconds, tenths of a second Adjust penalty timers y/n* Score, Shots on Goal and Saves The home and guest <SCORE +1, -1>, <SHOTS ON GOAL +1, -1> and <SAVES +1, -1> keys are all used to increment and decrement their respective totals. -
Page 154: Clear All Penalties
Clear All Penalties Press <CLEAR ALL PENALTIES> to delete all of the penalties for the home or guest team. LCD Display HOME PLYR/PEN CLEAR ALL Y/N? Delete Penalty Press <DELETE PENALTY> to delete a single penalty for the home or guest team. LCD Display home del pen? 1 pnn pn nn:nn... -
Page 155: Score, Shots On Goal And Saves
LCD Display TIME OUT-HOME FULL n = current setting TIME OUT-HOME PARTIAL n = current setting Score, Shots on Goal and Saves The home and guest < SCORE +1, -1 < > keys are all edited in the same way. Score is used as an example. SAVES +1, -1 LCD Display TEAM score-edit... -
Page 156: Time Out On/Off
Time Out On/Off LCD Display TIME OUTs-edit FULL MM:SS mm:ss = minutes, seconds TIME OUT- edit PARTIAL MM:SS mm:ss = minutes, seconds Menu The <MENU> key allows the user to select from a list of options specific for each sport. The up and down arrow keys allow the user to scroll through the menu list. -
Page 157: New Code
New Code LCD Display MENU-MAIN NEW CODE? Home Roster, Guest Roster Home Roster and Guest Roster are entered in the same way. Home Roster is used as an example. LCD Display MENU-ROSTER SELECT HOME HOME-TEAM NAME aaaaaaaaaaaaa* Action Press <YES> to begin selection of a new code from the ENTER CODE prompt. -
Page 158: The Display Menu
LCD Display HOME-TEAM abbr aaaaaaaaaa* Display Menu allows the user to start and edit the segment timer or to change the DISPLAY MENU brightness of the scoreboard. LCD Display MENU-MAIN ENTER DISPLAY MENU? Hockey Options (Continued from previous page) Action The TEAM NAME (LL-2441) insert must be inserted to enter the Team Name Message Center (TNMC) settings. - Page 159 LCD Display MENU-DISPLAY RUN SEG TIMER Y/N EXIT GAME ARE YOU SURE Y/N MENU- Dimming level (0-9): nn% nn = current level None = bright <0> 90% = <1> 80% = <2> 70% = <3> 60% = <4> 50% = <5>...
-
Page 160: Edit Settings
Edit Settings LCD Display MENU-MAIN edit SETTINGS? Time of Day LCD Display MENU-MAIN SELECT TOD? MENU-TIME OF DAY 1*12, 2-24 HOUR MENU-TIME OF DAY TOD hh:mm:ss* hh:mm:ss = current setting MENU-TIME OF DAY 1*GAME 2-tod * = current setting Hockey Options Action Press <YES>... -
Page 161: Settings
LCD Display MENU-TIME OF DAY BLANK GAME DATA? Settings The following settings can be edited by the user when EDIT SETTINGS has been selected from the Main Menu. Main Clock Note 1: The settings entered for Main Clock are used with the <SET MAIN CLOCK> key. Note 2: The period, break, and overtime lengths are used differently depending on the direction of the main clock. -
Page 162: Penalty Times
LCD Display MAIN CLOCK-TIME BREAK mm:ss mm:ss = current setting MAIN CLOCK-TIME OVERTIME mm:ss mm:ss = current setting Penalty Times Default times can be set for the minor and major penalty keys. The minor penalty time is used as the default when first entering the player penalty function. LCD Display Penalty time minor mm:ss... -
Page 163: Time Outs
Time Outs Note 1: If a full or partial time out is not needed for the HOME or GUEST <TIME OUT> keys, enter zero for the number of time outs. Note 2: If a full or partial time out is not needed for <TIME OUT ON/OFF>, enter zero for the time. -
Page 164: Select Captions
1 ← → 2 off Switch Output The All Sport 5000 series console has a switch that can be used to drive a number of different devices. The switch can be configured to operate under different settings. The default setting is 1-CLOCK= 0. -
Page 165: Default Settings
Setting 0-DISABLED SWITCH OUTPUT=n 0-DISABLED? n = current setting 1-CLOCK = 0 SWITCH OUTPUT=n 1-CLOCK =0? n = current setting 2-CLOCK STOP SWITCH OUTPUT=n 2-CLOCK STOP? n = current setting 3-MAIN HORN SWITCH OUTPUT=n 3-MAIN HORN? n = current setting Default Settings Write the settings for this installation in the space (Custom) provided. -
Page 166: Appendix D
Section 10: Soccer Operations Sport Insert: LL-2440 The Sport Insert drawing is located at the end of this section. The Team Name insert and Block Diagram drawings are located in Appendix A. The Quick Reference is located in Appendix D. Reference Drawings: Block Diagrams, A/S5000/3000, Outdoor Sports ... -
Page 167: 10.1 Soccer Keys
10.1 Soccer Keys Time Out On/Off <TIME OUT ON/OFF> stops and starts the time out clock. The length of both the full and partial time outs can also be changed when the time out clock is stopped. LCD Display TIME OUT-SELECT FULL MM:SS mm:ss = minutes, seconds... -
Page 168: Half +1
LCD Display TIME OUT-SELECT PARTIAL MM:SS mm:ss = minutes, seconds Half +1 LCD Display Half; +1 n = current setting Soccer Operations (Continued from previous page) Action Press <TIME OUT ON/OFF> a second time to display the configured time for partial time out length. To accept the partial time out length and press <YES>. -
Page 169: Time Out
Time Out The home and guest <TIME OUT> keys are used to decrement the number of time outs remaining and start the time out clock. The scoreboard indicator is turned on when the type of time out is selected (full or partial). The scoreboard indicator is turned off when the time out clock expires or is stopped. -
Page 170: Score +1, -1
Score +1, -1 The home and guest <SCORE +1> and <SCORE -1> keys are used to increment and decrement the team score. LCD Display TEAM SCORE: +1 HOME nnn = current setting Other Increment and Decrement Keys The home and guest < SHOTS ON GOAL +1, -1 <... -
Page 171: Time Out On/Off
Time Out On/Off LCD Display TIME OUTs-edit FULL MM:SS mm:ss = minutes, seconds TIME OUTs-edit PARTIAL MM:SS mm:ss = minutes, seconds Time Out Note 1: Only the time outs configured in the LCD and available for selection. Note 2: The up and down arrow keys can also be used to select the full and partial time outs. LCD Display TIME OUT-HOME FULL... -
Page 172: Score +1, -1
Score +1, -1 LCD Display TEAM SCORE: EDIT HOME nnn* nnn = current setting Other Increment and Decrement Keys The home and guest < SHOTS ON GOAL +1, -1 < > and < FOULS +1, -1 PENALTY KICKS +1, -1 used as an example. -
Page 173: New Game
New Game LCD Display MENU-MAIN NEW GAME? New Code When the LCD Display is as shown, the following actions may be selected. LCD Display MENU-MAIN NEW CODE? Home Roster, Guest Roster Home Roster and Guest Roster are entered in the same way. Home Roster is used as an example. -
Page 174: Display Menu
LCD Display HOME-TEAM NAME aaaaaaaaaaaaa* HOME-TEAM abbr aaaaaaaaaa* Display Menu The DISPLAY MENU allows the user to start and edit the segment timer or to change the brightness of the scoreboard. LCD Display MENU-MAIN ENTER DISPLAY MENU? Soccer Operations (Continued from previous page) Action The TEAM NAME (LL-2441) insert must be inserted to enter the Team Name Message... - Page 175 LCD Display MENU-DISPLAY RUN SEG TIMER Y/N EXIT GAME ARE YOU SURE Y/N MENU- Dimming level (0-9): nn% nn = current level None = bright <0> 90% = <1> 80% = <2> 70% = <3> 60% = <4> 50% = <5>...
-
Page 176: Settings
Settings LCD Display MENU-MAIN edit SETTINGS? Time of Day LCD Display MENU-MAIN SELECT TOD? MENU-TIME OF DAY 1*12, 2-24 HOUR MENU-TIME OF DAY TOD hh:mm:ss* hh:mm:ss = current setting Soccer Operations Action Press <YES> or the right or left arrow key to select the Edit Settings submenu and show the first prompt on the LCD. -
Page 177: Settings
LCD Display MENU-TIME OF DAY 1*GAME 2-tod * = current setting MENU-TIME OF DAY BLANK GAME DATA? 10.4 Settings The following settings can be edited by the user when EDIT SETTINGS has been selected from the Main Menu. Main Clock Note 1: The settings entered for Main Clock are used with the <SET MAIN CLOCK>... -
Page 178: Corner Kicks, Saves, Or Fouls
LCD Display MAIN CLOCK-TIME BREAK mm:ss mm:ss = current setting Corner Kicks, Saves, or Fouls Select whether to display corner kicks, saves, or fouls on the scoreboard. LCD Display corner,save,foul 1 - * = current setting Time Outs Note 1: If a full or partial time out is not needed for the HOME or GUEST <TIME OUT> keys, enter zero for the number of time outs. - Page 179 LCD Display TIME OUTS-MODE FULL n = current setting TIME OUTS-TIME FULL mm:ss mm:ss = current setting TIME OUTS-MODE WARNING mm:ss mm:ss = current setting TIME OUTS-MODE PARTIAL n = current setting TIME OUTS-TIME PARTIAL mm:ss mm:ss = current setting TIME OUTS-MODE SHOW ON MAIN? n n = current setting...
-
Page 180: Display Penalty/Tol
Penalty* TOL Switch Output The All Sport 5000 series console has a switch that can be used to drive a number of different devices. The switch can be configured to operate under different settings. The default setting is 1-CLOCK= 0. -
Page 181: Default Settings
The possible settings for the switch output are as follows: Setting 0-DISABLED SWITCH OUTPUT=n 0-DISABLED? n = current setting 1-CLOCK = 0 SWITCH OUTPUT=n 1-CLOCK =0? n = current setting 2-CLOCK STOP SWITCH OUTPUT=n 2-CLOCK STOP? n = current setting 3-MAIN HORN SWITCH OUTPUT=n 3-MAIN HORN? -
Page 182: Section 11: Tennis Operations
Section 11: Tennis Operations Sport Insert: LL-2483 The Sport Insert drawing is located at the end of this section. The Team Name insert and Block Diagram drawings are located in Appendix A. Reference Drawings: Block Diagrams, A/S5000/3000, Outdoor Sports ... Drawing A-124690 Insert, Team Name ...Drawing A-125290 Insert, Tennis ... -
Page 183: Matches Won +1
Matches Won +1 LCD Display Matches won +1 Top nn Nn = current matches won Games Won LCD Display GAMES WON +1 TOP N Point The <POINT> key increments the point value for the respective player. If Tie Break scoring mode is selected, the points will increment by 1. -
Page 184: Reset Match
Reset Match LCD Display TOP=nn BOT=nn RESET MATCH? nnn = current setting Reset Game Score Press < RESET GAME SCORE Match Number +1 LCD Display MATCH +1 Nnnn nnnn = current setting Set +1 Press <SET+1> to increment the current set number. The new set number and new set games won values will be displayed on the LCD. -
Page 185: Games Won
Games Won LCD Display GAMES WON EDIT SET 1 TOP N nn = current setting Points LCD Display TOP=nn BOT=nn EDIT TOP nn = current setting Set +1 LCD Display SET: EDIT n = current setting Match Number +1 LCD Display MATCH: EDIT nnnn nnnn = current setting... -
Page 186: Matches Won
Matches Won LCD Display Matches Won: EDIT Top nn Nn = current matches won 11.3 Menu The <MENU> key allows the user to select from a list of options specific for each sport. The up and down arrow keys allow the user to scroll through the menu list. Pressing a key other than <YES>, <NO>, the arrow keys, and other allowed keys, exit the Menu function. -
Page 187: Home Roster, Guest Roster
Home Roster, Guest Roster Home Roster and Guest Roster are entered in the same way. Home Roster is used as an example. LCD Display MENU-ROSTER SELECT HOME HOME-TEAM NAME aaaaaaaaaaaaa* Action Press <YES> or the right or left arrow key to select the Home or Guest Roster submenu and show the first prompt on the LCD. -
Page 188: Display Menu
Display Menu The DISPLAY MENU allows the user to start and edit the segment timer or to change the brightness of the scoreboard. LCD Display MENU-MAIN ENTER DISPLAY MENU? MENU-DISPLAY RUN SEG TIMER Y/N EXIT GAME ARE YOU SURE Y/N Tennis Operations Action Press <YES>... -
Page 189: Edit Settings
LCD Display MENU- Dimming level (0-9): nn% nn = current level None = bright <0> 90% = <1> 80% = <2> 70% = <3> 60% = <4> 50% = <5> 40% = <6> 30% = <7> 20% = <8> 10% = <9>... -
Page 190: Time Of Day
Time of Day LCD Display MENU-MAIN SELECT TOD? MENU-TIME OF DAY 1*12, 2-24 HOUR MENU-TIME OF DAY TOD hh:mm:ss* hh:mm:ss = current setting MENU-TIME OF DAY 1*GAME 2-tod * = current setting MENU-TIME OF DAY BLANK GAME DATA? Tennis Operations Action Press <YES>... -
Page 191: 11.4 Settings
= current setting Switch Output The All Sport 5000 series console has a switch that can be used to drive a number of different devices. The switch can be configured to operate under different settings. The default setting is 1-CLOCK= 0. -
Page 192: Default Settings
The possible settings for switch output are as follows: Setting 0-DISABLED SWITCH OUTPUT=n 0-DISABLED? n = current setting 1-CLOCK = 0 SWITCH OUTPUT=n 1-CLOCK =0? n = current setting 2-CLOCK STOP SWITCH OUTPUT=n 2-CLOCK STOP? n = current setting 3-MAIN HORN SWITCH OUTPUT=n 3-MAIN HORN? n = current setting... -
Page 194: Appendix D
Section 12: Track Operations Sport Insert: LL-2439 The Sport Insert drawing is located at the end of this section. The Team Name insert and Block Diagram drawings are located in Appendix A. The Quick Reference is located in Appendix D. Reference Drawings: Block Diagrams, A/S5000/3000, Outdoor Sports ...Drawing A-124690 Insert, Track ...Drawing A-125094... -
Page 195: 12.1 Track Keys
If you do not know the code number to enter for your scoreboard, refer to Appendix B in this manual. If you do not know the model number of your scoreboard, refer to the Installation and Maintenance manual provided with the scoreboard. 12.1 Track Keys Reset LCD Display... -
Page 196: Place
Place LCD Display PLACE:N n = current setting PLACE: N EXTERNAL TIMER n = current setting Home and Guest 1 Score The Home and Guest 1 Score keys are used to modify the value of home or guest team score. When the LCD Display is as shown, the following actions may be selected. -
Page 197: Guest 2 And Guest 3 Score (Event/Heat)
Guest 2 and Guest 3 Score (Event/Heat) The function of the Guest 2 and Guest 3 score keys depends on the . Refer to Section 12.4. SETTINGS LCD Display EVENT - EDIT nnn = current setting EVENT: nnn EXTERNAL TIMER nnn = current setting TEAM SCORE-EDIT GUEST 2 nnn... -
Page 198: Score +1
Score +1 The home and guest 1 and 2 <SCORE +1> keys are used to increment the team score. LCD Display TEAM SCORE-+1 HOME nnn nnn = current setting 12.2 Edit The <EDIT> key allows the user to select and edit the following scoreboard fields. Press <EDIT>... -
Page 199: New Game
New Game LCD Display MENU-MAIN NEW GAME? New Code LCD Display MENU-MAIN NEW CODE? Home Roster, Guest Roster Home Roster and Guest Roster are entered in the same way. Home Roster is used as an example. LCD Display MENU-ROSTER SELECT HOME Action Press <YES>... -
Page 200: The Display Menu
LCD Display HOME-TEAM NAME aaaaaaaaaaaaa* HOME-TEAM abbr aaaaaaaaaa* Display Menu allows the user to start and edit the segment timer or to change the DISPLAY MENU brightness of the scoreboard. LCD Display MENU-MAIN ENTER DISPLAY MENU? Track Operations (Continued from previous page) Action The TEAM NAME (LL-2441) insert must be inserted to enter the Team Name Message... - Page 201 LCD Display MENU-DISPLAY RUN SEG TIMER Y/N EXIT GAME ARE YOU SURE Y/N MENU- Dimming level (0-9): nn% nn = current level None = bright <0> 90% = <1> 80% = <2> 70% = <3> 60% = <4> 50% = <5>...
-
Page 202: Edit Settings
Edit Settings LCD Display MENU-MAIN EDIT SETTINGS? Time of Day LCD Display MENU-MAIN SELECT TOD? MENU-TIME OF DAY 1*12, 2-24 HOUR MENU-TIME OF DAY TOD hh:mm:ss* hh:mm:ss = current setting Track Operations Action Press <YES> or the right or left arrow key to select the Settings submenu and show the first prompt on the LCD. -
Page 203: 12.4 Settings
LCD Display MENU-TIME OF DAY 1*GAME 2-TOD * = current setting MENU-TIME OF DAY BLANK GAME DATA? 12.4 Settings The following settings can be edited by the user when EDIT SETTINGS has been selected from the Main Menu. Guest 2 and Guest 3 key function LCD Display GUEST 2,3 VALUE SCORE←→EVNT/HT... -
Page 204: Switch Output
LCD Display Switch Output The All Sport 5000 series console has a switch that can be used to drive a number of different devices. The switch can be configured to operate under different settings. The default setting is 1-CLOCK= 0. -
Page 205: Default Settings
Setting 2-CLOCK STOP SWITCH OUTPUT=n 2-CLOCK STOP? n = current setting 3-MAIN HORN SWITCH OUTPUT=n 3-MAIN HORN? n = current setting Default Settings Write the settings for this installation in the space (Custom) provided. Setting Guest 2,3 Score or Event/Heat Switch Output (Continued from previous page) Result... -
Page 206: Appendix D
Section 13: Volleyball Operations Sport Insert: LL-2434 The Sport Insert drawing is located at the end of this section. The Team Name insert and Block Diagram drawings are located in Appendix A. The Quick Reference is located in Appendix D. Reference Drawings: Block Diagrams, A/S5000/3000, BB, VB &... -
Page 207: 13.1 Volleyball Keys
13.1 Volleyball Keys Time Out On/Off <TIME OUT ON/OFF> stops and starts the time out clock. The length of both the full and partial time outs can also be changed when the time out clock is stopped. LCD Display TIME OUTs-SELECT FULL? MM:SS mm:ss = minutes, seconds... -
Page 208: Match Number +1, Games +1
LCD Display TIME OUT-HOME FULL n = current setting TIME OUT-HOME PARTIAL n = current setting TIME OUT-HOME NO TIME OUTS Match Number +1, Games +1 The <MATCH NUMBER +1>and <GAMES +1> keys are both used to increment their respective totals. <GAME +1> is used as an example. LCD Display game no.: -+1 n = current setting... -
Page 209: Score +1, -1
Score +1, -1 The home and guest <SCORE +1> and <SCORE -1> keys are used to increment and decrement the team score. LCD Display TEAM SCORE: +1 HOME nnn = current setting Games Won +1 The home and guest keys are used to increment their respective totals. LCD Display GAMES WON: +1 HOME nn... -
Page 210: Serve
LCD Display HOME PLAYER nn NOT FOUND, ADD? nn = current setting HOME PLAYER nn ROSTER FULL nn = current setting HOME PLAYER nn aces nn = current setting Serve LCD Display HOME serve HOME serve In Game/Out of Game The <IN GAME>... -
Page 211: Player
Player Note: If player stats are being received from DSTI the keys PLAYER, IND SUB, and MASS SUB will be disabled. The LCD will display the messages shown below when these keys are pressed. LCD Display STATS received Key disabled Exit stats mode Y/n? LCD Display... - Page 212 LCD Display HOME PLAYER nn S-n a-nn* k-nn nn = player number S-I = in game S-o = out of game a-nn = number of aces k-nn = number of kills b-nn = number of blocks d-nn = number of digs HOME PLAYER nn DELETE PLAYER? Volleyball Operations...
-
Page 213: Individual Substitution
Individual Substitution LCD Display IND SUB-HOME nn* in for nn* nn = current setting IND SUB-HOME SUB OK IND SUB-HOME SUB NOT MADE IND SUB-HOME NOT FOUND nn nn = current setting Action When the home or guest <INDIV. SUB.> key is pressed, this prompt asks the jersey number of the player entering and leaving the game. -
Page 214: Mass Substitution
Mass Substitution LCD Display MASS SUB-HOME PLAYER 1 nn* nn = current setting mass SUB-HOME SUB OK MASS SUB-HOME DUPLICATE nn nn = current setting MASS SUB-HOME NOT FOUND nn nn = current setting Volleyball Operations Action After the home or guest <MASS SUB> key is pressed, the LCD will display a message on the LCD asking for the first of six player numbers that are going into the game. -
Page 215: 13.2 Edit
13.2 Edit The <EDIT> key allows the user to select and edit the following scoreboard fields. Press <EDIT> and the key for the field to be edited. Match Number +1, Games +1 The <MATCH NUMBER +1>and <GAMES +1> keys are edited in the same ways. <GAME +1>... -
Page 216: Score +1, -1
Score +1, -1 LCD Display TEAM SCORE: EDIT HOME nnn* nnn = current setting Games Won +1 LCD Display GAMES WON: edit HOME nn* n = current setting Aces, Kills, Blocks, and Digs The home and guest <ACES +1>, <KILLS +1>, <BLOCKS +1>, and <DIGS +1> keys are all edited in the same way. -
Page 217: Time Out On/Off
Time Out On/Off LCD Display TIME OUTs-edit FULL MM:SS mm:ss = minutes, seconds TIME OUT- edit PARTIAL MM:SS mm:ss = minutes, seconds 13.3 Menu The <MENU> key allows the user to select from a list of options specific for each sport. The up and down arrow keys allow the user to scroll through the menu list. -
Page 218: New Code
New Code LCD Display MENU-MAIN NEW CODE? Home Roster, Guest Roster Home Roster and Guest Roster are entered in the same way. Home Roster is used as an example. LCD Display MENU-ROSTER SELECT HOME HOME-TEAM NAME aaaaaaaaaaaaa* Volleyball Operations Action Press <YES>... - Page 219 LCD Display HOME-TEAM abbr aaaaaaaaaa* MENU-HOME PLAYER 01 nn* nn = current setting MENU-HOME CLEAR STATS? (Continued from previous page) Action The TEAM NAME (LL-2441) insert must be inserted to enter the Team Name Message Center (TNMC) settings. The TNMC is updated after each selection is completed.
-
Page 220: The Display Menu
Display Menu allows the user to start and edit the segment timer or to change the DISPLAY MENU brightness of the scoreboard. LCD Display MENU-MAIN ENTER DISPLAY MENU? MENU-DISPLAY RUN SEG TIMER Y/N EXIT GAME ARE YOU SURE Y/N Volleyball Operations Action Press <YES>... -
Page 221: Edit Settings
LCD Display MENU- Dimming level (0-9): nn% nn = current level None = bright <0> 90% = <1> 80% = <2> 70% = <3> 60% = <4> 50% = <5> 40% = <6> 30% = <7> 20% = <8> 10% = <9>... -
Page 222: Time Of Day
Time of Day LCD Display MENU-MAIN SELECT TOD? MENU-TIME OF DAY 1*12, 2-24 HOUR MENU-TIME OF DAY TOD hh:mm:ss* hh:mm:ss = current setting MENU-TIME OF DAY 1*GAME 2-tod * = current setting MENU-TIME OF DAY BLANK GAME DATA? Volleyball Operations Action Press <YES>... -
Page 223: 13.4 Settings
13.4 Settings The following settings can be edited by the user when EDIT SETTINGS has been selected from the Main Menu. Main Clock Note 1: The settings entered for Main Clock are used with the <SET MAIN CLOCK> key. Note 2: The period, break, and overtime lengths are used differently depending on the direction of the main clock. -
Page 224: Time Outs
Time Outs Note 1: If a full or partial time out is not needed for the HOME or GUEST <TIME OUT> keys, enter zero for the number of time outs. Note 2 If a full or partial time out is not needed for <TIME OUT ON/OFF>, enter zero for the time. -
Page 225: Team Stats
Team Stats UPDATE PLAYER? allows the entry of a player number after the home or guest team aces, UPDATE PLAYER? kills, blocks or digs are incremented or decremented. This feature must be enabled for all player-foul-points panels. LCD Display TEAM stats-MODE UPDATE PLAYER? n n = current setting User Def 1 and User Def 2... - Page 226 LCD Display user def 1 = n 2 - kills n = current setting user def 1 = Team Score user def 1 = Player/Foul user def 1 = n 3 - blocks n = current setting user def 1 = Team Score user def 1 = Player/Foul user def 1 = n 4 - digs...
-
Page 227: Select Captions
Select Captions LCD Display Select captions on 1 ← → 2 off Action This menu option allows for the controlled backlit captions to be turned ON/OFF. Press the <1> key to select ON and OFF for captions controlled by control #1. Press the <2>... -
Page 228: Switch Output
Switch Output The All Sport 5000 series console has a switch that can be used to drive a number of different devices. The switch can be configured to operate under different settings. The default setting is 1-CLOCK= 0. To display the switch setting that you want to select: Press the number (0,1,2,3) key as a shortcut or use the left and right arrow keys to scroll to the desired setting. -
Page 229: Default Settings
Default Settings Write the settings for this installation in the space (Custom) provided. Setting Default Period Length 60:00 Break Length 3:00 Update Player User Def 1 Aces User Def 2 Kills Full Time Outs Full Time Out 0:30 Partial Time Outs Partial Time Out 0:00 Main Clock Mode... -
Page 230: Appendix D
Section 14: Wrestling Operations Sport Insert: LL-2435 The Sport Insert drawing is located at the end of this section. The Team Name insert and Block Diagram drawings are located in Appendix A. The Quick Reference is located in Appendix D. Reference Drawings: Block Diagrams, A/S5000/3000, BB, VB &... -
Page 231: 14.1 Wrestling Keys
14.1 Wrestling Keys Match Number +1 LCD Display match- +1 n = current setting Weight class 01 nnn nnn =weight class Period +1 LCD Display period +1 n = current setting Action Press <MATCH +1> to increment the match number. A prompt showing match number displays briefly. -
Page 232: Set Main Clock (Period Times)
Set Main Clock (Period Times) LCD Display MAIN CLOCK -SET CURR mm:ss.t* mm:ss.t = minutes, seconds, tenths of a second MAIN CLOCK -EDIT PERIOD mm:ss* mm:ss = minutes, seconds MAIN CLOCK -EDIT PER 2 mm:ss* MAIN CLOCK -EDIT PER 3 mm:ss* MAIN CLOCK -EDIT PER 4... -
Page 233: Home Advantage, Guest Advantage, Stop Advantage Clock
Home Advantage, Guest Advantage, Stop Advantage Clock LCD Display time n:nn ↓ AD TM n:nn.n >g n:nn = main clock n:nn.n = advantage timer g or h = guest or home Action The main clock must be running to use the advantage timer. -
Page 234: Team Score +1, -1
Team Score +1, -1 LCD Display team score- +1 home = n n = current setting Match Score +1, +2, +3, -1 The home and guest <MATCH SCORE +1>, <MATCH SCORE +2>, and <MATCH SCORE +3> keys are used to increment the team score and the <MATCH SCORE -1> key is used to decrement the team score. -
Page 235: Start/Stop Injury Time
Start/Stop Injury Time LCD Display g injury n:nn AD TM n:nn.n >g n:nn = injury timer n:nn.n = advantage timer g or h = guest or home Reset Match LCD Display reset match? Select Win Home Action The maximum allowed injury time is set for each competitor at the beginning of a match and reset to this time when the Reset Match function is performed. -
Page 236: Start/Stop Blood Time
LCD Display 11:36:23 Start/Stop Blood Time LCD Display g blood n:nn AD TM n:nn.n >g n:nn = blood timer n:nn.n = advantage timer g or h = guest or home Wrestling Operations Action The console will display the time of day, elapsed time of match, and points scored in the match. -
Page 237: Start/Stop Recovery Time
Start/Stop Recovery Time LCD Display RECOVERY n:nn AD TM n:nn.n >g n:nn = recovery timer n:nn.n = advantage timer 14.2 Edit key allows the user to select and edit the following scoreboard fields. <EDIT> Press and the key for the home or guest field to be edited. <EDIT>... -
Page 238: Blood Time
LCD Display AD TM guest mm:ss.t* mm:ss.t = minutes, seconds, tenths of a second Blood Time LCD Display blood time-EDIT HOME mm:ss* mm:ss = current setting Injury Time LCD Display injury time-EDIT HOME mm:ss* mm:ss = current setting Match Number, Period, Team Score and Match Score The home and guest <MATCH NUMBER +1>, <PERIOD +1>, <TEAN SCORE+1, -1>... - Page 239 LCD Display TEAM score-edit HOME nnn = current setting Action Press <EDIT> and the appropriate statistic key to display the current setting. For example, <TEAM SCORE +1, -1>. Enter the correct number on the number pad and press <ENTER>. Wrestling Operations...
-
Page 240: 14.3 Menu
14.3 Menu The <MENU> key allows the user to select from a list of options specific for each sport. The up and down arrow keys allow the user to scroll through the menu list. Pressing a key other than <YES>, <NO>, the arrow keys, and other allowed keys, exits the Menu function. The MENU function should be used at the beginning of each new game to edit the Home and Guest Rosters. -
Page 241: Home Roster, Guest Roster
Home Roster, Guest Roster Home Roster and Guest Roster are entered in the same way. Home Roster is used as an example. LCD Display MENU-ROSTER SELECT HOME HOME-TEAM NAME aaaaaaaaaaaa* HOME-TEAM abbr aaaaaaaaaa* Action Press <YES> or the right or left arrow key to select the Home or Guest Roster submenu and show the first prompt on the LCD. -
Page 242: The Display Menu
Display Menu allows the user to start and edit the segment timer or to change the DISPLAY MENU brightness of the scoreboard. LCD Display MENU-MAIN ENTER DISPLAY MENU? MENU-DISPLAY RUN SEG TIMER Y/N EXIT GAME ARE YOU SURE Y/N Wrestling Operations Action Press <YES>... -
Page 243: Weight Class
LCD Display MENU- Dimming level (0-9): nn% nn = current level None = bright <0> 90% = <1> 80% = <2> 70% = <3> 60% = <4> 50% = <5> 40% = <6> 30% = <7> 20% = <8> 10% = <9>... -
Page 244: Edit Settings
Edit Settings LCD Display MENU-MAIN edit SETTINGS? Time of Day LCD Display MENU-MAIN SELECT TOD? MENU-TIME OF DAY 1*12, 2-24 HOUR MENU-TIME OF DAY TOD hh:mm:ss* hh:mm:ss = current setting Wrestling Operations Action Press <YES> or the right or left arrow key to select the Settings submenu and show the first prompt on the LCD. -
Page 245: 14.4 Settings
LCD Display MENU-TIME OF DAY 1*GAME 2-tod * = current setting MENU-TIME OF DAY BLANK GAME DATA? 14.4 Settings The user can edit the following settings when EDIT SETTINGS has been selected from the Main Menu. Main Clock Note 1: The settings entered for Main Clock are used with the <SET MAIN CLOCK> key. Note 2: The period, break, and overtime lengths are used differently depending on the direction of the main clock. -
Page 246: Blood/Injury Time
Blood/Injury Time The maximum allowed blood and injury times are set for each competitor at the beginning of a match and reset to these times when the Reset Match function is performed. When enabled, the blood and injury times are displayed in the main clock digits and the corresponding (home or guest) match score digits flash. -
Page 247: Select Captions
Select Captions LCD Display Select captions on 1 ← → 2 off Display Lines for Weight Class LCD Display # of Disp Lines n = number of lines Display Team Score LCD Display Display Team score y/n? n = number of lines Action This menu option allows for the controlled backlit captions to be turned ON/OFF. -
Page 248: Switch Output
Switch Output The All Sport 5000 series console has a switch that can be used to drive a number of different devices. The switch can be configured to operate under different settings. The default setting is 1-CLOCK= 0. To display the switch setting that you want to select: Press the number (0,1,2,3) key as a shortcut or use the left and right arrow keys to scroll to the desired setting. -
Page 250: Section 15: Event Counter
15.1 General Event Counter Information Note: The All Sport 5000 uses Enhanced RTD with Venus 4600 / 7000 codes The Event Counter program is made up of six codes used to display information about external events. The codes used for event counter are shown below. -
Page 251: Value/Days
Value/Days Use the <SET MAIN CLOCK> key to set the Time in addition to the number of days to be counted. Press <START> to start the main clock. If the console is set to count down, the time value decrements to 00:00.00 and the day value decrements by one. This continues until 0 days and 00:00.00 time occurs. -
Page 252: Increment Value
Increment Value LCD Display INCREMENT VALUE nnnn nnnn = current value Decrement Value LCD Display DECREMENT VALUE nnnn nnn = current value Time Interval When <START> is pressed to start the main clock, the controller counts down the time interval to 00:00.00 and adjust the initial value by the increment or decrement value. The interval time is reset and the cycle will repeat. -
Page 253: 15.4 External Input Counter
15.4 External Input Counter The External Input Counter counts the occurrences of switch inputs starting at the initial value. Value/Days LCD Display VALUE nnnnnnnn Nnnnnnnn = current value Increment Value LCD Display INCREMENT VALUE nnnn nnnn = current value Decrement Value LCD Display DECREMENT VALUE nnnn... -
Page 254: 15.5 Menu
15.5 Menu The <MENU> key allows the user to select from a list of options specific for each sport. The up and down arrow keys allow the user to scroll through the menu list. Pressing a key other than <YES>, <NO>, the arrow keys, and other allowed keys exit the Menu function. New Game LCD Display MENU-MAIN... -
Page 255: Dim/ Bright
Dim/ Bright LCD Display MENU- Dimming level (0-9): nn% nn = current level None = bright <0> 90% = <1> 80% = <2> 70% = <3> 60% = <4> 50% = <5> 40% = <6> 30% = <7> 20% = <8>... -
Page 256: Section 16: Karate Operations
Section 16: Karate Operations Sport Insert: 0G-96890 Red/White Code 282 0G-98374 White/Red Code 285 The Sport Insert drawing is located at the end of this section. The Team Name insert and Block Diagram drawings are located in Appendix A. Reference Drawings: Insert, Karate Code 282...Drawing A-96890 Insert, Karate Code 285...Drawing A-98374 Refer to the information in Section 2 to start up the console and use the sport insert. -
Page 257: M (Mubobi)
M (Mubobi) LCD Display WHITE M +1 N = new value J (Jogai) LCD Display WHITE J +1 N = new value LCD Display WHITE WIN 16.2 Edit W,H,M,J The W,H,M and J values are edited in the same way. D is shown as an example. LCD Display WHITE D EDIT... -
Page 258: 16.3 Menu
16.3 Menu key allows the user to select from a list of options specific for each sport. The <MENU> up and down arrow keys allow the user to scroll through the menu list. Pressing a key other than the arrow keys, and other allowed keys exit the Menu function. <YES>, <NO>, New Game When the LCD Display is as shown, the following actions may be selected. -
Page 259: Display Menu
Display Menu The DISPLAY MENU allows the user to start and edit the segment timer or to change the brightness of the scoreboard. LCD Display MENU-MAIN ENTER DISPLAY MENU? MENU-DISPLAY RUN SEG TIMER Y/N EXIT GAME ARE YOU SURE Y/N Action Press <YES>... -
Page 260: Edit Settings
LCD Display MENU- Dimming level (0-9): nn% nn = current level None = bright <0> 90% = <1> 80% = <2> 70% = <3> 60% = <4> 50% = <5> 40% = <6> 30% = <7> 20% = <8> 10% = <9>... -
Page 261: Time Of Day
Time of Day LCD Display MENU-MAIN SELECT TOD? MENU-TIME OF DAY 1*12, 2-24 HOUR MENU-TIME OF DAY TOD hh:mm:ss* hh:mm:ss = current setting MENU-TIME OF DAY 1*GAME 2-TOD * = current setting Action Press <YES> or the right arrow key to select the Time of Day submenu and show the first prompt on the LCD. -
Page 262: 16.4 Settings
= current setting Switch Output The All Sport 5000 series console has a relay that can be used to drive a number of different devices. The relay can be configured to operate under different settings. The default setting is 1-CLOCK= 0. -
Page 263: Default Settings
Setting 2-CLOCK STOP SWITCH OUTPUT=n 2-CLOCK STOP? N = current setting 3-MAIN HORN SWITCH OUTPUT=n 3-MAIN HORN? N = current setting Default Settings Write the settings for this installation in the space (Custom) provided. Setting Switch Output Main Clock Period Length Result The relay closes when the main clock is stopped and opens... -
Page 264: Section 17: Tae Kwon Do Operations
Section 17: Tae Kwon Do Operations Sport Insert: 0G-96889 Red/White Code 283 0G-98375 White/Red Code 286 The Sport Insert drawing is located at the end of this section. The Team Name insert and Block Diagram drawings are located in Appendix A Reference Drawings: Insert, Tae Kwon Do, Code 283...Drawing A-96889 Insert, Tae Kwon Do, Code 286...Drawing A-98375... -
Page 265: Kyong-Go (K)
Kyong-go (K) LCD Display WHITE K +1 N = new value LCD Display WHITE WIN √ LCD Display WHITE CHECK Total On/Off < > sets the total point scoring on or off. The total points for each competitor TOTAL ON/OFF are calculated from scoring for all rounds. -
Page 266: Round Length
Round Length LCD Display ROUND LENGTH Nn:nn nn = current setting Rest Length LCD Display REST LENGTH Nn:nn nn = current setting Round Number LCD Display ROUND NUMBER nn = current setting 17.2 Menu The < > key allows the user to select from a list of options specific for each sport. The MENU up and down arrow keys allow the user to scroll through the menu list. -
Page 267: New Game
New Game LCD Display MENU-MAIN NEW GAME? New Code LCD Display MENU-MAIN NEW CODE? Reset Round LCD Display MENU-MAIN RESET ROUND? Action Press <YES> to clear all of the program data for the last game played or the game in progress and begin running the selected sport. -
Page 268: Reset Rest
Reset Rest LCD Display MENU-MAIN RESET REST? Display Menu allows the user to start and edit the segment timer or to change the DISPLAY MENU brightness of the scoreboard. LCD Display MENU-MAIN ENTER DISPLAY MENU? Tae Kwon Do Operations Action Press <YES>... - Page 269 LCD Display MENU-DISPLAY RUN SEG TIMER Y/N EXIT GAME ARE YOU SURE Y/N MENU- Dimming level (0-9): nn% nn = current level None = bright <0> 90% = <1> 80% = <2> 70% = <3> 60% = <4> 50% = <5>...
-
Page 270: Edit Settings
Edit Settings LCD Display MENU-MAIN EDIT SETTINGS? Time of Day LCD Display MENU-MAIN SELECT TOD? MENU-TIME OF DAY 1*12, 2-24 HOUR MENU-TIME OF DAY TOD hh:mm:ss* hh:mm:ss = current setting MENU-TIME OF DAY 1*GAME 2-TOD * = current setting Tae Kwon Do Operations Action Press <YES>... -
Page 271: 17.3 Edit
* = current setting Switch Output The All Sport 5000 series console has a relay that can be used to drive a number of different devices. The relay can be configured to operate under different settings. The default setting is 1-CLOCK= 0. -
Page 272: Default Settings
Press < > or the down arrow key to leave the relay setting and display the next prompt. The possible settings for relay output are as follows: Setting 0-DISABLED SWITCH OUTPUT=n 0-DISABLED? N = current setting 1-CLOCK = 0 SWITCH OUTPUT=n 1-CLOCK =0? N = current setting 2-CLOCK STOP... -
Page 274: Section 18: Judo Operations
The bottom line of the LCD will either display the Osaekomi time, the medical time or the competitor status during the operation of the All Sport 5000 console in this mode. When competitor status is displayed, it will show from left to right the one digit score... -
Page 275: 18.2 Judo Keys
18.2 Judo Keys White and Blue Osaekomi LCD Display TIME 4:00 ↓ WHITE OSAEKOMI Set Osaekomi LCD Display WHITE OSAEKOMI nn:nn NN:NN = current setting Action <WHITE OSAEKOMI> and <BLUE OSAEKOMI> start the Osaekomi timer. The timer displays on the corresponding opponents side of the scoreboard. -
Page 276: Sono-Mama
Sono-Mama LCD Display TIME 4:00 ↓ SONO-MAMA Yoshi LCD Display TIME 4:00 ↓ YOSHI Toketa LCD Display TIME 4:00 ↓ TOKETA Judo Operations Action <SONO-MAMA> stops the Osaekomi and main clock and disables the <START> key. The values of Osaekomi and main clock are held until the <YOSHI>... -
Page 277: Clear
Clear LCD Display TIME 4:00 ↓ CLEAR OSAEK LCD Display WHITE WIN Ippon LCD Display WHITE IPPON Action <CLEAR> clears the Osaekomi time from both opponents’ sides of the scoreboard. Note: This key is disabled if the Osaekomi timer is running or if the Osaekomi timer is currently on. -
Page 278: Medical Exam
Medical Exam LCD Display BLUE MEDICAL 1 Max Medical Keikoku LCD Display WHITE KEIK ON BLUE WAZAARI N n = new value Judo Operations Action There are two <MEDICAL EXAM> keys on the All Sport 5000. The first press of <MEDICAL EXAM> turns on the indicator for the selected opponent and starts the medical timer. -
Page 279: Wazaari
Wazaari LCD Display WAZAARI +1 N = current value Chui LCD Display WHITE CHUI ON BLUE YUKO n n = new value Yuko LCD Display YUKO +1 N = current value Action <WAZAARI+1> and <WAZAARI-1> keys increment or decrement the selected opponent’s Wazaari value. -
Page 280: Shido
Shido LCD Display WHITE SHIDO ON BLUE KOKA n n = new value Koka LCD Display KOKA +1 n = current value Judo Operations Action <SHIDO> lights the corresponding penalty indicator and increments the opposing players Koka by one. Pressing <SHIDO> a second time clears the penalty indicator and decrements the opposing players Koka by one. -
Page 281: 18.3 Edit
18.3 Edit Yuko/Koka The Yuko and Koka values are edited in the same way. Yuko is shown as an example. LCD Display WHITE YUKO EDIT n = current setting WHITE Medical EDIT n = current setting 18.4 Menu The < >... -
Page 282: New Code
New Code LCD Display MENU-MAIN NEW CODE? Display Menu The DISPLAY MENU allows the user to start and edit the segment timer or to change the brightness of the scoreboard. LCD Display MENU-MAIN ENTER DISPLAY MENU? Judo Operations Action Press <YES> to begin selection of a new code from the ENTER CODE prompt. - Page 283 LCD Display MENU-DISPLAY RUN SEG TIMER Y/N EXIT GAME ARE YOU SURE Y/N MENU- Dimming level (0-9): nn% nn = current level None = bright <0> 90% = <1> 80% = <2> 70% = <3> 60% = <4> 50% = <5>...
-
Page 284: Edit Settings
Edit Settings LCD Display MENU-MAIN EDIT SETTINGS? Time of Day LCD Display MENU-MAIN SELECT TOD? MENU-TIME OF DAY 1*12, 2-24 HOUR MENU-TIME OF DAY TOD hh:mm:ss* hh:mm:ss = current setting MENU-TIME OF DAY 1*GAME 2-TOD * = current setting Judo Operations Action Press <YES>... -
Page 285: 18.5 Settings
18.5 Settings The user can edit the following settings when EDIT SETTINGS has been selected from the Main Menu. Main Clock LCD Display MAIN CLOCK-TIME PERIOD mm:ss mm:ss = current setting Wazaari Time LCD Display OSAEKOMI LIMIT WAZAARI TIME:nn* nn = current value Ippon Time LCD Display OSAEKOMI LIMIT... -
Page 286: Medical Time
Medical Time 0:60 Switch Output The All Sport 5000 series console has a switch that can be used to drive a number of different devices. The switch can be configured to operate under different settings. The default setting is 1-CLOCK= 0. -
Page 287: Default Settings
The possible settings for the switch output are as follows: Setting 0-DISABLED SWITCH OUTPUT=n 0-DISABLED? n = current setting 1-CLOCK = 0 SWITCH OUTPUT=n 1-CLOCK =0? n = current setting 2-CLOCK STOP SWITCH OUTPUT=n 2-CLOCK STOP? n = current setting 3-MAIN HORN SWITCH OUTPUT=n 3-MAIN HORN? -
Page 288: Section 19: Boxing Operations
Section 19: Boxing Operations Sport Insert: 0G-96892 Boxing Code 0291 The Sport Insert drawing is located at the end of this section. The Team Name insert and Block Diagram drawings are located in Appendix A. Reference Drawings: Insert, Boxing, Code 291 ...Drawing A-096892 Refer to the information in Section 2 to start up the console and use the sport insert. -
Page 289: Maximum Round Number
Maximum Round Number LCD Display Max Round : Edit nn = current value Round Number +1 LCD Display Round - Nn = new value 19.2 Menu The <MENU> key allows the user to select from a list of options specific for each sport. The up and down arrow keys allow the user to scroll through the menu list. -
Page 290: New Code
New Code LCD Display MENU-MAIN NEW CODE? Dimming LCD Display MENU- Dimming level (0-9): nn% nn = current level None = <0> 90% = <1> 80% = <2> 70% = <3> 60% = <4> 50% = <5> 40% = <6> 30% = <7>... -
Page 291: Home Roster, Guest Roster
Home Roster, Guest Roster Home Roster and Guest Roster are entered in the same way. Home Roster is used as an example. LCD Display MENU-ROSTER SELECT HOME HOME-TEAM NAME aaaaaaaaaaaa* aaaaaaaaaaaaaa = Boxers name Action Press <YES> or the right or left arrow key to select the Home or Guest Roster submenu and show the first prompt on the LCD. -
Page 292: Display Menu
Display Menu The DISPLAY MENU allows the user to start and edit the segment timer or to change the brightness of the scoreboard. LCD Display MENU-MAIN ENTER DISPLAY MENU? MENU-DISPLAY RUN SEG TIMER Y/N EXIT GAME ARE YOU SURE Y/N MENU-TIME OF DAY BLANK GAME DATA? Boxing Operations... -
Page 293: Auto Time
Auto Time The Auto Time option allows the user to choose automatic time transitions. If turned ON, the time will automatically switch between round and rest time. If OFF is selected, this change must be done manually. ON is the default and is recommended. LCD Display Auto Time on 1 –... -
Page 294: 19.3 Edit
19.3 Edit Though <EDIT> is not disabled for this sport code, the buttons available on the insert are able to edit the settings without the use of the <EDIT> button. Therefore, this manual lists no function for the <EDIT> button. Boxing Operations... -
Page 296: Section 20: Strikeout Count
Section 20: Strikeout Count Sport Insert: 0G-163409 Strikeout Count Code 5099 The Sport Insert drawing is located at the end of this section. The Team Name insert and Block Diagram drawings are located in Appendix A. Reference Drawings: Insert, Strikeout Count, Code 5099 ...Drawing A-163409 Refer to the information in Section 2 to start up the console and use the sport insert. -
Page 297: Strikeouts +1, -1
Strikeouts +1, -1 LCD Display Cur value : +1 Nn = new value Display Control Keys The display control keys will send the selected frame command through the RTD port. Pressing these keys will initiate the display of that frame on the Venus system. -
Page 298: 20.2 Menu
20.2 Menu The <MENU> key allows the user to select from a list of options specific for each sport. The up and down arrow keys allow the user to scroll through the menu list. Pressing a key other than <YES>, <NO>, the arrow keys, and other allowed keys exits the Menu function. New Game LCD Display MENU-MAIN... -
Page 299: Dimming
Dimming LCD Display MENU- Dimming level (0-9): nn% nn = current level None = bright <0> 90% = <1> 80% = <2> 70% = <3> 60% = <4> 50% = <5> 40% = <6> 30% = <7> 20% = <8> 10% = <9>... -
Page 300: Section 21: Cricket Operations
Section 21: Cricket Operations Sport Insert: 0G-164973 Cricket Code 5599 The Sport Insert drawing is located at the end of this section. The Team Name insert and Block Diagram drawings are located in Appendix A. Reference Drawings: Insert; Cricket, Code 5599 ...Drawing A-164973 Refer to the information in Section 2 to start up the console and use the sport insert. -
Page 301: Batsman Left, Batsman Right
Batsman Left, Batsman Right <LEFT BATSMAN> and <RIGHT BATSMAN> set the Home and Guest Batsman numbers for the players that are currently batting. LCD Display home batsman left Nn = current value Runs +1, +4, +6 LCD Display left runs: +1 home nn = current setting Runs -1... -
Page 302: Extras +1
Extras +1 LCD Display Extra runs: +1 home nn = current setting Extras -1 < > is used to make corrections if an entry error has occurred. EXTRAS -1 LCD Display Extra runs: -1 home nn = current setting Wickets +1 LCD Display Wickets: nn = current setting... -
Page 303: Overs +1
Overs +1 LCD Display Overs: +1 nn = current setting Overs -1 < > is used to make corrections if an entry error has occurred. OVERS -1 LCD Display Overs: -1 nn = current setting Action Press the appropriate <O +1>... -
Page 304: Inning #1, Inning #2
Inning #1, Inning #2 LCD Display Change Inning? are you sure y/n Y = <ENTER> key N = <CLEAR> key 21.2 Edit Runs +1, +2, +3, -1 LCD Display TEAM runs-EDIT HOME nnn* nn = current setting Extras +1, -1 LCD Display extras-EDIT HOME... -
Page 305: Wickets +1, -1
Wickets +1, -1 LCD Display Wickets-EDIT nn = current setting Overs +1, -1 LCD Display overs-EDIT nn = current setting 21.3 Menu key allows the user to select from a list of options specific for each sport. The <MENU> up and down arrow keys allow the user to scroll through the menu list. Pressing a key other than the arrow keys, and other allowed keys exits the Menu function. -
Page 306: New Code
New Code LCD Display MENU-MAIN NEW CODE? Dimming LCD Display MENU- Dimming level (0-9): nn% nn = current level None = bright <0> 90% = <1> 80% = <2> 70% = <3> 60% = <4> 50% = <5> 40% = <6>... -
Page 307: Home Roster, Guest Roster
Home Roster, Guest Roster Home Roster and Guest Roster are entered in the same way. Home Roster is used as an example. LCD Display MENU-ROSTER SELECT HOME HOME-TEAM NAME aaaaaaaaaaaaaa* aaaaaaaaaaaaaa = Team name Inning Settings Menu INNING SETTINGS MENU inning. -
Page 308: Time Of Day
Time of Day LCD Display MENU-MAIN SELECT TOD? MENU-TIME OF DAY 1*12, 2-24 HOUR MENU-TIME OF DAY TOD hh:mm:ss* hh:mm:ss = current setting MENU-TIME OF DAY 1*GAME 2-tod * = current setting Cricket Operations Action Press <YES> or the right arrow key to select the Time of Day submenu and show the first prompt on the LCD. -
Page 310: Section 22: Water Polo Operations
Section 22: Water Polo Operations Sport Insert: 0G-178439 The Sport Insert drawing is located at the end of this section. The Team Name insert and Block Diagram drawings are located in Appendix A. Reference Drawings: Block Diagrams, A/S5000/3000 Hockey...Drawing A-124689 Insert, Team Name ...Drawing A-125290 Insert, Water Polo ...Drawing A-178439 Refer to the information in Section 2 of ED-11976 to start up the console and use the sport insert. -
Page 311: Enable Penalty Clocks
LCD Display TIME OUT-SELECT FULL MM:SS mm:ss = minutes, seconds TIME OUT-SELECT PARTIAL MM:SS mm:ss = minutes, seconds Enable Penalty Clocks Press < ENABLE PENALTY CLOCKS clock is on. Disable Penalty Clocks Press < DISABLE PENALTY CLOCKS main clock is on. Action Press <TIME OUT ON/OFF>... -
Page 312: Period +1
Period +1 LCD Display period +1 n = current setting Time Out The home and guest < TIME OUT remaining and start the time out clock. The scoreboard indicator is turned on when the type of time out is selected (full or partial). The scoreboard indicator is turned off when the time out clock expires or is stopped. - Page 313 LCD Display TIME OUT-HOME FULL? n = current setting TIME OUT-HOME PARTIAL? n = current setting TIME OUT-HOME NO TIME OUTS Action Press <TIME OUT> to display the number of full time outs remaining. To accept the full time out and start the time out clock, press <YES>.
-
Page 314: Player Penalty Start
Player Penalty Start LCD Display home plyr/pen Player o1* nn = current setting home plyr/pen penalty #n* n = penalty number Set Main Clock LCD Display MAIN CLOCK -SET CURR mm:ss.t* mm:ss.t = minutes, seconds, tenths of a second Water Polo Operations Action Press <PLAYER PENALTY START>... -
Page 315: Score
Score The home and guest <SCORE +1, -1> keys are used to increment and decrement their respective totals. LCD Display TEAM score-edit HOME nnn = current setting Clear All Penalties Press <CLEAR ALL PENALTIES> to delete all of the penalties for the home or guest team. LCD Display HOME PLYR/PEN CLEAR ALL Y/N? -
Page 316: 22.2 Edit
22.2 Edit The <EDIT> key allows the user to select and edit the following scoreboard fields. Press <EDIT> and the key for the home or guest field to be edited. Time Out Note 1: Only the time outs configured in the EDIT SETTINGS function are displayed on the LCD and available for selection. -
Page 317: Period +1
Period +1 LCD Display Period edit n = current setting Time Out On/Off LCD Display TIME OUTs-edit FULL MM:SS mm:ss = minutes, seconds TIME OUT- edit PARTIAL MM:SS mm:ss = minutes, seconds Action Press <EDIT> <PERIOD +1> to display the current quarter setting. -
Page 318: 22.3 Menu
22.3 Menu The <MENU> key allows the user to select from a list of options specific for each sport. The up and down arrow keys allow the user to scroll through the menu list. Pressing a key other than <YES>, <NO>, the arrow keys, and other allowed keys, exits the Menu function. The Menu function should be used at the beginning of each new game to edit the Home and Guest Rosters. -
Page 319: Home Roster, Guest Roster
Home Roster, Guest Roster Home Roster and Guest Roster are entered in the same way. Home Roster is used as an example. LCD Display MENU-ROSTER SELECT HOME HOME-TEAM NAME aaaaaaaaaaaaa* Action Press <YES> or the right or left arrow key to select the Home or Guest Roster submenu and show the first prompt on the LCD. -
Page 320: Display Menu
Display Menu The DISPLAY MENU allows the user to start and edit the segment timer or to change the brightness of the scoreboard. LCD Display MENU-MAIN ENTER DISPLAY MENU? MENU-DISPLAY RUN SEG TIMER Y/N EXIT GAME ARE YOU SURE Y/N Water Polo Operations Action Press <YES>... -
Page 321: Edit Settings
LCD Display MENU- Dimming level (0-9): nn% nn = current level None = bright <0> 90% = <1> 80% = <2> 70% = <3> 60% = <4> 50% = <5> 40% = <6> 30% = <7> 20% = <8> 10% = <9>... -
Page 322: Time Of Day
Time of Day LCD Display MENU-MAIN SELECT TOD? MENU-TIME OF DAY 1*12, 2-24 HOUR MENU-TIME OF DAY TOD hh:mm:ss* hh:mm:ss = current setting MENU-TIME OF DAY 1*GAME 2-tod * = current setting MENU-TIME OF DAY BLANK GAME DATA? Water Polo Operations Action Press <YES>... -
Page 323: 22.4 Settings
22.4 Settings The user can edit the following settings when EDIT SETTINGS has been selected from the Main Menu. Main Clock Note 1: The settings entered for Main Clock are used with the <SET MAIN CLOCK> key. Note 2: The period, break, and overtime lengths are used differently depending on the direction of the main clock. -
Page 324: Shot Clock
LCD Display MAIN CLOCK-TIME BREAK mm:ss mm:ss = current setting MAIN CLOCK-TIME OVERTIME mm:ss mm:ss = current setting Shot Clock LCD Display SHOT CLOCK-TIME RESET mm:ss* mm:ss = current setting Water Polo Operations (Continued from previous page) Action Set the amount of time between periods. Enter the correct amount of time for break length in minutes and seconds on the number pad and press <ENTER>. -
Page 325: Penalty Time
LCD Display SHOT CLOCK-MODE SYNC W/ MAIN? SHOT CLOCK-MODE AUTO BLANK? Penalty Time Default times can be set for the minor and major penalty keys. The minor penalty time is used as the default when first entering the player penalty function. LCD Display Penalty time set mm:ss... -
Page 326: Time Outs
Time Outs Note 1: If a full or partial time out is not needed for the HOME or GUEST <TIME OUT> keys, enter zero for the number of time outs. Note 2: If a full or partial time out is not needed for <TIME OUT ON/OFF>, enter zero for the time. -
Page 327: Switch Output
Switch Output The All Sport 5000 series console has a switch that can be used to drive a number of different devices. The switch can be configured to operate under different settings. The default setting is 1-CLOCK= 0. To display the switch setting that you want to select: Press the number (0,1,2,3) key as a shortcut or use the left and right arrow keys to scroll to the desired setting. -
Page 328: Default Settings
Default Settings Write the settings for this installation in the space (Custo ) provided. Setting Default Tenth of a Second Period Length 15:00 Break Length 10:00 Overtime Length 5:00 Minor Penalty 0:25 Full Time Outs Full Time Out 1:00 Partial Time Outs Partial Time Out 0:00 Switch Output... -
Page 330: Appendix A: Reference Drawings
Schematic, Dual ¼” Phone J-Box w/Shunt Jack... Drawing A-125316 Block Diagram, A/S 5000 BB, VB & WR #2 ... Drawing A-125415 All Sport 5000, 25 Pin PCB J-Box Wiring... Drawing A-125416 Block Diagram; A/S 3000 or 5000 BB, VB & WR #4 ...Drawing A-125417 Channel Selection;... -
Page 351: Appendix B: Sport Inserts
Appendix B: Sport Inserts Sport Insert Drawings: Insert; Event Counter Codes 371-376 ...Drawing A-058047 Insert; Tae Kwan Do, Code 283...Drawing A-096889 Insert; Karate Code 282...Drawing A-096890 Insert; Judo Code 281...Drawing A-096891 Insert; Boxing, Code 291 ...Drawing A-096892 Custom Insert, Karate Code 285 ...Drawing A-098374 Custom Insert, Karate Code 286 ...Drawing A-098375 Custom Insert, Judo Code 284 ...Drawing A-098376 Insert, Basketball, LL-2433 ...Drawing A-120121... -
Page 378: Sports Code Numbers
Appendix C: Sports Code Numbers Reference Drawings: Address Table, 1 through 128... Drawing A-115078 Address Table, 129 through 256 ... Drawing A-115079 Protocol Table, 1 through 15... Drawing A-115081 4 Column LED Driver II ... Drawing A-123783 Relay Driver ... Drawing A-123791 A/S 5000 Capable TNMC ... - Page 379 Model Address BB-2046 12,14 BB-2047 12,14 BB-2101 BB-2102 BB-2103 BB-2104 BB-2105 BB-2106 BB-2107 BB-2108 BB-2109 BB-2111 BB-2112 BB-2114 1 + Columns 5-8 BB-2115 BB-2116 BB-2117 BB-2119 BB-2120 BB-2121 BB-2122 BB-2123 17,14 BB-2124 17,14 BB-2125 BB-2126 BB-2127 BB-2128 BB-2129 BB-2130 BB-2131 BB-2132 BB-2137 BB-2142...
- Page 380 Model Address H-2021 71,72,73 H-2022 71,72,73 H-2023 71,72,73 H-2024 71,72,73 H-2025 71,72 H-2026 71,72 H-2030 71,72,73 H-2031 71,72,73 H-2101 H-2102 72 or 73 H-2103 H-2104 71,72,73 H-2105 71,72,73 H-2106 71,72,73 H-2107 71,72,73 H-2108 71,72,73 H-2109 71,72,73 H-2111 H-2112 H-2114 H-2115 72,73 MS-2016 SD-2001...
- Page 381 Model Address TI-2102 TI-2200 VB-2001 VB-2002 VB-2101 WR-2024 WR-2025 WR-2026 WR-2027 WR-2028 WR-2029 WR-2101 WR-2102 WR-2103 WR-2104 WR-2105 WR-2106 Model #2510 13,29,30 Model #2520 Model #2530 13,31,32 Model #3030 13,23,24,25,26 Model #3040 13,23,24,25,26 Model #3050 13,23,24,25,26 Model #3510 Model #3520 Model #3530 Model #4010 Model #4020...
-
Page 382: Outdoor Model Numbers
Notes: 1) code 1101 is Player-Foul and code 1102 is Foul-Player 2) code 2101 is Game Number & Match Number and code 2111 is Game Number only 3) code 3101 is Match Number and code 3102 is Advantage Time 4) Game Clock only C.2 Outdoor Model Numbers Model Address... - Page 383 Model Address FB-1630 15,16 FB-1630L 15,16 FB-1730 15,16 FB-1830 15,16 FB-1830L 15,16 FB-2001 15,16 FB-2002 15,16 FB-2003 15,16 FB-2004 15,16 FB-2005 FB-2018 15,19 FB-2019 15,19 FB-2020 15,19 FB-2021 15,19 FB-2022 15,19 FB-2023 15,19 FB-2350 12,15 FB-2100 FB-2110 FB-2120 FB-2130 FB-2140 FB-2150 FB-2160 FB-2170...
- Page 384 Model Address SO-824 SO-918 SO-1424 SO-1624 13,14 SO-1830 15,16 SO-1830L 15,16 SO-1930 15,16 SO-2008 SO-2009 SO-2010 SO-2011 11,17 SO-2013 13,14 SO-2018 15,19 SO-2019 15,19 SO-2021 15,19 SO-2022 15,19 SO-2023 15,19 SO-2030 15,16 SO-2031 11,17 MS-915 MS-918 MS-2002 MS-2003 MS-2004 74,75 MS-2006 MS-2009 71,72...
-
Page 385: Miscellaneous Model Numbers
1) Code 5601 is With Clock and code 5602 is With Out Clock. 2) To receive data from an external timer substitute code 8602 for the Omega PowerTime and code 8603 for the Daktronics Omni Sport 1000/6000. 3) Requires two (2) consoles to operate scoreboard. - Page 386 Model TI-2013 TI-2014 TI-2015 RO-2002 RO-2005 RO-2006 RO-2008 RO-2009 RO-2010 RO-2011 BB-2015 FB-2340 TI-2010 TI-2012 TI-2015 BB-114 BB-2041 BB-2042 BB-2046 BB-2047 BB-2101 BB-2102 BB-2105 BB-2106 BB-2116 BB-2117 BB-2121 BB-2122 BB-2123 BB-2124 TN-2007 TN-2008 TN-2009 TN-2016 TN-2501 TN-2603 TN-2604 TN-2605 WR-2021 WR-2022 WR-2023 Sports Code Numbers...
-
Page 387: Custom Outdoor Facility
Model Game/Shot Clock Console Game/Play Clock Console Shots On Goal Console See Table for Indoor Models Relay Driver TNMC – Home/Guest Team Name TNMC – Player-Foul-Points Caption Notes: 1) Code 8000 is available on the All Sport 5100 console only. C.4 Custom Indoor Facility Site Contract... -
Page 400: Appendix D: Quick Reference
Appendix D: Quick Reference ® All Sport 5000 Standard Keys Note: Refer to Section 2.6 Standard Keys for more detailed operating instructions. Start/Stop Clock • <START> and <STOP> control the function of the main clock. The green LED on the <START>... -
Page 401: All Sport
® All Sport 5000 Segment Timer Note: Refer to Section: 3 Segment Timer Operation for more detailed operating instructions. First and Last Segment • <FIRST SEGMENT> and <LAST SEGMENT> set the range of segments to be used. Auto Stop •... -
Page 402: Baseball
® All Sport 5000 Baseball Note: Refer to Section 4: Baseball Operation for more detailed operating instructions. Start-Up • Turn the Power Switch ON. • At the Resume Game? Y/N prompt: • Press <ENTER /YES> to resume the game where last shut off. - Page 403 • <HIT> or <ERROR> turn on or off their respective scoreboard indicators. • The <ERROR> key may also prompt for an error position depending on the Error Position setting • The total Team Hits and Errors are modified using the <HITS+1> and <ERRORS+1> keys. See Team Hits, Errors, Left On Base below.
-
Page 404: Basketball
® All Sport 5000 Basketball Note: Refer to Section 7: Basketball Operation for more detailed operating instructions. Start-Up • Turn the Power Switch ON. • At the Resume Game? Y/N prompt: • Press <ENTER /YES> to resume the game where last shut off. - Page 405 • <SET SHOT TIME> changes the current value of the shot clock timer. Pressing <SET SHOT TIME> a second time allows the reset value of the shot clock timer to be edited. Player Roster Keys • <PLAYER> selects the player number for statistics edit. Pressing <IN GAME> or <OUT OF GAME>...
-
Page 406: Football
® All Sport 5000 Football Note: Refer to Section 8: Football Operation for more detailed operating instructions. Start-Up • Turn the Power Switch ON. • At the Resume Game? Y/N prompt: • Press <ENTER /YES> to resume the game where last shut off. - Page 407 • The <TIME OUT ON/OFF> selects a full (1 time out clock. • The time out clock may be displayed on the main scoreboard using the Time Outs Show on Main setting in the Menu under Edit Settings. Possession • <POSS>...
-
Page 408: Hockey
® All Sport 5000 Hockey Note: Refer to Section 9: Hockey Operation for more detailed operating instructions. Start-Up • Turn the Power Switch ON. • At the Resume Game? Y/N prompt: • Press <ENTER/YES> to resume the game where last shut off. - Page 409 • <ENABLE PENALTY CLOCKS> and <DISABLE PENALTY CLOCKS> control the automatic decrement of the penalty clocks with the main clock. The current status is shown as an EN or DS in the bottom right corner of the LCD screen. Edit Key Function •...
-
Page 410: Soccer
® All Sport 5000 Soccer Note: Refer to Section 12: Soccer Operation for more detailed operating instructions. Start-Up • Turn the Power Switch ON. • At the Resume Game? Y/N prompt: • Press <ENTER /YES> to resume the game where last shut off. - Page 411 • <FOULS+1> and <FOULS-1> increment and decrement the team fouls. Edit Key Function • Press <EDIT> followed by any of the following keys to edit the respective value <SCORE+1>, <SCORE-1>, <SHOTS ON GOAL+1>, < SHOTS ON GOAL-1> SAVES-1>, <HALF+1>, <PENALTY KICKS+1>, <PENALTY KICKS-1>, <CORNER KICKS+1>, <CORNER KICKS-1>, <TIME OUT ON/OFF>,<TIME OUT>...
-
Page 412: Track
® All Sport 5000 Track Note: Refer to Section 12: Track Operation for more detailed operating instructions. Start-Up • Turn the Power Switch ON. • At the Resume Game? Y/N prompt: • Press <ENTER /YES> to resume the game where last shut off. -
Page 414: Volleyball
® All Sport 5000 Volleyball Note: Refer to Section 13: Volleyball Operation for more detailed operating instructions. Start-Up • Turn the Power Switch ON. • At the Resume Game? Y/N prompt: • Press <ENTER /YES> to resume the game where last shut off. - Page 415 Player Roster Keys • <PLAYER> selects the player number for statistics edit. Pressing <IN GAME> or <OUT OF GAME> within the player statistics edit screen changes the status of the player selected. Press the left and right arrow keys to edit the aces, kills, blocks, and digs for the selected player. Press the up or down arrow keys to move to a different player.
-
Page 416: Wrestling
® All Sport 5000 Wrestling Note: Refer to Section 14: Wrestling Operation for more detailed operating instructions. Start-Up • Turn the Power Switch ON. • At the Resume Game? Y/N prompt: • Press <ENTER /YES> to resume the game where last shut off.
Need help?
Do you have a question about the All Sport 5000 and is the answer not in the manual?
Questions and answers