Daktronics ALL SPORT 5000 SERIES Operation Manual
Control console
Hide thumbs
Also See for ALL SPORT 5000 SERIES:
- Operation manual (434 pages) ,
- Operation instructions (5 pages) ,
- Quick start manual (4 pages)
Table of Contents
Advertisement
Quick Links
Download this manual
See also:
Operating Manual
Advertisement
Table of Contents

Related Manuals for Daktronics ALL SPORT 5000 SERIES


Summary of Contents for Daktronics ALL SPORT 5000 SERIES
- Page 1 ALL SPORT 5000 SERIES ® CONTROL CONSOLE OPERATION MANUAL P1196 ED-11976 Rev 29 9 February 2018 201 Daktronics Drive Brookings, SD 57006-5128 www.daktronics.com/support 800.325.8766...
- Page 2 Daktronics trademarks are property of Daktronics, Inc. All other trademarks are property of their respective companies.
-
Page 3: Table Of Contents
Specifications Label ........2 WIDTH �����������������������������������������������������19 Resources ...........2 HEIGHT ���������������������������������������������������19 Console Revision History......2 FONT �������������������������������������������������������19 Daktronics Exchange and Repair & Return Programs ........3 Radio Diagnostics ........20 Exchange Program ��������������������������������3 Segment Timer Operation ����������������22 Repair & Return Program �����������������������4 Segment Timer Overview ......22 Daktronics Warranty &... - Page 4 Table of Contents Pitch Count Balls +1, Pitch Count Strikes New Code ���������������������������������������������39 +1, Foul Balls +1, In Play +1, Clear Pitch Dimming Menu �������������������������������������39 Count �����������������������������������������������������30 Radar Gun Type ������������������������������������39 Edit .............31 Speed Adjust Coefficient ���������������������40 Inning +1 ������������������������������������������������31 Select Speed Range ����������������������������41 Runs +1 ��������������������������������������������������31 Speed Indicator ������������������������������������41...
- Page 5 Table of Contents Score (+1/+2/+3/-1) �����������������������������52 Score (+1/+2/+3/+6/-1) �����������������������66 Team Fouls (+1/-1) �������������������������������52 Quarter +1 ���������������������������������������������66 Period +1 �����������������������������������������������52 Time Out On/Off������������������������������������66 Time Out On/Off������������������������������������52 Menu ............66 New Game ��������������������������������������������66 Menu ............53 New Game ��������������������������������������������53 New Code ���������������������������������������������66 New Code ���������������������������������������������53 Dimming Menu �������������������������������������67 Dimming Menu �������������������������������������53 Home Roster, Guest Roster ������������������67...
- Page 6 Table of Contents Delete Penalty ��������������������������������������76 Dimming Menu �������������������������������������87 Home Roster, Guest Roster ������������������87 Edit .............77 Time Out ������������������������������������������������77 Display Menu ����������������������������������������87 Score, Shots on Goal, Saves, Ground Time of Day �������������������������������������������87 Balls, Face Offs ��������������������������������������77 Edit Settings ..........87 Period +1 �����������������������������������������������77 Main Clock ��������������������������������������������88 Time Out On/Off������������������������������������77 Corner Kicks/Saves/Fouls ��������������������88...
- Page 7 Table of Contents Switch Output ����������������������������������������94 Match Number +1, Sets +1 ����������������106 Default Settings �������������������������������������94 Sets Won +1, Subs +1 ��������������������������106 12 Track Operation ��������������������������������95 Aces +1, Kills +1, Blocks +1, Digs +1 �106 Time Out On/Off����������������������������������106 Track Keys ..........95 Menu ............107 Reset ������������������������������������������������������95 New Game ������������������������������������������107...
- Page 8 Table of Contents Home Roster, Guest Roster ����������������118 Dimming Menu �����������������������������������127 Weight Class ���������������������������������������118 Home Roster, Guest Roster ����������������127 Display Menu ��������������������������������������118 Display Menu ��������������������������������������127 Time of Day �����������������������������������������118 Time of Day �����������������������������������������127 Auto Time ��������������������������������������������128 Edit Settings ..........119 Main Clock ������������������������������������������119 Edit Settings ..........128 Blood/Injury Time ��������������������������������119 17 Strikeout Count Operation �������������129...
- Page 9 Table of Contents Time of Day �����������������������������������������135 Try, Conversion, Drop Goal, Penalty Goal �����������������������������������������������������146 Default Settings �����������������������������������135 Tackles (+1/-1) ������������������������������������146 19 Water Polo Operation ���������������������136 Reset Tackles ��������������������������������������147 Water Polo Keys ........136 Edit ............147 Time Out On/Off����������������������������������136 Half +1 ��������������������������������������������������147 Penalty Time ����������������������������������������136 Time Out ����������������������������������������������147 Enable Penalty Clocks �����������������������136...
- Page 10 Home (Yellow) Roster, Guest (Red) Volleyball ..........229 Roster ���������������������������������������������������159 Wrestling ..........230 Display Menu ��������������������������������������160 Supplementary Documents �����������231 Time of Day �����������������������������������������160 Daktronics Warranty and Limitation Edit Settings ..........160 of Liability�����������������������������������������237 Main Clock ������������������������������������������160 Show Break Time ��������������������������������161 Show Hammer ������������������������������������161 Time Outs ���������������������������������������������161 Game Ends ������������������������������������������162...
-
Page 11: Introduction
5000 series control consoles. For ® additional information regarding the safety, installation, operation, or service of this system, refer to the telephone numbers listed in Daktronics Exchange and Repair & Return Programs (p� 3). Important Safeguards Read and understand all instructions, both general and for specific sports. -
Page 12: Specifications Label
Reference Drawing: System Riser Diagram ..................DWG-1007804 Daktronics identifies manuals by the DD or ED number located on the cover page. Console Revision History For a complete history of revisions to the console firmware, refer to All Sport & OmniSport Revision Histories (DD3679410), available online at www.daktronics.com/manuals. -
Page 13: Daktronics Exchange And Repair & Return Programs
Fill out and attach the enclosed UPS shipping document. c� Ship the part to Daktronics. 3� The defective or unused parts must be returned to Daktronics within 5 weeks of initial order shipment� If any part is not returned within five (5) weeks, a non-refundable invoice will be presented to the customer for the costs of replenishing the exchange parts inventory with a new part. -
Page 14: Repair & Return Program
Brookings, SD 57006 Daktronics Warranty & Limitation of Liability The Daktronics Warranty & Limitation of Liability is located at the end of this manual. The Warranty is independent of Extended Service agreements and is the authority in matters of service, repair, and display operation. -
Page 15: Basic Operation
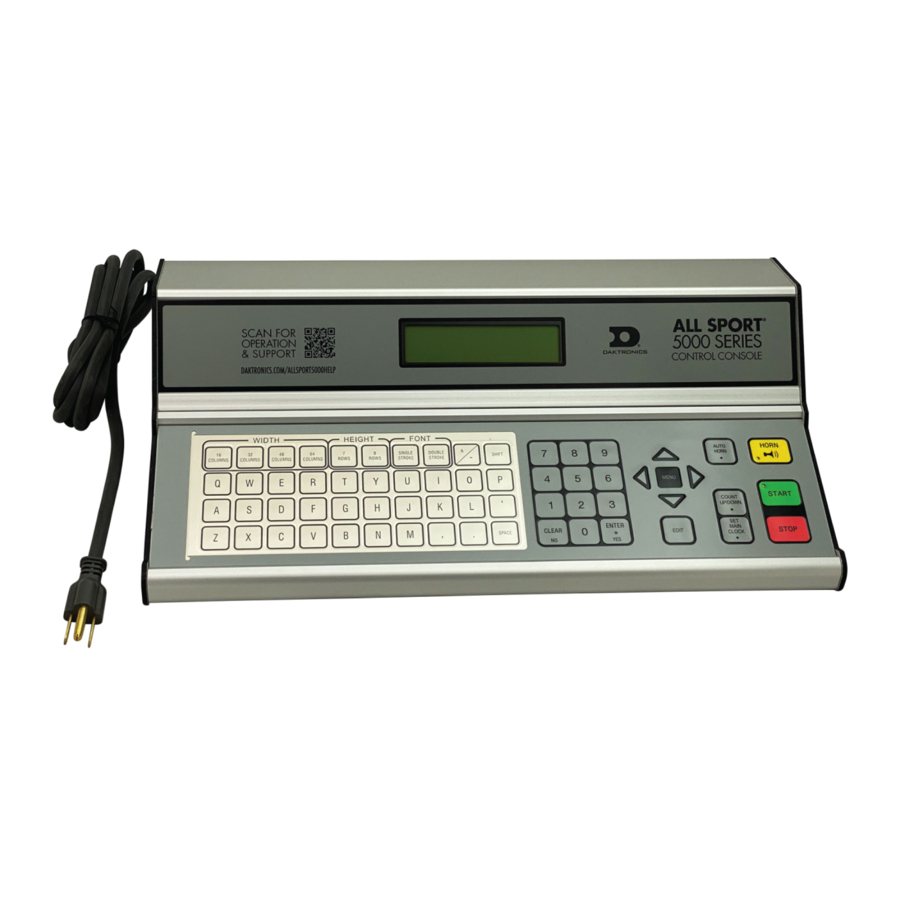
Basic Operation Console Operation The console face consists of a 2-line by 16-character liquid crystal display (LCD), number/ menu keypads, horn/clock controls with LED status indicators, and an area for a sport- specific insert. Refer to Figure 3 to locate these components on the control console face. Horn Control Clock... -
Page 16: Sport Inserts
Sport Inserts Sport inserts allow one console to control multiple sports. Select the proper insert from the chart below and slide it into the insert opening on the left side of the console until it stops. To remove a sport insert, pull on the tab that extends from the left side of the console. If an insert is lost or damaged, a printed copy of the insert drawing from Appendix B may be used until a replacement can be ordered. -
Page 17: Start Up
On most inserts, certain keys have been grouped together under the heading Home or Guest. These keys are team keys and work the same for both teams. They affect the statistics only for that one team. Keys not under one of these headings are game keys. They are general keys for the progress of the game (such as period or quarter). -
Page 18: Enter/Yes
Enter/Yes The <ENTER/YES*> key has two functions: • Completes an action. As a reminder to press this key, an asterisk appears on the LCD. Serves as <YES> for input prompts (Y). • Clear/No The <CLEAR/NO> key has two functions: • Clears the LCD of numerical information. -
Page 19: Count Up/Down
Display Action Press <SET MAIN CLOCK> three times to display the configured MAIN CLOCK -EDIT time for break length. BREAK MM:SS To change the break length and set the main clock, enter the MM:SS = minutes, seconds new time in minutes and seconds using the number pad, and then press <ENTER>. -
Page 20: Auto Horn
Auto Horn Display Action Press <1> to select ON (default), or press <2> to select OFF. The AUTO HORN- ON amber LED on the <HORN> key is on when the Auto Horn feature 1-ON, 2-OFF is enabled. The LED is off when the Auto Horn feature is disabled and the horn is in Manual mode. -
Page 21: Setting Radio Channels
Channel Selection; Multiple Broadcast Group, Gen IV ......... DWG-203113 Installation Details, Gen VI Channel Selection Guide ........DWG-1109870 The radio receiver units used in Daktronics scoreboards have a channel (CHAN) switch that can be set from 1–8. The receivers also have a broadcast group (BCAST) setting. The broadcast group defines a group of radio receivers that “listen”... -
Page 22: Single Controller System
An example of this type of system is a football field with a scoreboard in one or both end zones displaying the same information. HOME GUEST PERIOD DAKTRONICS BCAST 1, CHAN 01 HOME GUEST BCAST 1, CHAN 01... -
Page 23: Broadcast Group
BCAST 1, CHAN 01 DAKTRONICS HOME GUEST Multiple Controller System with Single Broadcast Group BCAST 1, CHAN 01 PERIOD DAKTRONICS In a multiple controller system with a single broadcast group (Figure 7), there may be BCAST 1, CHAN 01 one console for each scoreboard and/or one master controller that can run every scoreboard at one time or take control of a specific scoreboard. -
Page 24: Broadcast Groups
HOME GUEST HOME GUEST PERIOD PERIOD DAKTRONICS DAKTRONICS BCAST 1, CHAN 01 BCAST 1, CHAN 02 BCAST 1, CHAN 01 BCAST 1, CHAN 02 BCAST 0, CHAN 00... -
Page 25: Menu
Typically, all multiple controller systems will use BCAST 1, CHAN 1 for the first controller in Broadcast Group 1 and BCAST 2, CHAN 1 for the first controller in Broadcast Group 2. All other consoles in a group are added sequentially. Display Action The LCD will toggle between... -
Page 26: New Code
The LCD will show if the setting is ON or OFF. Press <1> to turn it on, or press <2> to turn it off. SYNC TO CHAN ON Note: This setting should remain ON unless instructed by 1-ON, 2-OFF Daktronics to turn it off. Basic Operation... -
Page 27: Time Of Day
Display Action Press <ENTER> to view or set the clock caption setting. MENU- DISPLAY CLOCK CAPTIONS The LCD will show if the setting is ON or OFF. Press <1> to turn it on, or press <2> to turn it off. CLOCK CAPTION- 1-ON, 2-OFF Press <ENTER>... -
Page 28: Switch Output
Switch Output The All Sport 5000 console has a relay switch that can be used to control external devices. The switch can be configured to operate under different clock or horn conditions. The default setting is 1-CLOCK= 0. 1� Press the number key (<0>, <1>, <2>, <3>) as a shortcut or use the left and right arrow keys to select the desired setting. -
Page 29: Team Name Entry
Team Name Entry Certain scoreboards may be equipped with Team Name Message Centers (TNMCs), LED matrix displays that show team names, abbreviations, or short messages. The team name entry function is typically accessed by pressing the <MENU> key and navigating to the HOME or GUEST ROSTER submenu (refer to an individual sport section for more information). -
Page 30: Radio Diagnostics
TNMC Font A B C D E F G H I J K L M N O P Q R S T U V W X Y Z Double Stroke - 7 7 7 7 7 7 7 7 2 7 7 6 9 7 7 7 7 7 7 6 7 7 9 8 8 7 Alternate Narrow* *To access Alternate Narrow fonts, press the <SHIFT>... - Page 31 Display Action Press <ENTER> to begin the radio channel test, or press the down RADIO TEST or up arrows to select another test. -RADIO CHAN This test shows the current Broadcast Group and Channel number settings in the console. This test also sends a command BCAST X CHAN Y to the radio receiver in the scoreboard to show the receiver’s...
-
Page 32: Segment Timer Operation
Segment Timer Operation Sport Insert: LL-2475 (Code 100 is for the dedicated Segment Timer) The Sport Insert drawing is located in Appendix B. The Quick Reference is located in Appendix D. Reference Drawings: Insert, Segment Timer ..................DWG-129357 Refer to Section 2: Basic Operation (p� 5) for information on how to start up the console and use the sport insert. -
Page 33: Accessing 2-Digit Or 6-Digit Display Segment Timer
Display Action After the main clock has been stopped, press the <MENU> MENU- MAIN ENTER key and press the down or up arrows until the LCD at left is DISPLAY MENU? displayed. Press <YES> to enter the display menu. Press <YES> to exit the sport code and run the segment timer MENU-DISPLAY RUN program. -
Page 34: Last Segment
Last Segment This key sets the last segment in a range of segments to run when <START> is pressed. Display Action Press <LAST SEGMENT •> and enter the segment to be set as LAST SEGMENT the last segment. Press <ENTER> to accept the time and exit the function. -
Page 35: Auto Stop
Auto Stop This key is the auto stop function of the console. Note: To set the console to stop after the last segment in the series is completed, the auto stop at each segment setting must be set to NO. Display Action Press <AUTO STOP>... -
Page 36: New Code
New Code Display Action Press <ENTER> to switch to a different sport code through the MENU- MAIN SELECT CODE prompt. Refer to Start Up (p� 7) for more NEW CODE? information on sport codes. Warning Time Display Action Enter the warning time in minutes and seconds, and then press WARNING TIME <ENTER>. -
Page 37: Baseball Operation
If an insert is lost/damaged, use a copy of the insert drawing until a replacement arrives. Use the label sheet provided with the console (Daktronics part # LL-2458) to attach the correct code number label to the sport insert in the designated location. Write the code number in the space below. -
Page 38: Out +1
Out +1 The current number of outs is displayed on the main LCD screen. Press <OUT +1> to increment the current number of outs. Press <OUT +1> to set the out value to 0 when the current value is 3. The <OUT +1>... -
Page 39: Error
Hit, Error, Fielder’s Choice, Clear Hit/Error The <HIT> and <ERROR •> keys are used to turn on the Hit or Error indicator or digits. On some scoreboards, the <ERROR •> key can also display the player’s position when the Error Position setting is on. The <FIELDER’S CHOICE>... -
Page 40: Hits +1, Errors +1, Left On Base +1
Display Action When the Score By Inning setting is DISABLED: TEAM RUNS: +1 HOME Press the appropriate <RUNS +1> key to increment the total number of runs for the home or guest team. NN = current setting The LCD shows which key was pressed and the new value for the corresponding team. -
Page 41: Edit
Edit Press <EDIT> followed by one of the keys below to quickly edit the value. Inning +1 Display Action Press <EDIT> followed by <INNING +1> to display the current INNING EDIT setting. Enter the correct value using the number pad, and then press NN = current setting <ENTER>. -
Page 42: Menu
Menu Press <MENU> to access general and sport-specific options. Use the up and down arrow keys to scroll through the menu list. Press <MENU> again at any time to return to the game in progress. New Game Display Action Press <ENTER> to clear all data for the current game in progress MENU- MAIN and begin a new game. -
Page 43: Display Menu
Display Action This function clears pitch count statistics and should only be CLEAR HOME used before the start of a game or when a new pitcher enters PITCHES Y/N? the game. Press <YES> to clear the home team pitcher’s pitches thrown. Display Menu Refer to Display Menu (p�... -
Page 44: Auto Increment Inning
Display Action Press <YES> to use the <BALL COUNT +1> and <STRIKE COUNT +1> AUTO INCREMENT keys to automatically increment the Ball and Strike pitch count PITCHES Y/N? N* data. Press <NO> to use the <PITCH COUNT BALLS +1> and <PITCH COUNT STRIKES +1>... -
Page 45: Display Innings
Example: Inning 1 2 3 4 5 6 7 8 9 becomes 2 3 4 5 6 7 8 9 10 Score 0 0 1 0 2 0 0 0 0 0 1 0 2 0 0 0 0 _ Select BLANK when the inning numbers are in a fixed position using decals. -
Page 46: Switch Output
Switch Output Refer to Switch Output (p� 18) for more information. Default Settings Print this page if necessary, and record any custom settings for this installation: Setting Default Custom 1 Custom 2 Custom 3 Custom 4 Period Length 60:00 Error Position Auto Increment Pitches Auto Increment... -
Page 47: Pitch & Speed Operation
For more information about radar gun setup, refer to the Radar Gun Speed of Pitch Systems Configuration Manual (ED-12224) or the Speed of Pitch Systems Setup Manual (DD3394576), both available online at www.daktronics.com/manuals. Pitch & Speed Keys Pitch Keys Note: In Auto mode, the pitch keys are not used. -
Page 48: Speed
Speed Display Action The <SPEED •> key edits the value of speed that is displayed EDIT SPEED on the scoreboard. The value is edited as miles per hour or NNN* MPH kilometers per hour depending on the current display setting. NNN = current setting Show MPH, Show KPH The <SHOW MPH>... -
Page 49: Edit
Edit User-Defined Keys User-defined keys are only available in Manual Mode. Display Action Press <EDIT> then <USER 1>, <USER 2>, <USER 3>, or <USER 4>. EDIT USER N Use the TEAM NAME (LL-2441) insert to type in a user-defined USER N pitch name of up to 16 characters, and then press <ENTER>. -
Page 50: Speed Adjust Coefficient
Display Action If CUSTOM was selected, additional settings must be entered. Press the left or right arrow keys to select one of the following RADAR GUN TYPE custom data formats, and then press <ENTER>. CUSTOM ###000 • ###000 (JUGS) • ###: (STALKER SPORT Gen I and all Gen II models) •... -
Page 51: Select Speed Range
Select Speed Range Display Action This setting allows the operator to select a speed range that will SELECT RANGE be accepted from the radar gun. Enter the minimum speed SPEED: >NN using the number pad, and then press <ENTER>. Then enter the maximum speed and press <ENTER>. -
Page 52: Rtd Item Numbers
RTD Item Numbers The Pitch and Speed function uses RTD item numbers to display pitch information. Items 23-25 will display either MPH or KPH depending on cycle and display settings. Item # Data Item # Data Home Total Pitch count x1 MPH x100 Home Strike Out count x100 MPH x10... -
Page 53: Clock Console Operation
If an insert is lost/damaged, use a copy of the insert drawing until a replacement arrives. Use the label sheet provided with the console (Daktronics part # LL-2458) to attach the correct code number label to the sport insert in the designated location. Write the code number in the space below. -
Page 54: Set Reset Time 1
Set Reset Time 1 Display Action <SET RESET TIME 1 •> sets the current Reset 1 value for the shot Basketball Mode: clock or play clock timer. SHOT CLOCK-EDIT RESET 1 MM:SS* Football Mode: PLAY CLOCK-EDIT RESET 1 MM:SS* MM:SS = minutes, seconds Set Reset Time 2 Display Action... -
Page 55: Basketball Operation
If an insert is lost/damaged, use a copy of the insert drawing until a replacement arrives. Use the label sheet provided with the console (Daktronics part # LL-2458) to attach the correct code number label to the sport insert in the designated location. Write the code number in the space below. -
Page 56: Recall Shot Time
Display Action Press <SET SHOT TIME •> three times to display the configured SHOT CLOCK-EDIT shot clock Reset 2 time. RESET 2 MM:SS* To accept the shot clock Reset 2 time and return to the game, MM:SS = minutes, seconds press <ENTER>. -
Page 57: Period +1
Period +1 Display Action Press <PERIOD +1> to increment the period number. PERIOD- +1 Note: The full and partial time outs and team fouls are automatically reset at halftime. N = current setting Time Out The home and guest <TIME OUT> keys are used to decrement the number of time outs remaining and start the time out clock. -
Page 58: Team Fouls (+1/-1)
Display Action If the player is not in the roster, this prompt asks if the player HOME PLAYER NN should be added. NOT FOUND, ADD? Press <YES> to add the player to the roster and credit the points NN = current setting to that player. -
Page 59: Bonus
Player Note: If player stats are being received from the Daktronics Scoring-Timing Interface (DSTI), the PLAYER, IND SUB, and MASS SUB keys will be disabled. The LCD displays the messages shown below when these keys are pressed. Refer to ED- 13009 for more information about DSTI. -
Page 60: Individual Substitution
Display Action When the home or guest <PLAYER •> key is pressed, this prompt HOME PLAYER NN* asks the jersey number of the player to be edited. Enter the jersey number using the number pad, and then press NN = current setting <ENTER>. -
Page 61: Mass Substitution
Display Action This message is displayed for the following reasons: IND SUB- HOME • The player going into the game is already marked as in. SUB NOT MADE • The player coming out of the game is not marked as in. This message is displayed if the player going in the game is not NOT FOUND, ADD? found in the roster. -
Page 62: Score (+1/+2/+3/-1)
Display Action Press <EDIT> followed by <TIME OUT> for the home or guest team TIME OUTS-HOME to display the current setting of full time outs. FULL Enter the correct full time outs value using the number pad, and N = current setting then press <ENTER>. -
Page 63: Menu
Menu Press <MENU> to access general and sport-specific options. Use the up and down arrow keys to scroll through the menu list. Press <MENU> again at any time to return to the game in progress. New Game Display Action Press <ENTER> to clear all data for the current game in progress MENU- MAIN and begin a new game. -
Page 64: Display Menu
Display Action Press <YES> to assign jersey numbers for all players in the roster. MENU- HOME EDIT PLAYERS? Press <NO> to exit the submenu and return to the Main menu. Once EDIT PLAYERS is selected, enter the jersey number for that MENU- HOME player from the official roster and press <ENTER>. -
Page 65: Shot Clock
Display Action When the main clock is set to count down and tenths of a MAIN CLOCK-MODE second is selected, the main clock displays in tenths of a second TENTH SECOND? Y remaining when the time is below one minute. Press <YES>... -
Page 66: Time Outs
Display Action Press <YES> to blank the shot clock time when the shot clock SHOT CLOCK-MODE time is greater than or equal to the main clock time. The shot AUTO BLANK? Y clock is reset and stopped when the display is blanked to eliminate inadvertent sounding of shot clock horn. -
Page 67: Team Score
Display Action Press <YES> to enable FIBA mode (international rules). This FIBA MODE will display number of time outs taken on the scoreboard. At Y/N? N the beginning of a new game, time outs will start at 0 and increment as they are taken, up to the max configured value. Press <NO>... -
Page 68: Score By Quarter
Score by Quarter Display Action This feature allows for scores to be recorded by quarter. This SCORE BY QUARTER data is available on the RTD output. Y/N? Press <YES> to score by quarter, or press <NO> to not score by quarter. -
Page 69: Football Operation
If an insert is lost/damaged, use a copy of the insert drawing until a replacement arrives. Use the label sheet provided with the console (Daktronics part # LL-2458) to attach the correct code number label to the sport insert in the designated location. Write the code number in the space below. -
Page 70: Set Play Clock
Set Play Clock The SET PLAY CLOCK setting is used by the remote play clock console. The configured play clock times are set using the EDIT SETTINGS menu when a new code is selected. When RESET ON STOP is set to yes (Y), the STOP switch automatically resets the play clock using the RESET 1 time and the RESET button uses the RESET 2 time. -
Page 71: Recall Last Down
Recall Last Down The <RECALL LAST DOWN> key is used to re-display the Ball On, Down, To Go, and Possession values of the previous play if a new value has been incorrectly entered. If Auto Calculate (p� 69) is off, this function is disabled. Display Action Press <RECALL LAST DOWN>... -
Page 72: Ball
Ball On The <BALL ON •> key is used to manually enter the field position (yard line) of the ball. Changing the ball on will vary depending on the Auto Calculate (p� 69) setting. Display Action Auto Calculate DISABLED: BALL ON NN* •... -
Page 73: Score (+1/+2/+3/+6/-1)
Display Action Press <TIME OUT> to display the number of full time outs TIME OUTS-HOME remaining. To accept the full time out and start the time out FULL clock, press <ENTER>. N = current setting To cancel the full time out, press <CLEAR>. Press <TIME OUT>... -
Page 74: Yards Rushing
Refer to Ball On (p� 62) for more information. NN = current setting Note: If player stats are being received from the Daktronics Scoring-Timing Interface (DSTI) the YARDS RUSHING/PASSING keys will be disabled. The LCD displays the messages below when these keys are pressed. Refer to ED-13009 for more information about DSTI. -
Page 75: Yards Passing
Yards Passing Press <YARDS PASSING •> to manually enter the number of passing yards gained or lost on a play. Display Action Enter the number of passing yards gained or lost on a play using PASSING -HOME the number pad, and then press <ENTER>. YARDS NN* Press <CLEAR>... -
Page 76: Score (+1/+2/+3/+6/-1)
Score (+1/+2/+3/+6/-1) Display Action Press <EDIT> and any of the SCORE keys for the home or guest TEAM SCORE- EDIT team to display the current team score setting. HOME NNN* Enter the correct team score value using the number pad, and NNN = current setting then press <ENTER>. -
Page 77: Dimming Menu
Dimming Menu Refer to Dimming Menu (p� 16). Home Roster, Guest Roster Use the Home Roster and Guest Roster menus to set up team names. Home Roster is used as an example below. Display Action Press <ENTER> to select the Roster submenu. MENU- ROSTER SELECT HOME... -
Page 78: Play Clock
Display Action When the main clock is set to count down and tenths of a MAIN CLOCK-MODE second is selected, the main clock displays in tenths of a second TENTH SECOND? Y remaining when the time is below one minute. Press <YES>... -
Page 79: Center Field Yard Line
The number for each type of time out must be manually entered for an overtime period using the <EDIT> <TIME OUT> key sequence for each team. Display Action Enter the number of full time outs using the number pad, and TIME OUTS- MODE then press <ENTER>. -
Page 80: First Down Yards
First Down Yards Display Action Press <1> to set the number of yards to first down at 10 yards . FIRST DOWN YARDS 1=10* 2=15 Press <2> to set the number of yards to first down at 15 yards. Number of Downs Display Action Enter the correct number of downs using the number pad, and... -
Page 81: Default Settings
Default Settings Print this page if necessary, and record any custom settings for this installation: Setting Default Custom 1 Custom 2 Custom 3 Custom 4 Tenth of a Second Period Length 12:00 Break Length 20:00 Overtime Length 5:00 Pre-Game Length 20:00 Post-Game Length 30:00 Play Clock Reset 1... -
Page 82: Hockey/Lacrosse/Handball
If an insert is lost/damaged, use a copy of the insert drawing until a replacement arrives. Use the label sheet provided with the console (Daktronics part # LL-2458) to attach the correct code number label to the sport insert in the designated location. Write the code number in the space below. -
Page 83: Enable Penalty Clocks
Enable Penalty Clocks Press <ENABLE PENALTY CLOCKS> to allow the penalty clocks to count when the main clock is on. Disable Penalty Clocks Press <DISABLE PENALTY CLOCKS> to disable the penalty clocks from counting when the main clock is on. Minor Penalty, Major Penalty The <MINOR PENALTY>... -
Page 84: Player Penalty
Display Action To exit the running time out clock, press <TIME OUT>. TIME OUTS-HOME This will turn the time out OFF. This message appears when there are no full time outs or partial TIME OUTS-HOME time outs remaining. NO TIME OUTS Player Penalty Display Action... -
Page 85: Recall Shot Time
Recall Shot Time Display Action Press <RECALL SHOT TIME> followed by <YES> to recall the shot SHOT CLOCK-MODE time that was remaining before the last shot clock reset was RECALL Y/N pressed. To cancel the recall, press <NO>. Set Shot Time Display Action Press <SET SHOT TIME>... -
Page 86: Auto Horn Interval Timer
Auto Horn Interval Timer The Auto Horn Interval Timer function can be used to automatically sound the horn at regular intervals, for instance, to indicate player substitutions. Display Action Press <AUTO HORN •> followed by <1> to ensure the auto horn AUTO HORN- ON is enabled. -
Page 87: Edit
Edit Press <EDIT> followed by one of the keys below to quickly edit the value. Time Out Note: Only the time outs configured in the EDIT SETTINGS menu are displayed on the LCD and available for selection. Display Action Press <EDIT> followed by <TIME OUT> for the home or guest team TIME OUTS-HOME to display the current setting of full time outs. -
Page 88: Menu
Display Action After accepting or rejecting the full time outs time setting, the TIME OUTS-EDIT partial time outs time setting is displayed. PARTIAL MM:SS* Enter the correct partial time out time value using the number MM:SS = minutes, seconds pad, and then press <ENTER>. Menu Press <MENU>... -
Page 89: Display Menu
Display Menu Refer to Display Menu (p� 16) for more information. Time of Day Refer to Time of Day (p� 17) for more information. Edit Settings Display Action From the Main Menu, select the EDIT SETTINGS submenu to MENU- MAIN modify the settings below. -
Page 90: Shot Clock
Shot Clock Display Action This setting is used for the <RESET> button on the remote shot SHOT CLOCK-TIME clock control console. RESET 1 MM:SS* Note: The current setting for the <RESET> time displays on the LCD until the first number key is pressed. SHOT CLOCK-TIME RESET 2 MM:SS*... -
Page 91: Select Captions
Display Action Enter the number of full time outs using the number pad, and TIME OUTS- MODE then press <ENTER>. FULL N = current setting Enter the amount of time for a full time out in minutes and TIME OUTS- TIME seconds using the number pad, and then press <ENTER>. -
Page 92: Default Settings
Default Settings Print this page if necessary, and record any custom settings for this installation: Setting Default Custom 1 Custom 2 Custom 3 Custom 4 Tenth of a Second No. of Periods Period Length 15:00 Break Length 10:00 Overtime Length 5:00 Pre-Game Length 20:00... -
Page 93: 10 Soccer Operation
If an insert is lost/damaged, use a copy of the insert drawing until a replacement arrives. Use the label sheet provided with the console (Daktronics part # LL-2458) to attach the correct code number label to the sport insert in the designated location. Write the code number in the space below. -
Page 94: Half +1
Display Action Press <TIME OUT ON/OFF> to display the configured time for full TIME OUTS-SELECT time out length. To start the full time out, press <ENTER>. FULL MM:SS To cancel the full time out, press <CLEAR>. MM:SS = minutes, seconds Press <TIME OUT ON/OFF>... -
Page 95: Score (+1/-1)
Score (+1/-1) The home and guest <SCORE +1> and <SCORE -1> keys are used to increment and decrement the team score. Display Action Press the appropriate score key to increment or decrement the TEAM SCORE: +1 score for the home or guest team. HOME The LCD shows which key was pressed and the new value for NNN = current setting... -
Page 96: Time Out
Time Out Note: Only the time outs configured in the EDIT SETTINGS menu are displayed on the LCD and available for selection. Display Action Press <EDIT> followed by <TIME OUT> for the home or guest team TIME OUTS-HOME to display the current setting of full time outs. FULL Enter the correct full time outs value using the number pad, and N = current setting... -
Page 97: New Code
New Code Display Action Press <ENTER> to switch to a different sport code through the MENU- MAIN SELECT CODE prompt. Refer to Start Up (p� 7) for more NEW CODE? information on sport codes. Dimming Menu Refer to Dimming Menu (p� 16). Home Roster, Guest Roster Use the Home Roster and Guest Roster menus to set up team names. -
Page 98: Main Clock
Main Clock The settings for the Main Clock are used with the <SET MAIN CLOCK> key. The period and break lengths are used differently depending on the direction of the main clock. For count down, the main clock is set to the selected length, decrements towards zero, and stops at zero. -
Page 99: Penalty/Tol
Display Action A warning horn can be configured to signal the end of a full TIME OUTS- MODE time out. While the time out clock is counting down, the horn will WARNING MM:SS* sound for one second when the warning time is reached. Enter a zero for the time to disable the warning horn. -
Page 100: 11 Tennis Operation
If an insert is lost/damaged, use a copy of the insert drawing until a replacement arrives. Use the label sheet provided with the console (Daktronics part # LL-2458) to attach the correct code number label to the sport insert in the designated location. Write the code number in the space below. -
Page 101: Games Won +1
Games Won +1 Display Action Press <GAMES WON +1> to increment the number of games won GAMES WON + 1 in the current set for the respective side. SET N TOP XX N = current set XX = current score Sets Won +1 Display Action... -
Page 102: Match Number +1
Match Number +1 Display Action Press <MATCH NUMBER +1> to increment the current match MATCH- + 1 number. NNNN NNNN = current setting Set +1 Press <SET +1> to increment the current set number. The new set number and new set games won values will be instantly updated on the LCD. -
Page 103: Matches Won +1
Matches Won +1 Display Action Press <EDIT> followed by <MATCHES WON +1> to edit the current MATCHES WON EDIT matches won for the selected team. TOP NN* Enter the correct matches won value using the number pad, NN = current setting and then press <ENTER>. -
Page 104: Display Menu
Display Action Use the TEAM NAME (LL-2441) insert to change the Team Name TOP - TEAM NAME Message Center (TNMC) settings� _OP NAME1 Use the <COLUMNS>, <ROWS>, and <STROKE> keys to select the WIDTH, HEIGHT, and FONT of the TNMC. The TNMC is updated after each selection is completed. -
Page 105: 12 Track Operation
If an insert is lost/damaged, use a copy of the insert drawing until a replacement arrives. Use the label sheet provided with the console (Daktronics part # LL-2458) to attach the correct code number label to the sport insert in the designated location. Write the code number in the space below. -
Page 106: Lane
Lane Display Action Press <LANE •> to set the value of the lane digits on the LANE: N* scoreboard. N = current setting This message is displayed when an external timer code is LANE: N selected. Use the external timer to modify the value. EXTERNAL TIMER N = current setting Place... -
Page 107: Score +1
Display Action This message is displayed on the LCD if the GUEST 2, 3 VALUE is EVENT: NNN set to EVNT/HT AND an external timer code is selected. EXTERNAL TIMER Note: The event or heat value will be automatically updated NNN = current setting to correspond with the external timer value if an external timer code is selected. -
Page 108: Menu
Menu Press <MENU> to access general and sport-specific options. Use the up and down arrow keys to scroll through the menu list. Press <MENU> again at any time to return to the game in progress. New Game Display Action Press <ENTER> to clear all data for the current game in progress MENU- MAIN and begin a new game. -
Page 109: Edit Settings
Edit Settings Display Action From the Main Menu, select the EDIT SETTINGS submenu to MENU- MAIN modify the settings below. EDIT SETTINGS? Guest 2 Score (Event), Guest 3 Score (Heat) Key Function Display Action This determines the function of the <GUEST 2 SCORE (EVENT) •> GUEST 2,3 VALUE or <GUEST 3 SCORE (HEAT) •>... -
Page 110: 13 Volleyball Operation
If an insert is lost/damaged, use a copy of the insert drawing until a replacement arrives. Use the label sheet provided with the console (Daktronics part # LL-2458) to attach the correct code number label to the sport insert in the designated location. Write the code number in the space below. -
Page 111: Time Out
Time Out The home and guest <TIME OUT> keys are used to decrement the number of time outs remaining and start the time out clock. The scoreboard indicator is turned on when the type of time out is selected (full or partial). The scoreboard indicator is turned off when the time out clock expires or is stopped. -
Page 112: Sets Won +1, Subs +1
Sets Won +1, Subs +1 The <SETS WON +1> and <SUBS +1> keys are both used to increment their respective totals. <SETS WON +1> is used as an example below. Display Action Press the appropriate key to increment statistics for the home or SETS WON: guest team. -
Page 113: In Game/Out Of Game
Player Note: If player stats are being received from the Daktronics Scoring-Timing Interface (DSTI), the PLAYER, IND SUB, and MASS SUB keys will be disabled. The LCD displays the messages shown below when these keys are pressed. Refer to ED- 13009 for more information about DSTI. -
Page 114: Individual Substitution
Display Action If the player is found, the player’s game status and statistics can HOME PLAYER NN be changed by following the steps below. S-I A-XX* K-YY 1� Use the up and down arrow keys to select the player from NN = player number the list. -
Page 115: Mass Substitution
Display Action This message is displayed if the player going out of the game is IND SUB- HOME not found in the roster. NOT FOUND NN Press <INDIV� SUB� •> to try entering the sub again. NN = current setting Mass Substitution Display Action... -
Page 116: Score (+1/-1)
Score (+1/-1) Display Action Press <EDIT> and either of the SCORE keys for the home or guest TEAM SCORE: EDIT team to display the current team score setting. CURR: NNN* Enter the correct team score value using the number pad, and NNN = current setting then press <ENTER>. -
Page 117: Menu
Display Action After accepting or rejecting the full time outs time setting, the TIME OUTS-EDIT partial time outs time setting is displayed. PARTIAL MM:SS* Enter the correct partial time out time value using the number MM:SS = minutes, seconds pad, and then press <ENTER>. Menu Press <MENU>... -
Page 118: Display Menu
Display Action Type in a team abbreviation of up to 10 characters and press HOME- TEAM ABBR <ENTER>. _OME Reinsert the VOLLEYBALL (LL-2434) insert to continue� Press <YES> to assign jersey numbers for all players in the roster. MENU- HOME EDIT PLAYERS? Press <NO>... -
Page 119: Time Outs
Display Action Enter the correct amount of time per period in minutes and MAIN CLOCK-TIME seconds using the number pad, and then press <ENTER>. PERIOD MM:SS* Note: Pressing <ENTER> to select the period time as the main MM:SS = minutes, seconds clock setting will increment the current period number if the clock value was previously zero. -
Page 120: Team Stats
Display Action Press <YES> to enable FIBA mode (international rules). This FIBA MODE will display number of time outs taken on the scoreboard. At Y/N? N the beginning of a new game, time outs will start at 0 and increment as they are taken, up to the max configured value. Press <NO>... -
Page 121: Switch Output
Switch Output Refer to Switch Output (p� 18) for more information. Default Settings Print this page if necessary, and record any custom settings for this installation: Setting Default Custom 1 Custom 2 Custom 3 Custom 4 Tenth of a Second Period Length 60:00 Break Length... -
Page 122: 14 Wrestling Operation
If an insert is lost/damaged, use a copy of the insert drawing until a replacement arrives. Use the label sheet provided with the console (Daktronics part # LL-2458) to attach the correct code number label to the sport insert in the designated location. Write the code number in the space below. -
Page 123: Set Main Clock (Period Times)
Set Main Clock (Period Times) Display Action After the main clock has been stopped, press <SET MAIN MAIN CLOCK -SET CLOCK> to display the current time of the main clock. CURR MM:SS* To change the time, enter the desired time using the number MM:SS = minutes, seconds pad, and then press <ENTER>. -
Page 124: Team Score (+1/-1)
Team Score (+1/-1) Display Action Press <SCORE +1> or <SCORE -1> to increment or decrement the TEAM SCORE- +1 home or guest team score. HOME Total score displays briefly. NNN = current setting Pressing a <TEAM SCORE> key will cause the team scores to show up on the LCD (TM will show on the LCD to indicate this). -
Page 125: Reset Match
Reset Match Display Action Press <YES> to clear all of the data for the last match or the match in progress and begin a new individual match. RESET MATCH? Y/N Press <NO> to resume the match in progress using the current data and exit the Menu. -
Page 126: Start/Stop Recovery Time
Start/Stop Recovery Time Display Action The recovery time is set to the configured recovery time for RECOVERY M:SS each competitor when the <START HOME RECOVERY> or <START AD TM M:SS.T >G GUEST RECOVERY> keys are pressed. M:SS = minutes, seconds When enabled, the recovery times are displayed in the main (recovery timer) clock digits and the corresponding (home or guest) match... -
Page 127: Blood Time
Blood Time Display Action Press <EDIT> followed by either BLOOD TIME key for the home or BLOOD TIME guest team to display the current blood time setting. HOME MM:SS* Enter the maximum allowed blood time in minutes and seconds MM:SS.T = minutes, seconds, using the number pad, and then press the <ENTER>... -
Page 128: Dimming Menu
Dimming Menu Refer to Dimming Menu (p� 16). Home Roster, Guest Roster Use the Home Roster and Guest Roster menus to set up team names. Home Roster is used as an example below. Display Action Press <ENTER> to select the Roster submenu. MENU- ROSTER SELECT HOME... -
Page 129: Edit Settings
Edit Settings Display Action From the Main Menu, select the EDIT SETTINGS submenu to MENU- MAIN modify the settings below. EDIT SETTINGS? Main Clock The settings for the Main Clock are used with the <SET MAIN CLOCK> key. The period length is used differently depending on the direction of the main clock. For count down, the main clock is set to the selected length, decrements towards zero, and stops at zero. -
Page 130: Recovery Time
Recovery Time The maximum allowed recovery times are set for each competitor at the beginning of a match and reset to these times whenever a recovery clock is activated. Display Action Enter the time for recovery time outs in minutes and seconds RECOVERY TIME using the number pad, and then press <ENTER>. -
Page 131: Default Settings
Default Settings Print this page if necessary, and record any custom settings for this installation: Setting Default Custom 1 Custom 2 Custom 3 Custom 4 Tenth of a Second Period Length 3:00 Period 2 Length 3:00 Period 3 Length 3:00 Period 4 Length 3:00 Period 5 Length... -
Page 132: 15 Event Counter Operation
15 Event Counter Operation Sport Insert: 0G-58047 The Sport Insert drawing is located in Appendix B. The Quick Reference is located in Appendix D. Reference Drawings: Insert, Event Counter Codes 371-376 ..............DWG-58047 Refer to the information in Section 2: Basic Operation (p� 5) to start up the console and how to use the sport insert. -
Page 133: Value/Days
Value/Days Display Action Press <VALUE/DAYS •>, enter the number of days for countdown DAYS (0 – 999) using the number pad, and then press <ENTER>. NNN* NNN = current value Use the <SET MAIN CLOCK> key to set the time to be counted. Press <START>... -
Page 134: Time Interval
Time Interval Display Action Press <TIME INTERVAL •> to set the interval time between each INTERVAL increment or decrement. HH:MM:SS* Note: The clock must be stopped to set the time interval. HH:MM.SS = hours, minutes, seconds When <START> is pressed to start the main clock, the controller counts down the time interval to 00:00:00 and adjusts the initial value by the increment or decrement value. -
Page 135: New Game
New Game Display Action Press <ENTER> to clear all data for the current game in progress MENU- MAIN and begin a new game. NEW GAME? New Code Display Action Press <ENTER> to switch to a different sport code through the MENU- MAIN SELECT CODE prompt. -
Page 136: 16 Boxing Operation
16 Boxing Operation Sport Insert: 0G-96892 (Code 0291) The Sport and Team Name Insert drawings are located in Appendix B. Reference Drawings: Insert, Boxing Code 291 ..................DWG-96892 Insert; LL-2441 A/S 5000, Team Name ............... DWG-125290 Refer to the information in Section 2: Basic Operation (p� 5) to start up the console and how to use the sport insert. -
Page 137: Menu
Menu Press <MENU> to access general and sport-specific options. Use the up and down arrow keys to scroll through the menu list. Press <MENU> again at any time to return to the game in progress. New Game Display Action Press <ENTER> to clear all data for the current game in progress MENU- MAIN and begin a new game. -
Page 138: Auto Time
Auto Time Use the Auto Time option to choose automatic time transitions. If turned ON, the time will automatically switch between round and rest time. If OFF is selected, this change must be done manually. ON is the default and is recommended. Display Action Press <1>... -
Page 139: 17 Strikeout Count Operation
17 Strikeout Count Operation Sport Insert: 0G-163409 (Code 5099) The Sport Insert drawing is located in Appendix B. Reference Drawings: Insert; Strike Outs ....................DWG-163409 Refer to the information in Section 2: Basic Operation (p� 5) to start up the console and how to use the sport insert. -
Page 140: Menu
<CLEAR DISPLAY> Frame 1 <RUN PROMO 1> Frame 2 <RUN PROMO 2> Frame 3 <RUN PROMO 3> Frame 4 <RUN PROMO 4> Frame 5 <RUN PROMO 5> Frame 6 <RUN PROMO 6> Frame 7 <RUN PROMO 7> Frame 8 <RUN PROMO 8> Frame 9 <RUN PROMO 9>... -
Page 141: 18 Cricket Operation
18 Cricket Operation Sport Insert: 0G-319507 (Code 5598) The Sport and Team Name Insert drawings are located in Appendix B. Reference Drawings: Insert; LL-2441 A/S 5000, Team Name ............... DWG-125290 Insert; Cricket, A/S 5000 Series ................DWG-319507 Refer to the information in Section 2: Basic Operation (p� 5) to start up the console and how to use the sport insert. -
Page 142: Batsman Number
Batsman Number Display Action Press <BATSMAN NUMBER •> to edit the uniform number of the batsman currently in the game. Enter the correct value using BATSMAN A NN* the number pad, and then press <ENTER>. NN = current setting Batsman Facing Display Action Press <BATSMAN FACING>... -
Page 143: Last Wicket
Last Wicket Display Action Press the <LAST WICKET •> key to enter or edit score that was shown at the last wicket. Enter the correct value using the LAST WICKET NNN* number pad, and then press <ENTER>. NNN = current setting Runs Reqd Display Action... -
Page 144: Edit
Edit Press <EDIT> followed by one of the keys below to quickly edit the value. Wickets, Overs, Extras The +/- <WICKETS>, <OVERS>, and <EXTRAS> keys are edited in the same way. <OVERS +1> is used as an example below. Display Action Press <EDIT>... -
Page 145: Inning Settings
Display Action Use the TEAM NAME (LL-2441) insert to change the Team Name HOME- TEAM NAME Message Center (TNMC) settings� _OME Use the <COLUMNS>, <ROWS>, and <STROKE> keys to select the WIDTH, HEIGHT, and FONT of the TNMC. The TNMC is updated after each selection is completed. -
Page 146: 19 Water Polo Operation
19 Water Polo Operation Sport Insert: 0G-178439 (Code 4498) The Sport and Team Name Insert drawings are located in Appendix B. The Block Diagram drawings are located in Appendix A. Reference Drawings: Block Diagram, A/S 3000 or 5000 Hockey ............DWG-124689 Insert;... -
Page 147: Period +1
Period +1 Display Action Press <PERIOD +1> to increment the period number. PERIOD- +1 The current period number displays briefly. N = current setting Shot Time Display Action Press <SHOT TIME •> to display the current shot clock time. SHOT CLOCK-EDIT CURR MM:SS* To accept the current shot clock time and return to the game,... -
Page 148: Score (+1/-1)
Score (+1/-1) Display Action Press the appropriate score key to increment or decrement the TEAM SCORE- +1 total score for the home or guest team. HOME The LCD shows which key was pressed and the new value for NNN = current setting the corresponding team. -
Page 149: Delete Penalty
Delete Penalty Press <DELETE PENALTY •> to delete a single penalty for the home or guest team. Display Action Use the up and down arrow keys to select the correct penalty, HOME DEL PEN? and then press <ENTER>. 1PNN PNMM:SS #1 Press <CLEAR>... -
Page 150: Period +1
Period +1 Display Action Press <EDIT> followed by <PERIOD +1> to display the current PERIOD- EDIT period setting. Enter the correct period value using the number pad, and then N = current setting press <ENTER>. Time Out On/Off Display Action Press <EDIT>... -
Page 151: Home Roster, Guest Roster
Home Roster, Guest Roster Use the Home Roster and Guest Roster menus to set up team names. Home Roster is used as an example below. Display Action Press <ENTER> to select the Roster submenu. MENU- ROSTER SELECT HOME Use the TEAM NAME (LL-2441) insert to change the Team Name HOME- TEAM NAME Message Center (TNMC) settings�... -
Page 152: Shot Clock
Display Action Enter the correct amount of time per period in minutes and MAIN CLOCK-TIME seconds using the number pad, and then press <ENTER>. PERIOD MM:SS* Note: Pressing <ENTER> to select the period time as the main MM:SS = minutes, seconds clock setting will increment the current period number if the clock value was previously zero. -
Page 153: Penalty Time
Penalty Time Default times can be set for the penalty keys. Display Action Enter the correct default time for a penalty in minutes and PENALTY TIME seconds using the number pad, and then press <ENTER>. SET MM:SS* The penalty time is used as the default when pressing the MM:SS = minutes, seconds <PLAYER PENALTY START •>... -
Page 154: Default Settings
Default Settings Print this page if necessary, and record any custom settings for this installation: Setting Default Custom 1 Custom 2 Custom 3 Custom 4 Tenth of a Second Period Length 15:00 Break Length 10:00 Overtime Length 5:00 Shot Reset 1 0:35 Sync Shot with Main Yes Auto Blank... -
Page 155: 20 Rugby Operation
20 Rugby Operation Sport Insert: 0G-712154 (Code 6690 = Union) (Code 6691 = League) The Sport and Team Name Insert drawings are located in Appendix B. The Block Diagram drawings are located in Appendix A. Reference Drawings: Block Diagrams, A/S 3000 or 5000 Outdoor Sports ......... DWG-124690 Insert;... -
Page 156: Try, Conversion, Drop Goal, Penalty
Display Action Press <TIME OUT> to display the number of full time outs TIME OUTS-HOME remaining. To accept the full time out and start the time out FULL clock, press <ENTER>. N = current setting To cancel the full time out, press <CLEAR>. Press <TIME OUT>... -
Page 157: Reset Tackles
Reset Tackles Display Action Press <RESET TACKLES> to set the current number of tackles back RESET TACKLES to the Start Tackles value. The LCD shows this key was pressed. Edit Press <EDIT> followed by one of the keys below to quickly edit the value. Half +1 Display Action... -
Page 158: Try, Conversion, Drop Goal, Penalty
Try, Conversion, Drop Goal, Penalty Goal The home and guest +/- <TRY>, <CONVERSION>, <DROP GOAL>, and <PENALTY GOAL> keys are edited the same way. <TRY +1> is used as an example below. Display Action Press <EDIT> followed by the appropriate statistic key to display EDIT the current setting. -
Page 159: Display Menu
Display Action Type in a team abbreviation of up to 10 characters and press HOME- TEAM ABBR <ENTER>. _OME Reinsert the RUGBY (0G-712154) insert to continue� Display Menu Refer to Display Menu (p� 16) for more information. Time of Day Refer to Time of Day (p�... -
Page 160: Start/Max Tackles
Start/Max Tackles Display Action Press <0> (default) or <1> to set the number of start tackles. START TACKLES N Press <ENTER> to move to the next menu. N = current setting Use the number pad to set the maximum number of tackles, MAX TACKLES from 2 to 9, and then press <ENTER>. -
Page 161: Australian Rules Football/Cricket
21 Australian Rules Football/Cricket Operation Sport Insert: 0G-315384 (Code 6699 = Australian Rules Football) (Code 5699 = Cricket) The Sport and Team Name Insert drawings are located in Appendix B. The Block Diagram drawings are located in Appendix A. Reference Drawings: Block Diagrams, A/S 3000 or 5000 Outdoor Sports ......... -
Page 162: Cricket Keys
Cricket Keys Overs, Wickets The +/- <OVERS> and <WICKETS> keys are all used to increment or decrement their respective statistics. <OVERS +1> is used as an example below. Display Action Press the appropriate key to increment or decrement statistics OVERS: +1 for the home or guest team. -
Page 163: Menu
Menu Press <MENU> to access general and sport-specific options. Use the up and down arrow keys to scroll through the menu list. Press <MENU> again at any time to return to the game in progress. New Game Display Action Press <ENTER> to clear all data for the current game in progress MENU- MAIN and begin a new game. -
Page 164: Inning Settings (Cricket Only)
Inning Settings (Cricket Only) Display Action Use the keypad to enter the desired value, and then press INNING SETTINGS <ENTER> to save the new setting. OVERS: NN* NN = current setting Time of Day Refer to Time of Day (p� 17) for more information. Edit Settings (Australian Rules Football Only) Display Action... -
Page 165: Default Settings
Default Settings Print this page if necessary, and record any custom settings for this installation: Setting Default Custom 1 Custom 2 Custom 3 Custom 4 Innings Setting (Cricket Only) Tenth of a Second Period Length 12:00 Break Length 20:00 Overtime Length 5:00 Switch Output 1-Clock = 0... -
Page 166: 22 Curling Operation
22 Curling Operation Sport Insert: 0G-1021630 (Code 4501) The Sport and Team Name Insert drawings are located in Appendix B. The Block Diagram drawings are located in Appendix A. Reference Drawings: Block Diagram: AS5000 BB- VB and WR #1 ............DWG-124686 Insert;... -
Page 167: Stop
Stop Press the Yellow or Red <STOP> key to stop that team’s game clock from counting. Time Out The Yellow and Red <TIME OUT> keys are used to decrement the number of time outs remaining and start the time out clock. Note: Only the time outs configured in the EDIT SETTINGS menu are displayed on the LCD and available for selection. -
Page 168: Set Time
Set Time Display Action Press <SET TIME •> for Yellow or Red and the LCD will show the TIME EDIT YELLOW current time and allow that team’s time to be adjusted. CURR MM:SS* Enter the correct time using the number pad and press <ENTER>. MM:SS = minutes, seconds Press <CLEAR>... -
Page 169: Score (+1/-1)
Display Action After accepting or rejecting the number of full time outs, the TIME OUTS-YELLOW number of extra time outs is displayed. EXTRA Enter the correct extra time outs value using the number pad, N = current setting and then press <ENTER>. Score (+1/-1) Display Action... -
Page 170: Display Menu
Display Action Use the TEAM NAME (LL-2441) insert to change the Team Name HOME- TEAM NAME Message Center (TNMC) settings� _OME Use the <COLUMNS>, <ROWS>, and <STROKE> keys to select the WIDTH, HEIGHT, and FONT of the TNMC. The TNMC is updated after each selection is completed. -
Page 171: Show Break Time
Display Action Enter the correct amount of time for a halftime break in minutes TIME EDIT and seconds using the number pad, and then press <ENTER>. HF BREAK MM:SS* MM:SS = minutes, seconds Enter the correct amount of time for an extra break in minutes TIME EDIT and seconds using the number pad, and then press <ENTER>. -
Page 172: Game Ends
Game Ends Display Action Press <1> to select 8 ends per game. GAME ENDS= NN 1=8 2=10 Press <2> to select 10 ends per game (default). NN = current setting This setting selects which time out is used, full or extra. Switch Output Refer to Switch Output (p�... -
Page 173: 23 Gymnastics Operation
23 Gymnastics Operation Sport Insert: 0G-207655 (Code 0015) The Sport and Team Name Insert drawings are located in Appendix B. The Block Diagram drawings are located in Appendix A. Reference Drawings: Block Diagram: AS5000 BB- VB and WR #1 ............DWG-124686 Insert;... -
Page 174: New Code
New Code Display Action Press <ENTER> to switch to a different sport code through the MENU- MAIN SELECT CODE prompt. Refer to Start Up (p� 7) for more NEW CODE? information on sport codes. Dimming Menu Refer to Dimming Menu (p� 16). Home Roster, Guest Roster Use the Home Roster and Guest Roster menus to set up team names. -
Page 175: A Reference Drawings
Reference Drawings Refer to Resources (p� 2) for information regarding how to read the drawing number. Any contract-specific drawings take precedence over the general drawings. Reference Drawings: Rear View, A/S 5010 Connector Assignments ..........DWG-102142 Block Diagram: AS5000 BB- VB and WR #1 ............DWG-124686 Block Diagram: AS5000 BB- VB and WR #3 ............ - Page 176 This page intentionally left blank.
- Page 179 ADDED CORRECT SIGNAL ROUTING FOR SCBD WITH DATE: STATS PANELS. 02 MAR 12 DATE:...
- Page 180 THE CONCEPTS EXPRESSED AND DETAILS SHOWN ON THIS DRAWING ARE CONFIDENTIAL AND PROPRIETARY. DO NOT REPRODUCE BY ANY MEANS WITHOUT THE EXPRESSED WRITTEN CONSENT OF DAKTRONICS, INC. COPYRIGHT 2012 DAKTRONICS, INC. ALL SPORT 5000 BLOCK DIAGRAM: A/S5000 HOCKEY E BRAVEK...
- Page 181 THE CONCEPTS EXPRESSED AND DETAILS SHOWN ON THIS DRAWING ARE CONFIDENTIAL AND PROPRIETARY. DO NOT REPRODUCE BY ANY MEANS WITHOUT THE EXPRESSED UPDATED BOARDER, TITLE BLOCK, REVISION BLOCK WRITTEN CONSENT OF DAKTRONICS, INC. DATE: COPYRIGHT 2013 DAKTRONICS, INC. 27 NOV 13 ALL SPORT 5000...
- Page 187 THE CONCEPTS EXPRESSED AND DETAILS SHOWN ON THIS DRAWING ARE CONFIDENTIAL AND PROPRIETARY. DO NOT REPRODUCE BY ANY MEANS WITHOUT THE EXPRESS WRITTEN CONSENT OF IN DRIVER OUT DAKTRONICS, INC. OR ITS WHOLLY OWNED SUBSIDIARIES. COPYRIGHT 2017 DAKTRONICS, INC. (USA) IN DRIVER OUT IN DRIVER OUT...
- Page 188 DAKTRONICS, INC. THE CONCEPTS EXPRESSED AND DETAILS SHOWN ON THIS DRAWING ARE CONFIDENTIAL AND PROPRIETARY. DO NOT REPRODUCE BY ANY MEANS WITHOUT THE EXPRESSED WRITTEN CONSENT OF DAKTRONICS, INC. COPYRIGHT 2012 DAKTRONICS, INC. TENNIS SCOREBOARDS UPDATED BOARD AND TITLE BLOCK DATE: SYSTEM RISER;...
- Page 191 BCAST GROUP #1 BCAST GROUP #8 BCAST GROUP #2 BCAST GROUP #7 CHANNELS 1 - 8 CHANNELS 1 - 8 AVAILABLE. AVAILABLE. INSTEAD OF CONTROLLING EACH SCOREBOARD IN INSTEAD OF CONTROLLING EACH SCOREBOARD IN BROADCAST GROUP #1 INDIVIDUALLY, YOU CAN BROADCAST GROUP #8 INDIVIDUALLY, YOU CAN ALSO CONTROL ALL 8 USING CHANNEL = 0 SETTING ALSO CONTROL ALL 8 USING CHANNEL = 0 SETTING...
- Page 192 This page intentionally left blank.
-
Page 193: B Sport Inserts
Sport Inserts Refer to Resources (p� 2) for information regarding how to read the drawing number. Reference Drawings: Insert; Event Counter Codes 371-376 ..............DWG-58047 Insert; Boxing Code 291 ..................DWG-96892 Insert, Basketball, LL-2433 ................... DWG-120121 Insert; LL-2437 A/S 5000, Football ..............DWG-122652 Insert;... - Page 194 This page intentionally left blank.
- Page 198 HOME GUEST PLACE CODE LABEL HERE ENTER THIS CODE NUMBER...
- Page 200 HOME (GREEN) GUEST (RED) PLACE CODE LABEL HERE ENTER THIS CODE NUMBER...
- Page 201 HOME GUEST PLACE CODE LABEL HERE ENTER THIS CODE NUMBER...
- Page 202 COUNT COUNT PLACE CODE LABEL HERE ENTER THIS CODE NUMBER...
- Page 203 HOME GUEST 1 GUEST 2 GUEST 3 PLACE CODE LABEL HERE ENTER THIS CODE NUMBER...
- Page 204 HOME GUEST PLACE CODE LABEL HERE ENTER THIS CODE NUMBER...
- Page 205 WIDTH HEIGHT FONT...
- Page 206 MENU ENTER ENTER...
- Page 208 BOTTOM PLACE CODE LABEL HERE ENTER THIS CODE NUMBER...
- Page 213 HOME GUEST ON/OFF ON/OFF OVERS OVERS WICKETS WICKETS...
- Page 215 ARE CONFIDENTIAL AND PROPRIETARY. DO NOT REPRODUCE BY ANY MEANS WITHOUT THE EXPRESS WRITTEN CONSENT OF ANY MEANS WITHOUT THE EXPRESS WRITTEN CONSENT OF DAKTRONICS, INC. OR ITS WHOLLY OWNED SUBSIDIARIES. DAKTRONICS, INC. OR ITS WHOLLY OWNED SUBSIDIARIES. COPYRIGHT 2018 DAKTRONICS, INC. (USA) COPYRIGHT 2018 DAKTRONICS, INC.
- Page 216 YELLOW PLACE CODE LABEL HERE ENTER THIS CODE NUMBER...
- Page 217 HOME GUEST PLACE CODE LABEL HERE ENTER THIS CODE NUMBER...
- Page 218 This page intentionally left blank.
-
Page 219: C Sport Code Numbers
Sport Code Numbers Indoor Scoreboard Models Model Address Basketball Volleyball Wrestling Hockey Football BB-114 1105 2105 3105 4105 6105 BB-1113 1101, 1102 2101 3101, 3102 BB-1813 1101, 1102 2101, 2111 3101, 3102 BB-2014 1 + Col 5-8 BB-2015 BB-2021 1101, 1102 2101 3101, 3102 BB-2023... - Page 220 Model Address Basketball Volleyball Wrestling Hockey Football BB-2127 1105 2105 3105 4105 6105 BB-2128 BB-2129 BB-2130 BB-2131 BB-2132 BB-2137 1101, 1102 2101, 2111 3101, 3102 BB-2142 1101 2101 3101 4105 6105 BB-2145 1101 2101 3101 4105 6105 BB-2146 1101 2101 3101 4105 6105...
- Page 221 Model Address Basketball Volleyball Wrestling Hockey Football MS-2126 1101 2101 3101 4101 6101 SD-2001 23,24,25,26 1101, 1102 2101 3101 23, 24, 25, SD-2002 1101, 1102 2101 3101 26, 27, 28 SD-2003 2105 3105 4105 SD-2004 1105 2105 3105 4105 6105 SD-2101 23,24,25,26 1101, 1102...
-
Page 222: Outdoor Scoreboard Models
Model Address Basketball Volleyball Wrestling Hockey Football Model 2510 13, 29, 30 1104 2104 3104 4104 6104 Model 2520 1104 2104 3104 4104 6104 Model 2530 13, 31, 32 1104 2104 3104 4104 6104 13, 23, 24, Model 3030 1103 2103 3103 4103... - Page 223 Model Address Baseball Football Soccer Track Lacrosse BA-2013 1, 1, 64,65,66 5500, 5501 BA-2014 72, 70, 71 5501 BA-2017 5501 BA-2018 1, 64, 65, 66 5501 BA-2019 72, 70, 71 5501 BA-2022 64,70 5501 BA-2023 5501 BA-2024 5501 BA-2025 72, 70, 71 5501 BA-2026 72, 70, 71...
- Page 224 Model Address Baseball Football Soccer Track Lacrosse FB-2023 15, 19 5601, 5602 6601 7601 8601 4601 FB-2024 15, 19 5601, 5602 6601 7601 4601 FB-2025 15, 19 5601, 5602 6601 7601 8601 4601 FB-2026 15, 19 5601, 5602 6601 7601 4601 FB-2027 15, 19...
-
Page 225: Miscellaneous Scoreboard Models
1� Code 5601 is With Clock; code 5602 is Without Clock. 2� To receive data from an external timer, substitute code 8602 for the Omega PowerTime or code 8603 for the Daktronics OmniSport 1000/6000. 3� Requires two (2) consoles to operate scoreboard. - Page 226 Model Address Sport/Function Code CU-2001 11, 12 Curling 4501 BA-2003 Pitch & Speed 5500 CT-2001 Pitch & Speed 5500 CT-2002 Pitch & Speed 5500 CT-2003 1 + Col 1-4 Pitch & Speed 5500 CT-2004 1 + Col 1-4 Pitch & Speed 5500 CT-2005 Pitch &...
- Page 227 Model Address Sport/Function Code RO-2002 Rodeo 8000 RO-2005 Rodeo 8000 RO-2006 Rodeo 8000 RO-2008 Rodeo 8000 RO-2009 Rodeo 8000 RO-2010 Rodeo 8000 RO-2011 Rodeo 8000 RO-2018 Rodeo 8000 RO-7002 Rodeo 8000 BB-2015 Segment Timer FB-2340 Segment Timer TI-2010 2 + Col 1-4 Segment Timer TI-2012 Segment Timer...
-
Page 228: Custom Indoor Facility
Model Address Sport/Function Code WR-2101 Gymnastics WR-2102 Gymnastics WR-2103 Gymnastics Game/Shot Clock 1, 2 Basketball 1000 Console Game/Play Clock 1, 2 Football 6000 Console Shots On Goal Console 74 Hockey 4000 See Table for Indoor 1, 2, 12, 13, 17 Boxing Models Relay Driver... -
Page 229: Custom Outdoor Facility
Custom Outdoor Facility Site Contract Baseball Football Soccer Track Lacrosse SUNY Cortland C10032 9603 9703 9403 3COM Park C11471 9606 University of South Carolina SVO 238271 9610 Custom contract retrofit Georgia Dome C13404 9611 Tottenham C7911 9714 University of Idaho C6371 9617 University of Louisiana... - Page 230 This page intentionally left blank.
-
Page 231: D Quick Reference
Quick Reference All Sport 5000 Standard Keys Refer to Standard Keys (p� 7) for detailed operating instructions. Start/Stop Clock <START> and <STOP> control the function of the main clock. • The green LED on the <START> button is illuminated when the clock is running. •... -
Page 232: Segment Timer
Segment Timer Refer to Section 3: Segment Timer Operation (p� 22) for detailed operating instructions. First and Last Segment <FIRST SEGMENT •> and <LAST SEGMENT •> set the range of segments to be used. • Auto Stop <AUTO STOP> sets the console to stop at the end of each segment or at the end •... -
Page 233: Baseball
Baseball Refer to Section 4: Baseball Operation (p� 27) for detailed operating instructions. Start-Up Turn the Power Switch ON. • At the Resume Game? Y/N prompt, press <ENTER /YES> to resume the game • where last shut off, or press <Clear/NO> to enter a new sport code number. At Bat <AT BAT>... -
Page 234: Basketball
Basketball Refer to Section 7: Basketball Operation (p� 45) for detailed operating instructions. Start-Up Turn the Power Switch ON. • At the Resume Game? Y/N prompt, press <ENTER /YES> to resume the game • where last shut off, or press <Clear/NO> to enter a new sport code number. Team Score <SCORE +1>, <SCORE +2>, <SCORE +3>, and <SCORE -1>... -
Page 235: Football
Football Refer to Section 8: Football Operation (p� 59) for detailed operating instructions. Start-Up Turn the Power Switch ON. • At the Resume Game? Y/N prompt, press <ENTER /YES> to resume the game • where last shut off, or press <Clear/NO> to enter a new sport code number. Team Score <SCORE +1>, <+2>, <+3>, <+6>, and <-1>... -
Page 236: Hockey/Lacrosse/Handball
Hockey/Lacrosse/Handball Refer to Section 9: Hockey/Lacrosse/Handball Operation (p� 72) for detailed operating instructions. Start-Up Turn the Power Switch ON. • At the Resume Game? Y/N prompt, press <ENTER /YES> to resume the game • where last shut off, or press <Clear/NO> to enter a new sport code number. Team Score <SCORE +1>... -
Page 237: Soccer
Soccer Refer to Section 10: Soccer Operation (p� 83) for detailed operating instructions. Start-Up Turn the Power Switch ON. • At the Resume Game? Y/N prompt, press <ENTER /YES> to resume the game • where last shut off, or press <Clear/NO> to enter a new sport code number. Team Score <SCORE +1>... -
Page 238: Track
Track Refer to Section 12: Track Operation (p� 95) for detailed operating instructions. Start-Up Turn the Power Switch ON. • At the Resume Game? Y/N prompt, press <ENTER /YES> to resume the game • where last shut off, or press <Clear/NO> to enter a new sport code number. Team Score <SCORE +1>... -
Page 239: Volleyball
Volleyball Refer to Section 13: Volleyball Operation (p� 100) for detailed operating instructions. Start-Up Turn the Power Switch ON. • At the Resume Game? Y/N prompt, press <ENTER /YES> to resume the game • where last shut off, or press <Clear/NO> to enter a new sport code number. Team Score <SCORE +1>... -
Page 240: Wrestling
Wrestling Refer to Section 14: Wrestling Operation (p� 112) for detailed operating instructions. Start-Up Turn the Power Switch ON. • At the Resume Game? Y/N prompt, press <ENTER /YES> to resume the game • where last shut off, or press <Clear/NO> to enter a new sport code number. Team Score <SCORE +1>... -
Page 241: E Supplementary Documents
Supplementary Documents Supplementary Documents Scoreboard Driver Bootload Update Procedure...........ED-18728 Supplementary Documents... - Page 242 This page intentionally left blank.
- Page 243 - Version 4.1.5: Unzip the FUD file in the “AllSport_v4_1_5_compatible” folder. - Version 4.1.6+: Unzip the FUD file in the “AllSport_v4_1_6_plus_compatible” folder. ED-18728 201 Daktronics Drive Brookings, SD 57006 Rev 3 www.daktronics.com/support 8 February 2018...
- Page 244 BLOCK # 0001 their firmware. Both the All Sport and the DakLoader program will then show the progress of the update: ED-18728 201 Daktronics Drive Brookings, SD 57006 Rev 3 www.daktronics.com/support 8 February 2018 800.325.8766...
- Page 245 The console will indicate to the network that the update process is complete and all drivers will exit the bootload mode. DO NOT UNPLUG OR POWER OFF THE ALL SPORT UNTIL IT HAS RETURNED TO NORMAL OPERATION! ED-18728 201 Daktronics Drive Brookings, SD 57006 Rev 3 www.daktronics.com/support 8 February 2018...
- Page 246 This page intentionally left blank.
-
Page 247: Of Liability
Daktronics Warranty and Limitation of Liability This section includes the Daktronics Warranty & Limitation of Liability statement (SL-02374)� Daktronics Warranty and Limitation of Liability... - Page 248 This page intentionally left blank.
- Page 249 EXCEPT AS OTHERWISE EXPRESSLY SET FORTH IN THIS WARRANTY, TO THE MAXIMUM EXTENT PERMITTED BY APPLICABLE LAW, DAKTRONICS DISCLAIMS ANY AND ALL OTHER PROMISES, REPRESENTATIONS AND WARRANTIES APPLICABLE TO THE EQUIPMENT AND REPLACES ALL OTHER WARRANTIES OR CONDITIONS, EXPRESS OR IMPLIED, INCLUDING, BUT NOT LIMITED TO, ANY IMPLIED WARRANTIES OR CONDITIONS OF MERCHANTABILITY, FITNESS FOR A PARTICULAR PURPOSE, OR ACCURACY OR QUALITY OF DATA. OTHER ORAL OR WRITTEN INFORMATION OR ADVICE GIVEN BY DAKTRONICS, ITS AGENTS OR EMPLOYEES, SHALL NOT CREATE A WARRANTY OR IN ANY WAY INCREASE THE SCOPE OF THIS LIMITED WARRANTY. THIS LIMITED WARRANTY IS NOT TRANSFERABLE. 2. Exclusion from Warranty Coverage This Warranty does not impose any duty or liability upon Daktronics for any: A. damage occurring at any time, during shipment of Equipment unless otherwise provided for in the Agreement. When returning Equipment to Daktronics for repair or replacement, End User assumes all risk of loss or damage, agrees to use any shipping containers that might be provided by Daktronics, and to ship the Equipment in the manner prescribed by Daktronics; B. damage caused by: (i)the improper handling, installation, adjustment, use, repair, or service of the Equipment,or (ii) any physical damage which includes, but is not limited to, missing, broken, or cracked components resulting from non‐electrical causes; altered, scratched, or fractured electronic traces; missing or gauged solder pads; cuts or clipped wires; crushed, cracked, punctured, or bent circuit boards; or tampering with any electronic connections, provided that such damage is not caused by personnel of Daktronics or its authorized repair agents; C. damage caused by the failure to provide a continuously suitable environment, including, but not limited to: (i) neglect or misuse; (ii) improper power including, without limitation, a failure or sudden surge of electrical power; (iii) improper air conditioning, humidity control, or other environmental conditions outside of the Equipment’s technical specifications such as extreme temperatures, corrosives and metallic pollutants; or (iv) any other cause other than ordinary use; Copyright © Daktronics, Inc. SL-02374 Rev 12 19Nov15 Page 1 of 2...
- Page 250 Limitation of Liability Daktronics shall be under no obligation to furnish continued service under this Warranty if alterations are made to the Equipment without the prior written approval of Daktronics. It is specifically agreed that the price of the Equipment is based upon the following limitation of liability. In no event shall Daktronics (including its subsidiaries, affiliates, officers, directors, employees, or agents) be liable for any claims asserting or based on (a) loss of use of the facility or equipment; lost business, revenues, or profits; loss of goodwill; failure or increased cost of operations; loss, damage or corruption of data; loss resulting from system or service failure, malfunction, incompatibility, or breaches in system security; or (b) any special, consequential, incidental or exemplary damages arising out of or in any way connected with the Equipment or otherwise, including but not limited to damages for lost profits, cost of substitute or replacement equipment, down time, injury to property or any damages or sums paid to third parties, even if Daktronics has been advised of the possibility of such damages. The foregoing limitation of liability shall apply whether any claim is based upon principles of contract, tort or statutory duty, principles of ...
Need help?
Do you have a question about the ALL SPORT 5000 SERIES and is the answer not in the manual?
Questions and answers