Table of Contents
Advertisement
Quick Links
Advertisement
Table of Contents

Related Manuals for Instanta SureFlow Counter-top Series


Summary of Contents for Instanta SureFlow Counter-top Series
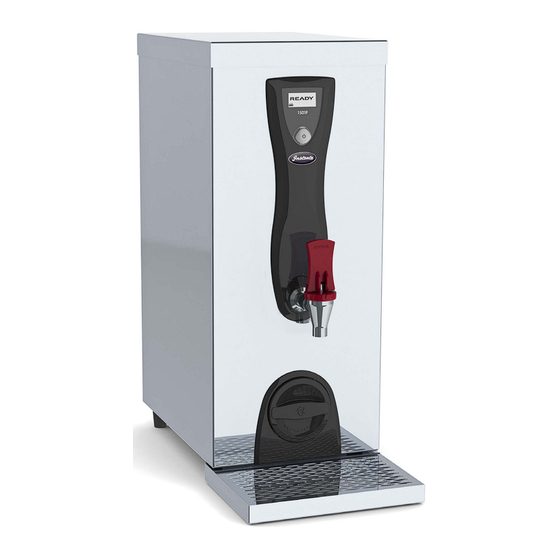
- Page 1 Installation and user instructions Instanta SureFlow Counter-top series CTS11F (1501F), CTS17F (3001F), CTS19F/6 (3001F/6) models Instanta verified original instructions: EN version. Installation instructions & user guide T210049 CTS11 manual v1.01 Dec 2023...
-
Page 2: Table Of Contents
Table of contents Contents SECTION 1 Using these instructions ..............3 Before you start ....................3 Explanation of symbols ..................3 Introduction ...................... 3 SECTION 2 IMPORTANT SAFETY INSTRUCTIONS ..........4 SECTION 3 WARNINGS & REGULATORY INFORMATION ........6 SECTION 4 Technical data .................9 4.1 Explanation of product codes for complete range ........9 4.2 Technical data table ................... -
Page 3: Section 1 Using These Instructions
• Your new appliance is designed to give you years of trouble-free service provided that the instructions contained in this manual are followed. • All new Instanta products are energy efficient, simple to operate and easy to service. • These instructions are available on our website at www.instanta.com. -
Page 4: Section 2 Important Safety Instructions
SECTION 2 IMPORTANT SAFETY INSTRUCTIONS Compliance In the UK the system must be installed in accordance with water supply byelaws, current IEEE regulations and local authority byelaws. Safety This appliance can be used by children from 8 years or persons (including children from 8 years) with reduced physical, sensory or mental capabilities, or lack of experience and knowledge, if they have been given supervision or instruction concerning the use of the appliance by a person... -
Page 5: Frost Protection
SECTION 2 IMPORTANT SAFETY INSTRUCTIONS to support its weight. Locate in an area of adequate space to use the boiler safely (e.g. free from tripping hazards and risk of congestion). Frost protection This appliance is not designed for outdoor use. Ensure that the appliance is installed in an area where the ambient air temperature cannot fall below 5ºC. -
Page 6: Section 3 Warnings & Regulatory Information
SECTION 3 WARNINGS & REGULATORY INFORMATION • FOR CONTINUED SAFETY OF THIS APPLIANCE IT MUST BE INSTALLED, OPERATED AND MAINTAINED IN ACCORDANCE WITH THE MANUFACTURER’S INSTRUCTIONS. • The appliance must be earthed, earthing is provided via the power cable. The resistance of the earth connection to each exposed metal part must be less than 1Ω. - Page 7 When positioning the appliance, ensure the power supply cord is not trapped or damaged. If it is damaged it must be replaced by an Instanta service provider or a qualified electrician in order to avoid a hazard.
- Page 8 • If the appliance is being fed by water treated by reverse osmosis, Instanta strongly recommend that the water is tested regularly. • If the appliance is being fed by water treated by reverse osmosis, Instanta strongly recommend that the water is tested regularly.
-
Page 9: Section 4 Technical Data
SECTION 4 Technical data 4.1 Explanation of product codes for complete range Complete Counter Top range appliance order code Product Product Draw off (l) Features kW rating range group High CounterTop SureFlow volume SureFlow Boiling Plus chilled Filtered High tap Twin tap Slim line Push... -
Page 10: Technical Data Table
SECTION 4 Technical data 4.2 Technical data table CTS11F CTS17F CTS19F/6 Model Unit (1501F) (3001F) (3001F/6) Width Depth* Depth inc. drip tray Height Supply voltage 230V 50Hz AC Power rating Power supply required Single phase Fill type Automatic Capacity Rapid draw off Weight (empty) 13.2 14.4... -
Page 11: Section 5 Parts Supplied
SECTION 5 Parts supplied 5.1 Supplied parts checklist • Before starting installation check that you have the following parts. Description Appliance & Tap kit Drip tray, overlow spigot, nut & washer 3/4" BSP water inlet hose Installation and user instructions AQ35 filter 5.2 Filter identification and capacities Identification... -
Page 12: Section 6 Installing The Appliance
SECTION 6 Installing the appliance 6.1 Positioning and ventilation Use of tools can be hazardous, assess the risks before you start. Use instructions supplied with individual kit parts. • Install the appliance within reach of a mains wholesome (cat 1) water supply, and a 230V 50Hz mains electricity supply. - Page 13 SECTION 6 Installing the appliance 6.1.2 Installation layout and features (inc optional Water block and install rail) Waste to drain Mains water supply Mains electricity supply Isolation valve & install rail Dispensing tap Water block (optional) Water filter cap & handle 3/4"...
-
Page 14: Connect The Drip Tray Overflow To Waste
SECTION 6 Installing the appliance 6.2 Connect the drip tray overflow to waste An air gap must be provided within 300mm of the overflow connection point. Failure to provide an air gap within this distance could cause an air lock which could stop the water discharging in the event of an overflow. IMPORTANT Overflow pipework must be no less than 15mm diameter. -
Page 15: Connect The Water Supply
To avoid damage, do not use any solder connections whilst pipes are connected to the appliance. Instanta cannot be held responsible for any appliance malfunction if the water pressure is not within the range stated. If in doubt, consult your water supply company. -
Page 16: Mains Water Connection
(Install rail & Water block arrangement) Use instructions supplied with the individual system components. • Fitting a Water block (available from Instanta) will limit the amount of water flowing to a predetermined flow rate, lowering the risk of harm to people and damage to property. -
Page 17: Reset Procedure
SECTION 6 Installing the appliance 6.4.3 Water block (optional) This device must be installed vertically with Fig. 1 the direction of flow downwards (inlet at the top, outlet at the bottom. See Fig. 1. • The Water block should be installed in a convenient location on the water supply line to the appliance. -
Page 18: Earth Continuity Test
SECTION 6 Installing the appliance 6.5 Earth continuity test All accessible metal parts must be earthed. One probe connected • After installation, the earth to the mains cable earth wire / pin continuity must be checked. Use an insulation tester, One probe appliance tester , DMM or connected... -
Page 19: Connect The Electricity Supply
SECTION 6 Installing the appliance 6.6 Connect the electricity supply Before you start, read : Section 2 Important safety instructions. Section 3 Warnings & Regulatory information. Do not switch on the mains electricity supply until installation is complete, The system earth must be verified once the mains electricity supply connection has been established. -
Page 20: Section 7 Commissioning And Operation
READY SECTION 7 Commissioning and operation CHANGE FILTER READY READY 7.1 Switch on and commissioning READY Use with caution, the appliance ! CHECK WATER ! dispenses near-boiling water. READY • Turn on the water supply. READY • Switch on the mains power supply. READY •... -
Page 21: Operation
SECTION 7 Commissioning and operation 7.2 Operation Use with caution, the appliance dispenses near-boiling water. • Switch on the appliance and wait until the white READY READY illuminated screen reads READY. • The water will be at the correct temperature. •... -
Page 22: Section 8 Maintenance
SECTION 8 Maintenance 8.1 Replace and flush the filter • The filter symbol displays a line of bars to show READY READY the remaining life of filter cartridge. • When the filter has 200 litres remaining, the filter icon begins to flash. •... - Page 23 SECTION 8 Maintenance • Carefully un-clip one tab of the filter cap with flat blade screwdriver. • Pull off the filter cap. • Align the filter cap with the base of the replacement filter. • Push filter base cap onto the replacement filter.
- Page 24 SECTION 8 Maintenance • Insert the new filter into the filter aperture. • Turn filter cap handle 1/4 turn clockwise until it stops. • Water supply to the tank turns on automatically. • Switch on the mains electricity supply to the appliance.
-
Page 25: Adjust The Water Temperature And Filter Monitor
SECTION 8 Maintenance 8.2 Adjust the water temperature and filter monitor • The filter monitor is factory-set to MEDIUM (default) which is suitable for most of the UK with average or medium water hardness. • The effectiveness of the filter will be reduced in hard water areas and extended in soft water areas. -
Page 26: Cleaning
SECTION 8 Maintenance 8.3 Cleaning Do not use air-drying disinfectant sprays. Do not use abrasive cleaning agents to clean the appliance. The appliance must never be located near or cleaned with water jets. • To clean the appliance and tap, wipe surfaces with a damp cloth and then wipe dry with a clean, dry cloth. -
Page 27: Section 9 Troubleshooting
SECTION 9 Troubleshooting 9.1 Troubleshooting table Non functional warnings Possible causes Action READY Replace filter - type AQ35 READY READY Filter cartridge is exhausted Call us on 0345 6 005 005 for CHANGE CHANGE FILTER a new filter to discuss on-site CHANGE FILTER FILTER... -
Page 28: Safety Controls
SECTION 9 Troubleshooting 9.2 Safety controls Isolate appliance from power supply before removing the access cover or attempting any reset. In order to avoid a hazard due to inadvertent resetting of the thermal cut- out, this appliance must not be supplied through an external switching device such as a timer, or connected to a mains supply that is regularly switched on and off. -
Page 29: In Case For Accidental Freezing
SECTION 9 Troubleshooting 9.3 In case for accidental freezing Before you start read : Section 2 Important safety instructions. Section 3 Warnings & Regulatory information. • Ensure that ambient environmental conditions around the appliance are above the minimum operating temperature of the appliance. •... -
Page 30: Environmental Information
Environmental information Waste electrical and electronic equipment • The symbol above means that according to United Kingdom and European Union member countries laws and regulations, your product and/ or its battery shall be disposed of separately from household waste. • When this product reaches its end of life, take it to a collection point designated by local authorities. -
Page 31: Warranty
Warranty Warranty • The appliance is guaranteed for two years from date of installation. • Our guarantee includes on site labour and parts for problems caused by fault of manufacture and component failure with the following exclusions: • Problems caused by hard water and lime-scale. We regret that we cannot be held responsible for problems caused by hard water. - Page 32 Zip Water UK Instanta Trafalgar House, Rash’s Green, Dereham, Norfolk, NR19 1JG 0345 6 005 005 www.zipwater co.uk www.instanta.com Installation instructions & user guide T210049 CTS11 manual v1.01 Dec 2023...
Need help?
Do you have a question about the SureFlow Counter-top Series and is the answer not in the manual?
Questions and answers