Advertisement
Quick Links
Advertisement

Related Manuals for Game Winner 170924


Summary of Contents for Game Winner 170924
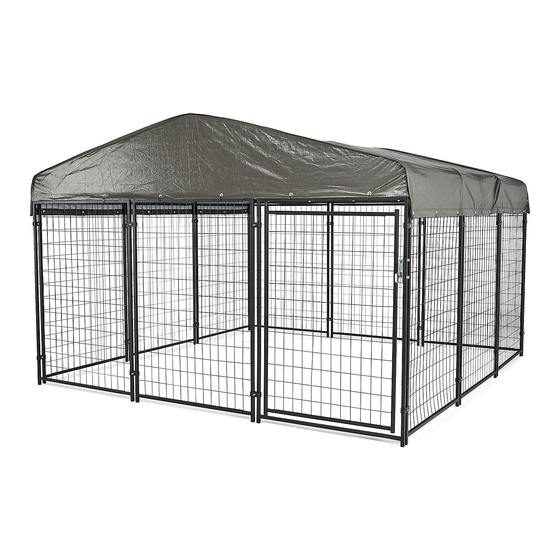
- Page 1 Game Winner 2 in 1 Dog Run 2.0 170924 Made in China...
- Page 2 5-16 Care and Maintenance Page 1 of 18...
- Page 3 frame panels are secure Page 2 of 18...
- Page 4 Ladder Gloves Rubber Mallet Tape measure Wrench Center arch Corner arch Female brace Male brace Outside Door Frame 1-1/4 Door Frame Page 3 of 18...
-
Page 5: Self-Tapping Screw
Lock Lock Lock base Cover Plastic tie Plug for tube Inside Concave 24+24 2 pcs bracket Outside Flat Bolts and Nuts 1/4 x1-1/2 for bracket Bolts and Nuts 1/4" X 1-3/4" assembled to top pipe Bolts M10x35 Flat washer Hex Nut assembled to lock Self-tapping screw J hook anchor Page 4 of 18... - Page 6 Apply end caps. Start with corner apply brackets from top down. Note that front panel will Right!!! Wrong!!! attach in front of the side panel Important: Do not fully tighten nuts and bolts until the roof frame is set. Page 5 of 18...
- Page 7 Apply end cap to the Next Panel. Attach the next panel using the concave and flat bracket (part 12) Page 6 of 18...
- Page 8 Repeat steps 3 and 4 for each additional panel to complete the base. Make sure sections are even. Notice: Recommended 10' X 10' dimensions. 3 panels per side. Assembled frame has 3 panels per side including door at designated front. Notice - Door placement can be centered or to the left or right of center.
- Page 9 Adjust lock placement to ensure door closes and locks easily from either direction. Page 8 of 18...
- Page 10 Door can swing ,close and lock from either direction. Page 9 of 18...
- Page 11 Install the Self-tapping screw to the outside door frame. Page 10 of 18...
- Page 12 Assemble the first section of the canopy. Insert assembled canopy section into the frame. Page 11 of 18...
- Page 13 Assemble the next section of the canopy. Insert the next assembled canopy section into the fence frame. Page 12 of 18...
- Page 14 Insert male brace(part 4) into the first section of the canopy. Insert male brace(part 4) into the 2nd assembled section. Page 13 of 18...
- Page 15 Insert female brace (part3) into the 3rd assembled section Insert end caps at all remaining pole openings at the top of the fence frame. Page 14 of 18...
- Page 16 Either with 2 people or using a ladder, cover the canopy frame with the enclosed tarp. Use the plastic ties to secure canopy cover to the frame. Page 15 of 18...
- Page 17 Anchor down. Page 16 of 18...
- Page 18 Clean all surfaces with a damp cloth and mild detergent,do not use bleach or abrasive products. Page 17 of 18...
- Page 19 Page 18 of 18...
Need help?
Do you have a question about the 170924 and is the answer not in the manual?
Questions and answers
We just purchased 2 in 1 kennel from academy and lock doesn't work, the .middle piece just came out. Anp tips can't seem to find it in manual. Thx
How can I get replacement tarp for the roof
Order replacement parts Roof ( Parts list- 1,2,3,4,9 and 14)