Advertisement
Available languages
Available languages
Quick Links
Please visit our website or scan QR code to
view a Video on assembling our patent pending
No Tools Arms
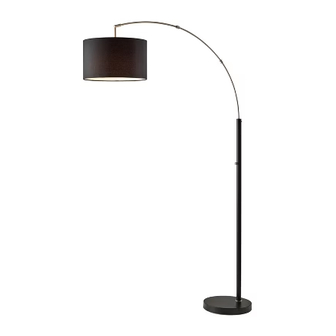
PARTS DIAGRAM:
(1)* Allen Wrench (E)
Assembly Instructions (English)
ASSEMBLY INSTRUCTION FOR
Arc Lamp
(1)* Wrehcn (O)
Please begin assembly by laying all parts down on the ground. The
arms are easiest to assemble if you assemble them first, before they
are attached to the lamp body.
1. Assemble arc arms (A) ,(C) and (D) by placing the top arc tube into
the bottom arc tube and securing each arm by tightening each metal
collar joint (B). Simply slide joint (B) over the threaded tube and
screw down to tighten. If you have trouble here, slightly lift up the
upper arm to relieve the tension on the joint while screwing the parts
together.
Attention: Be sure to align the consistency of the curve on the arm.
Do not tighten the metal collar joints all the way yet. This way, when
you set the arms onto the base later, you can get the arm curves
perfect and then tighten the joints.
2. Screw (F) comes pre-assembled to tube . Before placing the part (D)
onto the tube, please unscrew this screw (F)
3. Place the curved tube (D) onto tube (G), then tighten it using hex
screw pieces (F) with allen wrench (E).
Note: The Arc lamp should face forward with the arm reaching
over the base (see diagram below).Now you can make sure the
arm curves are aligned and tighten the joints.
4. Screw tube (G), (H) and (I) together until tight.
5. Throw away the black bushing (L) from the base.
6. Insert tube (I) into washer (J), base (L) & washer (M), then tighten
it with nut (N) using wrench (O).
7. Socket ring (Q) comes pre-assembled to the socket. Before placing
the shade onto the socket, please unscrew this socket ring.
8. Place shade (P) onto socket holder and turn the socket ring (Q)
until tight to secure shade.
9. Install the bulb (R) before putting the diffuser (S)
GENERAL PRODUCT INFORMATION:
This product is suitable
for dry locations only.
---------------------------------------------------------------
IMPORTANT SAFETY INSTRUCTIONS:
This portable lamp has a polarized plug as a feature to reduce the risk of
electric shock (one blade is larger than the other). This plug will fit in a
polarized outlet only one way. If the plug does not fit fully in the outlet,
reverse the plug. If it still does not fit, contact a qualified electrician.Do
not use with an extension cord unless the plug can be fully inserted.
NOT ALTER THE PLUG .
----------------------------------------------
BULB TYPE: type A Max 100W bulb (bulb not included).
DO
Advertisement

Related Manuals for Adesso Arc Lamp


Summary of Contents for Adesso Arc Lamp
- Page 1 3. Place the curved tube (D) onto tube (G), then tighten it using hex screw pieces (F) with allen wrench (E). Note: The Arc lamp should face forward with the arm reaching over the base (see diagram below).Now you can make sure the arm curves are aligned and tighten the joints.
- Page 2 Comience el ensamblaje colocando todas las piezas en el suelo. Los brazos son más fáciles de ensamblar si los ensambla primero, antes de fijarlos al cuerpo de la lámpara. 1. Ensamble los brazos de arco (A), (C) y (D) colocando el tubo de arco superior en el tubo de arco inferior y asegurando cada brazo apretando cada junta de collar metálico (B).
Need help?
Do you have a question about the Arc Lamp and is the answer not in the manual?
Questions and answers