Advertisement
Quick Links
Wind Management Device
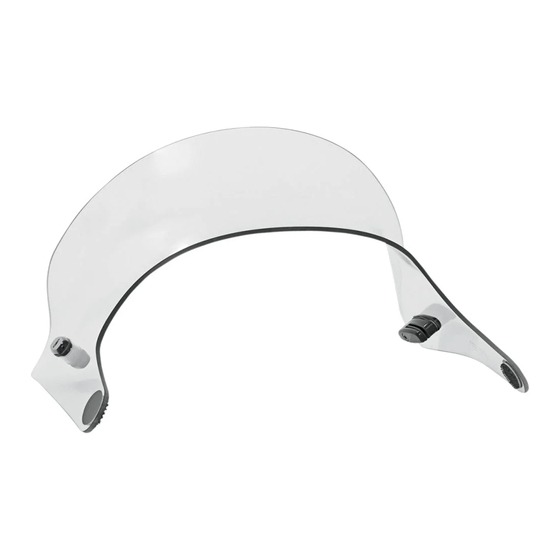
Bullet Booster Wing Lite
Bullet Fairing
Before assembly, read Warnings inside
WARNING
1.
During installation, make sure that the Bullet Booster
Wing/Fairing and hardware do not interfere with any
cables or wiring when the forks are turned all the way in
either direction. Also make sure, through the full range
of adjustment, that the Wing / Fairing and hardware do
not hit the gas tank.
2. The improper installation of this product and related
components could result in serious injury or death.
CAUTION
1.
Memphis Shades Bullet Booster Wings are made from
Luciteacrylic, and will last for years with proper care.
Clean your Booster Wing with plenty of soapy water
(mild dishwashing liquid is best) and a soft cotton cloth.
Use your bare hands to feel and dislodge bugs, or
cover with a wet, soapy towel and let it soak. Don't use
paper towels and scrape with anything. Small scratches
can be removed with NOVUS #2.
2.
Never use any glass cleaning products, petroleum
based chemicals, or cleaning agents with ammonia,
bleach or any other harsh chemicals. This includes (but
not limited to) RainX, brake fluid, acetone, paint thinner,
benzene and gasoline. "If it hurts your nose, it will hurt
the plastic."
3.
Glass cleansing agents will cause severe damage to
your Bullet Booster Wing, and will void your warranty.
For care and cleaning we recommend using Memphis
Shades All Kleer, a unique cleaner/polish, bug
remover and rain repellant that leaves a super slick
surface that makes the next cleaning even easier.
Memphis Shades warrants all product components, metal
and plastic, against defects in materials and workmanship
for 24 months.
For Parts and Warranty Help, Contact:
Memphis Shades, Inc.
P.O. Box 429
Rossville, TN 38066
(901) 853 0293
Visit us on the web at www.memphisshades.com or you
can also reach us by email:
customerservice@memphisshades.com
Part No. 2350-0201
MEM5807
REVISION 0
1. Kit Contents
Ref Code
Description
I5807
Mounting Instructions
MEP5807
Booster Wing
S1240
HW Biplane clamp - nylon
M943
Allen wrench, 5/32"
A pad
2. Mounting Instructions
1. Cover gas tank and front fender with towels to avoid
damage during installation.
2. Use the 5/32" allen wrench to remove the Socket head cap
screw from the Wing mount part of the
Biplane clamp (Fig 1).
3. Insert the posts on the Wing mount through the
corresponding holes in the Bullet Booster Wing. The Wing
mount should face to the outside. Reassemble the Biplane
clamp by fitting and tightening the Socket head cap screw
(Fig 2). Do this for each pair of holes. (Fig 3)
4. Use the 5/32" short arm allen wrench to remove the screw
in the wing clamp part of the Biplane clamps. (Fig. 4)
5. Fit "A" pad into Wing clamp and Wing mount by aligning
pads and pressing into place. Repeat for other
Biplane clamp (Fig. 5)
6. Position the Biplane clamps (with Bullet Booster Wing Lite
fitted) over the existing Bullet Fairing. Once satisfied with the
position, tighten down the Socket head cap screw to secure
the Biplane clamps in place (Fig 6).
7. Reach behind the Bullet Booster Wing, and pull the back-
ing strip off the rear of the Dual Lock Disc. Ensure everything
is aligned correctly then push down hard on the outside of the
Booster Wing securing the Dual Lock Disc in place on the
Bullet Fairing. (Fig 7)
8. The Top Wing can be removed from the Bullet Fairing by
loosening each Biplane Clamp and separating the two halves
of each Dual Lock Disc. (Fig 8)
Fig. 1
Qty
1
1
2
1
4
Advertisement

Summary of Contents for Memphis Shades 2350-0201
- Page 1 2. Use the 5/32” allen wrench to remove the Socket head cap Memphis Shades Bullet Booster Wings are made from screw from the Wing mount part of the Luciteacrylic, and will last for years with proper care.
- Page 2 Fig. 6 2. Mounting Instructions, continued Fig. 2 Fig. 7 Fig. 3 Detail Top half (bonded Peal away backing to inside surface strip on bottom half of Booster Wing) Fig. 4 Bottom half Fig. 8 Fig. 5...


Need help?
Do you have a question about the 2350-0201 and is the answer not in the manual?
Questions and answers