Table of Contents
Advertisement
Quick Links
Advertisement
Table of Contents

Related Manuals for HP f491 Series


Summary of Contents for HP f491 Series
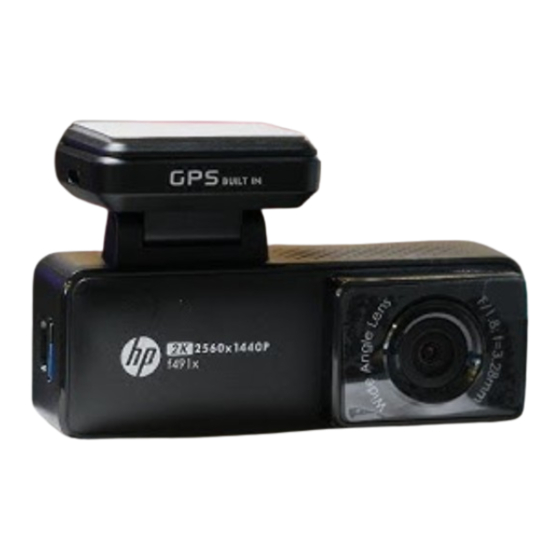
- Page 1 f491x Car Camcorder User Manual...
-
Page 2: About This Guide
About This Guide The content in this document is for information purpose and is subject to change without prior notice. We have made every effort to ensure that this User Guide is accurate and complete. However, no liability is assumed for any errors or omissions that may have occurred. -
Page 3: Ce Regulatory Notice
CE Regulatory Notice The product herewith complies with the requirements of the IEC 62368-1:2018, the EMC Directive 2014/30/EU, and the RoHS Directive 2011/65/EU. EU Health Protection: This equipment should be installed and operated with minimum distance 20cm between the radiator & your body. Disposal of a battery into fire or a hot oven, or mechanically crushing or cutting of a battery, that can result in an explosion. - Page 4 cutting of a battery, that can result in an explosion. Leaving a battery in an extremely high temperature surrounding ❖ environment that can result in an explosion or the leakage of flammable liquid or gas. Due to local laws and vehicles safety considerations, do not operate the ❖...
- Page 5 Please be advised that if another camcorder is also using the same ❖ 2.4GHz band as this product, the processing speed of both camcorders may slow down. This camcorder gets warm when in use; this is normal. ❖ Improper use or operation of the product may result in damage of the ❖...
- Page 6 Explosion Area or in a zone with a “Switch Off 2-way Radios” sign by switching off camcorders that may interfere with the radio frequency. HP Inc. is NOT responsible for the loss of any data/content during ❖ operation.
-
Page 7: Package Contents
Introduction Thank you for purchasing this advanced Car Camcorder. This product is specifically designed for real time video recording when driving. Features • Super high definition 2K (2560 x 1440) • Wide angle lens • Collision Detection, when a collision is detected, the camcorder will automatically trigger the emergency recording •... -
Page 8: Product Overview
1.3 Product Overview Item Item Power connector Speaker microSD card slot LED Indicator Rear cam(option) Power on/off connector Long press: reset *in standby/recording mode, short press to Bracket socket turn on Wi-Fi Wide angle lens Microphone... - Page 9 Get Start 2.1 Storage Media 2.1.1 Insert the Memory Card Insert memory card with the pins facing forward, see the picture as below: 2.1.2 Remove the Memory Card If the camcorder is power on, please power off first and wait for the procedure of switching off the camcorder completed before removing the memory card.
- Page 10 2.2 Install Put the electrostatic sticker onto the suggested area on the windshield. Before putting the sticker, please wipe and clean the windshield. During the installation, please make sure the bubbles in between the sticker and the window are all gone. Peel off the protective plastic sheet from the adhesive pad.
- Page 11 Place and press the bracket firmly onto the electrostatic sticker on the windshield window. Make sure the base is securely locked in place. Adjust the view angle. Make sure the camcorder is securely locked in place.
- Page 12 2.2.1 Install optional rear cam 1. Position the rear camera at upper central of rear windshield. Use cable to connect rear camera with front camera to check the preview image is in right position (not upside down) before installation. If the preview image is upside down, please rotate the base 180゚to make it correct.
-
Page 13: Connecting To Power
2.3 Connecting to Power Use only the attached power adapter to activate the camcorder. Connect one end of power connector to mini USB port of the camcorder. USB port input DC5V/2A. Plug the other end of car adapter to the cigarette lighter socket of your vehicle. -
Page 14: Power On/Off And Reset
2.5 Power on/off and Reset 2.5.1 Auto Power on/off Once start the car engine, the camcorder will automatically power on and start recording. Once the car engine shuts down, the camcorder automatically saves the recording and turns off the power. 2.5.2 Manually Power on/off Press power button to turn on. - Page 15 Setting Go Moto Plus App 3.1 Download The camcorder allows you to connect to the smart phone via the app. When using for the first time, install the [Go Moto Plus] app for your smart phone. Scan below QR code or download Go Moto Plus app from Google Play or App Store.
- Page 16 3.2 Wi-Fi Connection Starts the engine, and the camcorder will auto power on and record. Using the Wi-Fi function of your smart phone and search for camcorder’s ID ”hp_f491x_xxxx” (last 4 digits are system random number). Enter default password 12345678. Note: 1.
- Page 17 3.3 Use Go Moto Plus App Tap [Go Moto Plus] icon to launch the app. The main screen will pop up. Tap “Access Camera” to enter main screen for set up and operate camcorder.
-
Page 18: Main Screen
3.4 Main Screen icon Description Go Moto Plus logo / SD card message... - Page 19 Preview screen Switch front and rear camcorder preview Full screen display Start/Stop recording Take photo Camera File (check the files in microSD) Camera Setting To remind the emergency files in the microSD card is about to be full and going to over write the oldest files.
-
Page 20: Playback, Delete, Download
Note: 1. The App will auto sync the camera's date/time with your smartphone. 2. App layout and features are subject to change, depending on the software version. Refer to the Google Play Store or iOS App Store for the latest updates. 3. - Page 22 icon Description Download the file to “Local Album”. The downloaded file can be playback without connecting with the camcorder. Delete the file in microSD card. Downloaded file will show “Downloaded” in thumbnail image. It can be opened from ”Album” without Wi-Fi connection to the camera.
- Page 23 3.6 Album You can use this feature to playback or delete the file that you download in your smart phone. The files in the Album can be reviewed without connecting with camcorder. Tap icon [Album]. (It will stop recording if the camcorder is connected.) Tap the file that you want to playback, delete or edit.
-
Page 24: Camera Setting
Icon Description Edit video or snapshot. 1. Edit video: Remove original audio/voice, and embed favorite music from the recommendations. 2. Edit picture: Crop the picture, or change the color of picture from recommendations. Share the file to social media. Video Screenshot. The file will be saved in “Album”. -
Page 25: Available Options
Refer to the below table for details of menu items and available menu options. Menu Available Description Option options Set Time GMT -12 ~ GMT Set the time zone you are in. Zone Voice Record Setting for activating audio in the video. On / Off Camera Volume... - Page 26 If one of parking mode is activated, the Park Recording / camcorder will enter parking mode 10 Collision Parking seconds after disconnect the external Mode Detection / power. Timelapse / Off *Require to install ACC cable. Domestic power supply varies by area. It is recommended that you should check Anti-flicker the “Table of voltage and frequency of...
-
Page 27: Emergency Recording
Use the Camcorder 4.1 Initial Setting Before use the camcorder, use smart phone’s Wi-Fi to connect with the camcorder and open Go Moto Plus app to synchronize date/time. 4.2 Recording Once start the car engine, the camcorder will automatically power on and start recording. -
Page 28: Picture In Video
4.4 Picture in Video You can also use this camcorder to take snapshots of the current scene. app. Open Go Moto Plus icon. A “ka-za” sound will be heard which means photo has been taken. Note: 1. The screen shots image resolution is according to video resolution setting. 2. -
Page 29: Parking Mode
4.5 Parking Mode To monitor the vehicle when it is parked, you can activate Parking Mode. Before you activate Parking Mode, it is required to install ACC cable(Hardwire Kit) through professional car service shop. Open Go Moto Plus app. con, recording will be stopped and enter Menu Setting. - Page 30 will trigger emergency recording. 5. Timelapse is continuously recording by one second one frame. For example, 30 minutes recording will be saved in one minute. OTA Firmware Upgrade Connect Wi-Fi of the camcorder and smart phone, open the app. If there is a new firmware published, the screen will show notification as below.
- Page 31 Follow the app instruction, note1 1. Tap “Upgrade Now” to download the new firmware to smart note2 phone . (Figure1) 2. When download is completed, screen will show “Upgrade file has been downloaded”. Make sure smart phone Wi-Fi is connected with camcorder, then, tap the “Upgrade Now”...
- Page 32 3. When the file is dispatched successfully, screen will show “SENT”. The camcorder will then re-boot and automatically upgrade the firmware. After firmware is upgraded, the camcorder will power off. 4. Manually power on the camcorder, and it will work in the latest firmware.
- Page 33 Note: 1. If tap “Remind me later”, the app notification will pop up every time when the camcorder is connected. 2.When the smart phone’s Wi-Fi is occupied by the camcorder, iOS system will auto switch to cellular data, and the network is still useable; but, Android system won’t.
-
Page 34: Specification
Specification Item Description Image Sensor 4MP CMOS sensor Effective Pixels 2560 (H) x 1440 (V) Storage Media Supports class V30 or higher microSD card. Lens Wide angle fixed focus lens Focus Range 1.5m~infinity Resolution: 2K WDR / 1080p WDR Video Format: .MP4 Resolution: according to video resolution setting Picture... - Page 35 Item Description Temperature Operation 20 ~ 70% RH Humidity Storage -20° ~ 70° C Temperature Android 9.0 or higher Supports OS iOS 13 or higher Harmony 2.0 or higher Dimension 95.4 x 59.5 x 38.6 mm Weight approximate 88g Built-in IEEE 802.11g/n(HT20) Wi-Fi Chip: SSW101BC Wi-Fi Band 2412~2484MHz Wi-Fi Frequency Ch1~Ch13...
Need help?
Do you have a question about the f491 Series and is the answer not in the manual?
Questions and answers