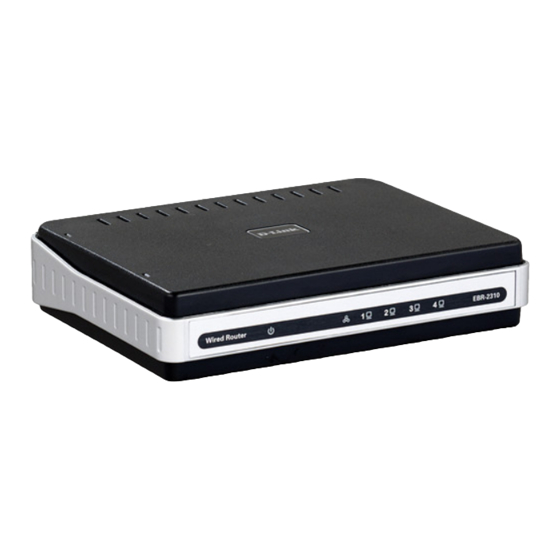
D-Link EBR-2310 User Manual
Ethernet broadband router
Hide thumbs
Also See for EBR-2310:
- User manual (103 pages) ,
- Specifications (2 pages) ,
- Quick install manual (1 page)
Table of Contents
Advertisement
Advertisement
Table of Contents

Related Manuals for D-Link EBR-2310


Summary of Contents for D-Link EBR-2310
-
Page 2: Table Of Contents
XP ..45 ® Internet Setup ..........17 Adding a local printer ........45 Static (assigned by ISP)......17 Sharing a Network Printer ........51 Dynamic (Cable) ........18 Sharing an LPR Printer.......... 55 PPPoE (DSL) ..........19 D-Link EBR-2310 User Manual... - Page 3 Table of Contents Networking Basics ............ 60 Check your IP address .......... 60 Statically Assign an IP address ......61 Technical Specifications........... 62 Contacting Technical Support ........63 Warranty ..............64 Registration..............66 D-Link EBR-2310 User Manual...
-
Page 4: Product Overview
Section 1 - Product Overview Product Overview Package Contents • EBR-2310 Ethernet Broadband Router • Power Adapter • Ethernet Cable • Manual on CD System Requirements • Ethernet-based Cable or DSL Modem • Computers with Windows , Macintosh , or Linux-based operating systems with an installed Ethernet ®... -
Page 5: Introduction
The D-Link Express EtherNetwork EBR-2310 is a 4-port Ethernet Broadband Router. The D-Link EBR-2310 enables users to quickly and easily share a high speed Internet connection. The D-Link EBR-2310 also incorporates many advanced features, traditionally found in more expensive routers. - Page 6 Internet users. • Special Application Supported - Special applications requiring multiple connections, like Internet gaming, video conferencing, Internet telephony and so on. The EBR-2310 can sense the application type and open a multi-port tunnel for it. • DMZ Host Supported - Allows a networked computer to be fully exposed to the Internet. This function is used when the Special Application feature is insufficient to allow an application to function correctly.
-
Page 7: Hardware Overview
WAN status indicator will light Green when there is good physical WAN connection. LAN Link/Act. Power Link status indicators light Power indicator will light Green. The LED flickers Green. when the corresponding port is sending or receiving data. D-Link EBR-2310 User Manual... -
Page 8: Rear Panel
(LAN.) Reset Used to restore the EBR-2310 back to factory default settings. *All ports (both LAN & WAN) are Auto-MDIX. All ports auto-sense cable types to accommodate Straight-through or Cross-over cable. D-Link EBR-2310 User Manual... -
Page 9: Technology Introduction
For example, a firewall can be configured to work with an FTP or Telnet server. Or a firewall can be configured to work with specific UDP or TCP ports to allow certain applications or games to work properly over the Internet. D-Link EBR-2310 User Manual... -
Page 10: Introduction To Local Area Networking
Leave the device powered on, do not disconnect the power Press the reset button and hold (use a paper-clip) Keep the button pressed about 10 seconds Release the button The EBR-2310 will then automatically reboot itself. D-Link EBR-2310 User Manual... -
Page 11: Installation
Configure your computers to obtain TCP/IP settings automatically from the DHCP server feature of the EBR-2310 Since the IP address of the EBR-2310 is 192.168.0.1, the IP address of your computer must be 192.168.0.X (where “X” is a number between 2 and 254.) Each computer on your network must have a different IP address within that range.The default gateway must be 192.168.0.1 (the IP address of the EBR-2310). -
Page 12: Configuration
Navigator with Java Script enabled. Log in Open your web browser and type in the IP address of the EBR-2310 into the Location (for Netscape) or Address (for IE) field and press “Enter.” The default IP address of the EBR-2310 is 192.168.0.1 For example: http://192.168.0.1... -
Page 13: Setup Wizard
Section 3 - Configuration Setup Wizard You may run the setup wizard to quickly setup your router. Click Setup Wizard to launch the wizard. Click Launch Internet Connection Setup Wizard to begin. Click Next to continue. D-Link EBR-2310 User Manual... - Page 14 Create a new password and then click Next to continue. Select your time zone from the drop-down menu and then click Next to continue. Select the type of Internet connection you use and then click Next to continue. D-Link EBR-2310 User Manual...
- Page 15 Note: Make sure to remove your PPPoE software from your computer. The software is no longer needed and will not work through a router. If you selected PPTP, enter your PPTP username and password. Click Next to continue. D-Link EBR-2310 User Manual...
- Page 16 Click Connect to save your settings. Once the router is finished rebooting, click Continue. Please allow 1-2 minutes to connect. Close your browser window and reopen it to test your Internet connection. It may take a few tries to initially connect to the Internet. D-Link EBR-2310 User Manual...
-
Page 17: Internet Setup
Enter the Primary DNS server IP address Address: assigned by your ISP. Secondary DNS This is optional. Address: MTU: Maximum Transmission Unit - you may need to change the MTU for optimal performance with your specific ISP. 1492 is the default MTU. D-Link EBR-2310 User Manual... -
Page 18: Dynamic (Cable)
Enter the Primary DNS (Domain Name Server) server IP address assigned by your ISP. Secondary DNS Address: This is optional. MTU: Maximum Transmission Unit - you may need to change the MTU for optimal performance with your specific ISP. 1500 is the default MTU. D-Link EBR-2310 User Manual... -
Page 19: Pppoe (Dsl)
To disable this feature, enable Auto-reconnect. MTU: Maximum Transmission Unit - you may need to change the MTU for optimal performance with your specific ISP. 1492 is the default MTU. Connection Mode Select either Always-on, Manual, or Connect-on demand. Select: D-Link EBR-2310 User Manual... -
Page 20: Pptp
To disable this feature, enable Auto-reconnect. MTU: Maximum Transmission Unit - you may need to change the MTU for optimal performance with your specific ISP. 1492 is the default MTU. Connect Mode: Select either Always-on, Manual, or Connect-on demand. D-Link EBR-2310 User Manual... -
Page 21: L2Tp
Enter a maximum idle time during which the Internet connection is maintained during inactivity. To disable this feature, enable Time: Auto-reconnect. MTU: Maximum Transmission Unit - you may need to change the MTU for optimal performance with your specific ISP. 1492 is the default MTU. Connect Mode: Select either Always-on, Manual, or Connect-on demand. D-Link EBR-2310 User Manual... -
Page 22: Big Pond
Ethernet Card installed by your ISP and replace the WAN MAC address with the MAC address of the router. It is not recommended that you change the default MAC address unless required by your ISP. D-Link EBR-2310 User Manual... -
Page 23: Port Forwarding Rules
Start Port/ Enter the port or ports that you want to open. End Port: If you want to open 1 port, enter the same port in both boxes. Traffic Type: Select TCP, UDP, or ANY. D-Link EBR-2310 User Manual... -
Page 24: Application Rules
You can use a comma to add multiple ports or port ranges. Traffic Type: Select TCP, UDP, or ANY. D-Link EBR-2310 User Manual... -
Page 25: Network Filter
To find the MAC address on a computer, please refer to the Networking Basics section in this manual. DHCP Client: Select a DHCP client from the drop-down menu and click << to copy that MAC Address. D-Link EBR-2310 User Manual... -
Page 26: Website Filter
filtering on and allow access, or Turn website filtering on and deny access. Website URL/ Enter the keywords or URLs that you want to Domain: block (or allow). Any URL with the keyword in it will be blocked. D-Link EBR-2310 User Manual... -
Page 27: Firewall Settings
Check this box to allow L2TP VPN traffic to pass Passthrough: through the router to your VPN client. Enable IPSec Check this box to allow IPSec VPN traffic to pass Passthrough: through the router to your VPN client. D-Link EBR-2310 User Manual... -
Page 28: Advanced Network Settings
To utilize Gaming Mode, click the box. If you are not using a Gaming application, it is recommended that you Disable Gaming Mode. Multicast Check the box to allow multicast traffic to pass streams: through the router from the Internet. D-Link EBR-2310 User Manual... -
Page 29: Administrator Settings
(*) into this field would present a security risk and is not recommended. Port: The port number used to access the WBR-1310. Example: http://x.x.x.x:8080 whereas x.x.x.x is the WAN IP address of the WBR-1310 and 8080 is the port used for the Web-Management interface. D-Link EBR-2310 User Manual... -
Page 30: Time Settings
Minute, and Second. Click Set Time. Time Zone: Select the Time Zone from the drop-down menu. Daylight Saving: To select Daylight Saving time manually, select enabled or disabled, and enter a start date and an end date for daylight saving time. D-Link EBR-2310 User Manual... -
Page 31: System Settings
Any settings that have not been saved will be lost, including any rules that you have created. If you want to save the current router configuration settings, use the Save button above. D-Link EBR-2310 User Manual... -
Page 32: Firmware Upgrade
You can upgrade the firmware of the Router here. Make sure the firmware you want to use is on the local hard drive of the computer. Click on Browse to locate the firmware file to be used for the update. Please check the D-Link support site for firmware updates at http://support.dlink.com. -
Page 33: System Check
Ping Test: The Ping Test is used to send Ping packets to test if a computer is on the Internet. Enter the IP Address that you wish to Ping, and click Ping. D-Link EBR-2310 User Manual... -
Page 34: Device Information
Disconnect to drop the PPPoE connection and use Connect to establish the PPPoE connection. LAN: Displays the MAC address and the private (local) IP settings for the router. WAN: Displays the MAC address and the public IP settings for the router. D-Link EBR-2310 User Manual... -
Page 35: Log
Section 3 - Configuration First Page: View the first page of the log. Last Page: View the last page of the log. Previous: View the previous page. Next: View the next page. Clear: Clear the log. D-Link EBR-2310 User Manual... -
Page 36: Stats
The screen below displays the Traffic Statistics. Here you can view the amount of packets that pass through the WBR-2310 on both the WAN and the LAN ports. The traffic counter will reset if the device is rebooted. D-Link EBR-2310 User Manual... -
Page 37: Support
Section 3 - Configuration Support D-Link EBR-2310 User Manual... -
Page 38: Troubleshooting
1. Why can’t I access the web-based configuration utility? When entering the IP address of the D-Link router (192.168.0.1 for example), you are not connecting to a website on the Internet or have to be connected to the Internet. The device has the utility built-in to a ROM chip in the device itself. - Page 39 • Close your web browser (if open) and open it. • Access the web management. Open your web browser and enter the IP address of your D-Link router in the address bar. This should open the login page for your the web management.
- Page 40 NT, 2000, and XP users type in cmd) and ® ® press Enter (or click OK). • Once the window opens, you’ll need to do a special ping. Use the following syntax: ping [url] [-f] [-l] [MTU value] Example: ping yahoo.com -f -l 1472 D-Link EBR-2310 User Manual...
- Page 41 • To change the MTU enter the number in the MTU field and click the Apply button to save your settings. • Test your email. If changing the MTU does not resolve the problem, continue changing the MTU in increments of ten. D-Link EBR-2310 User Manual...
-
Page 42: Assigning A Static Ip Address
If you are not using a DHCP capable Gateway/Router, or you need to assign a Static IP Address, please follow these instructions: • Go to Start • Double-click on Control Panel • Double-click on Network Connections D-Link EBR-2310 User Manual... - Page 43 Appendix A - Assigning a Static IP Address • Right-click on Local Area Connections. • Double-click Properties • Highlight Internet Protocol(TCP/IP) • Click Properties • Select Use the following IP address in the Internet Protocol (TCP/IP) Properties window (shown below.) D-Link EBR-2310 User Manual...
- Page 44 • Input your DNS server addresses. (Note: If you are entering a DNS server, you must enter the IP Address of the Default Gateway.) The DNS server information will be provided by your ISP (Internet Service Provider.) D-Link EBR-2310 User Manual...
-
Page 45: Adding And Sharing Printers In Windows ® Xp
If you do not need to share your printer on a network, follow these directions to add the printer to one computer. • Go to Start> Printers and Faxes D-Link EBR-2310 User Manual... - Page 46 Appendix B - Adding and Sharing Printers in Windows ® • Click on Add a printer • Click Next D-Link EBR-2310 User Manual...
- Page 47 • Click Next • Select Use the following port: • From the pull-down menu select the correct port for your printer (Most computers use the LPT1: port, as shown in the illustration.) • Click Next D-Link EBR-2310 User Manual...
- Page 48 • At this screen, you can change the name of the printer (optional.) • Click Next • SelectYes, to print a test page. A successful printing will confirm that you have chosen the correct driver. • Click Next D-Link EBR-2310 User Manual...
- Page 49 Appendix B - Adding and Sharing Printers in Windows ® This screen gives you information about your printer. (The printer will begin to print a test page) Click Finish When the test page has printed, Click OK D-Link EBR-2310 User Manual...
- Page 50 Appendix B - Adding and Sharing Printers in Windows ® • Go to Start> Printers and Faxes A successful installation will display the printer icon as shown at right. You have successfully added a local printer. D-Link EBR-2310 User Manual...
-
Page 51: Sharing A Network Printer
Please follow these directions to use the Add Printer Wizard to share a printer on your network: • Go to Start> • Printer and Faxes • Click on Add a Printer • Click Next D-Link EBR-2310 User Manual... - Page 52 Appendix C - Sharing a Network Printer • Select Network Printer • Click Next • Select Browse for a printer • Click Next • Select the printer you would like to share. • Click Next D-Link EBR-2310 User Manual...
- Page 53 Appendix C - Sharing a Network Printer • Click Finish To check for proper installation: • Go to Start > Printers and Faxes D-Link EBR-2310 User Manual...
- Page 54 • Make sure you have already run the Network Setup Wizard on all the network computers. After you run the Add Printer Wizard on all the computers in the network, you can share the printer. D-Link EBR-2310 User Manual...
-
Page 55: Sharing An Lpr Printer
• Go to Start > Printers and Faxes • Click on Add a Printer The screen to the right will display. • Click Next • Select Local printer… • Click Next • Select Create a new port D-Link EBR-2310 User Manual... - Page 56 • From the pull-down menu, select StandardTCP/IP Port, as shown. • Click Next • Please read the instructions on this screen. • Click Next • Enter the Printer IP Address and the Port Name, as shown. • Click Next D-Link EBR-2310 User Manual...
- Page 57 • Enter the Port Name and the Printer Name or IP Address. • Select LPR • Enter a Queue Name (if your Print-Server/Gateway has more than one port, you will need a Queue name.) • Click OK D-Link EBR-2310 User Manual...
- Page 58 • Select the printer you are adding from the list of Printers. • Insert the printer driver disk that came with your printer. • Click Have Disk If the printer driver is already installed, • Select Keep existing driver • Click Next D-Link EBR-2310 User Manual...
- Page 59 • Please run the Add Printer Wizard on all the computers on your network in order to share the printer. Note: You must run the Network Setup Wizard on all the computers on your network before you run the Add Printer Wizard. D-Link EBR-2310 User Manual...
-
Page 60: Networking Basics
Check your IP address After you install your new D-Link adapter, by default, the TCP/IP settings should be set to obtain an IP address from a DHCP server (i.e. wireless router) automatically. To verify your IP address, please follow the steps below. -
Page 61: Statically Assign An Ip Address
2000 - From the desktop, right-click My Network Places > Properties. ® Step 2 Right-click on the Local Area Connection which represents your D-Link network adapter and select Properties. Step 3 Highlight Internet Protocol (TCP/IP) and click Properties. Step 4 Click Use the following IP address and enter an IP address that is on the same subnet as your network or the LAN IP address on your router. -
Page 62: Technical Specifications
• W = 4.3in (109mm) • H = 1.2in (31mm) Media Access Control Weight CMSA/CA with ACK 0.44 lbs (200g) LEDS • Power Warranty • WAN 1-Year • Local Network – 10/100 Operating Temperature 32*F to 131*F (0*C to 55*C) D-Link EBR-2310 User Manual... -
Page 63: Contacting Technical Support
Appendix G - Contacting Technical Support Contacting Technical Support D-Link provides free technical support for customers within the United States and within Canada for the duration of the warranty period on this product. U.S. and Canadian customers can contact D-Link technical support through our web site or by phone. -
Page 64: Warranty
(or superior) in all material respects to the defective Hardware. Repaired or replacement hardware will be warranted for the remainder of the original Warranty Period or ninety (90) days, whichever is longer, and is subject to the same limitations and exclusions. If a material defect is incapable of correction, or if D-Link determines that it is not practical to repair or replace the defective Hardware, the actual price paid by the original purchaser for the defective Hardware will be refunded by D-Link upon return to D-Link of the defective Hardware. - Page 65 Damage that occurs in shipment, due to act of God, failures due to power surge, and cosmetic damage; Any hardware, software, firmware or other products or services provided by anyone other than D-Link; and Products that have been purchased from inventory clearance or liquidation sales or other sales in which D-Link, the sellers, or the liquidators expressly disclaim their warranty obligation pertaining to the product.
-
Page 66: Registration
Appendix I - Registration Registration Product registration is entirely voluntary and failure to complete or return this form will not diminish your warranty rights. Version 1.1 01/26/2006 D-Link EBR-2310 User Manual...
Need help?
Do you have a question about the EBR-2310 and is the answer not in the manual?
Questions and answers