
Related Manuals for Aura AMH-76DSP


Summary of Contents for Aura AMH-76DSP
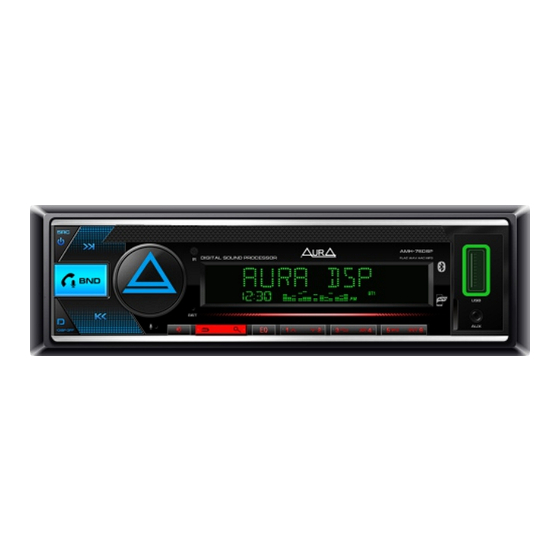
- Page 1 4x51W MAX POWER AMH-76DSP DSP BLUETOOTH / USB / FM RECEIVER USER MANUAL PLEASE READ CAREFULLY BEFORE USING...
- Page 2 Copyright Copyright “ “, “ “ are registered trademarks. All rights reserved. This document, entirely or in any part of it, is prohibited to reproduce, as well as copy without the preliminary written permission of the manufacturer. All trademarks, logos and names of products used on the packaging and in this document are logos or registered trademarks of the respective companies.
-
Page 3: Table Of Contents
Content Precautions.................... Equipment and installation ..............Connection ................... Appearance, controls ................Sizes...................... Remote control..................Basic operations ................... Menu: Sound settings ..................Preservation of DSP settings (presets) ..........Tuner settings ..................Bluetooth settings ................. System settings ..................Sources: Radio...................... USB ....................... Bluetooth .................... -
Page 4: Precautions
Precautions User manual contains important security recommendations and information about the proper operation of the device. Please carefully follow all the instructions given in this guide. 1. When installing the device, avoid places with high temperature, humidity, or places where there is a lot of dust. 2. -
Page 5: Equipment And Installation
Package and installation Open the package and make sure that inside are: 1. USB receiver - 1 pc. 2. Remote control - 1 pc. 3. Keys for removing the receiver - 2 pcs. 4. ISO connector - 1 pc. 5. Instruction Installation of the device Connect the required wires and connectors... -
Page 6: Connection
Power connection 1. Make sure your vehicle's onboard voltage is +12 volts. 2. Remove the fuse from the device before connecting the wires. 3. Connect the yellow (A4) wire to the +12 volt DC power supply. 4. Connect the red wire (A7) to the ACC terminal of the ignition switch. 5. -
Page 7: Appearance, Controls
Controls 1. Turning on / off the device / Source choice 2. Next track / rewinding / setting up radio 3. Volume adjustment / switching / confirmation of choice 4. IR receiver 5. LCD display 6. USB port Switching radio bands / Receiving / Ending a call / Voice assistant 8. -
Page 8: Sizes
Sizes Remote control Removing the battery protection (CR-2025). The remote control comes with battery protection. The remote control will not work until the protection is removed. Battery replacement: When the lithium battery has lost capacity, replace it as shown in the figure. 1. - Page 9 Remote control Turning on / off the device 2. Volume adjustment 3. Switching radio ranges Reception of a call Previous track / rewinding back / Radio setting up 5. Choosing a source Next track / rewinding forward / Radio setting up 7.
-
Page 10: Basic Operations
Main operations Turning on / off Press any button to enable the device. Press and hold the button (1) / SRC to turn off. Volume adjustment Rotate the volume control handle to set the desired level. Choosing a source Press the button (1) / SRC to switch between sources Reproduction: Radio ->... - Page 11 EQ SETTING Subwoofer Sub-W output - turning on / disabling the subwoofer. Sub-W level - settings of the volume volume level. Sub-W stereo - sabwuofer RCA output mode (Mono/Stereo). Fader Setting relative volume between the front and rear speakers. Balance Setting relative volume between the left and right channels.
- Page 12 X-OVER 3-WAY (Network) Tweeter - HPF setting for tweeters. HP FRQ - Cutoff frequency: 500 / 630 / 700 / 800 / 1 / 1.6 / 2.5 / 3.15 / 4 / 5 / 6.3 / 8 / 10 / 12.5 kHz. SLOPE (High-High Frequency Slope) - the steepness of the decline: 6 / 12 / 18 / 24 dB per octave.
- Page 13 DTA SETTING Delay - value for each channel. Front left - front left Front right - front right Rear left - rear left Rear right - rear right Sub-W left - subwoofer left Sub-W right - subwoofer right Gain - volume value of each channel Front left - front left Front right - front right Rear left - rear left...
-
Page 14: Preservation Of Dsp Settings (Presets)
DSP Presets You can save 6 independent settings (presets) and quickly switch between them. IMPORTANT! Settings are retained when the battery power is turned off. 1. Adjust the EQ, delay and crossover settings. 2. Exit the "Audio" menu. 3. hold down the volume knob (encoder) for 3 seconds. “DSP KEYS” (“memory”) will flash on the bottom line of the display. -
Page 15: Tuner Settings
TUNER (RADIO) BLUETOOTH PIN-code edit Changing the BT pairing PIN. MIC gain BT microphone level adjustment. SYSTEM Language Selecting the menu display language. Clock - clock setting Clock format - selection of clock display format (12 / 24 hours). Clock adjust - setting hours / minutes. Data format - select date display format. -
Page 16: System Settings
SYSTEM Beep - button sound Enable / disable sound when buttons are pressed. AUX IN Enable/disable AUX source. Programming regular steering wheel buttons. Detailed description of the programming procedure on page 18. Car ACC - ignition lock type Yes - set for the car with ACC position, the red power wire of the device is connected to the ACC position of the ignition switch. -
Page 17: Usb
Radio Automatic search and storage of stations Press and hold the SEARCH button (14) for more than 2 seconds.The unit will quickly search and automatically store 18 FM and 12 AM radio stations with strong signals. Manual search for radio stations Press the button (9) or (2) to change the frequency step by step. -
Page 18: Bluetooth
Pair your phone with the AMH-76DSP reciever: 1. Turn on Bluetooth on your mobile device. 2. Find «AMH-76DSP» in the list of available BT devices and connect to it. Authorization PIN: 1234 . 3. In case of successful connection, the “BT” indicator on the receiver’s display will stop blinking and will light up constantly. -
Page 19: Aux
Phone app Most device settings are available in the AurA Audio mobile app for Android or iOS. You can control the AMH-76DSP receiver from your smartphone: 1. Install the AurA Audio app from Google Play or the App Store. - Page 20 Steering wheel button setup...
-
Page 21: Specifications
Specifications Main Operating supply voltage: 12 V (allowable limits 9.6 - 15 V) Fuse: 15 A Maximum output power: 4 x 51 W (4 ohms) Rated output power: 4 x 16 W (4 ohms) Speaker Impedance: 4-8 ohm Frequency response: 20 Hz - 20 kHz Display viewing angle: vertical ±30°, horizontal ±15°... -
Page 22: Warranty Coupon
WARRANTY CARD Model name Serial No. Buyer name Buyer address Phone No. Sales date Signature Seller name/stamp... - Page 23 TERMS OF WARRANTY SERVICE The manufacturer guarantees the high quality and reliability of the products provided that the technical requirements described in Operating Instructions. This warranty is issued for a period of one year from the date of purchase and is provided in the event that the product is found to be defective due to inadequate quality of materials or workmanship of the manufacturer.
- Page 24 Due to continuous product development and improvement, all specifications and appearance are subject to change without notice. © AURA Electronics Inc. All rights reserved.
Need help?
Do you have a question about the AMH-76DSP and is the answer not in the manual?
Questions and answers