Table of Contents
Advertisement
Available languages
Available languages
Quick Links
Advertisement
Table of Contents

Related Manuals for Allen + Roth L-GZ1150PST-A


Summary of Contents for Allen + Roth L-GZ1150PST-A
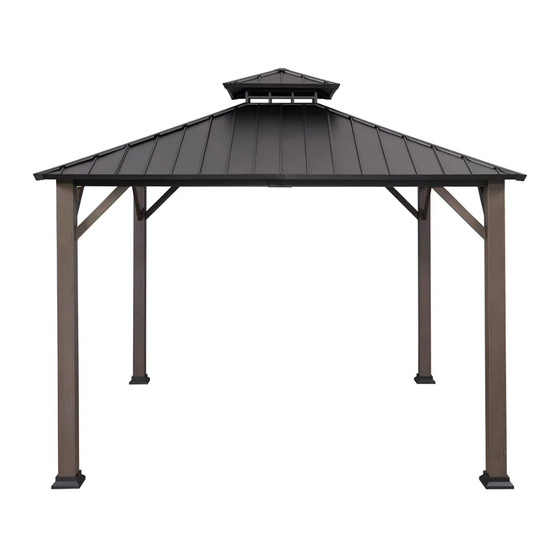
- Page 1 ITEM #0878762 HARDTOP GAZEBO MODEL #L-GZ1150PST-A Español p. 25 ATTACH YOUR RECEIPT HERE Purchase Date Serial Number Questions, problems, missing parts? Before returning to your retailer, call our customer service department at 1-866-439-9800, 8 a.m. - 8 p.m., EST, Monday - Friday.
-
Page 2: Package Contents
PACKAGE CONTENTS L5 L6... - Page 3 PACKAGE CONTENTS PART DESCRIPTION QUANTITY Left Beam Right Beam Connector 1 Connector 2 Big Roof Top Beam Big Roof Middle Beam Big Top Frame 1 Big Top Frame 2 Small Roof Top Beam Small Roof Connector Small Roof Cover Small Roof Panel Big Roof Panel 1 Big Roof Panel 2 Big Roof Panel 3...
- Page 4 HARDWARE CONTENTS (not shown to size) M6 x 20 mm Bolt M6 x 60 mm Bolt M6 x 40 mm Bolt M6 Flat Washer Qty. 16 + 1 spare Qty. 293 + 15 spare Qty. 260 + 13 spare Qty. 9 + 1 spare M6 Nut ¢8 X 180 mm Stake Plate...
-
Page 5: Safety Information
SAFETY INFORMATION Please read and understand this entire manual before attempting to assemble or install the product. WARNING • Keep all children and pets away from assembly area. Children and pets should be supervised while gazebo is being assembled. • The assembled gazebo should be located at least 6 feet from any obstruction such as a fence, garage, house, overhanging branches, laundry lines or electrical wires. - Page 6 PREPARATION Before beginning assembly of product, make sure all parts are present. Compare parts with package contents list and hardware contents list. If any part is missing or damaged, do not attempt to assemble the product. Estimated Assembly Time: 150 minutes Tools Required for Assembly (included): Wrench.
- Page 7 ASSEMBLY INSTRUCTIONS Fig.12 Fig.7 Fig.13 Fig.10 Fig.8 Fig.2 Fig.4 Fig.5 Fig.11 Fig.9 Fig.3 Fig.6 Fig.1 1. Insert the base covers (Q1) to the posts (O1), attach the bases (P1) to the posts (O1) using bolts (LL) and flat washers (EE). Tighten with wrench (II). Hardware Used M6 x 20 mm Bolt M6 Flat Washer...
- Page 8 ASSEMBLY INSTRUCTIONS 2. Attach the connectors 1 (B1) to the upper side of posts (O1) using bolts (LL) and flat washers (EE), tighten with wrench (II). Hardware Used x 12 M6 x 20 mm Bolt x 12 M6 Flat Washer M6 Wrench 3.
- Page 9 ASSEMBLY INSTRUCTIONS 5. Attach one end of left beams (A3) to the posts (O1) using bolts (LL), flat washers (EE) and spring washers (KK). Tighten with wrench (II). Use these same instructions to attach the right beams (A4) to the posts. Hardware Used x 24 M6 x 20 mm Bolt...
- Page 10 ASSEMBLY INSTRUCTIONS 8. Attach the upper end of big roof top beams (D1) to the assembled big top frames (F1/ F2) using bolts (AA), flat washers (EE) and spring washers (KK). Tighten with wrench (ZZ). (Note: A ladder and one assistant is required to complete this step.) Hardware Used M6 x 20 mm Bolt...
- Page 11 ASSEMBLY INSTRUCTIONS 11. Attach the other end of big roof middle beams (E) to the connectors 2 (C) using bolts (DD), nuts (GG) and flat washers EE DD (EE). Tighten with wrench (II). Hardware Used M6 x 60 mm Bolt x 16 M6 Flat Washer M6 Nut...
- Page 12 ASSEMBLY INSTRUCTIONS Fig.18 Fig.15 Fig.17 Fig.14 Fig.16 Fig.19 Fig.20 Fig.21 Fig.22 14. Attach the small roof bottom panels (X1) to the end of small roof top beams (G1) using bolts (LL) and flat washers (EE). Tighten with wrench (II). Hardware Used M6 x 20 mm Bolt M6 Flat Washer M6 Wrench...
- Page 13 ASSEMBLY INSTRUCTIONS 16. Attach the small roof sheets (Y1) to small top bottom panels (X1) using bolts (LL) and flat washers (EE). Tighten with wrench (II) . Hardware Used M6 x 20 mm Bolt M6 Flat Washer M6 Wrench 17. Attach the small roof sheetings 1 (M) to the small roof top beams (G1) using bolts (BB) and flat washers (EE).
- Page 14 ASSEMBLY INSTRUCTIONS 19. Attach the big roof beams 1(U3) to the big roof top beams (D1) using bolts (LL) and flat washers (EE), tighten with wrench (II). Hardware Used x 16 M6 x 20 mm Bolt LL EE x 16 M6 Flat Washer M6 Wrench 20.
- Page 15 ASSEMBLY INSTRUCTIONS 22. Attach the other end of big roof beams 4 (W4) to the big roof middle beams (E) using bolts (LL) and flat washers (EE), tighten with wrench (II). Repeat these instructions to assemble big roof beams 3 (W3). Hardware Used M6 x 20 mm Bolt M6 Flat Washer...
- Page 16 ASSEMBLY INSTRUCTIONS 24. Attach the big roof panels (L1, L2, L3, L4,L5, L6) to the big roof top beams (D1) using plates (JJ), bolts (LL) and flat washers (EE). Tighten with wrench (II). Hardware Used x 24 M6 x 20 mm Bolt x 24 M6 Flat Washer M6 Wrench...
- Page 17 ASSEMBLY INSTRUCTIONS 27. Attach the big roof sheets (Y2) to the big roof beams (W4) using bolts (LL) and flat washers (EE). Tighten with wrench (II) Hardware Used x 24 M6 x 20 mm Bolt x 24 M6 Flat Washer M6 Wrench...
- Page 18 ASSEMBLY INSTRUCTIONS Fig.28 28. Lift the base covers (Q1) and secure the gazebo to the ground using stakes (HH). Hardware Used ¢8 X180mm Stake...
-
Page 19: Care And Maintenance
CARE AND MAINTENANCE • The steel components for this gazebo are treated with rust inhibiting paint that protects it from rusting. However, due to the nature of steel, surface oxidation (rusting) will occur if these protective coatings are scratched. This is not a defect and thus not covered by the warranty. -
Page 20: Replacement Parts List
REPLACEMENT PARTS LIST For replacement parts, call our customer service department at 1-866-439-9800, 8 a.m. - 8 p.m., EST, Monday - Friday. - Page 21 REPLACEMENT PARTS LIST For replacement parts, call our customer service department at 1-866-439-9800, 8 a.m. - 8 p.m., EST, Monday - Friday.
- Page 22 REPLACEMENT PARTS LIST PART DESCRIPTION PART# H02020C11 M6 x 20 mm Bolt M6 x 40 mm Bolt H02040C11 H02060C11 M6 x 60 mm Bolt H19001C11 M6 Flat Washer H14001C11 M6 Nut ¢8 X 180 mm Stake P12401A01001 P11456A01107 Plate M6 Spring Washer H13001C11 H00001C12 M6 Wrench...
- Page 23 REPLACEMENT PARTS LIST PART DESCRIPTION PART# Left Beam P11044D01107 Right Beam P11045D01107 P10758A01107 Connector 1 Connector 2 P10806A01107 Big Roof Top Beam P10356B05107 Big Roof Middle Beam P10417A01107 Big Top Frame 1 P10118A01107 P10119A01107 Big Top Frame 2 Small Roof Top Beam P10275A05107 Small Roof Connector P10170B01107...
- Page 24 ARTÍCULO # 0878762 GAZEBO CON CUBIERTA RÍGIDA MODELO # L-GZ1150PST-A ADJUNTE SU RECIBO AQUÍ Fecha de compra Número de serie ¿Preguntas, problemas, piezas faltantes? Antes de volver a la tienda, llame a nuestro Departamento de Servicio al Cliente al 1-866-439-9800, de lunes a viernes de 8 a.m. a 8 p.m.,...
- Page 25 CONTENIDO DEL PAQUETE L5 L6 L3 L4...
- Page 26 CONTENIDO DEL PAQUETE CANTIDAD PIEZDE DESCRIPCIÓNA Viga izquierda Viga derecha Conector 1 Conector 2 Viga superior de techo grande Viga central de techo grande Estructura superior grande 1 Estructura superior grande 2 Viga superior de techo pequeña Conector de techo pequeño Cubierta de techo pequeña Panel de techo pequeño Panel de techo grande 1...
- Page 27 ADITAMENTOS (no se muestran en tamaño real) Perno M6 x 20 mm Perno M6 x 40 mm Arandela plana M6 Perno M6 x 60 mm Cant.260 + 13 Cant.16 + 1 Cant. 293 + 15 Cant.9 + 1 repuestos repuestos repuestos repuestos Placa...
-
Page 28: Información De Seguridad
INFORMACIÓN DE SEGURIDAD Lea y comprenda completamente este manual antes de intentar ensamblar o instalar el producto. ADVERTENCIA • Mantenga a niños y mascotas alejados del área de ensamblaje. Los niños y las mascotas se deben supervisar mientras ensambla la pérgola. •... - Page 29 PREPARACIÓN • Verifique las normas estatales y locales antes de comprar el producto. Es posible que algunas jurisdicciones requieran permisos para su instalación y uso. Es posible que algunos procedimientos especiales sean válidos en su área. • Solo para uso en exteriores. •...
-
Page 30: Instrucciones De Ensamblaje
INSTRUCCIONES DE ENSAMBLAJE Fig.12 Fig.7 Fig.13 Fig.10 Fig.8 Fig.2 Fig.4 Fig.5 Fig.11 Fig.9 Fig.3 Fig.6 Fig.1 1. Inserte las cubiertas de la base (Q1) en los postes (N), fije las bases (P1) a los postes (O1) con pernos (LL) y arandelas planas (EE). - Page 31 INSTRUCCIONES DE ENSAMBLAJE 2. Fije los conectores 1 (B1) a la parte superior de los postes (O1) con pernos (LL) y arandelas planas (EE), apriete con la llave (II). Aditamentos utilizados x 12 Pemo M6 x 20 mm x 12 Arandela plana M6 Llave M6 3.
- Page 32 INSTRUCCIONES DE ENSAMBLAJE 5. Fije un extremo de las vigas izquierdas (A3) a los postes (O1) con pernos (LL) y arandelas planas (EE) y arandela de resortes (KK). Apriete con la llave (II). Use estas mismas instrucciones para KK EE fijar las vigas derechas (A4) a los postes.
- Page 33 INSTRUCCIONES DE ENSAMBLAJE Fije el extremo superior de las vigas superiores para techo grandes (D1) a las estructuras superiores grandes ensambladas (F1 y F2) con pernos (LL) y arandelas planas (EE) y arandelas de resortes (KK). Apriete con la llave (II). Nota: se requieren una escalera y un asistente para completar este paso).
- Page 34 INSTRUCCIONES DE ENSAMBLAJE 11. Fije el otro extremo de las vigas centrales de techo grandes (E) a los conectores 2 (C) con pernos (DD), tuercas (GG) y EE DD arandelas planas (EE). Apriete con la llave (II). Aditamentos utilizados Pemo M6 x 60 mm x 16 Arandela plana M6 Arandela de resorte M6...
- Page 35 INSTRUCCIONES DE ENSAMBLAJE Fig.18 Fig.15 Fig.17 Fig.14 Fig.16 Fig.19 Fig.20 Fig.21 Fig.22 14. Fije los paneles inferiores de techo peqeños (X1) al extremo de las vigas superiores de techo pequeñas (G1) con pernos (LL) y arandelas planas (EE). Apriete con la llave (II). Aditamentos utilizados Pemo M6 x 20 mm Arandela plana M6...
- Page 36 INSTRUCCIONES DE ENSAMBLAJE 16. Fije las láminas de techo pequeñas (Y1) a los paneles inferiores y superiores pequeños (X1) con pernos (LL) y arandelas planas (EE). Apriete con la llave (II) . Aditamentos utilizados Pemo M6 x 20 mm Arandela plana M6 Llave M6 17.
- Page 37 INSTRUCCIONES DE ENSAMBLAJE 19. Fije las vigas de techo grandes 1 (U3) a las vigas superiores de techo grandes (D1) con pernos (LL) y arandelas planas (EE), apriete con la llave (II). Aditamentos utilizados LL EE x 16 Pemo M6 x 20 mm x 16 Arandela plana M6 Llave M6...
- Page 38 INSTRUCCIONES DE ENSAMBLAJE 22. Fije el otro extremo de las vigas de techo grandes 4 (W4) a las vigas centrales de techo grandes (E) con pernos (LL) y arandelas planas (EE), apriete con la llave (II). Repita estas instrucciones para ensamblar las vigas de techo grandes 3 (W3) Aditamentos utilizados...
- Page 39 INSTRUCCIONES DE ENSAMBLAJE 24. Fije los paneles de techo grandes (L1/L2/ L3/ L4/ L5/L6) a las vigas superiores de techo grandes (D1) con placas (JJ), pernos (LL) y arandelas planas (EE). Aditamentos utilizados x 24 Perno M6 x 20mm x 24 Arandela planaM6 Llave M6 x 12...
- Page 40 INSTRUCCIONES DE ENSAMBLAJE 27. Fije las láminas de techo grandes (Y2) a las vigas superiores de techo grandes 4 (W4) con pernos (LL) y arandelas planas (EE). Repita este paso para fijar las láminas de techo grandes (Y2) a las vigas de techo grandes 3 (W3).
- Page 41 INSTRUCCIONES DE ENSAMBLAJE Fig.28 28. Levante las cubiertas de la base (Q1) yasegure el gazebo 30 al suelo con las estacas (GG). Aditamentos utilizados Estaca de Φ8 x 180 mm...
-
Page 42: Cuidado Y Mantenimiento
CUIDADO Y MANTENIMIENTO • Los componentes de acero de este gazebo están tratados con pintura antioxidante que lo protege del óxido. Sin embargo, debido a la naturaleza del acero, puede producirse una oxidación superficial si estos recubrimientos protectores se rayan. Esto no es un defecto y por lo tanto no está cubierto por la garantía. •... -
Page 43: Lista De Piezas De Repuesto
LISTA DE PIEZAS DE REPUESTO Para obtener piezas de repuesto, llame a nuestro Departamento de Servicio al Cliente al 1-866-439-9800, de lunes a viernes de 8 a.m. a 8 p.m., hora estándar del Este. - Page 44 LISTA DE PIEZAS DE REPUESTO Para obtener piezas de repuesto, llame a nuestro Departamento de Servicio al Cliente al 1-866-439-9800, de lunes a viernes de 8 a.m. a 8 p.m., hora estándar del Este.
- Page 45 LISTA DE PIEZAS DE REPUESTO PIEZA DESCRIPCIÓN CANTIDAD Perno M6 x 20 mm H02020C11 H02040C11 Perno M6 x 40 mm H02060C11 Perno M6 x 60 mm H19001C11 Arandela plana M6 Tuerca M6 H14001C11 Estaca de¢8 X 180 mm P12401A01001 P11456A01107 Placa Arandela de resorte M6 H13001C11...
- Page 46 LISTA DE PIEZAS DE REPUESTO PIEZA DESCRIPCIÓN CANTIDAD P11044D01107 Viga izquierda P11045D01107 Viga derecha P10758A01107 Conector 1 P10806A01107 Conector 2 Viga superior de techo grande P10356B05107 Viga central de techo grande P10417A01107 P10118A01107 Estructura superior grande 1 P10119A01107 Estructura superior grande 2 Viga superior de techo pequeña P10275A05107 Conector de techo pequeño...
Need help?
Do you have a question about the L-GZ1150PST-A and is the answer not in the manual?
Questions and answers