Table of Contents
Advertisement
Available languages
Available languages
allen + roth ® is a registered trademark of LF, LLC.
All rights reserved.
ATTACH YOUR RECEIPT HERE
Serial Number
Questions, problems, missing parts? Before returning to your retailer, call our customer service
department at 1-866-439-9800, 8 a.m. - 8 p.m., EST, Monday - Friday.
EB15498
w
Purchase Date
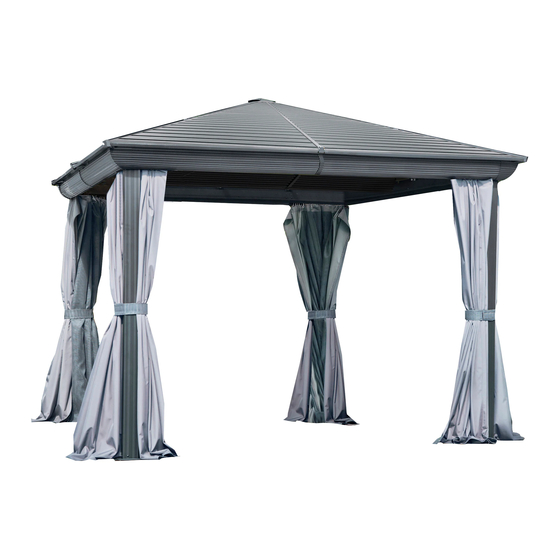
HARDTOP GAZEBO
Lowes.com/allenandroth
1
ITEM #0697454
MODEL #L-GZ604PCO-H
Français p. 21
Advertisement
Chapters
Table of Contents

Related Manuals for Allen + Roth L-GZ604PCO-H


Summary of Contents for Allen + Roth L-GZ604PCO-H
- Page 1 + roth ® is a registered trademark of LF, LLC. ITEM #0697454 All rights reserved. HARDTOP GAZEBO MODEL #L-GZ604PCO-H Français p. 21 ATTACH YOUR RECEIPT HERE Serial Number Purchase Date Questions, problems, missing parts? Before returning to your retailer, call our customer service department at 1-866-439-9800, 8 a.m.
-
Page 2: Table Of Contents
TABLE OF CONTENTS Package Contents ..........................Hardware Contents ..........................Safety Information ..........................Preparation ............................Assembly Instructions ........................Care and Maintenance ........................Warranty .............................. Replacement Parts List........................Lowes.com/allenandroth... -
Page 3: Package Contents
PACKAGE CONTENTS Lowes.com/allenandroth... - Page 4 PACKAGE CONTENTS PART QUANTITY DESCRIPTION Post Base Base Cover Left Decorative Groove Right Decorative Groove Oblique Beam Middle Beam Decorative Groove Connector Left Slot Right Slot F-Baffle 1 F-Baffle 2 Left Baffle Right Baffle Left Mosquito Netting Tube Right Mosquito Netting Tube Left Arc Support Bar Right Arc Support Bar Corner Support...
-
Page 5: Hardware Contents
HARDWARE CONTENTS M6 x 15 mm M6 x 35 mm M5 x 15 mm M6 x 25 mm Bolt Flat Washer Bolt Bolt Bolt Qty. 144 Qty. 180 Qty. 16 Qty. 48 Qty. 16 M6 x 20 mm M8 Cap Flat Washer Bolt Qty. -
Page 6: Safety Information
SAFETY INFORMATION Please read and understand this entire manual before attempting to assemble, or install the product. WARNING This product is intended for outdoor use only and should be placed on flat, horizontal ground. Ensure enough clearance around the product. Before assembling the product, find level ground no less 6 feet away from any structures or obstruction, such as fences, garages, houses, overhanging branches, laundry lines or electrical wires. -
Page 7: Assembly Instructions
ASSEMBLY INSTRUCTIONS ASSEMBLY INSTRUCTIONS 1. Attach base cover (B2) to the bottom of post (A), then lift it and post (A) to install base (B1) to post (A) using M6 x 15 mm bolts (AA) and M6 flat washers (BB). Tighten with Phillips screwdriver (not included). - Page 8 ASSEMBLY INSTRUCTIONS 2. Connect the left decorative groove (C1) and the right decorative groove (C2) to a decorative groove connector (F) using four M6 x 15 mm bolts (AA) and M6 flat washers (BB). Tighten with Phillips screwdriver. Repeat this step for the 3 remaining left decorative grooves (C1), right decorative grooves (C2) and decorative groove connectors (F).
- Page 9 ASSEMBLY INSTRUCTIONS 5. Attach the left decorative groove (C1) and right decorative groove (C2) of one assembly to 2 posts (A) using M6 x 35 mm bolts (CC) and M6 flat washers (BB). Tighten with M6 wrench (JJ). Repeat for the other decorative groove assemblies to make the frame of the gazebo.
- Page 10 ASSEMBLY INSTRUCTIONS 8. Attach middle covers (Q2) to the outside of the gazebo frame. Secure the top of the middle covers (Q2) to the assembly using M5 x 15 mm bolts (DD) and secure the bottom using M6 x 15 mm bolts (AA) and M6 flat washers (BB).
- Page 11 ASSEMBLY INSTRUCTIONS 11. Attach a left arc support bar (K1) to the underside of a left decorative groove (C1) using M6 x 15 mm bolts (AA) and M6 flat washers (BB). Secure it to the post (A) using M6 x 25 mm bolts (EE) and M6 flat washers (BB). Tighten with Phillips screwdriver.
- Page 12 ASSEMBLY INSTRUCTIONS 13. Attach post connectors (P) to the top of each post (A). Then, with the assistance of another person, lift the assembly from step 12 and insert an M6 x 20 mm bolt (II) through a M6 flat washer (BB), then through the bottom of oblique beam (D), post (A) and post connector (P).
- Page 13 ASSEMBLY INSTRUCTIONS 16. Attach the hook (O) to the underside of roof connector (N). 17. From the top of the assembly, attach the small roof cover (M) to the thread of hook (O). Secure using M8 flat washer (HH) and M8 cap nut (GG). Hardware Used M8 Cap Nut M8 Flat Washer...
- Page 14 ASSEMBLY INSTRUCTIONS 18. Slide a PC panel 1 (S1) into the triangular top section created by a oblique beam (D) and a middle beam (E). Insert a left slot (G1) into the assembly next, then fit a PC panel 3 (S3) into the left slot (G1); it will be secured in the next step.
- Page 15 ASSEMBLY INSTRUCTIONS 21. Insert corner closure plates (R1) into the outside of oblique beams (D) using M6 x 15 mm bolts (AA) and M6 flat washers (BB). Tighten with Phillips screwdriver. Hardware Used M6 x 15 mm Bolt M6 Flat Washer Lowes.com/allenandroth...
- Page 16 ASSEMBLY INSTRUCTIONS 22. Attach the mosquito netting (T) to the previously installed plastic hooks (U). Note: The netting with belts should face outside. 23. With the assistance of another person(s), move the assembled gazebo to the desired installation site. For ground installations, lift base cover (B2) and insert stakes (FF) through holes on base (B1).
-
Page 17: Care And Maintenance
CARE AND MAINTENANCE Check all nuts and bolts periodically for tightness. When required, tighten them again. This gazebo is intended for decorative and sunshade purposes only, and is not designed to withstand hard weather, including high winds, rain or snow. In order to avoid damage, remove accumulated water on the roof immediately, or disassemble the gazebo. -
Page 18: Replacement Parts List
REPLACEMENT PARTS LIST For replacement parts, call our customer service department at 1-866-439-9800, 8 a.m. - 8 p.m., EST, Monday - Friday. Lowes.com/allenandroth... - Page 19 REPLACEMENT PARTS LIST PART PART # DESCRIPTION #0697454-A Post Base #0697454-B1 Base Cover #0697454-B2 Left Decorative Groove #0697454-C1 Right Decorative Groove #0697454-C2 Oblique Beam #0697454-D Middle Beam #0697454-E Decorative Groove Connector #0697454-F #0697454-G1 Left Slot #0697454-G2 Right Slot #0697454-H1 F-Baffle 1 #0697454-H2 F-Baffle 2 Left Baffle...
- Page 20 M6 x 25 mm Bolt #0697454-EE #0697454-FF M8 Cap Nut #0697454-GG M8 Flat Washer #0697454-HH M6 x 20 mm Bolt #0697454-II M6 Wrench #0697454-JJ Printed in China allen + roth ® is a registered trademark of LF, LLC. All Rights Reserved. Lowes.com/allenandroth...
- Page 21 + roth ® est une marque de commerce déposée de LF, LLC. ARTICLE #0697454 Tous droits réservés. PAVILLON DE JARDIN À AUVENT RIGIDE MODÈLE #L-GZ604PCO-H JOIGNEZ VOTRE REÇU ICI Numéro de série Date d’achat Des questions, des problèmes, des pièces manquantes? Avant de retourner le produit au détaillant, appelez notre service à...
- Page 22 TABLE DES MATIÈRES Contenu de l’emballage ..........................Quincaillerie incluse ..........................Consignes de sécurité ..........................Préparation ............................Instructions pour l’assemblage ........................Entretien ........................Garantie .............................. Liste des pièces de rechange ........................Lowes.com/allenandroth...
-
Page 23: Contenu De L'emballage
CONTENU DE L’EMBALLAGE Lowes.com/allenandroth... - Page 24 CONTENU DE L’EMBALLAGE PIÈCE QUANTITÉ DESCRIPTION Montant Base Capuchon de pied Plaque rainurée décorative gauche Plaque rainurée décorative droite Poutrelle en diagonale Poutrelle centrale Raccord de plaque rainurée décorative Plaque gauche Plaque droite Déflecteur F 1 Déflecteur F 2 Déflecteur gauche Déflecteur droit Tube de moustiquaire gauche Tube de moustiquaire droit...
-
Page 25: Quincaillerie Incluse
QUINCAILLERIE INCLUSE Boulon M6 Rondelle Boulon M6 Boulon M5 Boulon M6 de 15 mm plate M6 de 35 mm de 15 mm de 25 mm Qté. 144 Qté. 180 Qté. 16 Qté. 48 Qté. 16 Rondelle plate Boulon M6 Écrou à chapeau de 20 mm Qté. -
Page 26: Consignes De Sécurité
CONSIGNES DE SÉCURITÉ Assurez-vous de lire et de comprendre l’intégralité de ce manuel avant de tenter d’assembler ou d’installer le produit. AVERTISSEMENT Cet article est conçu pour une utilisation extérieure seulement et devrait être placé sur un sol horizontal et plat. Assurez-vous qu’il y a suffisamment d’espace autour de l’article. -
Page 27: Instructions Pour L'assemblage
INSTRUCTIONS POUR L’ASSEMBLAGE INSTRUCTIONS POUR L’ASSEMBLAGE 1. Fixez le capuchon de pied (B2) à la partie inférieure du montant (A), puis soulevez le capuchon de pied et le montant pour fixer la base (B1) au montant (A) à l’aide de boulons M6 de 15 mm (AA) et de rondelles plates M6 (BB). - Page 28 INSTRUCTIONS POUR L’ASSEMBLAGE 2. Attachez la plaque rainurée décorative gauche (C1) et la plaque rainurée décorative droite (C2) à un raccord de plaque rainurée décorative (F) à l’aide de quatre boulons M6 de 15 mm (AA) et de rondelles plates M6 (BB). Serrez-les à...
- Page 29 INSTRUCTIONS POUR L’ASSEMBLAGE 5. Attachez la plaque rainurée décorative gauche (C1) et la plaque rainurée décorative droite (C2) d’un des assemblages à 2 montants (A) à l’aide de boulons M6 de 35 mm (CC) et de rondelles plates M6 (BB). Serrez à l’aide de la clé M6 (JJ). Répétez avec les autres assemblages de plaques rainurées décoratives pour former l’armature du pavillon de jardin.
- Page 30 INSTRUCTIONS POUR L’ASSEMBLAGE 8. Attachez les plaquettes centrales (Q2) à l’extérieur de l’armature du pavillon de jardin. Fixez la partie supérieure des plaquettes centrales (Q2) à l’assemblage à l’aide de boulons M5 de 15 mm (DD) et fixez la partie inférieure à l’aide de boulons M6 de 15 mm (AA) et de rondelles plates M6 (BB).
- Page 31 INSTRUCTIONS POUR L’ASSEMBLAGE 11. Attachez une barre de soutien d’arche gauche (K1) au dessous d’une plaque rainurée décorative gauche (C1) à l’aide de boulons M6 de 15 mm (AA) et de rondelles plates M6 (BB). Fixez-la au montant à l’aide de boulons M6 de 25 mm (EE) et de rondelles plates M6 (BB).
- Page 32 INSTRUCTIONS POUR L’ASSEMBLAGE 13. Attachez les raccords de montant (P) sur le dessus de chaque montant (A). Ensuite, avec l’aide d’une autre personne, soulevez l’assemblage de l’étape 12 et insérez un boulon M6 de 20 mm (II) dans une rondelle plate M6 (BB), puis à...
- Page 33 INSTRUCTIONS POUR L’ASSEMBLAGE 16. Attachez le crochet (O) au dessous du connecteur du toit (N). 17. À partir du haut de l’assemblage, attachez le petit capuchon de toit (M) au filetage du crochet (O). Fixez à l’aide d’une rondelle plate M8 (HH) et d’un écrou à chapeau (GG).
- Page 34 INSTRUCTIONS POUR L’ASSEMBLAGE 18. Glissez un panneau PC 1 (S1) à travers la section supérieure triangulaire créée par une poutrelle en diagonale (D) et une poutrelle centrale (E). Ensuite, insérez l’assemblage dans une plaque gauche (G1), puis rentrez un panneau PC 3 dans cette plaque gauche. Il sera fixé...
- Page 35 INSTRUCTIONS POUR L’ASSEMBLAGE 21. Insérez les plaquettes de fermeture des coins (R1) dans la partie extérieure des poutrelles en diagonale (D) à l’aide de boulons M6 de 15 mm (AA) et de rondelles plates M6 (BB). Serrez-les à l’aide d’un tournevis cruciforme. Quincaillerie utilisée Boulon M6 de 15 mm Rondelle plate M6...
- Page 36 INSTRUCTIONS POUR L’ASSEMBLAGE 22. Fixez la moustiquaire (T) aux crochets en plastique déjà installés (U). Remarque : La moustiquaire avec courroies devrait faire face à l’extérieur. 23. Avec l’aide d’au moins une autre personne, déplacez tout le pavillon de jardin à l’emplacement d’installation désiré.
-
Page 37: Entretien
ENTRETIEN Vérifiez périodiquement tous les écrous et les boulons afin de vous assurer qu’ils sont serrés. Au besoin, serrez-les de nouveau. Ce pavillon de jardin est conçu pour un usage décoratif et pour la protection solaire seulement. Il n’est pas conçu pour résister aux agents atmosphériques, notamment les vents violents, la pluie et la neige. -
Page 38: Liste Des Pièces De Rechange
LISTE DES PIÈCES DE RECHANGE Pour obtenir des pièces de rechange, communiquez avec notre service à la clientèle au 1 866 439-9800, entre 8 h et 20 h (HNE), du lundi au vendredi. Lowes.com/allenandroth... - Page 39 LISTE DES PIÈCES DE RECHANGE PIÈCE PIÈCE # DESCRIPTION Montant #0697454-A Base #0697454-B1 Capuchon de pied #0697454-B2 Plaque rainurée décorative gauche #0697454-C1 Plaque rainurée décorative droite #0697454-C2 Poutrelle en diagonale #0697454-D Poutrelle centrale #0697454-E Raccord de plaque rainurée décorative #0697454-F Plaque gauche #0697454-G1 Plaque droite...
- Page 40 #0697454-FF Écrou à chapeau M8 #0697454-GG Rondelle plate M8 #0697454-HH Boulon M6 de 20 mm #0697454-II Clé M6 #0697454-JJ Imprimé en Chine allen + roth est une marque de commerce ® déposée de LF, LLC. Tous droits réservés. Lowes.com/allenandroth Lowes.com/allenandroth...
Need help?
Do you have a question about the L-GZ604PCO-H and is the answer not in the manual?
Questions and answers