Advertisement
Quick Links
IMPORTANT INSTRUCTIONS
AND OPERATING MANUAL
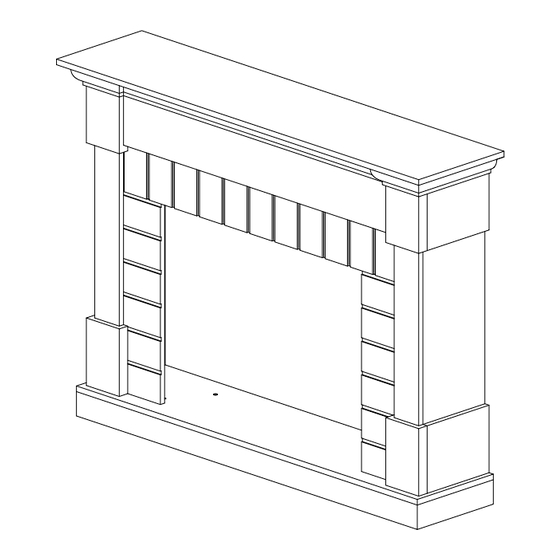
M0128 ELECTRIC FIREPLACE
THIS INSTRUCTION BOOKLET CONTAINS IMPORTANT SAFETY INFORMATION. PLEASE READ AND KEEP FOR FUTURE REFERENCE.
Do Not Return This Product!
Contact our customer service team for help first.
Call: 213-4467172 or 661-4358826
Monday - Sunday 8:30 am -5:30 pm P.S.T
ROWAN ELECTRIC APPLIANCE LLC
750S. Valley View Avenue, San Bernardino, CA 92408
60MIN
- Unit can tip over causing severe injury.
- Anchor unit to study on wall (if instructed to).
- Do Not allow children to climb on unit.
- Put heavy items on lower shelves or drawers.
Advertisement

Subscribe to Our Youtube Channel
Related Manuals for ROWAN ELECTRIC APPLIANCE M0128


Summary of Contents for ROWAN ELECTRIC APPLIANCE M0128
- Page 1 IMPORTANT INSTRUCTIONS AND OPERATING MANUAL M0128 ELECTRIC FIREPLACE THIS INSTRUCTION BOOKLET CONTAINS IMPORTANT SAFETY INFORMATION. PLEASE READ AND KEEP FOR FUTURE REFERENCE. Do Not Return This Product! Contact our customer service team for help first. Call: 213-4467172 or 661-4358826 Monday - Sunday 8:30 am -5:30 pm P.S.T ROWAN ELECTRIC APPLIANCE LLC 750S.
- Page 2 - 2 -...
- Page 3 -Do NOT use harsh chemicals or abrasive cleaners on this item.
-
Page 4: Parts List
PARTS LIST - 4 -... -
Page 5: Hardware List
HARDWARE LIST X 33 X 16 X 16 X 14 Ø6 x12mm Ø6 x 28mm Ø4 x12mm - 5 -... - Page 6 DIMENSIONS 303mm/ 1286mm/50.63" 11.93" 950mm/37.4" 950mm/37.4" 535mm/21.06" 714mm/28.11" 270mm/ 1210mm/47.64" 10.63" 1286mm/50.63" 303mm/ 11.93" ASSEMBLY Before installing this fireplace, please read the following steps carefully. - 6 -...
- Page 7 STEP 1: Join panels (2)+(4), (3)+(5) by securing screws (A) via L-brackets (B) with the allen wrench (E) provided. X 16 Ø6 x12mm - 7 -...
- Page 8 STEP 2: Join the panel (1) by inserting dowels (J). Ø8 x30mm - 8 -...
- Page 9 STEP 3: Lock them by securing screws (A) via L-brackets (B) with the allen wrench (E) provided. Ø6 x12mm...
- Page 10 STEP 4: Join panels (6)+(7) by securing screws (C) via washers(D) with the allen wrench (E) provided. Ø6 x 28mm - 10 -...
- Page 11 STEP 5: Fix panels (6)+(7) to the base panel by securing screws (A) via L-brackets (B), with the allen wrench (E) provided. Ø6 x 12mm - 11 -...
- Page 12 STEP 6: Join the panel (8) by securing screws (C) via washers(D) with the allen wrench (E) provided. Fix the panel (8) to left and right surrounds by securing screws (C) via washers(D) and MDF blocks(G) with the allen wrench (E) provided. Ø6 x 28mm - 12 -...
- Page 13 STEP 7: Join the panel (9) by securing screws (C) via washers(D) with the allen wrench (E) provided. Ø6 x 28mm - 13 -...
- Page 14 STEP 8: Join the panel (10) by securing screws (C) via washers(D) with the allen wrench (E) provided. Ø6 x 28mm - 14 -...
- Page 15 STEP 9: Remove 2 qty screws (F) on the bottom-left and bottom-right of the firebox. - 15 -...
- Page 16 STEP 10: Join the metal strip (I) and L-brackets (H ) by securing screws (F) with the screw driver. Ø4 x12mm - 16 -...
- Page 17 STEP 11: Install the firebox by securing screws (A) via the metal strip (I) and L-bracket (H) with the allen wrench provided. Ø6 x 12mm - 17-...
- Page 18 213-4467172 661-4358826 (8:30am - 5:30pm P.S.T.) SE REQUIERE PRUEBA DE COMPRA CON FECHA PARA SERVICIO BAJO GARANTÍA. Address: ROWAN ELECTRIC APPLIANCE LLC 750S. Valley View Avenue, San Bernardino, CA 92408 Phone: 213-4467172 or 661-4358826...
Need help?
Do you have a question about the M0128 and is the answer not in the manual?
Questions and answers