
Related Manuals for Eureka NEC490 Series


Summary of Contents for Eureka NEC490 Series
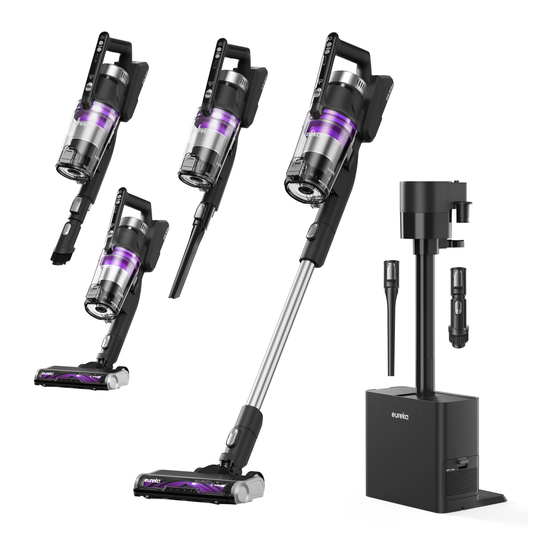
- Page 1 USER MANUAL NEC490 Series CORDLESS STICK VACUUM WITH STATION Please read the manual before use.
-
Page 3: Table Of Contents
CONTENTS SAFETY INSTRUCTIONS PRODUCT OVERVIEW PRODUCT INSTALLATION OPERATION INSTRUCTIONS CLEANING AND MAINTENANCE TROUBLE SHOOTING THE EUREKA LIMITED WARRANTY HOW TO ORDER REPLACEMENT PARTS... - Page 4 SAFETY INSTRUCTIONS IMPORTANT SAFEGUARDS When using an electrical appliance, basic precautions should always be followed, including the following: READ ALL INSTRUCTIONS BEFORE USING (THIS APPLIANCE) For the hand vacuum WARNING To reduce the risk of fire, electric shock, or injury: •...
-
Page 5: Safety Instructions
SAFETY INSTRUCTIONS • Use appliances only with specifically designated battery packs. Use of any other battery packs may create a risk of injury and fire. • When battery pack is not in use, keep it away from other metal objects, like paper clips, coins, keys, nails, screws or other small metal objects, that can make a connection from one terminal to another. - Page 6 SAFETY INSTRUCTIONS For the station WARNING To reduce the risk of fire, electric shock, or injury: • Do not leave appliance when plugged in. Unplug from outlet when not in use and before servicing. • Do not use outdoors or on wet surfaces. •...
- Page 7 SAFETY INSTRUCTIONS Tips • Longer charging time may be needed in the following circumstances. - When charging in a place where the indoor temperature exceeds 30°C; - When charging immediately after stopping running. • Please charge the vacuum cleaner after using no matter how long it is used. •...
-
Page 8: Product Overview
PRODUCT OVERVIEW Battery pack Post-motor cover Indicator lights Dust cup release button Dust cup Dust collection button Support pipe Wand Dust full Indicator Dust collection lid Motorized floor nozzle Filter cover... - Page 9 PRODUCT OVERVIEW List of Parts List of Accessories Upholstery brush Crevice tool Hand vacuum Motorized floor nozzle User Manual Dust bag*2 Battery pack Wand Station Dust collector assembly...
-
Page 10: Product Installation
PRODUCT INSTALLATION Hand Vacuum Assembly Battery Slide the battery into the hand vacuum until it clicks into place. Power button Align the hand vacuum nozzle opening with the top of Mode button Indicator lights the wand and slide it on until it clicks into place. Slide the wand into the floor nozzle until it clicks into place. - Page 11 PRODUCT INSTALLATION Station Assembly ATTENTION before assembling the station assembly, release the power cord to the length you need, up to 1.3 meters long. Insert the bottom of the dust collector assembly into the connector of the station assembly until you hear a "click".
-
Page 12: Operation Instructions
OPERATION INSTRUCTIONS Indicator for Modes Indicator For Battery Level And Modes ATTENTION Low mode: The speed indicator light is o . Medium mode: The speed indicator light is ON with white light. • Fully charge the battery before first use. High mode: The speed indicator light is ON with blue •... - Page 13 OPERATION INSTRUCTIONS How To Charge Battery Indicator for Charging Status Place the vacuum cleaner on the base station and it will The lower battery indicator light is blinking, indicating an automatically start charging. Please ensure the machine is incomplete charge. placed on the right place.
- Page 14 OPERATION INSTRUCTIONS Control Mode How to Remove and Reconnect the Hand Vacuum from Wand Press the power button on the handle to turn on, and press again to turn o . Use the speed mode button to switch Please press the release button to detach the handheld vacuum between low, medium, and high speed modes.
- Page 15 OPERATION INSTRUCTIONS How to Use Hand Vacuum and Accessories How to Use the Wand to Clean High Places The hand vacuum can be used with or without accessories. To clean in high up places you can use tools with the wand. To use without tools, press releasebutton and remove wand.
- Page 16 OPERATION INSTRUCTIONS How to Remove and Install Accessories How to Use the Station ATTENTION Grab the accessory with one hand, push the button on the accessory and then pull it down from the storage rack. Align the accessories with the storage opening and insert them •...
- Page 17 OPERATION INSTRUCTIONS When the vacuum is removed from the station, it stops How to Use the Station collecting dust and charging. ATTENTION • Please replace the dust bag when the dust full indicator turns red. • After replacing the dust bag, if the dust full indicator remains red, please check for clogging in the station elbow tube and filter.
- Page 18 OPERATION INSTRUCTIONS How to Disassemble the station Insert a screwdriver into the runway-shaped hole and press down on the removal latch of the station while pulling up on the metal tube of the dust collector assembly.
-
Page 19: Cleaning And Maintenance
CLEANING AND MAINTENANCE Lay the hand vacuum flat, press the dust cup release How to Maintain Your Vacuum button to remove the dust cup assembly. Then detach and turn over the dust cup filter assembly to dump the ATTENTION dust. •... - Page 20 CLEANING AND MAINTENANCE Pull the filter handle and take out the filter. How to Maintain Post-motor HEPA Filter Disassemble and Clean the HEPA Filter Filter ATTENTION Separator assembly • Please pay attention to sharp objects such as glass to prevent injury. •...
- Page 21 CLEANING AND MAINTENANCE Remove the HEPA filter. Open the top cover of the station. The HEPA filter can be washed gently with water, but not rubbed by brute force. After being fully dried, assemble it back according to the above disassembly steps.
- Page 22 CLEANING AND MAINTENANCE Pull up and remove the dust bag. How to Maintain Station’s Inlet Air Filter ATTENTION Before disassembling or replacing the station's inlet air filter, please remove the dust bag. For instructions, refer to the previous page. Hold the handle on the upper part of the filter cotton bracket and take out the filter assembly.
- Page 23 CLEANING AND MAINTENANCE Disassemble HEPA filter. Install the filter assembly after throughly dry. Place the HEPA filter on the trash can to remove any external dust and debris. How to Maintain HEPA Filter for Station Press down on the button of station’s cover. Clean the HEPA filter by water.
- Page 24 CLEANING AND MAINTENANCE After the HEPA filter is completely dry, reassemble it. How to Maintain Floor Nozzle ATTENTION • To avoid unnecessary service calls, periodically check floor nozzle for debris. lf floor nozzle gets clogged it will automatically shut o . •...
-
Page 25: Cleaning And Maintenance
CLEANING AND MAINTENANCE Press the release button of the floor nozzle, pull out the assembly, remove and clean it. After cleaning, follow the disassembly procedure to reinstall. -
Page 26: Trouble Shooting
TROUBLE SHOOTING In the case of any abnormalities in the use of this product please refer to the table below first. Abnormality Possible Cause Treatment • Floor nozzle or mite removal brush • Clean floor nozzle or mite removal brush entangled during rolling 3 indicators flash •... - Page 27 TROUBLE SHOOTING Install the whole vacuum back as shown in the picture, If there is a blockage in the inlet of the station, take steps as follows: press the duct collection button and observe whether the Dust Full Indicator is o . Detach the dust collector assembly and use hand vacuum to suck out the blockage from the station.
- Page 28 TROUBLE SHOOTING If the Dust Full Indicator still red: - Remove the dust bag assembly and use tools to clean the blockage inside the bent pipe. - Use the hand vacuum with crevice tool to clean the dust inside the station and prevent dust from being sucked into the motor.
-
Page 29: The Eureka Limited Warranty
Eureka will, at its option, repair or replace a defective vacuum/Battery Module or vacuum part that is covered by this warranty. Repairs may be performed using new or refurbished parts that meet or exceed Eureka specifications for new parts. lf Eureka elects to replace it, the replacement may be a reconditioned unit. - Page 30 You will be responsible for any initial shipping and insurance charges if the defective product(s) must be shipped for warranty service or warranty evaluation; however, Eureka or a Eureka Authorized Warranty Station will pay the return shipping charges if repairs are covered by the warranty.
-
Page 31: How To Order Replacement Parts
HOW TO ORDER REPLACEMENT PARTS Order genuine Eureka accessories and replacement parts Visit www.eureka.com or call 1-800-282-2886 Dust bag 12175000099401 Post-motor HEPA 12175000077502 Dust cup filter 12475000008870 HEPA for station 12175000065393 Station inlet 12475000008869 air filter Upholstery brush 12175000073682 Crevice tool...
Need help?
Do you have a question about the NEC490 Series and is the answer not in the manual?
Questions and answers