Table of Contents
Advertisement
Quick Links
Advertisement
Table of Contents

Related Manuals for Tekon 950


Summary of Contents for Tekon 950
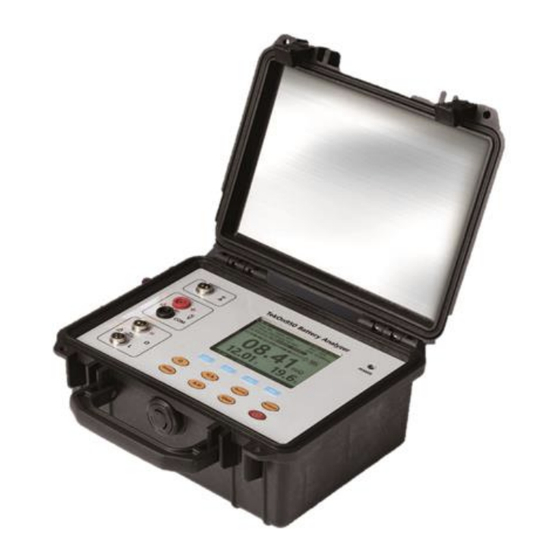
- Page 1 Battery Quality Analyzer User Manual Ⓒ 2016 TEKON, Inc 2020.07 Ver 5...
-
Page 2: Table Of Contents
Table of Contents General ....................................1 International Standard Safety Symbol ..................1 Measurement Range (Over voltage range) definition ............. 2 Opening Package ......................2 1. Description and Specifications ........................... 3 1.1. Product Description ......................3 1.1.1. Major function ...................... 3 1.2. - Page 3 5. Record ..................................29 5.1. Description ........................29 5.1.1. Check Used Memory ..................29 5.2. Meter mode record ....................... 30 5.2.1. Meter mode record .................... 30 5.2.2. Erase Meter mode Record................. 31 5.3. String Management ...................... 33 5.3.1. String Listing ...................... 33 5.3.2.
-
Page 5: General
General Warning Please use the unit after read Safety Information. Use only the designated operation method. Do not use environments in combustible gas, steam or humid. Do not use damaged unit. Do not use any unit with abnormal operation. Do not apply over voltage more than rated voltage between Terminal or between respective terminal and Ground. -
Page 6: Measurement Range (Over Voltage Range) Definition
Measurement Range (Over voltage range) definition Higher Category indicates Higher Over Voltage Electric environment. Tester designed for CAT III environment can withstand higher voltage than the tester designed for CAT II To avoid any serious accident while measurement, better to use Tester higher category for the testing environment. -
Page 7: Description And Specifications
1. Description and Specifications 1.1. Product Description TEKON950 measures Internal Resistance, Voltage and Temperature simultaneously which determine Battery Deterioration status. Depend on model, can measure Internal Resistance of High Voltage Battery max 200V or 400V. By using STRING record designed for Battery Maintenance and Management, can accumulate saved measurement data systematically and analyze Deterioration status and can be a reference to estimate Battery Change Time. -
Page 8: Description Of Each Part And Functions
1.2. Description of each part and functions 1.2.1. Exterior Figure 2. Product Exterior Function Description ① Display LCD display .(320x240 pixel) F1~F4 button ② Softkey press when Softkey showing on display Function operation key Impedance (resistance ) measurement Voltage, Current measurement Record function Analyzer function ③... -
Page 9: Display
1.2.2. Display The unit shows different display by different measurement functions. Below explains Display Configuration showing on most function displays. Figure 3. General Display Name Description ① Function name Function name presently displaying. Present time of unit. ② Time used when Recording. Icon indicates Bluetooth transmission status : Bluetooth function OFF Bluetooth... -
Page 10: Ordering Information
1.3. Ordering information 1.3.1. Accessories and parts Impedance Test Lead Test Lead ( multimeter ) TKP01-400 AC Adapter Bluetooth Dongle T25A (DC12V 2.5A) T400 (BTU400) USER MANUAL... - Page 11 Carry Bag Pouch T50A Zero-Bar TP04 Current Clamp T130BE USER MANUAL...
-
Page 12: Specifications
1.4. Specifications 1.4.1. Power Supply AC Charging Adapter Input : AC 100V ~ 240V @ 50Hz/60Hz Output : DC 12V 2.5A Battery Pack Type Li-Ion Rechargeable Battery Pack > 5.4Ah Voltage Rating 7.4V Charging Time Battery Life > 8 Hr, 300 Charging / Discharging cycle 1.4.2. -
Page 13: Electrical Specification
1.4.6. Electrical Specification Accuracy is specified for a period of one year after calibration, at 18℃ to 28 ℃ with relative humidity to 80 %. Accuracy specifications are given as: ±([% of reading] + [number of least significant digits]). Accuracy specification assumes ambient temperature stable ±1℃. Warm up time : about 30 minutes ... - Page 14 Current Probe Accuracy TEKON130BE Ratio 0-40A 10mv/A AC Amps 0-40A ±(1.5%+6digits) DC Amps 0-40A ±(1.5%+5digits) USER MANUAL...
-
Page 15: Set Up
2. Set Up 2.1. Power ON/ OFF Press longer “POWER” key longer than 2 seconds to activate power ON/OFF 2.2. Keyboard Use when input Name or Number etc While keyboard is displaying, can input letters with buttons on the unit (except Power button). English only. -
Page 16: User Set Up
2.3. User Set Up 2.3.1. User Set Up display Figure 4 User Set Up display Menu Set range Description Display Contrast 1~15 LCD Contrast Auto Back light Off Auto Back light Off, 1, 3, 5, 10, Backlight automatically OFF when no button 20, 30, 60(min) operation within the set up time Buzzer Sound... -
Page 17: Impedance Measurement
3. Impedance measurement 3.1. Insert Test Probe For safe and accurate measurement, insert precisely the probe provided with unit. 4 Terminal Pin type probe provided to measure Impedance Fig 1. Impedance Probe Fig 2. Impedance Input Terminal Insert Probe to Ω-H, Ω-L terminal. Figure 5 Impedance Probe Figure 6 Impedance input terminal ... -
Page 18: Record
[“O” adjustment] ① Press to enter Impedance display ② 0 Adj Press long to start 0 adjustment Figure 7. “O” Adjustment display 1 Tip of Probe down into the hole of “O” adjustment board and press down probe vertically. ③ SOURCE, SENSE terminal. -
Page 19: Meter Record
3.4. Meter Record Meter Record is useful for One Time measurement which measurement record does not need to manage continuously. For Simple measurement and saving. [Display Configuration ] Figure 11. Ω- Meter Record display Function Description ① Impedance Impedance measurement is displaying display Voltage measurement ②... -
Page 20: Range Adjustment
3.4.2. Range adjustment Press short time to change from 3mΩ to 300Ω in order Press long time to set AUTO Range ON/OFF Voltage measurement in Impedance mode always operate in Auto Range (5V~500V) 3.4.3. Hold Press short time to Hold the measurement data. If press short time again, HOLD mode is released and display present measurement 3.4.4. -
Page 21: Limit
3.5. Limit Limit function decides category PASS, WARNING or FAIL, after comparison Pre Set Limit with measurements of battery Limit function provides for Resistance - Upper level 1 (WARNING), Upper level 2 (FAIL) and for Voltage – Lower level (WARNING) as below. Figure 13. - Page 22 [ LIMIT set up - direct input ] in Ω display ① Limit... Press ② Press □ Limit key to enter LIMIT function ③ Edit... Press key . Figure 14. Limit Edit ④ Ω Up2... Ω Up1... V Low... Select to edit .
-
Page 23: String Record
3.6. STRING Record “STRING Record“ is designed for continuous battery management and maintenance. String name, battery model, limit value and number of battery can be set up in the STRING Record. Measurement Data is saved at selected string. ... -
Page 24: Recording Process Bar
3.6.2. Recording Process Bar Record processing bar (line) indicates present Record Processing status and Limit result Figure 16. Record Processing Indication Line Function Description Empty cell means the Cell is not measured. Measured cells shows following Limit result : Cell is PASS PASS ①... -
Page 25: String Record
3.6.3. STRING Record To measure in String mode, write String Lst of the batteries to be measured. Refer Record explanation. [String Mode measurement ] ① Press button to display Impedance ② Press button to select String ③ Press String ④ String list is displayed (To make String, refer explanation of Record Function) ⑤... -
Page 26: Measurement
4. V.A measurement 4.1. Test Probe Insert Figure 17. Voltage Test Lead Figure 18. Voltage Input Terminal Figure 19. Current Clamp Figure 20. Clamp Input terminal 4.2. Measurement Set Selection The Unit can measure DC Voltage , AC Voltage , DC Currents , AC Currents Ripple Voltage. V.A measurement function is consist of following 3 test sets. -
Page 27: Meter Record
4.3. Meter Record Figure 21. V.A Meter record Function Description ① Measurement 1 display V DC ,V AC measurements . ② Measurement 2 display V ripple ,A DC, A AC measurement Indicates Measurement range. In DC Voltage & DC Current measurement set, Measurement 1 ③... -
Page 28: Hold
4.3.2. Hold During measurement, press button on the unit for a moment to hold the d measurement data in display. If press the button again for a moment, HOLD status is released and present measurement is displayed. HOLD During Hold , is displayed and present measurement of measurement 1 is displayed in smaller size. -
Page 29: String Record
4.4. String Record Figure 22. V.A String record Function Description ① measurement 1 display V DC ,V AC measurement ② measurement 2 display V ripple ,A DC, A AC measurement indicates Range of measurement 1 . In DC voltage & DC current mode, press measurement 1 ③... -
Page 30: Capacity (Charge / Discharge Test)
4.5. Capacity (Charge / discharge test) Charge / discharge test is measured and recorded using VA measurement function. Calculate the recorded voltage, current measurement, and calculate the efficiency against the rated capacity or charge capacity. 4.5.1. Prepare charge / discharge test Connect the wiring as shown below to measure the charge and discharge voltage and current of the battery. - Page 31 ④ ▲▼Cursor ▲ ▼ Press and move Cursor with and press 책갈피가 정 Back ↩ 의되어 있지 ⑤ After all settings are completed, press Start to start recording. During recording, 않습니다. Auto Power OFF operation is stopped, and all keys except for some soft keys are restricted. Cursor In the recording graph, the time ratio is automatically changed to show the entire record.
-
Page 32: Recall Charge / Discharge Test
4.5.2. Recall charge / discharge test The capacity measurement is called up in the following order. ① Press key to switch to VA measurement mode. ② Press Capacity to display the capacity measurement record screen. Figure 29. VA Display Figure 30. Charge / Discharge Test Initial Screen ③... -
Page 33: Record
5. Record 5.1. Description The Unit has following Saving Space structure Record saves Impedance , Voltage, Temperature and Measurement time , Record saves Measurement 1, Measurement 2, Measurement time Meter mode saves max 1000 measurements in record , record ... -
Page 34: Meter Mode Record
5.2. Meter mode record 5.2.1. Meter mode record [ Procedure ] ① Meter Press to select in record display.. Figure 33. Record Initial display ② >Meter > select RECORD to display Meter-Ω record. - Press Ω - press to display Meter-V.A record. Figure 34. -
Page 35: Erase Meter Mode Record
5.2.2. Erase Meter mode Record [ Procedure ] ① Press to select Meter Figure 37. Record Initial display ② > Meter > Record selection to display Meter-Ω record - Press Ω - Press to display Meter–V.A record. Figure 38. Ω / V.A selection ③... - Page 36 ④ Delete Press to erase the Record where Cursor locates Figure 41. Meter Record Erase ⑤ Press Delete long time to erase the indicated record Figure 42. Meter Record Erase USER MANUAL...
-
Page 37: String Management
5.3. String Management 5.3.1. String Listing ① Press to select String in Record display . Figure 43. Record Initial display Figure 44. String List ② Press ▲▼Cursor and press ▲ ▼ to move the empty number and press Back ↩ ③... -
Page 38: String Edit
5.3.2. String Edit ① Press to select String in Record display Figure 49. String List Figure 48. Record Initial display ② ▲▼Cursor ▲ ▼ Press and press to move cursor to edit string Back ↩ and press ③ Press Edit... ④... -
Page 39: String Copy
5.3.3. String Copy When list up new string, can copy data from original string and save it to new string. ① press to select String in record display Figure 52. Record Initial display Figure 53. String List ② press ▲▼Cursor and move Cursor ▲... -
Page 40: String Erase
5.3.4. String Erase Erase String does not needed. Record saved in the String will also be erased ① Press to select String in Record display. Figure 56. Record Initial display Figure 57. String List ② Press ▲▼Cursor and press ▲ ▼... -
Page 41: String Record Management
5.4. String Record management 5.4.1. Impedance Record ① Press to select String in Record display. Figure 59. Record Initial display Figure 60. String List ② Press ▲▼Cursor and press ▲ ▼ to move Cursor to the string and press Back ↩ ③... - Page 42 ⑥ Press Erase to erase slot. If erased, following slot numbers are pulled forward. For example, after fill up 60th measurement, if need additional measurement and erase 1st measurement, 2nd measurement pulled to 1st measurement 3rd measurement pulled to 2nd measurement.
-
Page 43: Record
5.5. V.A Record ① String Press to select Figure 65. Record Initial display Figure 66. String List ② ▲▼Cursor ▲ ▼ Press and press cursor to move to selected string and press Back ↩ ③ press Select... Selected String - V.A record display Figure 67. -
Page 44: Analyzer
6. Analyzer 6.1. Description Analyzer function can analyze following analysis from records saved in the unit. At a specific string, can check in the order of higher impedance cell ( more deteriorated cell) And can draw Trend Curve of Impedance change which can be a reference of estimated time of battery change 6.2. - Page 45 ⑥ ▲ ▼ Press to select the Cell need to check Trend Curve. ⑦ Press Trend... to display selected cell record Figure 72. Cell Record ⑧ Measurement trend can be seen in Chart , in the order of measurement time. Press Chart...
-
Page 46: Pc S/W
7. PC S/W 7.1. Description PC S/W communicates Unit through Bluetooth with followings Transmit Measurement Data stored on Unit to Computer. String in Unit can be added, edited or erased Erase Record on Unit . Can see Record in Table and Chart . ... -
Page 47: Pc S/W Installation
7.3. PC S/W Installation Insert Installation CD When below display appears , select ‘AutoPlay’ At below menu, select ‘Install PC S/W’. Click ‘Next’. Click ‘Install‘. Click ‘Next’. Click ‘End ‘. After Installation completed, will add PROGRAM Icon on display . USER MANUAL... -
Page 48: How To Use S/W
7.4. How to use S/W 7.4.1. Connection Check whether bluetooth symbol appears on Upper display When OFF, press “USER“ key to move to User Set Up Display and do bluetooth ON After PC S/W executed, press “Device search” to search Unit Figure 76. -
Page 49: String List
7.4.2. String list Figure 78. String List When Unit is connected, String list is automatically displayed. When closed, click “string mode’ on upper display to appear on display. Figure 79. String List menu Function Description Detail Indicates slot list of selected string save String list to Excel File . -
Page 50: String
7.4.3. String Press ‘ Detail “ button in String list to display information ’ Figure 80. String Figure 81. String menu 설명 Function Slot Tap : display Record of selected slot. Detail Cell Tap : display Record ( measurement data change) of selected cell Export slot, V.A record into Excel file Export... -
Page 51: Impedance Record
7.4.4. Impedance record After select slot, press ‘ detail ’ to display Record of the slot. Figure 82. Impedance Record Figure 83. Impedance Record menu Function Description Select Record sort method. Sort Cell Number/Impedance/Voltage Save Impedance record to Excel file Export Refresh Refresh record... - Page 52 Slot chart tap Records displayed in Chart. Locate Cursor on Graph to display measurement data of cell . displayed chart can be saved in Image. Report Tap Formulate Report . Can input Installed Location, person name who measured, Comment. ...
-
Page 53: Cell Record
7.4.5. Cell record Select cell in string and press “Detail” to display change trend of measurement data. Figure 84. Cell record Figure 85. Cell record menu Function Description Sort Select the Sort Records. Measuring slot/impedance/voltage save Impedance record to Excel Export Refresh Refresh Record . -
Page 54: Replay
7.4.6. Replay Transmitted data from Unit is saved in PC. Recall function enables to use downloaded data without connecting Unit Through a full sync when connected to the product receiving and leave all the records, you can use most of the functions except the functions necessary to connect using the View feature. -
Page 55: Android App
8. Android APP 8.1. Install Search and install 'TEKON950' on Google Play. 8.2. Connection Run the application, the connection screen is displayed. Check bluetooth status display TEKON950. If it is off, turn it on in the USER screen. If you can not find the device you want to connect to the application, press the Search button in the bottom right corner to find the Bluetooth device nearby. -
Page 56: Using The Menu
- String > Impedance - String > VA Select the record you want to use. Select the homepage the website of TEKON is displayed. 8.3.1. Meter – Impedance record Select Meter - Impedance from the menu. Meter - Impedance records are displayed in reverse order of measurement time. -
Page 57: Meter - Va Record
8.3.2. Meter – VA record Select Meter – VA from the menu. Meter - VA records are displayed in reverse order of measurement time. meas value 1, meas value 2, and time are displayed. Touch the Share button at the bottom right, share records as a CSV file. 8.3.3. -
Page 58: Record
Slot list slots of the selected string is displayed. Measurement time, number of records, and the average impedance of the slot are displayed. Select slot Record of the selected slot is displayed. 8.3.4. Record Record of the selected slot is displayed. ... -
Page 59: String - Va Record
8.3.5. String – VA record String list Select String – VA from the menu. List of strings displayed. Select the string. Record of the string is displayed. Record VA record of the selected string is displayed. ... -
Page 60: Share Record
8.4. Share record On the Record screen, press button. Display list of applications that can share files in applications installed on the phone. Select the application. (In the picture below, select Gmail) Shared in selected applications. (Added as attachment of mail) USER MANUAL... -
Page 61: String Management
8.5. String management 8.5.1. Add string Press button on the string list screen. Enter the string information to be added. Press the ‘130% / 150%‘, ‘150% / 200%‘ button sets the upper impedance limit to the corresponding magnification of the initial impedance. ... -
Page 62: Maintenance
9. Maintenance Use replacement part designated by manufacturer . Otherwise Manufacturer is not liable from Safety Accident, Unit Failure . For safety, do not use Unit if Unit or its accessory is damaged or mal function and send to Service center . 9.1. - Page 63 MEMO...
- Page 64 203-702 Bucheon Technopark, 388, Songnae-daero, Wonmi-gu, Bucheon-si, Gyeonggi-do, Korea, 14502 TEL : 82-32-325-6030 / FAX : 82-32-325-6032 / http://www.tekon.co.kr...
Need help?
Do you have a question about the 950 and is the answer not in the manual?
Questions and answers