Advertisement
See website for
warranty details
Model
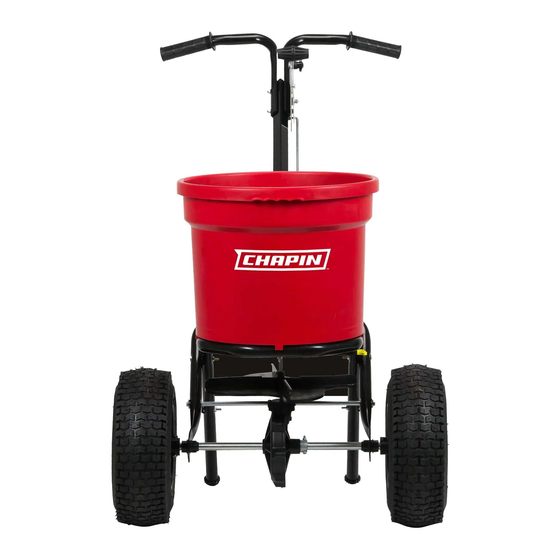
82050
70 lb. Contractor Turf Spreader Assembly Instructions
Instrucciones para el ensamblaje de esparcidoras de pasto para contratista de 70 libras
Instructions d'assemblage de l'épandeur à gazon de 32 kg (70 lb) pour entrepreneur
DO NOT RETURN TO STORE. CALL
CHAPIN CUSTOMER SERVICE:
NO DEVUELVA A LA TIENDA.
LLAME A SERVICIO A CLIENTES DE CHAPIN:
NE PAS RETOURNER EN MAGASIN
APPELER LE SERVICE À LA CLIENTÈLE DE CHAPIN :
800-950-4458
www.chapinmfg.com
015625-1 R0220
Advertisement
Table of Contents

Related Manuals for Chapin 82050


Summary of Contents for Chapin 82050
- Page 1 Instructions d’assemblage de l’épandeur à gazon de 32 kg (70 lb) pour entrepreneur DO NOT RETURN TO STORE. CALL CHAPIN CUSTOMER SERVICE: NO DEVUELVA A LA TIENDA. LLAME A SERVICIO A CLIENTES DE CHAPIN: NE PAS RETOURNER EN MAGASIN APPELER LE SERVICE À LA CLIENTÈLE DE CHAPIN : 800-950-4458 www.chapinmfg.com 015625-1 R0220...
- Page 2 WARNING Carefully Read These Instructions Before Use IMPROPER USE OR FAILURE TO FOLLOW INSTRUCTIONS CAN RESULT IN PRODUCT FAILURE OR INJURIES. FOR SAFE USE OF THIS PRODUCT YOU MUST READ AND FOLLOW ALL INSTRUCTIONS BEFORE USING. - Do not allow anyone to operate the broadcast spreader without proper instructions - Do not permit children to operate the broadcast spreader - Wear protective eyewear and gloves when handling and applying lawn and garden chemicals - Read the chemical label instructions and warnings for handling and applying the chemicals you plan to...
- Page 3 Contents: Contenido: Contenu: Spreader Hardware (Actual size) Accesorios para esparcidor (tamaño real) Quincaillerie de l’épandeur (taille réelle) H-1 (4) H-12 H-10 H-9 (X2) H-13 (X2) H-11 (X2) Note: Not all components shown may be needed on your model Nota: Puede que no todos los componentes mostrados sean necesarios en su modelo.
- Page 4 TOOLS NEEDED: HERRAMIENTAS REQUERIDAS: 8 mm 10 mm OUTILS REQUIS: 8 mm 10 mm Spreader Components (Not Actual size) Componentes de la esparcidor (no en tamaño real) Composants de l’épandeur (taille non réelle) C-18 C-13 C-11 C-10 C-14 C-17 C-16 C-15 C-19 C-12...
- Page 5 Handle Bar and Gate Control Assembly Barra de manija y conjunto de controles de la compuerta / Assemblage de la barre de la poignée et du contrôle de la vanne C-16 C-11 C-11 Loosely attach (H-7). Keep loose for further adjustment later (see step 10). Coloque sin apretar (H-7) Manténgala floja para ajustarla posteriormente (ver paso 10).
-
Page 6: Frame Assembly
Assemble baffle between frame legs Montaje del marco / Assemblage du cadre. C-19 Frame Assembly Montaje del marco / Assemblage du cadre. C-19 H-10 C-12 C-12 H-10 H-10 C-18 C-10 H-10 Orient components C-12 as shown. Oriente los componentes C-12 como se muestra. Orientez les composants C-12 comme il est indiqué. - Page 7 Assemble Impeller to Gearbox Sujete el impulsor a la caja de velocidades / Assembler l’impulseur au boîtier d’engrenage H-12 H-12 Assemble Impeller to Gear Box Shaft Sujete el impulsor al eje de la caja de velocidades / Assembler l’impulseur sur l’arbre du boîtier d’engrenage H-11 Note orientation of holes Tome nota de la orientación de los agujeros.
-
Page 8: Assemble Wheels
Counterclockwise marking on the impeller. Indicación en sentido contrario a las agujas del reloj en el impulsor. Sens antihoraire marqué sur l’arbre. Assemble wheels Ensamble las ruedas / Assembler les roues Cotter Pin attaches on outside of wheel El pasador de chaveta se une en el exterior de la rueda. La goupille fendue se fixe à... - Page 9 Use washers (H-1) as needed. Use las arandelas (H-1) según sea necesario. Utiliser des rondelles (H -1) au besoin. Bend Cotter pin installation on outside of wheel Instalación del pasador de chaveta en el exterior de la rueda. Installation de la goupille fendue à l’extérieur de la roue Assemble Hopper to Frame Sujete la tolvilla al marco / Assembler la trémie au cadre...
- Page 10 Assemble Auger Ensamble el tornillo sin fin / Assembler la vis d’alimentation C-17 C-20 Note: Spiked Auger (C-20) can also be used as shown. Nota: El barreno con púas (C-20) también se puede usar como se muestra. Remarque : Vis d’alimentation Note: Auger is threaded.
- Page 11 Assemble first H-7 nut to linkage C-7 as shown. Assemble C-7 to C-16 as shown. Attach second H-7 C-16 nut to C-7 linkage. Coloque la primera tuerca H-7 en la unión C-7 como se muestra. Sujete C-7 a C-16 como se muestra. Coloque la segunda tuerca H-7 en la unión C-7.
- Page 12 Insert C-13 linkage arm into hole in rotary gate below hopper. Inserte el brazo de la unión C-13 en el agujero en la compuerta giratoria bajo la tolvilla. Insérer le bras de tringlerie C-13 dans le trou de la vanne rotative sous la trémie. C-13 Attach R-Pin (H-8) Sujete el pasador R (H-8)
- Page 13 Assemble Adjustable Feet Ensamble el pie ajustable / Assembler pieds ajustables Go back and tighten all hardware that was left loose. Regrese y apriete todos los sujetadores que quedaron flojos. Revenez pour serrer tout le matériel laissé desserré. H-13 Use hammer to tap in adjustable feet (H-13). Use adjustable feet to level spreader on flat surface.
- Page 14 11.1 Turn rotary gate (part of hopper assembly) clockwise until gate is completely closed. Note: Impeller (C-2) not shown in drawing for clarity. Gire la compuerta rotatoria (parte del conjunto de tolvillas) en sentido de las agujas del reloj hasta que la compuerta esté completamente cerrada.
- Page 15 11.3 With the rotary gate closed and the gate control arm in the closed position, tighten the Hex nuts to the bracket as shown. Con la compuerta rotatoria cerrada y el brazo de control de la compuerta en posición cerrada, apriete las tuercas hexagonales al soporte como se muestra.
- Page 16 Left Spread Pattern Right Spread Pattern Patrón de distribución a la izquierda Patrón de distribución a la derecha Motif d’épandage à gauche Motif d’épandage à droite Left Gate (closed) Left Gate (open) Right Gate (closed) Compuerta izquierda (cerrada) Compuerta izquierda (abierta) Right Gate (open) Vanne de gauche (fermé) Compuerta derecha (cerrada)
-
Page 17: Storage And Maintenance
STORAGE AND MAINTENANCE • Use garden hose to wash down the spreader after each use. • Be careful not to direct the spray directly onto the gear box • It is recommended that you DO NOT use a power washer on your spreader. • On models with a grease fitting, it’s recommended that you apply a general purpose grease at least once a month. - Page 18 Replacement Parts / Partes de repuesto / Pièces de rechange Ref.# Qty Part No. Description / Descripción / Description Ref.# Qty Part No. Description / Descripción / Description 6-9140 Gear Box Assembly / Conjunto de la caja de engranes / Ensamble de la boîte de’engrenages 6-9009 Drive shaft w/2 bearings / Fletcha de transmisión c/2 conjinetes / Arbre de transmission avec 2 roulements 6-9060...
- Page 19 All Season Residential & Professional Push Spreader Application Conversion Chart Table de conversión para la aplicación profesional y residencial del distribuidor de empuje para toda temporada Tableau de conversion d’application pour épandeur à pousser résidentiel et professionnel toute saison SCOTTS 3.25 4.75 CHAPIN EARTHWAY 13.5 14.25 14.5 LESCO YARDWORKS YARDWORKS YSB10M 3.25...
- Page 20 800-950-4458 CHAPIN CUSTOMER SERVICE: CHAPIN INTERNATIONAL, INC. P.O. BOX 549 700 ELLICOTT ST. BATAVIA, NY 14021-0549 Due to our ongoing product improvement process, product specifications may change without notice. U.S. and foreign patents pending.
Need help?
Do you have a question about the 82050 and is the answer not in the manual?
Questions and answers