Table of Contents
Advertisement
Quick Links
Advertisement
Table of Contents

Related Manuals for Steelco DS1000


Summary of Contents for Steelco DS1000
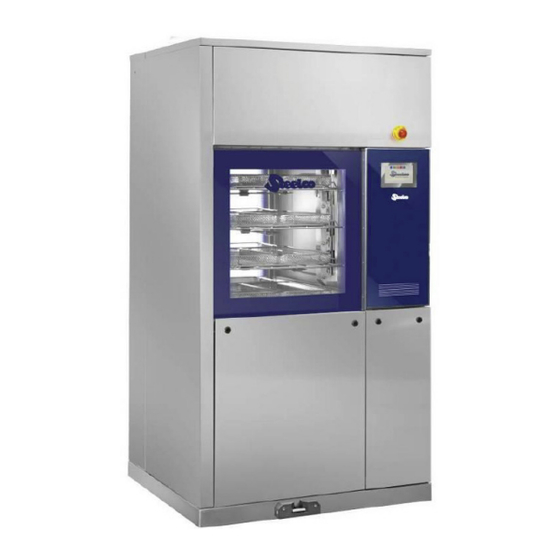
- Page 1 Version: 04072023-1 STEELCO DS1000 Quick Guide 2023...
- Page 2 Version: 04072023-1 Contents Routine Maintenance Routine Monitoring Front Panel Controls Main Menu Opening & closing door Starting a cycle Cancelling a cycle Releasing a cycle Parametric Release Consumption List Breakdown Changing the printer paper Alarm Reset Loading & unloading faults Troubleshooting Alarms &...
-
Page 3: Routine Maintenance: Daily
Version: 04072023-1 Routine Maintenance: Daily Cleaning of washing chamber drain filters Frequency of Intervention: every day Clean the washing chamber drain filters in the following manner: 1. Open the washing chamber door and extract the basket. 2. Extract the drain water filtering assembly from the chamber. - Page 4 Version: 04072023-1 Routine Maintenance: Daily Cleaning the external body of the machine Cleaning outer body • Use a damp cloth to clean the outer body of the machine. • Use only neutral detergents. • Do not use abrasive detergents or solvents and/or thinners of any kind.
- Page 5 Version: 04072023-1 Routine Maintenance: Weekly Cleaning of washing rotors Frequency of Intervention: every week Clean the washing rotors as follows: 1. Open the washing chamber door and extract the basket. 2. Unscrew the fastening pin of the two rotors and extract them from the chamber. 3.
- Page 6 Version: 04072023-1 Routine Monitoring: Daily Perform one Tosi Test per Washer Disinfector on the first cycle of the day. Perform a Lumcheck on each MIS rack on their first cycle of use per day. Perform this test on a different irrigator each time to ensure that each irrigator gets tested.
- Page 7 Version: 04072023-1 Routine Monitoring: Daily Lumcheck Perform a Lumcheck on each MIS rack on their first cycle of use per day. Perform this test on a different irrigator each time to ensure that each irrigator gets tested.
-
Page 8: Front Panel Controls
Version: 04072023-1 Front Panel Controls Control panel (Loading side) Button Description The control panel is composed of a LCD Touch- Selection for the access to funtions screen monitor and a membrane keypad with six for the adjustment of monitor setting keys. display parameters: SYSTEM •... - Page 9 Version: 04072023-1 Main Menu • This displays the various programmes, • Pressing on this message shows the page phases, the temperature and and related to warnings, with the possibility to abnormalities of the machine. reset. Initially, in the Standby status OK, it shows •...
-
Page 10: Opening And Closing The Door
Version: 04072023-1 Opening and Closing the Door Door opening and closing takes place by means of motorized vertical sliding. This machine is equipped with a door-blocking system during operation. • The door is constructed in high-resistance Attention tempered glass and a special test (HST) during manufacture certifies its integrity and •... -
Page 11: Starting A Cycle
Version: 04072023-1 Starting a Cycle Preparation and load transfer • Place the items to be washed inside the machine and position them carefully on the holder and in the rack. • Items should not overlap. Warning • Receptacles should be positioned so that •... - Page 12 Version: 04072023-1 Starting a Cycle • Place the basket with its load in the chamber. Standby Page • Close the door by means of the CLOSE In the standby phase, the machine shows the DOOR button. following page on the screen: Press the WORKING CYCLE key to access the cycle selection page.
- Page 13 Version: 04072023-1 Starting a Cycle Cycle Page 3. Confirm. The number of the job order (3) is displayed automatically after the insertion of the values on the fields (1) and (2). Press CONFIRM button to confirm the values. 4. Start. The cycle is ready to start.
- Page 14 Version: 04072023-1 Starting a Cycle Cycle Status Key Simplified Cycle Status page 1. The name of the cycle (1). To display a simplified reading of the following information, push in the centre of the control 2. The phase on cycle (2). panel once the cycle has started.
- Page 15 Version: 04072023-1 Cancelling a Cycle 2. Once this is selected the following menu will pop up; Please note that contents inside the washer may be very hot! 1. In the event that a cycle is to be cancelled we first need to press the FORCE button at the End Cycle bottom of the cycle screen below;...
- Page 16 Version: 04072023-1 Releasing a Cycle Open and close door using icon on the control To open the door during a wash cycle it is panel. necessary to interrupt the cycle, keeping in mind that: Pass through models will only open the door on the unload side once a successful cycle has 1.
- Page 17 Version: 04072023-1 Parametric Release Sample Printout Check Cycle has completed with no incidences is a formulated calculation of time (sec) & temp (Celsius) used to assess the overall lethality of the cycle. Check temperature has been at or above 90 C for at least 60 seconds (1 ½...
- Page 18 Version: 04072023-1 Consumption List Breakdown Sample Consumption List Programmed times Actual times DOSE 1 - Actual amount dosed DOSE 1 during cycle programmed Temperature of Thermal Disinfection DOSE 2 - Actual amount dosed DOSE 2 during cycle programmed...
-
Page 19: Changing The Printer Paper
Version: 04072023-1 Changing the Printer Paper 1. Handle is magnetic. 2. Remove handle. 3. To remove remainder of paper on the roll, pull green lever forward gently. 4. Pull back the remaining paper. 5. Feed the new roll into the slot and rollers. 6. -
Page 20: Alarm Reset
Version: 04072023-1 Alarm Reset In the instance of an anomaly, the message ALARM!! Will be displayed in the Status Bar. Press the alarm message and this will allow access to view the specific alarm. • The page ACTIVE ALARMS includes the alarms that occur during the operation of the machine. - Page 21 Version: 04072023-1 Loading and Unloading Faults • Place the basket with its load in the chamber. Close the door by means of the CLOSE DOOR button. • If the basket is not positioned correctly, the door will not move. In this case, check that: –...
- Page 22 Version: 04072023-1 Troubleshooting This section includes possible problems which may oocur during machine operation along with their cause and solution. If the problem remains unresolved after consulting this guide then contact In Vitro Technical Services on 1300 932 156 or email: service@invitro.com.au. Problem Causes Solutions...
-
Page 23: Troubleshooting
Version: 04072023-1 Troubleshooting Problem Causes Solutions Perform the routine maintenance set Chemical dispensing pump not forth in chapter 21 (form M6)of the very efficient. Detergent filling phase Operating Manual. does not occur correctly Chemical dispensing pump Please contact Customer Care on failed. -
Page 24: Alarms Management
Version: 04072023-1 Alarms Management In the instance of an anomaly, the message ALARM!! will be displayed in the Status Bar. Press that field to access the page Active Alarms and view the specific Alarm. Warning In the presence of an alarm the machine stops. - Page 25 Version: 04072023-1 Alarms Management ALARMS ACT page 1. If the parameter is set to STANDARD the cycle automatically starts again from the The page ACTIVE ALARMS includes the alarms point at which it was interrupted. that occur during the operation of the machine. 2.
- Page 26 Version: 04072023-1 Alarms Management Alarm List Alarm List 00 control PLC blocked Failure on chemicals 3 PLC control failures (XOB8) Failure on chemicals 4 PLC control failures (XOB10) Chem.flow.read.fail PLC control failures (XOB12) Wash.pump press.switch 2 04 PLC control failures (TEST) Chamb.heating failure (time) PLC record failures Dryer heating failure (time)
- Page 27 Version: 04072023-1 Alarms Management Alarm List Out of range PT1000 tank 2 Unloading door LS disparity Out of range PT1000 tank 3 Max.prew.temp. Fail heating tank 1 Water leak-overflow Fail heating tank 2 Press.transd.pump pressure Fail heating tank 3 Conduct.transd.failure Fail.tank 1 water filling Conduc.
- Page 28 Version: 04072023-1 Warning Management Warnings indicate to the user the occurrence of WARNINGS ACT page a change of a specific operating condition. The Active Warnings page displays the warnings Unlike alarms, warning do not prejudice the that occur during the operation of the machine. operation of the unit which will continue it’s It displays a short description of the warnings cycle.
- Page 29 Version: 04072023-1 Warning Management Warning List Warning List 128 Low level product 1 156 Free 129 Low level product 2 157 Free 130 Low level product 3 158 Free 131 Low level product 4 159 Free 132 Mitsubishi link 160 Free 133 CF-Card not ok 161 Free 134 Max prewashing temp.
-
Page 30: Emergency Stop
Version: 04072023-1 Emergency Stop Main power supply switch Emergency push buttons The machine is equipped with a main ON- This machine is equipped with two emergency OFF switch, located on the dirty side, which stop buttons. disconnects the electrical power supply from all There is one emergency button located on the the auxiliary controls.
Need help?
Do you have a question about the DS1000 and is the answer not in the manual?
Questions and answers