Sign In
Upload
Download
Table of Contents
Contents
Add to my manuals
Delete from my manuals
Share
URL of this page:
HTML Link:
Bookmark this page
Add
Manual will be automatically added to "My Manuals"
Print this page
×
Bookmark added
×
Added to my manuals
Manuals
Brands
Steelco Manuals
Laboratory Equipment
VS1/1V
Use and maintenance manual
Steelco VS1/1V Use And Maintenance Manual
Hide thumbs
1
2
3
Table Of Contents
4
5
6
7
8
9
10
11
12
13
14
15
16
17
18
19
20
21
22
23
24
25
26
27
28
29
30
31
32
33
34
35
36
37
38
39
40
41
42
43
44
45
46
47
48
49
50
51
52
53
54
55
56
57
58
59
60
61
62
63
64
65
66
67
68
69
70
71
72
73
74
75
76
77
78
79
80
81
82
83
84
85
86
87
88
89
90
91
92
93
94
95
96
97
98
99
100
101
102
103
104
105
106
107
108
109
110
111
112
113
114
115
116
117
page
of
117
Go
/
117
Contents
Table of Contents
Bookmarks
Table of Contents
Table of Contents
1 Introduction
Dear Customer
Product Presentation
Identification of the Various Model
Purpose of the Manual
General Notices
Clauses of Supply
Conditions of Guarantee
Fields of Use
Applicable Standards
2 Constructional Characteristics
Figure 1 -Main Components
Autoclaves Accessories
Steelco VS Series Performances
Unit Classification (for All Versions)
Noise/Vibrations
Heat Loss of the Unit
Table 1 - Classification as Standard en 61010-1
Table 2 - Heat Loss
Electromagnetic Compatibility
Warning Tags
Figure 2 - Labelling Design
Table of Symbols
Characteristics of Storage and Conservation
Residual Risks
Options
Steam Generator
Table 3 - Environmental Characteristics
Number of Doors
Technical Compartment
Reference Pressure Transmitter
Other Options
3 Operator Guide
Operator Position
Figure 3 - Operator Position VS1
Figure 4 - Operator Position VS12
Figure 5 - Operator Position VS 18
Control System
Figure 6 - Load Side
Figure 7 - Sterile Side
Main Menù Page
State of the Sterilizer
Figure 8 - Main Menu
Figure 9 - State of the Sterilizer
Keyboards
Figure 10 - Keyboards
STERILIZATION" Menu
Figure 11 - Menu
Figure 12 - Sterilization
Figure 13 - Basic Program
Figure 14 - User Program
Figure 15 - Work State
Figure 16 - Sterilization Describe
Figure 17 - Input and Output Diagram
Figure 18 - Parameters Diagram
Figure 19 - Finished Cycle
Figure 20 - Cycle Suspend
Figure 21 - Alarm
Figure 22 - Alarm Describe
Figure 23 - Cycle Suspend
Figure 24 - Active Alerts
LAST CYCLE" Menu
Figure 25 - Last Cycle
Figure 26 - Cycle Diagram
UTILITY" Menu
Figure 27 - Utility Menu
Figure 28 - Machine Data
Figure 29 - Maintenance State
Figure 30 - State I/O
Figure 31 - Inlet
Figure 32 - Outlet
Figure 33 - Graph. State
Figure 34 - Printer Utility
MAINTENANCE" Menu
Figure 35 - Maintenance Menu
Figure 36 - Update Clock
Figure 37 - Manual Control
Figure 38 - Disabled Manuals
Figure 39 - Outlet Control
Figure 40 - Inlet State
Figure 41 - Graph. State
Figure 42 - Constructor Data Restore
CONFIGURATION" Menu
Figure 43 - Configuration
Figure 44 - System Data
Figure 45 -Temperature
Figure 46 - Operators Authorized List
Figure 47 - Insert a New Operator
Figure 48 - Program
Figure 49 - Program Management
Characteristics of the Phases of the Sterilization Programs
Figure 50 - Programs Set
Figure 51 - Properties Phase Set
Figure 52 - Seal Control
Figure 53 - Homogenization
Figure 54 - Sterilization
Figure 55 - Aeration
Figure 56 - Vacuum Test
Figure 57 - Heating
Figure 58 - Cooling
Graphs
Pc Interface
4 Alarms
Table 4 - Alarms
5 Maintenance
Periodic Cleaning
External Paneling Cleaning
Table 5 - Routine Maintenance
Sterilization Chamber Cleaning
Safety Devices
Table 6 - Safety Devices
Procedure to Extract the Load in Emergency
Figure 59 - Electric Control Board
6 Treatment and Conservation of Sterilized Material
Treatment of Materials before Sterilization
Arrangement of the Load
Conservation of Sterilized Material
7 Printouts
Printout Management
Figure 60 - Printout of the PLC Checking
Table 7 - Available Reports Content
Complete Cycle Report
Figure 61 - Complete Cycle Report Example
Table 8 - Analogical Data for Report
Table 9 - Values and Meaning of Result
Cycle Report Data
Cycle Result
Report Trend
Digital Inputs/Outputs Status Report
Analogical Values Status Report
Set Point Report
Machine History Report
Machine Settings Report
8 Glossary
9 Attachment 1 P&I Drawing
10 Attachment 2 Electrical Diagram
Advertisement
Quick Links
1
Product Presentation
2
Table 4 - Alarms
3
Attachment 1 P&I Drawing
Download this manual
0398
0051
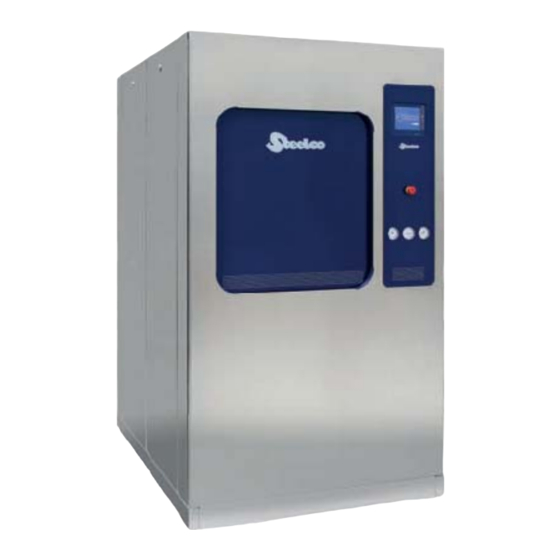
Steelco VS series
Use and Maintenance Manual
1
Steelco S.p.A.
Via Balegante, 27
31039 - Riese Pio X (TV)
ITALY
Tel. - +39 0423 7561
Fax. - +39 0423 755528
www.steelcospa.com
Table of
Contents
Previous
Page
Next
Page
1
2
3
4
5
Advertisement
Table of Contents
Need help?
Do you have a question about the VS1/1V and is the answer not in the manual?
Ask a question
Questions and answers
Related Manuals for Steelco VS1/1V
Laboratory Equipment Steelco VS Series Use And Maintenance Manual
(117 pages)
Laboratory Equipment Steelco ID 300 Quick Manual
(13 pages)
Laboratory Equipment Steelco DS 50 Instruction Manual
Washer disinfector (50 pages)
Laboratory Equipment Steelco DS1000 Quick Manual
(31 pages)
Laboratory Equipment Steelco DS 900 1S Instruction Manual
Washer disinfector (116 pages)
Laboratory Equipment Steelco DS 1000 2S Instruction Manual
Washer disinfector (116 pages)
This manual is also suitable for:
Vs series
Vs1/1e
Vs1/2e
Vs1/1ei
Vs1/1i
Vs1/2v
...
Show all
Vs1/2i
Vs1/1ev
Vs1/2ei
Vs1/2ev
Vs1.5/1e
Vs1.5/1v
Vs1.5/1i
Vs1.5/1ei
Vs1.5/1ev
Vs1.5/2e
Vs1.5/2v
Vs1.5/2i
Vs1.5/2ev
Vs2/1e
Vs1.5/2ei
Vs2/1v
Vs2/1i
Vs2/1ev
Vs2/1ei
Vs2/2e
Vs2/2v
Vs2/2i
Vs2/2ev
Vs2/2ei
Vs3/1e
Vs3/1v
Vs3/1i
Vs3/1ei
Vs3/2v
Vs3/2e
Vs3/1ev
Vs3/2i
Vs3/2ev
Vs3/2ei
Vs4/1v
Vs4/1e
Vs4/1i
Vs4/1ev
Vs4/1ei
Vs4/2e
Vs4/2v
Vs4/2i
Vs4/2ev
Vs6/1v
Vs6/1e
Vs4/2ei
Vs6/1i
Vs6/1ei
Vs6/1ev
Vs6/2v
Vs6/2e
Vs6/2i
Vs6/2ev
Vs6/2ei
Vs8/1e
Vs8/1v
Vs8/1i
Vs8/1ei
Vs8/1ev
Vs8/2e
Vs8/2v
Vs8/2i
Vs8/2ev
Vs8/2ei
Vs10/1v
Vs10/1e
Vs10/1i
Vs10/1ev
Vs10/1ei
Vs10/2e
Vs10/2v
Vs10/2i
Vs10/2ev
Vs10/2ei
Vs12/1v
Vs12/1e
Vs12/1i
Vs12/1ev
Vs12/2e
Vs12/1ei
Vs12/2v
Vs12/2i
Vs12/2ev
Vs12/2ei
Vs12h/1e
Vs12h/1v
Vs12h/1i
Vs12h/1ev
Vs12h/2e
Vs12h/1ei
Vs12h/2v
Vs12h/2i
Vs12h/2ei
Vs15h/1e
Vs12h/2ev
Vs15h/1v
Vs15h/1i
Vs15h/1ev
Vs15h/1ei
Vs15h/2e
Vs15h/2v
Vs15h/2i
Vs15h/2ev
Vs18h/1e
Vs15h/2ei
Vs18h/1v
Vs18h/1i
Vs18h/1ei
Vs18h/1ev
Vs18h/2e
Vs18h/2v
Vs18h/2i
Vs18h/2ev
Vs18h/2ei
Table of Contents
Save PDF
Print
Rename the bookmark
Delete bookmark?
Delete from my manuals?
Login
Sign In
OR
Sign in with Facebook
Sign in with Google
Upload manual
Upload from disk
Upload from URL


Need help?
Do you have a question about the VS1/1V and is the answer not in the manual?
Questions and answers