Table of Contents

Related Manuals for pietranera LAVAGGIO WEN PRO 537


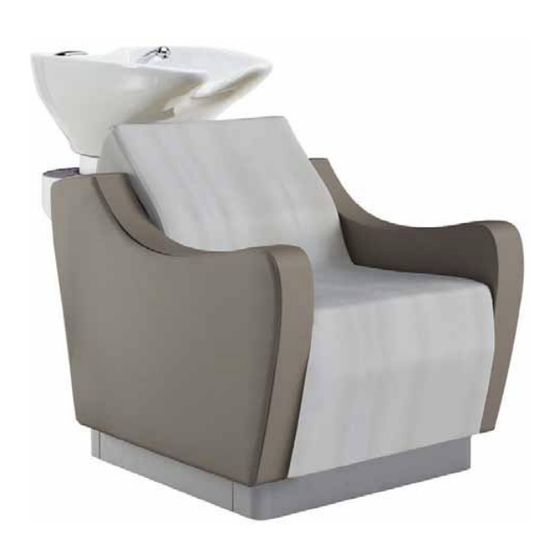
Summary of Contents for pietranera LAVAGGIO WEN PRO 537
- Page 1 IT ALIAN DESIGN & PRODUCTION ISTRUZIONI PER L’INSTALLAZIONE L’USO E LA MANUTENZIONE ORDINARIA INSTRUCTIONS FOR INSTALLATION USE AND ORDINARY MAINTENANCE LAVAGGIO WEN PRO 537_537M_537P...
-
Page 2: Table Of Contents
INDICE INTRODUZIONE ................................3 PREREQUISITI................................4 CARATTERISTICHE TECNICHE..........................5 CONDIZIONI AMBIENTALI............................5 DIMENSIONI.................................5 PIANO DI INSTALLAZIONE ..........................6 INSTALLAZIONE................................6 PREPARAZIONE................................8 MONTAGGIO DEL MISCELATORE ..........................9 MONTAGGIO DELLA DOCCETTA ........................11 MONTAGGIO PILETTA SUL LAVABO ........................13 FISSAGGIO DEL LAVAGGIO............................14 INSTALLAZIONE A TERRA............................15 INSTALLAZIONE A PARETE............................17 USO....................................19 ACCENSIONE DELL’APPARECCHIO........................19 COMANDI RELAX E JET MASSAGE........................19... -
Page 3: Introduzione
INTRODUZIONE Grazie per avere scelto un prodotto Pietranera, siamo certi che ne sarete pienamente soddisfatti. I prodotti Pietranera sono costruiti seguendo rigorosi standard qualitativi ed utilizzano esclusivamente componenti di qualità. Ogni lavaggio al momento della spedizione viene sottoposto ad una scrupolosa serie di collaudi relativi a funzionalità... -
Page 4: Prerequisiti
PREREQUISITI Per una corretta e sicura installazione dell’apparecchio vanno rispettate le seguenti prescrizioni: • Il pavimento deve essere conforme alle Norme DIN 1055 B 1.3 e DIN 18560 T 1. • L’impianto elettrico deve essere conforme alle Norme CEI 64.4, realizzato con conduttori di protezionea di erenziale (con indice <30mA) da 250V / 16A. -
Page 5: Caratteristiche Tecniche
CARATTERISTICHE TECNICHE Modello Frequenza Potenza Modo operativo Tensione lavaggio nominale nominale nominale intermittente WEN PRO relax elettrico 8 min. 220V ~ ±10% 50/60 Hz 80V A WEN PRO jet massage 8 min. 220V ~ ±10% 50/60 Hz 110VA CONDIZIONI AMBIENTALI Condizioni ambientali di trasporto e magazzinaggio •... -
Page 6: Piano Di Inst Allazione Piano Di Installazione
PIANO DI INST ALLAZIONE PIANO DI INSTALLAZIONE ATTENZIONE! Prima di ssare il lavaggio in batteria con scarico laterale, ef fettuare ATTENZIONE! Prima di ssare il lavaggio in batteria con scarico laterale, e ettuare l’apertura della ancat a. l’apertura della ancata. Disposizione impianti Disposizione impianti 1 = Calda... - Page 7 PIANO DI INSTALLAZIONE Distanza dal muro : Min. 1150 mm (Compresa dello spazio lavoro di 600 mm) ISTRUZIONI 1 = Rilevare l’altezza da terra dello scarico a parete. 2 = Aprire il carter posteriore del lavaggio. 3 = All’interno della spalla trovare l’asola preesistente ed e ettuare un foro di centratura all’altezza rilevata.
-
Page 8: Preparazione
MONTAGGIO LAVABO Preparazione 1) Togliere il carter posteriore svitando le 2 viti (1). 2) Posizionare la ceramica sopra il gruppo oscillante avendo cura di stringere con cautela i 4 tasselli in gomma. Istruzioni per l’installazione e l’uso e la manutenzione... -
Page 9: Montaggio Del Miscelatore
MONTAGGIO DEL MISCELATORE 1) Svitare il tubo rigido dal miscelatore ed al suo posto avvitare il tubo essibile inox più lungo dei tre. 2) Avvitare il grano nel foro di 8 Ø. 3) Avvitare nei due fori restanti indistintamente i due tubi essibili inox. Serrare i tre tubi essibili. Istruzioni per l’installazione e l’uso e la manutenzione... - Page 10 MONTAGGIO DEL MISCELATORE 4) In lare la guarnizione in gomma no a battuta con il corpo miscelatore 5) Posizionare il corpo miscelatore sulla vasca facendo passare i tre tubi essibili nel foro tenendo quello più lungo centrale. 6) Fissare il corpo miscelatore alla vasca. Istruzioni per l’installazione e l’uso e la manutenzione...
-
Page 11: Montaggio Della Doccetta
MONTAGGIO DELLA DOCCETTA Caratteristiche Tecniche Pressione di collaudo 15 bar Alimentazione acqua fredda indice blu a destra Alimentazione acqua calda indice rosso a sinistra Limiti di impiego secondo UNI 10234 EN (817): Pressione MIN. 0.5 bar MAX. 10 bar Temperatura MAX. 90° Limiti di impiego raccomandati da UNI 10234 (EN 817) per un buon funzionamento del rubinetto Pressione: MIN. - Page 12 MONTAGGIO DELLA DOCCETTA 3) Avvitare il tubo argento alla doccetta e alla forcella. Mantenere il tubo argento ortogonale alla forcella. 4) Serrare tutti i componenti. Istruzioni per l’installazione e l’uso e la manutenzione...
-
Page 13: Montaggio Piletta Sul Lavabo
MONTAGGIO PILETTA SU LAVABO Montare la piletta sul lavabo come da gura. 1)Griglia 2)Vite di serraggio 3)Corpo scarico INOX 4)Stucco 5)Lavabo 6)Guarnizione 7)Corpo scarico 8)Guarnizione OR 9)Tubo scarico corrugato estensibile ( Min 430 - Max 1300 mm ) Istruzioni per l’installazione e l’uso e la manutenzione... -
Page 14: Installazione
INSTALLAZIONE Preparazione 1) Togliere le parti superiori e laterali dell’imballo lasciando il lavaggio montato sul pallet in maniera che sia più facilmente trasportabile. Rimuovere le protezioni del lavaggio e anche gli eventuali accessori contenuti nell’imballo stesso. 2) Segnare sul pavimento la posizione dell’unità lavaggio e dei fori per le viti di ssaggio. Fissaggio del lavaggio 1) Svitare le viti (1) che bloccano il carter posteriore. -
Page 15: Installazione A Terra
INST ALLAZIONE INSTALLAZIONE Installazione a terra ATTENZIONE! Se l’installazione prevede l’entrata delle alimentazioni a parete oppure in batteria e ettuare l’apertura della ancata ( punto 2) 1) Eseguire tutte le installazioni del gruppo idrico mediante raccordi idraulici ø 3/8”. E’ consigliabile prevedere una saracinesca di chiusura a monte di ogni raccordo. - Page 16 INSTALLAZIONE 3) Per il modello di lavaggio WEN PRO relax elettrico e jet massage, provvedere all’allacciamento elettrico collegando la spina alla corrente. E anche possibile,aprendo la scatola di derivazione (1) del lavaggio, collegare i li di rete alla morsettiera nei punti N - L e Terra e provvedere ad eseguire un collaudo completo della apparecchiatura.
-
Page 17: Installazione A Parete
INST ALLAZIONE ALLAZIONE INSTALLAZIONE Installazione a parete ATTENZIONE! Se l’installazione prevede l’entrata delle alimentazioni a parete oppure in batteria e ettuare l’apertura della ancata. 1) Apertura della ancata 1 = Rilevare l’altezza da terra dello scarico a parete 2 = Aprire il carter posteriore del lavaggio. 3 = All’interno della spalla trovare l’asola preesistente ed e ettuare un foro di centratura all’altezza rilevata. - Page 18 INSTALLAZIONE 3) Per il modello di lavaggio WEN PRO relax elettrico e jet massage, provvedere all’allacciamento elettrico collegando la spina alla corrente. E anche possibile,aprendo la scatola di derivazione (1) del lavaggio, collegare i li di rete alla morsettiera nei punti N - L e Terra e provvedere ad eseguire un collaudo completo della apparecchiatura.
-
Page 19: Uso
Accensione del lavaggio L’accensione del lavaggio avviene collegando la spina alla corrente elettrica premendo l’interruttore . Tastiera per attivazione alzagambe elettrico (1 ) Con questa tastiera si può attivare il dispositivo che regola l’alzagambe di queste unità di lavaggio. Tastiera per attivazione jet massage (2 ) Con questa tastiera si può... -
Page 20: Manutenzione Ordinaria
MANUTENZIONE ORDINARIA Seduta - Veri care ogni mese lo stato di usura della seduta. - Veri care ogni sei mesi che i braccioli laterali siano ben ssati e saldi (1). Gruppo alzagambe relax In caso di mancato funzionamento, controllare che non si sia veri cata una delle seguenti anomalie: - La spina di alimentazione non inserita correttamente. -
Page 21: Gruppo Lavabo
MANUTENZIONE ORDINARIA Gruppo lavabo - Controllare ogni due mesi che non vi siano perdite d’acqua sotto il lavabo che potrebbero danneggiare la base e gli impianti del lavaggio stesso. Per compiere questa operazione rimuovere il carter del mobile lavaggio (1) in modo da rendere visibile la parte sotto il lavabo. -
Page 22: Pulizia Delle Superfici
MANUTENZIONE ORDINARIA Pulizia delle super ci Per qualsialsi comunicazione con il fabbricante o con i centri di assistenza citare sempre il numero di matricola. - Togliere tensione al lavaggio prima di e ettuare la pulizia o altri interventi. - Per pulire le parti metalliche, non usare solventi ma solo un panno umido. - Per pulire le materie plastiche, usare solo liquido igenizzante. - Page 24 INDEX INTRODUCTION..................................25 SERVICE REQUIREMENT...............................26 TECHNICAL SPECIFICATIONS.............................27 ENVIRONMENTAL CONDITIONS REQUIREMENT......................27 DIMENSIONS...................................27 INSTALLATION CONNECTIONS PLANNING..............................28 BASIN ASSEMBLY..................................30 WATER MIXER ASSEMBLY..............................31 SHOWER ASSEMBLY................................33 DRAIN ASSEMBLY...................................35 WASHING UNIT INSTALLATION............................36 FLOOR INSTALLATION................................37 SIDE DRAIN INSTALLATION..............................38 USE INSTRUCTIONS STARTING....................................39 RELAX CONTROL and JET MASSAGE CONTROL ......................39 ROUTINE MAINTENANCE CHAIR......................................40 RELAX UNIT....................................40...
- Page 25 INTRODUCTION Thank you for choosing a Pietranera product, we are con dent you will be fully satis ed with us. Pietranera products are manufactured on the basis of very high quality level ,and by high quality components only. Before being shipped each back wash must pass a series of strict tests concerning its performance and safety level.
-
Page 26: Service Requirement
SERVICE REQUIREMENT A correct and safe installation needs what follows: • The floor must be in accordance with the DIN 1055 B 1.3 and DIN 18560 T 1. Rules. • The electric system must be in accordance with the CEI 64. 4 rules, it is made of differential protection wire (value <... -
Page 27: Technical Specifications
TECHNICAL SPECIFICATIONS Unit Rated Rated Rated Rated Model voltage frequency power cycle WEN PRO electrical relax 8 min. 220V ~ ±10% 50/60 Hz 80V A WEN PRO jet massage 8 min. 220V ~ ±10% 50/60 Hz 80V A ENVIRONMENTAL CONDITIONS REQUIREMENT Transport and stockage conditions required •... -
Page 28: Inst Alla Tion Plan
INSTALLATION PLAN INST ALLA TION PLAN ATTENTION! If you should install your back wash with a side drain please follow these steps: Disposition system Disposition system 1 = W arm = Warm 3/8” 3/8” = Cold = Cold 3/8” 3/8” = Drain = Drain ø... - Page 29 INSTALLATION PLAN ATTENTION! If you should install your back wash with a side drain please follow these steps: Distance to the wall: Min. 1130 mm (Including working space 600 mm) INSTRUCTION Armrest opening 1 = Measure the height on the wall where the drain must be connected to. 2 = Open the back carter of the wash unit.
- Page 30 BASIN ASSEMBLY 1) Remove the rear cover by loosening the 2 screws (1). 2) Place the ceramic part on the oscillating unit, carefully tightening the 4 rubber plugs. Instructions for installation use and maintenance...
-
Page 31: Mixer Assembly
MIXER ASSEMBLY 1) Unscrew the rigid pipe from the mixer and tighten the longest of the three exible stainless steel tubes in its place. 2) Tighten the grub screw in the Ø 8 hole 3) Screw the other two exible stainless steel tubes in the two remaining holes. Tighten the three exible tubes. - Page 32 MIXER ASSEMBLY 4) Insert the rubber gasket until it is up against the mixer body. 5) Place the mixer body on the basin, passing the three exible tubes in the hole, keeping the longest one in the middle. 6) Fix the mixer body to the basin. Instructions for installation use and maintenance...
- Page 33 SHOWER ASSEMBLY Technical Speci cations Test pressure 15 bar Cold water supply blue pointer on your right Warm water supply red pointer on your left Usage limit according to UNI 10234 EN (817): Pressure: MIN. 0.5 bar MAX. 10 bar Temperature: MAX.
- Page 34 SHOWER ASSEMBLY 3) Tighten the silver tube to the shower and the fork. Keep the silver tube at right angles to the fork. 4) Tighten all the components. Instructions for installation use and maintenance...
-
Page 35: Drain Assembly
DRAIN ASSEMBLY Mount the drain onto the washbasin as shown in the gure 2) Tightening screw 3) Stainless steel drain body Washbasin 1) Grid 4) Plastering 5) Ceramic basin 6) Gasket 7) Draining cup 8) OR Gasket 9) Extensible- exible drainage pipe ( Min 430 - Max 1300 mm ) Instructions for installation use and maintenance... -
Page 36: Installation
INSTALLATION Pre-Installation Steps 1)Take away the upper and side part of the package just leaving the washing unit on the pallet so that it is easier to move it. 2) Mark on the oor the position of the wash unit and the xing holes Wash unit xing 1) Unscrew the xing screw (1) of the rear carter. - Page 37 INSTALLATION Floor drain installation ATTENTION! If you should install your back wash with a side drain please follow these steps: Armrest opening 1 = Measure the height on the wall where the drain must be connected to. 2 = Open up the back carter of the wash unit. 3 = From the back side of your new wash unit look for the inner side holes already arranged for this purpose and drill them at the needed height .
- Page 38 INSTALLATION 3) Only for Electrical relax and Jet massage WEN PRO: insert the plug to the main or connect the unit to the electric system by opening the branch point box (1) and then connecting the net wire to the joint in the ground points N- L-T. Make then a general test of the unit. ATTENTION: - Please in order to avoid any accident choose the right wires for this datum.
- Page 39 Starting The washing unit starts inserting the plug to the main. Electric legrest control (1 ) Using this remote you can adjust the legrest position. Jet massage control (2 ) Using this remote you can adjust the legrest position and jet massage. up legrest down legrest jet massage...
-
Page 40: Routine Maintenance
ROUTINE MAINTENANCE Armchair - Seat: once per month check its wearing condition - Side armrests: every six months check if they are still well xed (1). Relax movement If the unit stops working check what follows: - The input plug must be connected. Instructions for installation use and maintenance... - Page 41 ROUTINE MAINTENANCE Basin unit Please check every two months there is no water dripping under the basin which could damage base and the washing unit system. In order to check it up, remove rst the back carter (1) so that you can easly see all the system under the basin. - Every two months check the grip of the basin system screwing the two lock nuts (2) clockwise.
- Page 42 ROUTINE MAINTENANCE Surface cleaning - Before making any operation switch o the electrical system. - On metal parts do not use any solvent, please use only a damp cloth. - On plastic parts please use soft liquid soap without alcohol . - On simil leather please use only water and soft liquid soap without alcohol.
- Page 44 IT ALIAN DESIGN & PRODUCTION Via Masaccio, 2 - 42124 Reggio Emilia - Italy Tel . +39-0522.516510 Fax. +39-0522.514.669 e-mail: info@pietranera.com www.pietranera.com...
Need help?
Do you have a question about the LAVAGGIO WEN PRO 537 and is the answer not in the manual?
Questions and answers