Table of Contents
Advertisement
Quick Links
Advertisement
Table of Contents

Related Manuals for ACMER P3


Summary of Contents for ACMER P3
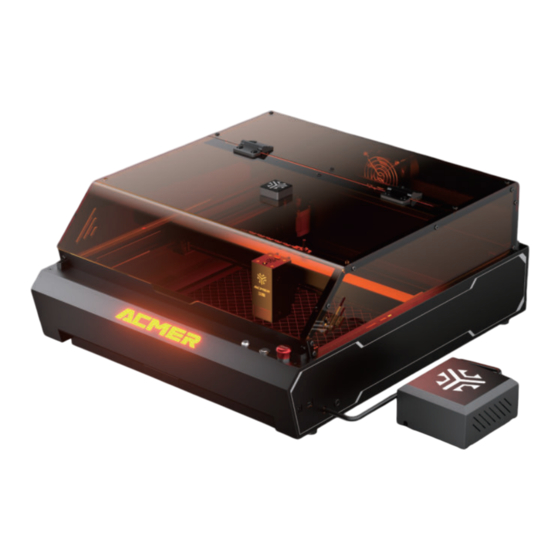
- Page 1 L A S E R E N G R A V E R ACMER P3 MANUAL 1.0...
- Page 2 Thank you for choosing our product and placing your trust in our brand. We are committed to providing high-quality products and exceptional se爀瘀ice to all our customers, and we greatly appreciate your suppo爀琀. To help you utilize and maintain your product, we o昀昀er several suppo爀琀 options: Social Media Channels: Join our Facebook group and follow our Facebook page by scanning...
-
Page 3: Table Of Contents
1. CONTENTS 1. Contents 2. Disclaimer and Safety Guide 3. Speci昀椀cations 4. Package List 5. Machine Introduction 6. Installation Steps 7. Software Installation and Usage 8. Mobile App Installation and Usage Guide 9. Machine Maintenance and Cleaning 10. FAQ 11. After Sale... -
Page 4: Disclaimer And Safety Guide
2. Disclaimer and Safety Guide 1. The laser engraving machine produces laser, and it is strictly forbidden to aim the laser at any living being. 2. When using the laser engraving machine, the operator and people nearby must wear laser safety glasses. Do not operate the laser without protective eyewear (laser safety goggles)! 3. -
Page 5: Specifications
3. Specifications 577*655*286mm Machine Size P3 24W / 2W IR: 400*400mm Engraving Size P3 48W / 2 IN 1: 400*390mm Machine Weight 19Kg 10W Diode + 2W IR(2 IN 1) / 2W IR Laser Output Power / 24W Diode / 48W Diode... -
Page 6: Package List
4. Package List Air Pump Machine Laser Module (Except 2W IR) Power Adapter Laser Safety Goggles USB Cable Air Pipe Engraving Materials Tools (Except 2W IR) Smoke Exhaust Pipe Hose Clamp... -
Page 7: Machine Introduction
5. Machine Introduction Exhaust Outlet Camera Laser Module Power Port USB Port Safety Lock Power Button Air Pump Emergence Button Drawer Air Pipe Port Air Pipe Air Pump Power Port LED Switch Camera Port Roller Port Fan Switch TF Card Slot Micro-Airflow Mode Flame Detector... -
Page 8: Installation Steps
6. Installation Steps 6.1 Install the Laser Module and Air Pipe Step 1: Insert the laser module into the slider and tighten the locking screws. Step 2: Insert the small air pipe into the X-axis connector. - Page 9 6.2 Connect the Laser Power Cord and Air Pipe Step 1: Connect the laser power cord. Step 2: Connect the air pipe.
- Page 10 6.3 Install the Air Pump Step 1: Connect the air pump power cord Step 2: Connect the large air pipe between the air pump and the machine.
- Page 11 6.4 Place the Engraving Material and Adjust 24W Diode Laser Module 2W IR Laser Module 2 in 1 Dual Laser Module 48W Diode Laser Module Tips: The focus is complete when the focus rod end con- tacts the surface of the engraving material. 6.5 Connect the Power and USB Cable Step 1: Connect the power cord.
- Page 12 6.6 Connect the Exhaust Pipe Hose Clamp Exhaust Pipe ① First, slide the hose clamp onto the exhaust pipe. ② Then, insert the exhaust pipe into the exhaust outlet at the back of the machine. ③ Use the hose clamp to secure the exhaust pipe to the outlet.
-
Page 13: Software Installation And Usage
7. Software Installation and Usage The ACMER laser engraving machine supports the main- stream laser engraving software LaserGRBL and LightBurn. LaserGRBL is an open-source, easy-to-use and feature-rich software that is very suitable for beginner users. However, LaserGRBL only supports Windows systems (Win XP/Win 7/Win 8/XP/ Win 10/Win 11), and it does not support camera positioning and rotary module functions. - Page 14 ① Choose “Devices” then Click “Import” ② From the "Software/" folder on the TF card, find the configuration file corresponding to your product. For example, if your machine is the P3 24W, select the "ACMER P3 24W.lbdev" file, then click "Open".
- Page 15 ③ Select the configuration file you just imported, then click "OK".
- Page 16 ④ Return to the main interface, select the correct port and configuration, and the connection is successful when the text shown in the control window appears.
- Page 17 7.1.2 Software Settings Click "Setting" and set the machine’s speed unit to "mm/min". 7.1.3 Camera Calibration ① Find "Window" in the software toolbar, then click "Camera Control" to confirm it is checked and bring up the camera control window.
- Page 18 ② Find "Laser Tools" in the software toolbar, then click "Calibrate Camera Lens" (the interface may di er between software versions). ③ Select "P3 Camera" - "Standard Lens", then click Next.
- Page 19 ④ Uncheck the "Honeycomb check enabled" option, and place the calibration card in the specified location per the prompts. The first step is to place it in the center, then click "Capture" and "Next". If the calibration card cannot be recognized, it is recom- mended that a layer of other material, such as plywood, be placed on top of the honeycomb.
- Page 20 ⑥ After the calibration steps, 24W, 48W, 2-IN-1 users should place 5 pieces of 100*100 wood boards in the corresponding positions as shown; 2W IR users should place 5 pieces of 100*100 white ABS boards in the corre- sponding positions. Adjust the laser focal distance correctly.
- Page 21 ⑧ Select: "Laser Tools" -> "Calibrate Camera Alignment", then click on the "Camera is over the work area".
- Page 22 ⑨ Select "P3 Camera" and click "Next". ⑩ Adjust the power and speed (refer to the parameter table below according to your actual purchased product), then enter the value of 180 in the Scale item. Click “Frame" to preview the engraving range, and finally click "Start"...
- Page 23 ⑪ Move the laser to a blank area, click "Capture Image", and then click "Next".
- Page 24 ⑫ Mark the intersections of the four corner patterns in sequence as prompted, then click "Next". ⑬ In the Camera Control window, select "P3 Camera" and click "Update Overlay". Draw a rectangle to engrave. When the carving is finished, click "Update Overlay" again to update the screen and observe whether the carving pattern overlaps.
- Page 25 ② Click the "Open" button in the software toolbar, select the engraving file, and click "Open" ③ After importing the file, select"P3 Camera",and click "Update Overlay" in the Camera Control window.
- Page 26 ④ Find the function key to adjust the size of the pattern in the software toolbar, select the engraving pattern, and adjust it to the desired size (the engraving pattern size should not exceed the size of the engraving material). ⑤...
- Page 27 (1) Set the engraving speed and power (it is recommend- ed to refer to the engraving parameter table for the specific parameters); (2) Turn the air pump on or o ; (lt is recommended to switch on the air pump when cutting and switch o the air pump when engraving) (3) Set the "Overscanning"...
- Page 28 ⑥ Select the engraving pattern with the confirmed size, then press and hold the left mouse button and drag the engraving pattern to any position you want to place it on the engraving material. ⑦ Click the "Laser" window, click “Frame" to preview the engraving area, and if there are no issues, click "Start"...
- Page 29 7.1.5 How to Use the ACMER M2/M3 Rotary Module Note:Before using the rotary module, you need to remove the drawer and raise the entire machine to a height where the rotary module can be used normally. (It is recom- mended to use the ACMER riser kit) ①...
- Page 30 ③ Find "Laser Tools" - "Rotary Setup" on the software toolbar. ④ Choose "Roller", click "Enable Rotary", and select the Z Axis as the Rotary Axis. Then enter the value of [31.5] in the "mm per rotation" field, enter the value of [16] in the "Roller Diameter"...
- Page 31 7.2 LaserGRBL 7.2.1 Machine Connection ① Select the corresponding COM port, check that the baud rate is "115200", click connect, and the control window will display a string of text indicating a successful connection. ② Click the "Unlock" button, move the mouse to the blank area in the lower right corner of the controls, right-click and select "Import custom buttons".
- Page 32 ③ In the "Software" folder of the TF card, select the "CustomButtons" file. After importing, click "OK" or "Yes" for all the prompt windows. ④ Click the "Air Pump" button to control the air pump on/o . ⑤ (1) Click the "Open File" button; (2) Select the engraving file;...
- Page 33 ⑥ Select an image, click open. Then select the engraving mode, refer to the engraving parameter table to enter the line spacing parameters, and click "Next". (0.1 in the parameter table corresponds to 10 in the software) ⑦ According to the engraving material, refer to the engraving parameter table to set the corresponding engraving speed and power, laser mode ("M3"...
- Page 34 ⑧ (1) Click preview to check the engraving range; (2) Confirm the engraving range and start engraving. Note: LaserGRBL currently does not support the use of the rotary module. We apologize for the inconvenience! Tips: You can refer to the video tutorial in the TF card for the software setup steps.
-
Page 35: Mobile App Installation And Usage Guide
8. Mobile App Installation and Usage Guide 8.1 Download and Install the App 8.1.1 Android users can scan the QR code below to down- load and install the app. 8.1.2 iOS users can search for "MKSLaser" in the app store to download and install the app. - Page 36 8.2 App Connection Guide 8.2.1 Insert the TF card into the card slot on the back of the front frame of the machine. 8.2.2 After powering on the machine, use your phone's WIFI function to search for the network name "AC- MER_P3_XXXXX"...
- Page 37 8.2.3 Open the mobile app and click the icon in the top left corner. 8.2.4 Enter the IP address (the default IP address is "192.168.4.1"), then click "CONNECT" to connect.
- Page 38 You can select the You can store the engraving files prepared programs generated by for you by ACMER. the computer software on the TF card and access the files on the TF card for o ine engraving through this function.
- Page 39 8.4 Usage Guide 8.4.1 Click "Material" 8.4.2 Select the material you want to engrave;...
- Page 40 8.4.3 Select the engraving e ect you want; 8.4.4 Set your engraving size and set your engraving parameters based on your engraving material.
- Page 41 8.4.5 Click upload and wait for the upload in image one; click "Confirm" to start engraving after the upload is successful in image two; 8.4.6 Wait for the engraving to complete.
-
Page 42: Machine Maintenance And Cleaning
9. Machine Maintenance and Cleaning 10.1 Laser Maintenance and Cleaning 10.1.1 When the laser is used continuously for 4-5 hours, remove the light shielding cover and the nozzle to check if the laser lens is dirty. 10.1.2 If the lens is dirty, use a cotton swab to wipe it clean and keep the lens free of contamination. - Page 43 10.1.3 If the laser nozzle is dirty, use the black bristle brush to clean the dirt o the nozzle. 10.1.4 If there is a lot of dust on the laser cooling fan, use the yellow bristle brush to sweep away the dust.
- Page 44 10.2 Maintenance and Cleaning of Guide Rail and Optical Axis 10.2.1 First, turn o the power to the machine. Use a lint-free cloth to wipe the dirt o the two Y-axis optical rails. 10.2.2 Take out the lubricant, squeeze out a small amount, and apply it to the optical rails.
- Page 45 10.2.3 Remove the drawer, flip the machine over so the bottom is facing up, and use a lint-free cloth to wipe the dirt o the guide rail on X-axis. 10.2.4 Squeeze out a small amount of lubricant and apply it to the guide rail. Flip the machine back over so the top is facing up, and manually move the X-axis to distribute the lubricant evenly along the rail.
- Page 46 10.3.2 Remove the drawer, dump out all the waste and dust, and wipe it clean with a lint-free cloth. Then, put the drawer back into the machine. The image below shows the completed cleaning. 10.3.3 Use a lint-free cloth to wipe the inside and outside of the machine body, the inside and outside of the acrylic cover, and the camera clean.
-
Page 47: Faq
10.FAQ Q1. Poor engraving or cutting e ect (IR laser does not have cutting capability): 1. Check if the laser module's wires are loose. 2. Check if the laser's working focal distance is correct, using the focus rod that comes with the laser. 23mm... - Page 48 3. Check if the surface of the engraving material is flat. 4. For cutting, try lowering the speed and increasing the number of cutting passes. Refer to the engraving parame- ter table for specific parameters. 5. For engraving: if the engraving is too deep, try increas- ing the speed and reducing the power.
- Page 49 Q3. The machine makes noise during operation: 1. It is normal for the machine to have some light noise during operation, such as the cooling fan of the laser, the exhaust fan, and the high-speed motion of the structure. 2. Manually move the X and Y axes to check if there is any obvious sticking or binding.
- Page 50 Q5. The machine stops working during opera- tion 1. If the machine lid is opened while the machine is work- ing, the machine will pause its operation. In this case, do not arbitrarily move the laser or the engraving material. Just close the lid, and the machine will resume its work.
- Page 51 Q6. The machine camera is blurry or unable to capture images. 1. Check if the camera lens is obstructed or dirty by foreign objects. 2. Check if the camera's data cable on the front frame has become loose or disconnected. 3.
-
Page 52: After Sale
11 After Sale To ensure high-quality after-sales support, we recommend visiting our o cial website (https://acmerlaser.com/ ) for detailed informa- tion on after-sales and warranty. Additionally, our Frequently Asked Questions (FAQs) page provides answers to common ques- tions to help you better utilize the product. If you have any questions or need further assis- tance, please feel free to contact us via email at support@acmer3d.com. - Page 53 ACMER O昀케cial Group https://www.facebook.com/groups/acmerlaser MADE IN CHINA https://acmerlaser.com/ Shenzhen Titan International Development Technology Co., Ltd. ADD: 501, Building 1, No. 6 Zhongyuguan Road, Yousong Community, Longhua Street, Longhua District, Shenzhen,Guangdong, China...
Need help?
Do you have a question about the P3 and is the answer not in the manual?
Questions and answers
Перестала включаться камера на acmer p3 48w