Table of Contents
Advertisement
Advertisement
Table of Contents

Related Manuals for ACMER P1


Summary of Contents for ACMER P1
- Page 1 www.facebook.com/groups/636514078064476/...
- Page 2 MANUAL ASSEMBLY MANUAL Acmer 3D Electronlc Technology Co., Ltd.
-
Page 3: Table Of Contents
CONTENTS | 目录 CONTENTS / 目录 WARING / 警告 MAIN PARAMETERS / 机器参数 PARTS LIST / 配件清单 Machine description / 机器说明 Assembly Process / 装配过程 1. Assemble the tailboard assembly and Y-axis section bar assembly 组装背板组件与Y轴型材组件 2. Assemble X-axis assembly / 组装X轴组件 3. -
Page 4: Waring / 警告
WARING | 警告 Warning: Avoid direct eye contact with the laser, and there is a risk of blindness due to excessive stimulation 避免直接目光接触激光,过度刺激有失明风险 Warning: Avoid body contact with laser, which may cause burns 避免肢体与激光接触,有灼伤风险 Warning: Please place a metal base plate under the machine before use to prevent the laser from directly burning the desktop 使用前请在机器下方放置底板,防止激光直接灼烧桌面... -
Page 5: Main Parameters / 机器参数
MAIN PARAMETERS / 机器参数 Type 型 号 机身尺寸 Machine size 610*590*200mm Machine weight 机身重量 5.8KG Engraving range 雕刻范围 400*410mm 雕刻精度 Engraving accuracy 0.01mm Engraving speed 雕刻速度 10000mm/min Engraving method 雕刻方式 USB connection 系统支持 Supporting systems MAC, Windows Laser power 激光功率 10000mW Laser wavelength 激光波长... -
Page 6: Parts List / 配件清单
PARTS LIST / 配件清单 Power line 电源线 x1 Adapter 电源适配器 x1 Ribbon 扎带 x1 512MB USB cable USB线 x1 TF card 内存卡 x1 Manual 说明书 x1 Screw bag 螺丝包 x1 Card reader 读卡器 x1 Board 100*100 木板 x1 Goggles 护目镜 x1 Keys 钥匙... -
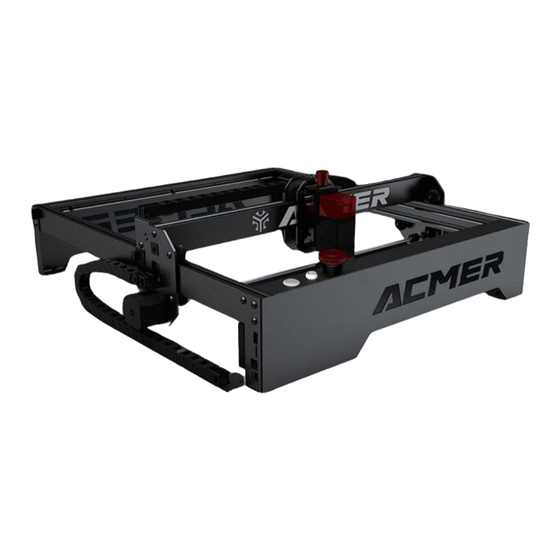
Page 7: Machine Description / 机器说明
Machine description | 机器说明 Y-axis section bar assembly Tailboard assembly Y轴型材组件 背板组件 X-axis assembly Laser head X轴组件 激光头 Front panel assembly Switch 面板组件 开关 Securly Lock Emergency stop switch 安全锁 急停开关... -
Page 8: Assembly Process / 装配过程
Assembly Process | 装配过程 1. Assemble X-axis assembly 组装背板组件与Y轴型材组件 Required materials: X-axis assembly, Y-axis section bar assembly, open-end wrench 1PCS, M3*8 countersunk head screw 2PCS, M3*10 round head screw 材料:X轴组件,Y轴型材组件,开口扳手 1PCS, M3*10沉头螺丝 2PCS,M3*8半圆头螺丝 4PCS 1.1 Adjust pulley spacin 调整滑轮间距 Note:Before pushing the x-axis assembly into the Y-axis section bar, it is necessary to adjust the eccentric wheel to increase the spacing between the pulleys on both sides, to avoid damaging the pulley due to the too close spacing between the pulleys during installation... - Page 9 1.3 Assembling the laser head 组装激光头 Use two m3*10countersunk screws to lock the laser backplane onto the slider 用2颗M3*10沉头螺丝将激光背板锁紧再滑块上 M3*10 countersunk screws Lock the laser head from the side with four m3*8 half round head screws 用四颗M3*8半圆头螺丝从侧面锁紧激光头 M3*8 screws...
-
Page 10: Assemble The Tailboard Assembly And Y-Axis Section Bar Assembly 组装背板组件与Y轴型材组件
2. Assemble the tailboard assembly and Y-axis section bar assembly 组装背板组件与Y轴型材组件 Required materials: Tail plate assembly, Y-axis section bar assembly, m5*35 screws 2pcs, m5*16 screws 2pcs 材料:背板组件、Y轴型材组件、 M5*35螺丝 2PCS 、 M5*16螺丝 2PCS。 2.1 Assemble the Y-axis and tailboard assembly as shown in the figure 按照如图所示方式组装Y轴和尾板组件... -
Page 11: Assemble The Y-Axis Belt 锁Y皮带
3. Assemble the y-axis belt 锁Y皮带 Required materials: Synchronous belt 2PCS, square gasket 2PCS, m5*8 round head screw 2PCS 材料:同步带 2PCS、方形垫片2PCS、M5*8半圆头螺丝 2PCS 3.1 Pass one end of the timing belt through the pulley and the timing wheel and out of the tailboard hole 将同步带一端穿过滑轮和同步轮,从尾板孔位穿出... -
Page 12: Assemble Tank Chain 组装X、Y拖链
4.1 Align the front panel with the y-axis profile and lock it with screws 将前面板与Y轴型材对其后,用螺丝锁紧 M5*35 screws M5*16 screws 5. Assemble tank chain 组装X、Y拖链 Required materials: M3*6 countersunk head screw 12PCS 材料:M3*6沉头螺丝 12PCS... -
Page 13: Pulley Adjustment 滑轮调节
Lock the tank chain fixing holes at the four positions shown in the figure with countersunk screws 将图示四个位置的拖链固定孔用沉头螺丝锁紧即可 M3*6 countersunk head screw 6. Pulley adjustment 滑轮调节 Use an open-ended wrench to rotate the eccentricity of six eccentric nuts of X and Y axes, and adjust the pulley to the state of just clamping 使用开口扳手旋转X、Y轴共六个偏心螺母的偏心距,调节滑轮至刚好卡紧的状态... -
Page 14: Connect The Electronic Harness 连接线束
7. Connect the electronic harness 连接线束 7.1 Connect the y-axis motor wire and the y-axis limit switch harness 连接Y轴电机线、Y轴限位开关线束 Connect the Y axis limit switch Connect the Y-axis motor... - Page 15 7.2 Connect X-axis motor wire, X-axis limit switch harness and laser harness 连接X轴电机线、X轴限位开关线束、激光线束 Connect the X-axis limit switch Connect the Y-axis motor...
-
Page 16: Software Setting And Focusing / 软件设置及对焦
Software setting and focusing 软件设置及对焦 1. Drive installation 驱动安装 Before connecting the laser engraving machine with USB cable, you need to install ch340 driver for your computer, otherwise the computer cannot recognize the laser engraving machine 在使用USB线连接激光雕刻机之前,需要为您的电脑安装CH340驱动,否则电脑无法识别激 光雕刻机。 1.1 Find the file package "software and driver files" in the memory card delivered with the machine, and select the software installation package corresponding to your computer system 在跟随机器配送的内存卡中找到“软件与驱动文件”文件包,选择您电脑系统对应的软件安... -
Page 17: Software Settings 软件设置
2. Software settings 软件设置 2.1Lightburn setting You can import the lightburn software in the accessory USB flash drive into the computer or log in directly https://lightburnsoftware.com/ Download the soft- ware. The trial period of this software is 30 days. You need to pay for subsequent use,support Windows, Mac system 您可以将附件USB闪存驱动器中的lightburn软件导入计算机或直接登录https://lightburn- software.com/下载软件。该软件的试用期为30天。后续使用需要付费。支持Windows、... - Page 18 Name your machine and set the engraving area, Select the carving origin 为您的机器命名并设置雕刻面积, 选择雕刻原点 Select finish machine setup 选择完成机器设置...
- Page 19 The button in this area is the command of the laser engraving machine 此区域按钮为激光雕刻机指令 This area selects the device and COM interface to connect your device 此区域选择设备和COM接口以连接您的设备...
- Page 20 The basic parameters of the equipment can be set as shown in the figure 设备基本参数设置,如图设置即可 In the grid area, place the file to be engraved in the grid 雕刻网格区域,放置要雕刻的 文件在网格内 Make sure your speed is in mm/min 请确保你的速度单位是mm/min After setting up the software, you can open the testfile folder in the delivered TF card file.
- Page 21 2.2 LaserGRBL setting The software is open source and only supports windows system. LaserGRBL is rela- tively simple, as shown in the figure. Select the COM interface, connect the machine, then import the file and adjust the parameters 软件开源,仅支持Windows系统,LaserGRBL较为简单,如图所示,选择COM接口,连接 机器即可,然后导入文件,调整参数即可。 Click the button below to connect the machine 点击下图按钮连接机器...
-
Page 22: Adjust Focus 调整焦距
Click the 'file' button as shown in the figure, and import the picture file to adjust the parameters 点击如图‘文件’按钮,导入图片文件即可进行参数调节 3. Adjust focus 调整焦距 Place the board within the laser engraving range, and it is best to place a steel plate under the board 将木板放置在激光雕刻范围内,最好在木板下面放置一块钢板... - Page 23 Rotate and put down the focusing column 将调焦柱旋转放下 Rotate the nut by hand to make the focusing column contact with the board 旋转手拧螺母使调焦柱与木板接触...
-
Page 24: Faq
1. Machine installation videos, software operation tutorials and access? 机器安装视频,软件操作教程及获取途径? 1.1 In the TF card or U disk included in the package. 1.2 Or download it from our official website: 包装附送的TF卡中或者从我们的官网下载: https://www.facebook.com/groups/636514078064476/ 2. What should I do if the LaserGRBL software cannot connect to the laser engraving machine? / LaserGRBL 软件无法连接激光雕刻机... - Page 25 Motor cable issue: After confirming that the motor is ok, test it after swapping the defective motor cable with the normal motor cable of the motherboard port. If there is no issue, then it means the motor cable problem. If it still doesn't work, then check the driver.
- Page 26 The engraving pattern is reversed due to incorrect software configuration parame- ters. 雕刻图案颠倒由于软件配置参数错误导致的 Method: Re-import LaserGRBL through the configuration file in TF card. 方法:通过TF卡中配置文件重新导入 LaserGRBL 4.3 Irregular carving patterns are caused by machine assembly problems. 雕刻图案不规则是由于机器装配问题造成 1. Please check whether the X axis of the engraving machine is parallel to the bottom frame and whether the bottom frame is parallel and the diagonal size.
-
Page 27: After Sale
1.2.1. Within 7 days of the delivery date, ACMER will replace any parts free of charge including shipping fees. 1.2.2. After 7 days of the delivery date, ACMER will replace any parts free of charge BUT the customer will be responsible for shipping fees. - Page 28 2.1.3. ACMER will work with the customer on replacing the parts in the claim. For Missing Parts, refer to section 1.2, the customer shall fill out a Service Ticket (Report a Prob- lem / Missing Parts.) For Damaged Hardware Parts, refer to section 1.2, the customer shall take photos or video and submit them when filling out a Service Ticket (Report a Problem / Damaged Hardware Parts.)
Need help?
Do you have a question about the P1 and is the answer not in the manual?
Questions and answers
не мого подключить. перепробывал все. станок стоит колом. винда 32. ком порт есть. при включении стоит.
To troubleshoot connection issues with the ACMER P1 machine on Windows 32-bit:
1. Set the baud rate to 115200.
2. Close other software that might be occupying the port or causing repeated openings.
3. Check if the data cable connection is normal and secure.
If the motor shows issues (shaking, wrong direction, or no response after power on):
1. Ensure the motor wiring, motor terminal, and motherboard port connections are firm and without loose contacts.
2. Re-power the machine and test again.
3. If problems persist, swap the defective motor with a normal motor connected to the motherboard port to determine if the issue is with the motor, motor cable, or drive.
This answer is automatically generated
можно установить лазерный модуль P2 33w