
Related Manuals for ergoline ergoselect 10


Summary of Contents for ergoline ergoselect 10
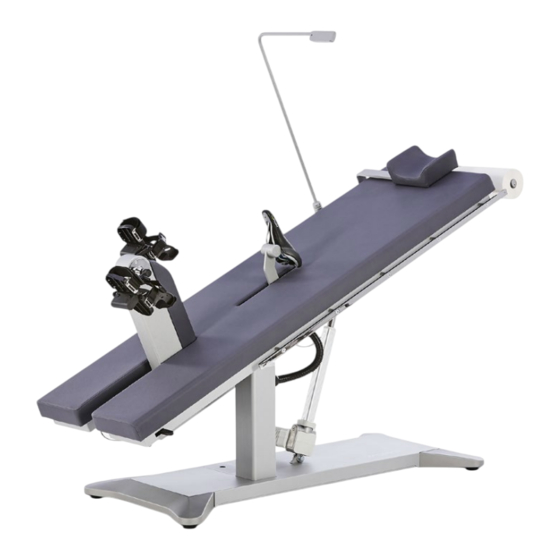
- Page 1 10 Couch Ergometer Operator's Manual 201000546000 • Version 2022-11-16 / Rev 03 • English...
- Page 3 This manual also describes optional components that are not included in the standard scope of delivery of this product. The document “Cleaning and Disinfecting ergoline Medical Devices” (Part No. 201000641000) in its most recent version is also part of this manual. This document is exclusively made available for download from the ergoline website www.ergoline.com.
- Page 4 10...
-
Page 5: Table Of Contents
7 3 1 Turning the System On 7 3 2 Operating Modes with Control Terminal T 7 3 2 1 PC Mode 7 3 2 2 Ergometry 7 3 2 3 Training / Test 7 3 2 4 Manual 7 3 2 5 Setup ergoselect 10... - Page 6 11 2 Exercise Test Protocols 11 3 Test Protocols (control terminal T only) 11 4 Family of characteristics of the braking torque control range 11 5 Family of characteristics of the load periods according to IEC 60601-1 Electromagnetic Compatibility EN 60601-1-2 ergoselect 10...
-
Page 7: General Information
1 General Information 1 General Information • On request, ergoline GmbH will provide a Field Service Danger Manual. In the case of failures, visible wear or defect: • Ensure that the device is de-energized. • The implemented quality management system covers •... -
Page 8: Safety Information
• To prevent personal injury and product/property damage, the hand grip must not be used by patients as an aid to Only the special shielded cables supplied by ergoline GmbH may standing up. be used to connect the device to other pieces of equipment. -
Page 9: 1 Contraindications
2.2 Intended Use • patients under the influence of substances that impair vigilance (alcohol, drugs, medication). The medical device ergoselect 10 is a reclining ergometer Contraindications in exercise testing carried used on the intended patient population for the following out with ergometers purposes: •... -
Page 10: 3 Biocompatibility
If you have questions in this matter, please contact ergoline GmbH or an ergoline representative. 2.4 Applicable Laws, Regulations... -
Page 11: Symbols
Transport and storage label: NRTL label for the USA and Canada approved humidity, non-condensing Do not push! Transport and storage label: approved pressure range Transport and storage label: This symbol indicates the overall weight of the do not stack medical device ergoselect 10... -
Page 12: Setup And Mains Connection
• Check the device for damage before each use. • If you detect signs of damage or identify malfunctions, switch the device off. • Contact your service partner or the ergoline GmbH Service Department immediately. 4.1 Description of the Medical Device... -
Page 13: 2 Transport
Several persons should be present to set up the ergoselect 10. Caution • Patient Hazard / Equipment Damage • The ergoselect 10 must be set up on a horizontal level floor. During assembly, the ergometer must be disconnected from the power line. -
Page 14: 4 Mounting Attachment Parts
• Slide the attachment part to the appropriate position and secure by tightening the set screw • Use an Allen key (M5x10, 8.8) to tighten the retaining screws (see figure 4 – 6) at the ends of the standard rail. ergoselect 10... - Page 15 Retractable pedal unit for Permanently • To prevent injuries due to the pedal unit Pedal unit exercise tests. fitted. falling down, hold the pedal unit with one hand after releasing the locking lever when you extend or retract the pedal unit! ergoselect 10...
- Page 16 OKS470. • Introduce the saddle post into the saddle guide rail and press down lightly until the post locks into place. Figure 4 – 11: Introducing the saddle post into the guide rail ergoselect 10...
-
Page 17: 5 Connecting The Power Cord
For operation, the ergometer must be connected to a properly Before connecting the ergometer to the power line, check that installed, grounded power socket. the line voltage corresponds to the ratings on the type plate. The type plate is located at the bottom of the table column. ergoselect 10... -
Page 18: 6 Interface
A special PC driver software, which can be obtained from Ensure that the power plug is readily accessible at all times. ergoline GmbH, is required for operation via the USB port. 4.7 Start-up and preparation MCU (Motor Control Unit) power supply... - Page 19 (such as the baud rate, ECG type) before use, or to initiate a manual blood pressure measurement. These adjustments should be referred to a qualified Service Engineer. Figure 4 – 15: Control terminal under the couch surface ergoselect 10...
-
Page 20: Operation
The remote control may heat up, the batteries may leak and destroy the remote control. • Never use old and new batteries together or mix batteries of different brands as this may cause the device to malfunction. • Use only high-quality, leak-proof batteries. ergoselect 10... -
Page 21: 2 Extending / Retracting The Pedal Unit
The pedal unit is secured against dropping inadvertently only when it is properly locked in place. When retracting the pedal unit, lower it carefully with your hand and don't let it drop. Figure 5 – 2: Extending and retracting the pedal unit ergoselect 10... -
Page 22: Preparing The Patient
10% (1 min ON / 9 min OFF) must be observed. This patient can easily read the displayed values. means that 1 minute of continuous operation of the control terminal must be followed by a pause of 9 minutes. Now you can adjust the incline of the couch. ergoselect 10... -
Page 23: Control Terminals
(e.g., from an ECG recorder or a PC). mmHg ♥ / min Figure 7 – 4: Start screen Note • Instruct the patient not to pedal while the ergometer is being turned on and during the self-test. ergoselect 10... -
Page 24: 1 2 Operating Mode With Control Terminal D / M
(see below) 3 duration of exercise test (min) 4 heart rate at the time of the BP measurement (BPM) 5 pedal speed (RPM) mmHg ♥ / min Figure 7 – 7: Exercise test screen 2 ergoselect 10... -
Page 25: 2 Control Terminal P
With this key you display the main menu or return to the previous menu level. The functions of these three softkeys change with the displayed menu – the key label describing the function is shown on the display. Figure 7 – 10: Keypad P ergoselect 10... -
Page 26: 2 2 Operating Modes
Figure 7 – 11: Main menu The start screen will be displayed – the ergometer is wait- ing for commands from the external ECG unit. Watt / min mmHg ♥ / min PC Mode Figure 7 – 12: Start screen ergoselect 10... -
Page 27: 2 2 2 Ergometry
Figure 7 – 14: Exercise test screen 2 7.2.2.2 Ergometry Use the softkeys on the right and left (↑ ↓) to position the bar cursor on Ergometry and confirm the selection with PC Mode Select. Ergometry Manual Settings Select Figure 7 – 15: Main menu ergoselect 10... - Page 28 – 5 W Figure 7 – 18: Display during the exercise test Note • The saddle height can be adjusted during an exercise test. • To activate the saddle height adjustment, press : the arrow keys will be displayed then. ergoselect 10...
-
Page 29: 2 2 3 Manual
/ min The load will immediately drop to 0 watt. 138/96 There is no recovery phase in the manual mode. mmHg ♥ / min + 5 W – 5 W Figure 7 – 22: Display during the exercise test ergoselect 10... -
Page 30: 2 2 4 Settings With Control Terminal P
Figure 7 – 26: Selecting the exercise test protocol to configure Use the softkeys on the right and left (↑ ↓) to position the bar cursor on the protocol to change (No. 6 to 15) and confirm the selection with Select. ergoselect 10... - Page 31 Depending on your choice, each key press will change the +/– 1 Watt load by +/–1, 5, 10 or 25 watts. +/– 5 Watt +/– 10 Watt +/– 25 Watt Select Figure 7 – 30: Selecting the increment for manual load changes ergoselect 10...
-
Page 32: Software Version
↑ ↓ keys and saved with Select. Time The time is adjusted in the same way. 09:00:00 You exit the configuration with Select Figure 7 – 33: Setting the date Date 30.06.2022 Time 09:00:00 Select Figure 7 – 34: Setting the day ergoselect 10... - Page 33 ECG unit. The selection is part of the installation procedure. • The "Analog/Digital" and "Digital" communication is only possible when PC Mode is selected from the main menu or when this is the default mode. ergoselect 10...
- Page 34 751 – 850 118 – 125 851 – 950 > 125 951 – 999 > 130 Pulse Display The pulse readout on the display can be turned off. Display Pulse Display Select Figure 7 – 38: Setting the pulse readout ergoselect 10...
-
Page 35: 3 Control Terminal T
The reclining ergometer runs a self-test. Subsequently, the main menu displays. Figure 7 – 40: Self-test screen The ergometer software is controlled from the touch panel. PC Mode Ergometry Training/Test Manual Setup Figure 7 – 41: Main menu ergoselect 10... -
Page 36: 3 2 Operating Modes With Control Terminal T
Manual Manual The reclining ergometer is controlled manually, i.e., the user performs all load changes via the display. Figure 7 – 45: Manual mode Setup Used to configure the reclining ergometer. Setup Figure 7 – 46: Setup mode ergoselect 10... -
Page 37: 3 2 1 Pc Mode
[ I / 0 ] key. To switch off the pump, press the appropriate key [ low ], [ middle ], [ high ] for about 3 seconds. Figure 7 – 48: ECG screen Confirm all inputs with the [ ] key. ergoselect 10... -
Page 38: 3 2 2 Ergometry
• the stage time (form 1 to 30 min), • the stage rate (increment, from 1 to 400 W). Basic Load 30 W Stage Time 2 min Stage Rate 25 W Figure 7 – 51: Exercise test protocol – screen 2 ergoselect 10... - Page 39 You change the load with the [ + 5 W ] and [ – 5 W ] keys. – 5 W The actual load change can be set in the configuration menu between +/–1 W and +/–25 W (see chapter 7.3.2.5 Setup, section Load Change on page 43). Figure 7 – 54: Starting an exercise test ergoselect 10...
-
Page 40: 3 2 3 Training / Test
Test protocol you want to edit. Training/Test 0. Protocol 1 1. Protocol 2 2. Protocol 3 3. Inactive 4. Inactive 5. Inactive 6. Inactive 7. Inactive 8. Inactive 9. Inactive Figure 7 – 57: Selecting the training / test protocol ergoselect 10... - Page 41 Recovery Time 3 min Inputs are confirmed with the [ ] key. Load Change Stage Time 20 sec Weight 3 kg Figure 7 – 60: Editing parameters – screen 2 ergoselect 10...
-
Page 42: 3 2 4 Manual
Default Mode Protocols Confirm inputs with the [ ] key and exit menus with the ECG Type Training/Test [ ] key. HR belt no. Load Change Date/Time Regulation Service Beep Software Version Language Figure 7 – 63: Setup menu ergoselect 10... -
Page 43: Default Mode
To change the name of a protocol, touch the protocol name and enter the new name from the keypad. Confirm Bezeichnung Description Protocol your inputs with the [ ] key. Figure 7 – 67: Setup – protocols, screen 3 ergoselect 10... - Page 44 A submenu opens when you touch ECG Type on the display. Date/Time Regulation (0* ... 9999*) (0* ... 9999*) Enter the code number "3" via the numeric keypad and Service Beep confirm with the [ ] key. Software Version Language Figure 7 – 70: Setup menu ergoselect 10...
- Page 45 [ ] key. Load Change With this function, you select the increments for load changes. Load Change +/– 1 Watt +/– 5 Watt +/– 10 Watt +/– 25 Watt Figure 7 – 72: Setup – load change ergoselect 10...
- Page 46 Inputs are confirmed with the [ ] key. Duration: load + Second Load control normal (0 min ... 15 min) (0 s ... 59 s) Duration: load + 3 min Duration load – 3 min Figure 7 – 76: Setup – regulation method, screen 2 ergoselect 10...
- Page 47 Max. 50 … 130 65 1/min 65 1/min Figure 7 – 78: Setup – RPM, screen 2 Beep A short beep confirms each key press. The audible feedback can be enabled and disabled. Beep Figure 7 – 79: Beep setup ergoselect 10...
- Page 48 Suomi Italiano Dansk Figure 7 – 81: Setup – language Display Press the [ 2. ] key to display the next screen and touch Display. Display Date/Time Service Service Figure 7 – 82: Setup – screen display 1 ergoselect 10...
- Page 49 7 Control Terminals Switch the pulse readout on or off. Display Select the blood pressure unit: mmHg (millimeter of mer- cury) or kPa (kilopascal). Pulse Display NIBP mmHg/kPa mmHg Figure 7 – 83: Setup – screen display 2 ergoselect 10...
-
Page 50: Cleaning, Disinfection, And General Hygiene Measures
General Hygiene Measures The document "Cleaning and Disinfecting ergoline Medical Devices" (Part No. 201000641000) in its most recent version is also part of this manual. This document is exclusively made available for download from the ergoline website www.ergoline.com. ergoselect 10... -
Page 51: General Product Information
GmbH every 2 years at the latest. For inspections of the measuring system (MTK) and calibra- tion, the ergoline test bench ergoTest 550 is available as a calibration tool. The date of the next mandatory inspection is indicated on the inspection sticker attached next to the type plate on the reclining ergometer. -
Page 52: Accessories
10 Accessories 10 Accessories Part no. Description 705956 Hand grip with bracket 705957 Armrest, curved, with bracket 705958 Armrest, flat, with bracket 705960 Swiveling armrest 707227 Floor stand, large (for control terminal) 705883 Saddle, standard 705979 Saddle, wide ergoselect 10... -
Page 53: Technical Specifications
11 Technical Specifications 11 Technical Specifications 11.1 Ergometer Model Modular reclining ergometer system ergoselect Model ergoselect 10 M / P / T Operating mode Saddle motor: ON 2min / OFF 18min Motor for table inclination: ON 1min / OFF 9min... - Page 54 +10 to +40°C rel. humidity: 30 to 75 %, no condensation atmospheric pressure: 800 to 1060 hPa Transport and storage: temperature: –20 to +70°C rel. humidity: 10 to 95 %, no condensation atmospheric pressure: 500 to 1060 hPa ergoselect 10...
-
Page 55: 11 2 Exercise Test Protocols
Duration Load Change Stage Time Recovery Load Recovery Time [sec] [sec] [min] Ramp Test PWC-130 (*) PWC-150 (*) PWC-170 (*) (*) the protocol advances to the recovery phase as soon as the target heart rate (130/150/170) is reached ergoselect 10... -
Page 56: 11 4 Family Of Characteristics Of The Braking Torque Control Range
If operation of the ergometer continues after the indicated time interval, it is mandatory to observe the OFF and ON times. Caution When the defined load periods are exceeded or the required pauses are not observed, the exposed parts of the medical device may reach excessive temperatures. ergoselect 10... -
Page 57: Electromagnetic Compatibility En 60601-1-2
12 Electromagnetic Compatibility EN 60601-1-2 12 Electromagnetic Compatibility EN 60601-1-2 Changes or modifications to this system not expressly approved by ergoline GmbH could cause EMC issues with Warning this or other equipment. • RF Interference • Use of portable phones or other radio frequency (RF) emitting... - Page 58 The ergoselect ergometer has no com ponents susceptible to magnetic fields. Note: UT is the a.c. mains voltage prior to application of the test level. ergoselect 10...
- Page 59 If abnormal performance is observed, additional measures may be necessary, such as re-orienting or relocating the ergoselect ergometer. (b) Over the frequency range from 150 kHz to 80 MHz, field strengths should be less than 3 V/m. ergoselect 10...
- Page 60 Note 1: At 80 MHz and 800 MHz, the higher frequency range applies. Note 2: These guidelines may not apply in all situations. Electromagnetic propagation is affected by absorption and reflection from struc- tures, objects, and people. 201000546000 • Version 2022-11-16 / Rev 03 • English ergoselect 10...
- Page 62 GmbH Lindenstraße 5 72475 Bitz Germany Tel.: +49-(0) 7431 98 94 - 0 Fax: +49-(0) 7431 98 94 - 128 e-mail: info@ergoline.com http: www.ergoline.com...
Need help?
Do you have a question about the ergoselect 10 and is the answer not in the manual?
Questions and answers