Advertisement
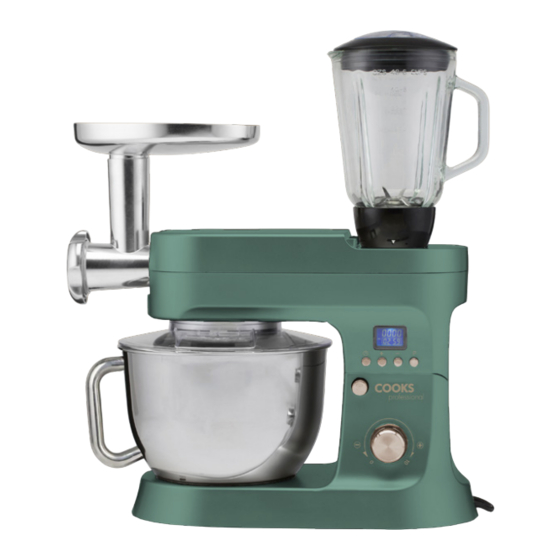
1200W Stand Mixer, Blender & Mincer
Instruction Manual
Product Code: K387 • K589 • G1183 • G1184 • G2880
After Sales Support
care@cooksprofessional.co.uk
For correct usage, please read these instructions carefully
before use and keep in a safe place for future reference.
REGISTER NOW FOR EXTENDED 2-YEAR WARRANTY
When you buy direct from the Cooks Professional website your free 2-year warranty
is automatically applied upon purchase (no further action required).
If you purchased your product through a different retailer website you can
register your product for an extended 2-year warranty by visiting
www.cooksprofessional.co.uk/extended-warranty
or scan the QR code.
Advertisement
Table of Contents

Related Manuals for Cooks Professional K387


Summary of Contents for Cooks Professional K387
- Page 1 REGISTER NOW FOR EXTENDED 2-YEAR WARRANTY When you buy direct from the Cooks Professional website your free 2-year warranty is automatically applied upon purchase (no further action required). If you purchased your product through a different retailer website you can register your product for an extended 2-year warranty by visiting www.cooksprofessional.co.uk/extended-warranty...
-
Page 2: Introduction
INTRODUCTION Congratulations You have made an excellent choice with the purchase of this quality Cooks Professional product. By doing so you now have the assurance and peace of mind which comes from purchasing a product that has been manufactured to the highest standards, performance and safety. -
Page 3: Table Of Contents
Contents Introduction General Information and safety warnings Before first use Description of parts Using the stand mixer Dough recipes Using the blender Using the mincer Care and maintenance Plug wiring Guarantee General information and safety warnings Read these instructions fully and make sure you understand the manual •... -
Page 4: Before First Use
Never use the appliance outdoors. • Make sure that your hands are dry when you touch the appliance, the • power cable or the plug. Always unplug the appliance by holding the plug, never pull on the • power cord. Only use the attachments provided with the appliance. -
Page 5: Description Of Parts
Description of parts Description of parts Description of parts Description of parts Main motor body Main motor body Main motor body Main motor body Speed control dial Speed control dial Speed control dial Speed control dial Mincer attachment Mincer attachment Mincer attachment Mincer attachment Mincer location cover... -
Page 6: Using The Stand Mixer
Instructions for use Before attaching any parts, ensure the mixer is unplugged from the mains power supply. Using the stand mixer Push the head tilt release button inwards and at the same time, tilt the • motor head back. To attach the bowl, place it on the base of the mixer and gently turn •... - Page 7 Description of parts Speed control guide Description of parts The speed control dial (10) should be set to the lowest speed for starting and Main motor body Main motor body Speed control dial Speed control dial then gradually moved to the desired higher speed to avoid ingredients Mincer attachment Mincer attachment Mincer location cover...
-
Page 8: Dough Recipes
Dough recipes Plain pasta Ingredients 500g plain flour 4 medium eggs 2.5ml salt Method Put the flour and salt into your mixing bowl. Beat the eggs in the measuring cup. Add a little water. Then pour in the flour. Mix with the flat beater in speed 1 for 8 minutes. Scrape down half way through to get anything off the sides of the bowl. - Page 9 Description of parts Using the blender Main motor body Speed control dial You can blend fruits, vegetables and ingredients to be used in cooking. You Mincer attachment Mincer location cover can also make iced drinks. The capacity of the glass jar 1500ml. Mincer attachment location 3 mincer plates Remove the blender location cover at the rear of the unit by pulling it...
-
Page 10: Using The Mincer
Assembling the mincer Remove the mincer cover from the front of the unit by pulling upwards. Attach the main body of the mincer to the mixer housing, making sure that the guide arrows are aligned. Push in and rotate upwards anticlockwise until it locks into place. - Page 11 Continue to feed ingredients until all have been fed through. For more Description of parts tender results feed the mixer through again. Main motor body Speed control dial Mincer attachment Mincer location cover Note: some of the mixture will remain in the spiral drive use some bread to Mincer attachment location 3 mincer plates push it through you will see the colour of the mixture change as the meat is all...
-
Page 12: Care And Maintenance
Care and maintenance When cleaning the appliance, you should pay attention to the following points. Switch off and remove the plug from the mains electrical supply • before cleaning. Do not immerse any part of the appliance in water and make sure •... - Page 13 Description of parts Plug Wiring These safety instructions should be read carefully and kept in safe place for Main motor body Speed control dial future reference. Mincer attachment Mincer location cover Mincer attachment location 3 mincer plates This appliance is fitted with a plug that complies with BS 1363. Only high Clear splash guard Flat beater quality 13A (square pin) plugs that comply with this standard should be fitted.
- Page 14 EXTENDED 2 YEAR WARRANTY WHEN YOU BUY DIRECT FROM THE COOKS PROFESSIONAL WEBSITE YOUR FREE 2 YEAR WARRANTY IS AUTOMATICALLY APPLIED UPON PURCHASE. If you purchased your product through a different retailer you can register your product for an extended 2-year warranty by visiting our website www.cooksprofessional.co.uk/extended-warranty.
- Page 15 More great products from Cooks Professional Slow Cooker Hot Water Dispenser Sensor Recycling Bin Mini Oven Espresso Maker Bamboo Chopping Boards Air Fryer Storage Tins Electric Salt and Pepper Mills Kitchen inspiration...
- Page 16 Follow us on Instagram 1200W Stand Mixer, Blender & Mincer K387 • K589 • G1183 • G1184 • G2880 Instruction Manual For correct usage, please read these instructions carefully before use and keep in a safe place for future reference.
Need help?
Do you have a question about the K387 and is the answer not in the manual?
Questions and answers