Sign In
Upload
Download
Table of Contents
Contents
Add to my manuals
Delete from my manuals
Share
URL of this page:
HTML Link:
Bookmark this page
Add
Manual will be automatically added to "My Manuals"
Print this page
×
Bookmark added
×
Added to my manuals
Manuals
Brands
eta Manuals
Boiler
eHACK 20
Installation manual
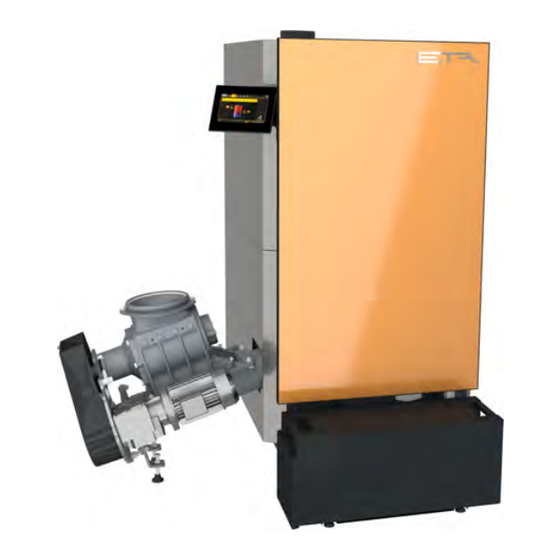
eta eHACK 20 Installation Manual
Wood chip boiler
Hide thumbs
Also See for eHACK 20
:
Operation
(108 pages)
1
2
Table Of Contents
3
4
5
6
7
8
9
10
11
12
13
14
15
16
17
18
19
20
21
22
23
24
25
26
27
28
29
30
31
32
33
34
35
36
37
38
39
40
41
42
43
44
45
46
47
48
49
50
51
52
53
54
55
56
57
58
59
60
61
62
63
64
65
66
67
68
69
70
71
72
73
74
75
76
77
78
79
80
81
82
83
84
85
86
87
88
page
of
88
Go
/
88
Contents
Table of Contents
Bookmarks
Table of Contents
Table of Contents
General
Preface
General Information
Warranty, Guarantee and Liability
Dismantling, Disposal
Technical Data
Energy Labelling
Regulations, Standards and Guidelines
CE-Conformity
Boiler Room
Safety
General Information
Safety Devices
Emergency Stop Switch
Safety Devices in the Fuel Path
Information for Installation
Chimney
Planning and Layout
Renovation
General Information
Water Hardness
Corrosion
Bleeding
Pressure Equalisation
Noise Emission
Buffer Storage Tank
General Information
Hydraulic Integration
Connection between Multiple Buffer Storage Tanks
Parallel Buffer Connection
External Tichelmann
Serial Buffer Connection
Installation
Placement of the Boiler
Removing Panels
Stoker
Assembling the Conveyor
Installing the Drive Chain
Fuel Store
Align Boiler Horizontally
Ash Box
Cables
Bottom Insulation
Connecting Piping
Filling the Heating System
Checks
Network Connection
10 Electrical Connections
Requirements
Overview of Circuit Boards
Circuit Board HA-C6
Circuit Board GM-C3
Terminal Function
11 Commissioning
Checklist
12 Concluding Activities
13 Fuel Store
Requirements
Dimensioning
Tilted Floor
Pellet Operation
Heating Value
Technical Data
Advertisement
Quick Links
Download this manual
2022-01-25
EN
0000000260
V.016
3.54.0
5011
93030-007
Wood chip boiler
eHACK 20-50 kW
Installation
Table of
Contents
Previous
Page
Next
Page
1
2
3
4
5
Advertisement
Table of Contents
Need help?
Do you have a question about the eHACK 20 and is the answer not in the manual?
Ask a question
Questions and answers
Related Manuals for eta eHACK 20
Boiler eta 13020L-D-01 Operation
Wood chip boiler (108 pages)
Boiler eta eHACK 20-50 kW Service Manual
Wood chip boiler (76 pages)
Boiler eta eHACK 20-50 kW Installation Manual
Replacing the combustion chamber (24 pages)
Boiler eta eHACK 180 Installation Manual
Wood chip boiler (84 pages)
Boiler eta eHACK 240 Installation Manual
Wood chip boiler (84 pages)
Boiler eta eHACK 60-80 kW Operation
Wood chip boiler (108 pages)
Boiler eta eHACK 60 Installation Manual
Wood chip boiler (88 pages)
Boiler eta eHACK 80 Service Manual
Wood chip boiler (48 pages)
Boiler eta eHACK 70 Installation Manual
Wood chip boiler (88 pages)
Boiler eta eHACK 50 Installation Manual
Wood chip boiler (88 pages)
Boiler eta ePE-K Service Manual
(44 pages)
Boiler eta ePE-K 100-130 kW Service Manual
Pellet boiler (44 pages)
Boiler eta ePE-K 140 Installation Manual
Pellet boiler (84 pages)
Boiler eta ePE-K 150 Installation Manual
Pellet boiler (84 pages)
Boiler eta ePEK 180 Operation
Pellet boiler (96 pages)
Boiler eta ePE-K 100 kW Service Manual
Pellet boiler (60 pages)
This manual is also suitable for:
Ehack 25
Ehack 32
Ehack 45
Ehack 50
Ehack 20ep
Ehack 25ep
...
Show all
Ehack 32ep
Ehack 45ep
Ehack 50ep
13020l-d
13020r-d
13020l-de
13020r-d-e
13025l-d
13025r-d
13025l-d-e
13025r-d-e
13032l-d
13032r-d
13032l-de
13032r-d-e
13045l-d
13045r-d
13045l-d-e
13045r-d-e
13049l-d
13049r-d
13049l-d-e
13049r-d-e
Table of Contents
Print
Rename the bookmark
Delete bookmark?
Delete from my manuals?
Login
Sign In
OR
Sign in with Facebook
Sign in with Google
Upload manual
Upload from disk
Upload from URL


Need help?
Do you have a question about the eHACK 20 and is the answer not in the manual?
Questions and answers