nilan VPL 15 User Manual
Hide thumbs
Also See for VPL 15:
- Installation instruction (23 pages) ,
- Software instructions (32 pages)

Related Manuals for nilan VPL 15


Summary of Contents for nilan VPL 15
- Page 1 USER MANUAL CTS602 HMI BY NILAN VPL15 Top M2 Version 5.00 - 01.08.2024 B24 VPL15 Top M2 GB...
-
Page 2: Table Of Contents
Table of contents General information Safety ..........................................3 Power supply ......................................3 Introduction ........................................3 Documentation ..................................... 3 Data plate ....................................... 4 Control panel Functions in the control panel ................................... 5 Main screen items ....................................5 Main screen settings options ................................6 Warnings and alarms .................................... -
Page 3: General Information
The instructions can be downloaded from www.nilan.dk. If you have questions regarding installation and operation of the unit after having read the instructions, please contact your nearest Nilan dealer. A list of Nilan dealers is available on www.nilan.dk. ATTENTION The unit must be started up immediately after installation and connection to the duct system. -
Page 4: Data Plate
ATTENTION When contacting Nilan with questions about the product, it is important to have the unit name and serial no. (SN) ready. From this information, the service department can find all information about the unit in question and thus help... -
Page 5: Control Panel
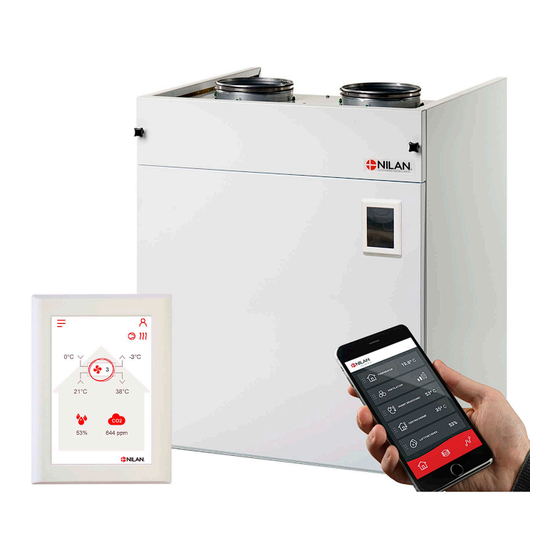
Control panel Functions in the control panel Main screen items The main screen of the HMI panel shows the information and the settings options that a user mostly requires. 1. Shows the current room temperature in the house, measured via the extract air 2. -
Page 6: Main Screen Settings Options
Main screen settings options The settings options that are necessary in daily life can all be set on the main screen of the panel. If you press current fan speed level, the set fan speed level will If you press current room temperature, the set room be displayed. -
Page 7: Settings Menu Overview
Settings menu overview The settings menu is constructed to make it easy to navigate through. You navigate through the settings menu by pressing the arrow below or above. If you want to access a menu, tap the text for that menu and it will open. -
Page 8: Service And Maintenance
Generally A ventilation unit from Nilan can last for many years if it is properly serviced and maintained. Ventilation units are often hidden away, and they are therefore rarely given attention in everyday life. But just as you maintain your car, your ventilation unit will need servic- ing regularly to keep it functioning properly. -
Page 9: Illustration Of Filter Replacement
Illustration of filter replacement 1. Before opening the door, turn off the ventilation unit on 2. The finger screws are turned in the door at the top of the control panel under “Operation” in the settings menu. the unit and the door opens 3. -
Page 10: Annual Maintenance
Annual maintenance General cleaning The ventilation unit should be cleaned on the inside once a year. Dust may escape through the filters and potentially mix with moisture from the extract air. WARNING Stop the ventilation unit on the control panel and switch off the power supply for the ventilation unit before you open the front door to the unit. -
Page 11: Check Air Intake And Discharge
Check air intake and discharge It is important for operation of the unit that air can freely move through the air intake and discharge. If roof stacks have been fitted to the air intake and discharge, check that they are not blocked with birds' nests, leaves or other dirt which can hamper air passage. -
Page 12: User Settings
User settings Setting the ventilation unit Turn off the ventilation unit If you need to open the doors to the ventilation unit in connection with servicing or filter replacement, remember to turn off the venti- lation unit. You do this under the menu item “Operation”. When the ventilation unit is off, this icon is displayed on the main screen of the control panel in the top righthand corner. -
Page 13: Alarm
Alarm You can read off warnings and alarms under the “Alarm” menu item. This is also where you reset them once the problem has been solved. If an alarm or a warning is active, the alarm icon will be displayed in the upper righthand corner of the control panel. >... -
Page 14: Date/Time
Date/time It is important to set date and time correctly. It makes it easier to trace potential faults when an error is being reported. When logging data, it is important to be able to follow the history. You set the time in the settings menu. >... -
Page 15: Heating Element
Heating element You will only have this menu item if an electrical after-heating element or a water after-heating element has been installed, and if it has been activated in “Service settings”. ATTENTION An after-heating element is not included as standard. However, you can order it as an additional extra, and it can also be retrofitted. -
Page 16: Humidity Control
Humidity control The primary purpose of ventilation is to extract humidity from the house so it does not damage the building, and to achieve a good in- door climate. This is rectified by an integrated humidity control system that maintains good, relative air humidity. When the average air humidity in the house falls below a set level (default set at 30%), ventilation may be reduced. -
Page 17: Co2 Control
Control This menu is only displayed if a CO -sensor has been installed, and the function has been chosen under Service settings. ATTENTION A CO sensor is not a standard part of all ventilation units, but may be purchased as an accessory. If the number of people using a building varies considerably, controlling ventilation through the CO level in the extract air may be a good solution. -
Page 18: Air Exchange
Air exchange Low humidity in the dwelling can be prevented by reducing ventilation at low outdoor temperatures. This function can be used in countries with regular sub-zero temperatures and at high altitudes where the outdoor air is very dry. This function can also be used at cold outdoor temperatures if no after-heating element has been installed, and the supply air feels too cold. -
Page 19: Filter Alarm
Condenser curve control Supply air [%] Condenser temperature [°C] Filter alarm ATTENTION It is important to change the filters regularly and when needed. Dirty filters reduce the efficiency of the ventilation unit and result in a poorer indoor climate and higher power consumption. From factory, the filter alarm has been set to signal filter replacement every 90 days. -
Page 20: Temperature Regulation
Temperature regulation If you have not installed an after-heating element, use the settings to control the bypass damper. It is necessary to install an after-heating element if you want to control the supply air temperature and for it to contribute towards the heating of the dwelling. -
Page 21: Alarmliste
Alarmliste Alarmliste Nedenstående liste gælder for ventilationsaggregater med CTS602 styring. Hændelserne er opdelt i følgende kategorier: Advarsel Driften fortsætter, men der er opstået en hændelse, som man bør være opmærksom på. Alarm Driften er delvis eller helt stoppet, da det er kritisk fejl, der straks kræver opmærksomhed. Type Displaytekst Beskrivelse/årsag... - Page 22 Rumtemperaturen Når rumtemperaturen er under indstillede Opvarm huset og nulstil alarmen. er for lav værdi (fabriksindstilling 10 °C), vil aggrega- tet stoppe for at undgå yderligere nedkø- ling af boligen. Dette kan evt. være fordi husets varmean- læg er stoppet. Software fejl Fejl i ventilationsaggregatets software.
-
Page 23: Product Data
Product data EU/EC Declaration of Conformity... -
Page 24: Disposal
The environment - part of the solution At Nilan A/S we recognize our responsibility in minimizing the environmental impact of our products. We consider the impact on the environment in all aspects of production, operation and subsequent disposal. We recognize our responsibility in minimizing consump- tion of resources. - Page 28 25 St Leonards Road Horsham West Sussex RH13 6EH Tel: +44 (0) 14 03 56 30 45 service@slservicesgroup.com or info@slservicesgroup.com www.slservicesgroup.com Ireland: Nilan Ireland Ballylahive, Abbeydorney Tel: +353 (0) 87 97 98 361 maurice@nilan.ie www.nilanireland.ei Nilan A/S Nilanvej 2 8722 Hedensted Danmark Tlf.
Need help?
Do you have a question about the VPL 15 and is the answer not in the manual?
Questions and answers